Showing posts with label GFX. Show all posts

Tuesday, November 5, 2024

REVIEW: Fujifilm GFX100s II with GF 45-100mm f/4 R LM OIS WR. Medium Format with No Limits–WOW!


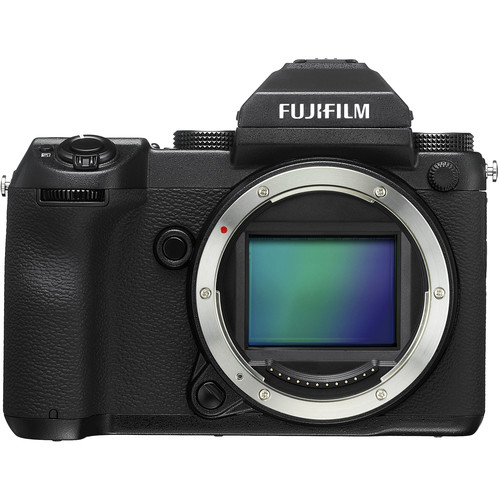
Fujifilm GFX 100s II with 45-100mm f/4 lens

When I reviewed the Fujifilm GFX 50s with the 32-64mm in 2019, I was impressed with the amazing image quality, but It felt a bit useless as anything but a landscape or studio camera. Sure the image quality was great, but where things were with image processing and noise reduction back then, it just was a very limited use camera with a huge price. Fast forward to 2024, and the GFX 100s II addresses all those concerns even with twice the pixels.


FUJIFILM GF 45-100mm f/4 R LM OIS WR Lens

Over the past few months I’ve had the luxury of putting this camera through its paces using the GF 45-100mm f/4 R LM OIS WR Lens and I’m pleased to say that all my past complaints have been addressed. What we have now is a camera that is usable as handheld camera for everyday use, studio, landscape and sports in good lighting conditions.

Overall I found the user controls to be excellent from the ease of use of the touch screen, to the well designed Q menu, to the great traction of the joystick, everything is there when I need it without any hassle. \ What’s more, features like object (including pets), people and eye detection (including options for right and left eye only) make it easy to get a sharp focused shot without much challenge on your part.

One feature I didn’t play with too much because the default was good were the metering modes. Part of that was because I forgot that Fujifilm hides the metering options under the Photometry setting of the Shooting Settings, but it’s easy enough to assign that feature to one of the function buttons.That said, I only had two situations during the entire time I reviewed this camera whereby the default metering wasn’t spot on.

Here’s a video that does a deeper dive into the features of this camera along with some of my thoughts:

Now a 102MP camera creates amazing image files, but it comes with some pain as well. For starters, my RAF (raw) files were typically around 62 to 104MB and my HIF (HEIF) files could be as little as 4MB, but more frequently from 12 to 34MB on average. Toss one of the files (in any format) into Photoshop, and within a few layers you easily get 1 to 2GB files. As a result, after you’ve broke the bank to buy this camera and a lens, you better plan to upgrade your Synology NAS because you are going to need a ton of high speed disk storage! With that disclaimer out of the way, you’ll be rewarded with a lot of data to work with to create amazing images. Here’s one of the first shots I did in a makeshift studio in my garage using just a couple lights:


f/13 @ 100mm for 1/125 sec at ISO 200

You quickly realize that it’s easy to recover from just about any lighting mistake you made as the dynamic range is so wide. Here’s a link to the in-camera HIF file converted to JPEG of the above photo. It was easy to cover up some of my mistakes and edit a file that captured my intent perfectly.

Real World Shots

This was literally the first photo I took with this camera, so I was pretty excited right from the start. While this review will not feature many of the photos I took, here’s a look at some unedited images I took during my time reviewing this camera. In a few cases I show a cropped version, but link to the unedited original. However, all of these photos are HIF converted to JPEG versions of the in-camera original using Lightroom classic version 14.

All of my photos shown in this article are for your personal viewing. You may not print, edit, reuse or otherwise share any of these photos without my written consent. I retain copyright ownership and all rights are reserved.

For this photo, I used a Manfrotto (formerly Lastolite) 6x7'  Illuminated Background along with a Elinchrom Rotalux Deep Octabox (100cm / 39") and a Elinchrom Rotalux Deep Octabox (100cm / 39") to capture a pretty solid in-camera image (although the one shown here is cropped, but you can click to see the original):

f/13 @ 62mm for 1/125 sec at ISO 125

The detail in the fabric, hair, and embroidery are amazing. What’s more, nothing is blown out.  This image had a lot more to work with than the predecessor I had done years back with the GFX 50s.

This next photo represents a lot of what I love about this camera. In this case, I was taking photos elsewhere when I heard a ruckus in the water. I never noticed this guy, but he was winding down for the day. Without the ability to get close enough, I just took the shot knowing that with 102mp I could just crop and still have enough pixels for a reasonable photo. Click the image to see the full uncropped version:


f/5.6 @ 100mm for 1/125 sec at ISO 40

An added bonus of taking this shot was discovering the shadow details – this is the in-camera original with only a crop, yet I can clearly make out details on the face and in the body. What’s more, the sunset sky offers an amazing background as does the faint view of the mountains – captured identical to the naked eye at that moment in time.

Here’s a better view of that sunset and the mountains, off to the right, are a bit easier to see in this one:


f/32 @ 100mm for 1/6 sec at ISO 80

Again, I was impressed with the dynamic range of this sensor – wow! Then again, taking photos of sunsets kind of became addicting with this camera.

Here’s actually the first sunset I took with this camera from a house on the Puget Sound coast in Seattle when I was supposed to taking pictures of something else (hence the odd camera settings):    


f/5.6 @ 45mm for 1/1000 sec at ISO 160

Again, zero edits – just point and click at f/5.6! If you live in Scottsdale, Arizona, this camera is a must for those amazing sunsets! And just because they are so fun to photograph, here’s another one:

Now let’s take a break from landscapes for a bit, and get to one of the surprises I discovered with this camera during the early days of my review. For kicks and giggles I decided to shoot a football game with it just to see if it was up to the task, and it did much better than I expected. Here’s a shot that is really zoomed in for the crop, but you can click it to see the original image:


f/7.1 @ 90mm for 1/800 sec at ISO 200

Even though 90mm wasn’t enough to get me right there in the action, I could toss a ton of pixels and still get a shot with plenty of pixels of the play. Here’s another play:


f/4 @ 100mm for 1/800 sec at ISO 80

It had been a while since I shot football, so it was nice being able to have some breathing room while shooting the play and then using the crop tool to get closer to the action. However, all was not perfect. Despite great light, if I did a pan too fast while shooting the camera couldn’t keep up and the image would get very distorted creating an effect I’ve never seen before:


f/8 @ 100mm for 1/800 sec at ISO 400

I had a few dozen pics like that, some of which were much worse, but I won’t hold it against the camera as this camera was never designed to be a action sports camera. That said, I wonder if it will potentially be addressed with a firmware fix in the future.

Going back into the studio, here’s an unedited shot that shows how amazing this camera is with skin tones and textures, but it also highlights the danger of use the ambiance auto white balance setting when you get back to the studio:


f/13 @ 88mm for 1/125 sec at ISO 125

Fortunately, I have the raw image so that’s a problem that’s easy to fix. However, the HIF suffers from a yellow background and the kids got unnecessarily scolded for not brushing their teeth properly – ha ha!

Speaking of textures, this camera just blew me away with every photo, so I sometimes found myself just trying things to see how much detail it would capture. Here’s another shot of my daughter in her Korean Hanbok:


f/13 @ 81mm for 1/125 sec at ISO 125

The detail in her hair, the dress, and the ribbon just make me grin every time I'm zoom in. It's going to be tough returning this camera back to B&H at the end of this review!

Speaking of detail, look at the detail in the cliff on this handheld shot of Snoqualmie Falls. Now this one is lightly edited in Lightroom due to the mixed light, but you can click the image to see the unedited original:


f/6.4 @ 45mm for 1/160 sec at ISO 320

This is a really tough shot because if you expose for the falls, the cliff is totally blown out. If you expose for the cliff (as I’ve done here) then you black out the falls. Knowing the range of this camera, I just exposed for the cliff and figured I could work it out at home – and I was right. The only problem here was that I needed a wider angle lens so I could capture more sky and the bottom of the falls, but alas the compromised shot still wasn’t too shabby for a handled snap.

Just in case you were wondering, here’s the full shot of the falls in portrait orientation zoomed out to the max at 45mm:


f/8 @ 45mm for 1/80 sec at ISO 1250

And just for fun, here’s another shot taken of the falls at that same spot using the Acros film simulation mode instead of Velvia:


f/8 @ 45mm for 1/80 sec at ISO 1250

Speaking of mixed light, this camera had me embracing mixed light instead of avoiding. The next two photos of my daughter in the park gave me a chance to play with the mixed light and I was rewarded:


f/4 @ 96mm for 1/125 sec at ISO 250

.


f/4 @ 78mm for 1/125 sec at ISO 125

That said, even light and underexposed shots still gave me a lot to work with in post-processing. Here’s one that I’ve left unedited for this article, but it was one of my favorites after cropping it to a portrait orientation and selectively lighting up my daughters face similar to the way God did in the above shots:


f/4 @ 100mm for 1/125 sec at ISO 250

In this next shot, I tried to do too much in one shot. With that gorgeous mountain and beautiful blue sky behind them, I couldn’t help myself.


f/7.1 @ 96mm for 1/110 sec at ISO 80

This shot, using the Velvia/Vivid film simulation mode, exaggerated the colors in a tasteful way that reminded me why I love shooting with Fujifilm cameras. I know some hate it and call it Velveeta, but I’m not in that camp.

Here’s another shot that I intentionally took at 1 stop underexposed so I could avoid blowing out the back right corner. Obviously I need to brighten it up on post processing, but it’s a common shot that I do for a lot of my reviews so I thought I’d include it:


Velvia - f/8 @ 45mm for 14 sec at ISO 80

This was also a 14 seconds exposure about 30 minutes before sunset in the shade, so I was happy with how much the lens and sensor gathered. Here’s one mnore that was done for 15 seconds with the Sepia film simulation applied in-camera:


Sepia - f/8 @ 45mm for 15 sec at ISO 80

For more images, visit https://photos.ronmartblog.com/fujifilm/gfx100sii/.

A Funny Thing

While taking this photo of a creek, I decided to take versions at multiple aperture settings just to examine if there were any diffraction issues:


f/32 @ 45mm for 8/10 sec at ISO 80

In the oddest of things happened, the files got larger as the f-stop number got smaller! As a result, in a few cases I had to crop in order to reduce the size to get the file size under the 64MB limit of my hosting site, Zenfolio!


Zenfolio limits originals to 64mb - who knew?!

This meant I had to crop a little off the edges to get the file under the 64mb limit as shown here in Lightroom Classic:


No important details were lost, but I needed to clip the edges to upload for this review

And below is the file in question at f/16, but ironically the f/22 file was smaller and totally fine to upload:


f/16 @ 45mm for 1/5 sec at ISO 80

The f/11 version had the same issue, but it required even more cropping so I just left it out of this review.

Film Simulation Modes

Ask any experienced film photographer what is the first thing that comes to mind when they think of Fujifilm and the answer will almost always be great color. What sets Fujifilm cameras apart from other digital cameras is that perfect transition of color film to the digital area for amazing in-camera results. I’ve done this type of discussion many times in other articles, so I won’t do a comprehensive review.

Here are just a few samples of the same shot with some different in-camera film simulation modes taken using the handy film simulation bracketing drive mode. This allows you to push the shutter release button once and get up to three different film simulation modes applied to the same shot.

Conclusion

I’m in love with Fujifilm all over again. It’s going to be tough returning this camera because I love the detail that the sensor captures, and the lens was great. Having 45-100mm zoom really gave me a lot of options with only one lens, so I never really felt myself wanting for another lens.

I can easily recommend this camera for the serious photographer and unlike its predecessor, it’s not a tripod only camera best left for landscapes and studio work – this one really can do almost anything.

Where to Buy?

CLICK HERE to learn more or buy today.

Other articles you may enjoy

If you enjoyed this article, you may also enjoy my other recent Fujifilm review entitled REVIEW: FUJIFILM X100VI - Is it better than you smartphone?

Enjoy this and more on the Reviews tab.

Disclosure

If you make a purchase using links found in this article, I may make a commission. It doesn’t cost you a penny more, but it does help to support future articles like this.

Saturday, September 7, 2019

REVIEW: Fujifilm GFX 50S with 32-64mm–Finally A User-Friendly Medium Format Camera, But Is It Worth It

Click to learn more on B&H
FUJIFILM GFX 50S Medium Format Mirrorless Camera with 32-64mm Lens Kit

Most people have no experience with a medium format camera from one of the big names in the business, but they are as expensive as a luxury car (not including the expensive lenses) and frequently lack all of the creature comforts we take for granted with modern DSLR and mirrorless cameras.  High ISO? – Forget about it. Format your card in your camera? – Nope, you’ve got to do that on your computer. Handhold and shoot? – Only if you are using studio lights. And the list goes on and on and on.

Now, medium format shooters who spend the money have to defend their decision to spend so much for a camera that offers so little, so they will argue til the death about why their cameras are so much better than yours. However, unless your shooting billboards or other commercial work where every pixel counts, the reality is that most prosumers these days end up discarding most of their megapixels when they post their photos online or display their images on their TV’s / digital frames.

As a result, this always begged the question – why can’t we have a camera with all of the creature comforts that high end cameras offer that simply adds a larger size sensor? Seems simple, but it sure took a long time to see that become a reality.

At just under $7800 USD (2019-03-02) the GFX 50s and its 32-64mm lens aren’t cheap, but it’s still less than some Hasselblad zoom lenses! At 51.4MP it’s also about half the megapixels which actually looks closer in specification to the Canon 5Ds/5DsR, Nikon D850 and the phenomenal Sony a7R III – all of which are much cheaper. This begs the question, is the bigger sensor worth the bigger price?

Ron’s Take on 50s Body Usability

When you analyze specs and high ISO performance, it’s easy to have a negative perception of Fujifilm cameras. However, every Fujifilm camera I’ve ever reviewed has had some magic that makes me fall in love with photography all over again. Perhaps its their more retro and classic designs, but I think it really boils down to the amazing film simulation modes (e.g., Provia, Velvia, etc…) that give you an image that straight out of the camera that is just wow – no additional work is required. To me, this makes them much like an iPhone XS in the sense that you stop thinking about what you need to do with the images after you shoot and just focus on composition which is so refreshing.

While some features will require you to peek at the manual to figure them out, once you learn you come to love this camera body real quick. Features like:

  • push button locks on the dials that make them easy to turn, but also easy to lock in place (brilliant!!!);
  • excellent touch enabled 2.36M-dot LCD
  • removable tilting (!!!) electronic viewfinder that is fantastic quality, but something you can leave off to save battery if you want;
  • built-in focus stacking that performed the best of any that I’ve ever tested;
  • excellent built-in eye tracking auto focus with auto, left, and right eye priority options;
  • and an industry leading number of drive modes that include exposure bracketing, film simulation bracketing, time lapse , and so much more. 

Check out B&H’s awesome interactive 360 view of this camera to really see what it is like in your hands and get your geek on at all of the glorious technical details about this camera on Fujifilm’s website.

Yeah, I loved this camera body and it was durable too. I shot in the rain, snow, and even took a hard fall on the ice and there was not a single scratch on this camera by the end of my review – that’s rare these days.

This love spilled over to the awesome GF32-64mmF4 R LM WR lens which features my much loved aperture dial so that with this feature and the 1.28-inch monochrome LCD monitor can be viewed in all conditions (including bright sunlight), you can easily set all of your settings without needing to get bogged down in menus that slow you down.

Simply put, this is a well engineered tool for photographers who hate menus and who know how to shoot manual. With that said, every dial and option has an auto setting so if you want to let the camera do all of the work then it will – and quite well from my experience.

Lastly, if you haven’t shot a Fujifilm camera with its outstanding film simulation modes, you are really missing out. What’s more, if you don’t like something (say Velvia is too dark in the shadows and perhaps a touch to vibrant for your taste), you can easily adjust the default settings. The customization in this camera is excellent, so you can genuinely have a series of presets and programmable buttons to match your style with final images that will cause you to just use the raw as insurance because the in-camera JPEG’s are spot on most of the time.

So yes, in case you haven’t figured it out yet – I love this camera body & lens. It was a delight to use and extremely difficult to return back to B&H when I was done shooting. In fact, I ended up keeping it much longer than the typical allotted time I devote to my review camera check-out window.

Fun with Focus Stacking

Focus stacking has been around for quite some time, but I never got into it because it was too cumbersome for my busy (and impatient) lifestyle. With that said, this camera makes focus stacking incredibly easy to use and improvements in Lightroom and Photoshop have made the process about as easy as processing a raw file. Yes, it does take some time, but the result is worth the reward.

Here’s an example of the kind of detail I got of a 58 images (2 flash misfires missing) shot of a lily with a very long stem – a shot that is totally impossible without focus stacking. This image is 100% unedited from RAW except for it being cropped and focused stacked & RAW processed in Lightroom:

Here’s a 100% crop with no post-processing of any type (including NO sharpening):
Click to see the full Photoshop stacked 8280 x 6208 original image
f/11 @ 64mm for 1/100 sec at ISO 100 (x 58 1 step frames)
No editing adjustments – only stacked from RAW via Lightroom

The 50s has a deep body so that during focus stacking the sensor can move 1 to 10 steps between each frame and you can set the interval for how long to pause between each frame (great when using a flash). This flexibility was excellent, but even more impressive is that this feature came out as a newly added feature with the 3.30 firmware update! Who doesn’t like new features after you’ve bought the camera?!!

For those new to focus stacking, here’s a great example of why you need to stack to get more depth of field:

Lightroom has FINALLY got the raw processing of Fujifilm film simulation down to where it can match in-camera results, so I found no difference between the focus stacked in-camera JPEG vs the Lightroom processed RAW. Both also resulted in a ~19.5GB file in Photoshop if you keep all 58 layers, so I always flattened to have a more manageable ~296 MB file. Oh and yes, this is one case where the more RAM you have in your computer (and you better have a fast SSD & processor) will save a lot of time.

I also should note that if you get things right in camera, then focus stacking with the in-camera JPEG results in nearly identical results to focus stacking with the RAW as you can see here:

Other than white balance, can you tell the difference? The raw is on the right, but was the time required to process it took twice as long.

However, if you get things wrong in camera, then obviously having the RAW images can save the shot as shown here:


Click here to see the amazing detail of the flowers in the yellow roses RAW processed shot. It’s another textbook case of focus stacking really saving the day!

Black & White Lovers Delight

Fujifilm is so well loved for its great in-camera black and white conversion that they even made monochrome only versions of a couple of their cameras a few years back. Here’s three shots taken in my studio where the first two are straight out of the camera using the ACROS+R film simulation and the last is obviously edited but you can click it to see the in-camera original.


f/11 @ 58mm for 1/125 sec at ISO 100

Can you believe this is straight out of the camera with zero edits? This is literally the in-camera JPEG that I loved so much that I printed it and put it on my Meural frame. Impressive!


f/10 @ 64mm for 1/125 sec at ISO 100

Even at 1/125 sec there’s still a little vignette on the left edge caused by this camera having a very slow flash sync speed. However, the JPEG image that comes straight out of the camera is pretty amazing!


f/5.6 @ 64mm for 1/60 sec at ISO 100

Kai and I even had a little fun with it (and yes he wanted to be 7’ tall)
Edited shown, click to see full original unedited file

Some say that if you really want to see the face, shoot monochrome, otherwise it gets lost in the color. I think that rings true, so if you love making black and white images you are going to love this camera.

Bracketed Exposures

I found myself using the exposure bracketing drive mode quite a bit with the 7 exposures setting with 1 stop between each exposure (i.e., -3 to + 3). I really liked the menu design for how bracketing works on this camera.

Just for fun, here’s the RAW files merged with Aurora HDR for Windows with highest ghosting, chromatic aberrations correction and the Balanced Interior preset:

I wasn’t impressed with how it handled the sky and tree line and there were some artifacts in the stream, but it did a good job in the shadow details.

Here’s a Lightroom Classic 8.2 Photo Merge HDR with Auto Align, Auto Settings and High deghost amount:

This was a much better merge but a lot of detail is lost on the rocks and in the trees.

Here’s my final edit using a high-end photo retoucher manual HDR technique from RAW then edited with Luminar 3:

GFX50S Hike-271_273_275_277_279_281_283_IY [3.1 sec at f - 22 32 mm Fujifilm GFX 50S GF32-64mmF4 R LM WR]

I think too much was lost in the sky, so I tried to distract from it via the sunrays filter in my final edit via Luminar 3.

As someone who enjoys shooting landscapes, I really loved this camera.

In the Studio

Medium formats pretty much own ultra high end studio photography, so I was looking forward to taking this camera into the studio to see how it compared to the 5Ds I used for my personal portrait. Read on to see how it did.

I was pretty shocked when I discovered that the flash sync speed was below 1/160 as shown by the black bar at the left of the frame here (f/7.1 @ 64mm for 1/160 sec at ISO 100), so I had to shoot at 1/125 sec in the studio:

This shot was also pretty heavily overexposed, but there’s tons of details in these raw files so this was a trivial recovery for a gorgeous final edit:

As someone who does a lot of studio portrait work, I was extremely happy with the GFX 50s!

Again, because this is a large sensor the depth of field is much more shallow so when the eye auto focus on my left (camera right) eye did its job, my deep eye wells and big nose resulted in unexpected softness. As a result, a face like mine required f/11 or better (photo taken by my wife):


f/8 @ 62mm for 1/125 sec at ISO 100

As you can see going to f/10 solved the problem, but that’s something I wouldn’t have needed to do on the full frame sensors I’m using to shooting with.

When you compare the image below with a similar shot my daughter took of me with the 5Ds, you’ll notice that the hot spots on the face aren’t as harsh. This is the recurring theme I’m seeing for indoor and outdoor shooting with Canon vs Fujifilm & Sony – they do sooo much better and preserving details in the highlights which saves a lot of time in post-process editing.


f/10 @ 64mm for 1/125 sec at ISO 100

The Provia film simulation is pretty impressive straight out the camera with default RAW processing from Lightroom Classic 8.2


f/10 @ 64mm for 1/125 sec at ISO 100

The same RAW file switched to Velvia processing really makes the eyes and tie pop and the blacks deeper on the suit, but it makes the background too yellow.

When I did a background replacement to white on the next frame after the shot above and asked Facebook friends to compare Velvia to the Provia, most came back saying they preferred the Velvia. I felt the skin tone was too red, so I merged the skin of the Provia to the rest with Velvia, replaced the background and did typical processing for this final result:

Yeah, I love this camera as a studio portrait camera too – the details are outstanding! This would definitely be my studio camera of choice if I had one, but I’d definitely use a longer focal length lens (I generally prefer 200mm). The 64mm focal length is the full frame sensor equivalent to a 51mm which I consider a horrible lens for portrait photography (makes subjects look fatter than they are), so keep that in mind when making your lens choice if you photograph people.

More Unedited Images

The following images in this section are all 100% unedited and exactly as they came out of the camera via in-camera JPEG originals. While I did use my mini-tripod setup, I did not use any lens filters or  in-camera photo adjustments. Most shots are Velvia or Provia film simulations with no other camera adjustments beyond setting white balance to taste.

ALL images in this article are copyright Ron Martinsen © All Rights Reserved. You may not save, copy, edit, print, link to or otherwise use any of these photos without ink on paper signature and a consent agreement with Ron Martinsen.Contact me if you are interested in prints or licensing.

If the photos in this article aren’t enough for you, click here to visit the full gallery more images with duplicates taken at various apertures or settings for comparisons.


f/32 @ 32mm for 3 sec at ISO 100

f/32 means you can pretty easily get a long exposure without needing to carry a ND filter


f/5.6 @ 64mm for 1/10 sec at ISO 100

Because this is medium format, you get roughly half the depth of field you’d get with your full frame sensors. As such, f/5.6 is pretty shallow and f/4 feels like f/2.8.


f/32 @ 32mm for 4 sec at ISO 100

You have to view with no ambient light, but even in Provia mode the shadow areas are pretty blocked up. As such, if you need shadow detail you’ll either need to adjust the shadows default behavior or handle via raw for post-processing.


f/32 @ 48mm for 4 sec at ISO 100

If you compare this shot at f/32 and the one below at f/22 & f/16, you’ll see that unlike many full frame cameras there is a visible depth of field differences. What’s more, f/32 suffers from very little diffraction compared to other brands, so I didn’t avoid f/32 with this camera.
Notice how crisp the details are in the background rock on the right in the river.


f/22 @ 48mm for 2 sec at ISO 100

Details in the background definitely drop off at f/22 so that rock isn’t as crisp, but the foreground does get slightly sharper.


f/16 @ 48mm for 1 sec at ISO 100

f/16 is plenty sharp but at the expense of a smooth river, so I found myself comfortable with longer exposures at f/32 with this camera.


f/11 @ 44mm for 1/5 sec at ISO 100

While I was pleased that flare wasn’t a huge issue, the backlit foreground details weren’t totally lost despite shooting into the sun. While dynamic range isn’t close to the Sony a7R III, it’s not terrible.


f/11 @ 32mm for 1 sec at ISO 100
(-1 EV)
This was the –1 EV exposure of a bracketed series, but a great starting point for a fun edit. However, when I got home I regretted shooting it at f/11.


f/32 @ 32mm for 20 sec at ISO 100

This is one of those fairytale scenes in nature that only Fujifilm Velvia film simulation can properly capture. I also felt f/32 was a must for the details on the tree laying down in the woods at the top 1/3rd of the frame.


f/16 @ 32mm for 6 sec at ISO 100

Yes, f/16 was sharp but the depth of field loss wasn’t worth it.


f/6.4 @ 64mm for 1 sec at ISO 100

High megapixel images give you lots of details so that when you downsize your images for the web, more details are preserved. The detail in the tree stump here is a great example – it’s way more crisp


f/32 @ 32mm for 1 sec at ISO 100

This is an in-camera natural starburst from shooting into the sun, but I did get some nasty rainbows on the rock and in the trees so the anti-flare coating isn’t close to what Canon offers in some of its amazing lenses like the 11-24mm


f/8 @ 32mm for 1/2 sec at ISO 100

Even if your composition sucks, this camera makes every scene just look gorgeous!


f/32 @ 38mm for 3 sec at ISO 100

I had a love affair with f/32 since I didn’t have a ND filter for my review, but this sensor does so well at f/32 it felt like I was shooting film. I really didn’t have the fear of diffraction like I do when shooting with Canon and Nikon (both of which are useless after f/11)


f/32 @ 32mm for 4 sec at ISO 100

The DR-AUTO feature which is supposed to help increase the dynamic range didn’t impress me. The Sony a7R III would not have blown out this long exposure as bad as this camera does.


f/16 @ 32mm for 17 sec at ISO 100

You become obsessed with scenes with tons of detail when shooting with this camera because you look on the rear screen LCD and just say “oh my god” every time you do. If you love super detailed images, this camera will delight you to no end!


f/16 @ 40mm for 10 sec at ISO 100

Personally, I love shooting in the Velvia film simulation when doing landscapes, but others mock it and call it Velveeta because it is too saturated. Compare this image to the one below which is using Provia to decide which you prefer 


f/16 @ 40mm for 10 sec at ISO 100

Provia film simulation is still excellent in my opinion, but if you hate it too there’s tons of flexibility in this camera to adjust the saturation, contrast, highlights, shadows, sharpness and more to create your own film simulation. In fact, you can even bracket shoot with multiple film simulations to give yourself options later (assuming you only shoot JPEG)


f/8 @ 57mm for 19 sec at ISO 100

This is a shot where I got burned by this being a larger sensor camera. f/8 was waaaaay too shallow depth of field for this scene, so I learned that lesson really quick


f/22 @ 32mm for 14 sec at ISO 100

Even at f/22 if you focus on nearby subjects you are going to get much less depth of field than you are used to with full frame cameras, but this thing can focus stack like nobody’s business so the choice is yours as to whether or not you embrace it (as I did in this shot) or work around it.


f/5.6 @ 32mm for 1/27 sec at ISO 800

Sadly you lose a lot at higher ISO, so 800 is the max I’d use for this camera. That’s a tremendous difference from mainstream DSLR’s where I have no reservations at shooting at ISO 25,600 (or higher on some models)


f/5.6 @ 40mm for 1/17 sec at ISO 800

Using my assisted handheld technique I managed to get a MUCH sharper shot with the GFX than I did with my iPhone XS (which is VERY RARE) due to the low light conditions. However, my pure handheld shot was completely unusable so I had to delete it in the field


f/22 @ 32mm for 4 sec at ISO 100

I started to risk life and limb to get shots with this camera – that’s a good sign of a fun camera that rewards the effort


f/11 @ 32mm for 1/26 sec at ISO 100

Some AF systems I’ve tested struggle in snow, but the Fujifilm didn’t focus hunt during my entire snow shoot


f/4 @ 42mm for 1/140 sec at ISO 200
Obviously if you’ve got good light then you can do hand held shots so I was pretty pleased with the in-camera results on this shot


f/32 @ 64mm for 1/2 sec at ISO 100

The 50s ability to capture lots of detail made this the perfect camera for a snowy day at the falls


f/4 @ 53mm for 1/100 sec at ISO 100

Edited version on Instagram
Default metering struggled with this scene, so I had to resort to some exposure compensation in the subsequent shots as shown below


f/5.6 @ 64mm for 1/40 sec at ISO 200

My 9 year old son had a shaky hand when taking this photo and the pixels literally shifted!
This is NOT a handheld friendly camera


f/5.6 @ 64mm for 1/40 sec at ISO 200

Edited version on Instagram
But with the same settings and not moving, he got a crisp shot.
My wife despised the focal length as it made her face super wide compared to what it is in real life and with longer focal length cameras. Guys, do NOT photograph your wife with this lens!

Full Gallery for more images at https://photos.ronmartblog.com/fujifilm/gfx50s

ALL IMAGES COPYRIGHT RON MARTINSEN © ALL RIGHTS RESERVED – NO LINKING, SAVING, PRINTING, ETC… WITHOUT WRITTEN AND INK SIGNED PERMISSION

The Occasional “Off” Shot


On a few occasions I got a shots where things just felt way off compared to the adjacent shots. In some cases the shots were super blue so it was obvious that the white balance was off, but the white balance was set to shade so how could that be? In the shot above things weren’t the extreme blue, but it felt darker and more blocked up in the shadows than I typically saw during my review with other shots.

Of course these are all easy to fix if you have the raw file as you can see below:

In some cases some might even prefer the result of this anomaly even more than the accurate shot!

If you’ve seen this, please feel free to comment. Due to massive spamming, I am slow to manually approve comments and I generally don’t approve comments with links in them.

Conclusion

In case you haven’t figured it out yet, YES I love this camera and highly recommend it. The camera body performance and features were excellent and this lens was plenty sharp. While the price is too steep for me to afford it, it’s a bargain compared to the medium format cameras I’ve used over the years with clients. I also think the odds of getting BETTER results because of all of the features (like eye AF, auto ISO, etc…) mean that this is the medium format camera of the future.

Fujifilm cameras have some special magic that always makes me love them, and this one was no different. If you find yourself in a rut and looking for inspiration, then definitely buy or rent one from my friends at LensRentals.com.

Where to Buy?

CLICK HERE to learn more or buy today.

Other articles you may enjoy

If you enjoyed this article, you may also enjoy these:

Enjoy these and more on the Reviews tab as well as Ron's Recommendations.

Disclosure

If you make a purchase using links found in this article, I may make a commission. It doesn’t cost you a penny more, but it does help to support future articles like this.