Showing posts with label DeNoise. Show all posts

Tuesday, March 15, 2016

Topaz DeNoise 6 is Now Available (Special Offer until March 20)


Only $49.99 with coupon code NOISEFREE (until March 20, 2016)

I’ll do a review at some point in the future, but I wanted to get this offer to you as it is only available for a limited time. They have some cool before and after effects on their web site, so click here to learn more.

Other articles you may enjoy

Here’s some of my Topaz Labs software reviews:

If you enjoyed this article, you may also enjoy these articles:

Disclosure

If you make a purchase using links found in this article, I may make a commission. It doesn’t cost you a penny more, but it does help to support future articles like this.

Wednesday, December 23, 2015

35% Off All Topaz Labs Products Through December 31, 2015

Topaz Labs 35% Off Sale

Topaz Labs has a 35% Off Sale going on for the rest of 2015. Now is your time to get the best deal of the year on the complete collection or to complete your collection if you’ve bought products individually. Topaz Labs is like some of the competitors which perpetually has sales – this is a once a year thing, so if you are on the fence then now is the time to act.

Check out these Topaz Labs reviews to see why these are cool products are my #1 recommend bundle in my What Plug-ins Should I Buy? article:

Here’s some webinars that I’ve done to show I use these products (my apologies for the poor audio from the webcast recording software):

Here’s another that people often write me about to thank me for some of the tricks I show in this webinar:

Other articles you may enjoy

If you enjoyed this article, you may also enjoy these:

Disclosure

If you make a purchase using links found in this article, I may make a commission. It doesn’t cost you a penny more, but it does help to support future articles like this.

Monday, December 1, 2014

Topaz Labs offers a 15% discount to ronmartblog.com readers!

Get 15% off ANY Topaz Labs product or save even more when you buy the bundle just by entering the coupon code ronmart in your shopping cart. Here’s a screen shot of the shopping cart that shows you how to use the code:

image

The price shown and discount code can change, so visit my discount coupon code page for the latest offer details.

Other articles you may enjoy

If you enjoyed this article, you may also enjoy these:

Disclosure

If you make a purchase using links found in this article, I may make a commission. It doesn’t cost you a penny more, but it does help to support future articles like this.

Tuesday, September 30, 2014

Topaz Labs October 2014 Webinar Visitors (Coupon Code & Video Link)

Copyright (c) Ron Martinsen - ALL RIGHTS RESERVED

Thank you to everyone who attended my Topaz Labs Webinar! Click here to see all of the Topaz Labs products and be sure to visit my discount coupon code page to get a discount on ALL Topaz Labs products. 

While I didn’t feature it in the webinar due to its recent release, Impression is an awesome (albeit a little slow at this time) product that can create some stunning artistic effects. While it isn’t for everyone, it’s certain to please those people who are looking for something unique that they haven’t seen from other products before. Here’s literally a one click example from the numerous options available:

Copyright (c) Ron Martinsen - ALL RIGHTS RESERVED

If you like Simplify, you will love Impression!

More about this webinar

This webinar focused mostly on the following products:

Here’s a couple of the images covered by the webinar today:

Copyright (c) Ron Martinsen - ALL RIGHTS RESERVED

Copyright (c) Ron Martinsen - ALL RIGHTS RESERVED

Conclusion

Click here to see the webinar recording. Unfortunately the audio quality is very low so you’ll need to turn up your speakers.

Where to order

Click here to learn more or order and don’t forget to use my Discount Coupon Code page to save on your purchase.

Other articles you may enjoy

Here’s some of my Topaz Labs software reviews:

Here’s some other articles you might also enjoy:

Disclosure

If you make a purchase using links found in this article, I may make a commission. It doesn’t cost you a penny more, but it does help to support future articles like this.

Thursday, November 28, 2013

Topaz Labs Complete Collection Black Friday Deal–Save $570!!!

One of the best deals on the web for this Black Friday period is NOW live! Get all 14 Topaz Labs products ($770 if sold separately) in one collection for only $199.99 – that’s only $14.29 each!!!! Even the normal sale price with my blog over $100 more than this, so this is a screaming deal!

This offer expires on December 2nd, so act fast by CLICKING HERE to order and use the promo code blackfriday2013

Here’s a sample cart showing the code working and how to use it:

image

Other articles you may enjoy

If you enjoyed this article, you may also enjoy these:

Disclosure

If you make a purchase using links found in this article, I may make a commission. It doesn’t cost you a penny more, but it does help to support future articles like this.

Friday, March 1, 2013

PhotoThoughts: Treehouse-An All Topaz Software Edit with a Surprise Ending

Treehouse by Ron Martinsen (ronmart) on 500px.com - Copyright ® Ron Martinsen - ALL RIGHTS RESERVED
Treehouse by Ron Martinsen
Copyright ® Ron Martinsen- All Rights Reserved

I recently taught a Webinar on Topaz Labs website called “Spice up your images without HDR” (link to wrap up article for attendees). During this video (which will be available soon here), I show how easy it is to create a nice enhancement to what starts off as a nice but kinda blah photo.

The challenge I gave myself for this photo was to only use Topaz Labs products and simply experiment. You can see from my layers pallet below that I relied heavily on Topaz Labs Adjust 5. After getting the look I wanted with those presets, I had a little more noise than I wanted so I used Denoise 5 to clean it up. Finally I used Lens Effects for the final touches. This gave me that HDR-Like look that I wanted without actually using HDR.

SNAGHTMLae282b

The effect was a little overdone so I put them all in a group (in this case I just needed to do it to the last layer) and reduced the opacity to tone down the effect. Some areas were a little too crispy with detail so I used a mask on the group to soften that (again, in this case I could have just done it to the layer, but I was trying to demonstrate the features of layer groups).

This gave a pleasing result, but I wanted to bring it back to reality and give it a little darker midtone feel so I create a black and white layer with an opacity of 80% to give it “the look” that you see in the finished image.

For those who are interested, here’s the original as it came out of the camera.

Treehouse - Before Editing - Copyright ® Ron Martinsen- All Rights Reserved
Canon EOS-1D Mark IV, f/5.6 @70 mm, 1/100, ISO 3200, No Flash, AWB

Lost? Don’t worry, it’ll all make more sense when you watch me do it in the webinar video – coming soon.

One little secret is that I did do noise reduction on the Background layer before doing the demo using Noiseware, but don’t tell anyone! ;-)

Conclusion

I went pretty fast here, but I’ll update this article with the video once it becomes available. Hopefully you enjoy seeing how it was done though and you can try yourself using the free demo versions of the products mentioned in this article. Here’s links to those demo versions:

Free Demos

Go try out the free demos or order today using these links:

If you do decide to buy, then do the math – between my discount (available on the discount coupon code page) and the cost of a few plug-ins by themselves, you can easily save by getting the bundle.

Click here to Save 30% on March 1st ONLY or visit my discount coupon code page to use my normal discount after the special offer expires.

Other articles you may enjoy

If you enjoyed this article, you may also enjoy these:

Disclosure

If you make a purchase using links found in this article, I may make a commission. It doesn’t cost you a penny more, but it does help to support future articles like this.

Tuesday, November 20, 2012

Topaz Labs 30% Off, Pro Insights & Webinar Info


Welcome Webinar & Pro Insights Visitors!


Topaz Labs Pro Insights with Ron Martinsen

On November 15th, I did a Pro Insights article for Topaz Labs that readers here might enjoy. Click the link above or the photo to see that article.

I also just finished my Topaz Labs Webinar to 758 people and they are offering a special 30% discount valid through 11/22/12 if you use the special coupon code:

ronweb1

Click here to see the products and use the code!

If you were in the market for some Topaz software anyway, here’s your chance to save a bit more!

My webinar will be archived soon on http://www.topazlabs.com/webinars/ if you want to watch the recording.

Here’s some of my Topaz Labs software reviews:

Here’s some other articles you might also enjoy:

Disclosure

If you make a purchase using links or coupon codes found on this blog, I may make a commission.

Friday, April 20, 2012

35% Off All Topaz Software Products THIS WEEKEND ONLY

Topaz Labs is offering 35% off ALL their products this weekend only when you use my special coupon code ronmartTWP at http://www.topazlabs.com/store. Here’s what your cart should look like after you've applied the code:

image
Enter the code and click apply to see your discount

Personally I recommend the bundle because you only need to buy a few products before you’ve exceeded the cost of the bundle (especially with this great deal), but even if you only buy one product this is a great offer.

This offer ends just before midnight on Sunday April 22nd, so act fast!

Here’s some of the Topaz Software products I’ve reviewed on this blog:

Disclosure

I may make a commission if you make a purchase using this deal. This offer is not valid with any other offers or codes.

Tuesday, February 14, 2012

Best of ronmartblog.com: Photomatix & Topaz Reviews

Someone said to me recently that “there’s a bunch of great stuff on your blog if you look for it, but after it’s off the main page nobody’s likely to find it.” That comment inspired me to try out a little “Best of the Blog” idea where I remind people about some of the popular articles of the past that are still relevant today.

I hope you enjoy the blast through the past here. Click the heading (in blue) to go to the topic and use the images below them to jog your memory about the product in question.

HDRSoft Photomatix Pro 4.x

HDR Fisheye Forest - Copyright Ron Martinsen - All Rights Reserved
Here’s a wild HDR images created with a Canon 8-15mm Fisheye Zoom (review)

Topaz Adjust 5.0

Trey Ratcliff secret sauce:

Topaz Labs B&W Effects

After this article, some say that this contender wasn’t a pretender and felt it was nearly as good as Silver Efex Pro 2…

B&W Effects - Traditional Collection - Warm Tone

Topaz Labs DeNoise 3.0

Topaz Denoise 3 - click for a larger image

Topaz Labs InFocus

Hand your camera to a bartender in a dark pub in Dublin and a blurry photo is sure to follow. Now how do you fix it? Learn here…

Mouse over to see before, mouse out to see after
After InFocus and basic sharpening
(Hover to see the before & click for a larger version)

Topaz Labs ReMask 3.0

Complex masking sucks, but ReMask 3 makes it pretty simple to get 95% of the work done in a hurry…

Topaz Labs Star Effects

Add some extra sparkle to your images…

Conclusion

I hope you enjoy this blast from the past! Enjoy the discount coupon code page for discounts on ALL of these products.

Disclaimer

I may get a commission if you make purchases using links in this blog. Thanks for supporting this blog by using my links!

Tuesday, December 14, 2010

Topaz Software & InFocus save a throw away photo

alt
Your mother warned you this would happen… :-)

It happens to everyone – even Top Photographers – at some point. Your camera’s auto focus hits the wrong spot and the result is something like the shot above - a nice sharp elbow with much of the rest horribly out of focus. When it happens with a good shot it is even more annoying, so what do you do? Well, if you are lucky and have taken multiple frames then maybe you have a decent shot that you can edit and you can toss the blurry shot.  However, what do you do if your blurry shot is a good shot that you wanted wish you could save (i.e., baby’s first smile, the photo you took of your spouse at an overseas landmark you’ll never visit again, etc…)? Well that’s where Topaz Software’s InFocus comes in! The purpose of InFocus is to try to save that shot you’d otherwise trash.

Now this blog is no stranger to the concept of saving bad photos as my review of Focus Magic (not recommended), and Nik Software’s Sharpener Pro have both taken on this problem with Sharpener Pro being the incumbent winner for this problem – until now. 

Saving a photo with Topaz Labs InFocus

Mouse over to see before, mouse out to see after
Photo Save After InFocus and Friends
Mouse over to see the before shot

Now when I first used InFocus to try to save the photo above it didn’t seem to work for me. I went through the getting started guide and just didn’t get it, so I sent Topaz Labs a copy of my shot and asked them to prove to me that this wasn’t yet another piece of junk software making a claim that it couldn’t live up to. Here was Nichole Paschal of Topaz Labs response:

Thanks so much for your interest in writing about InFocus, and I hope I can provide you with some information that will be helpful.  Also be sure to check out our new workflow tips and tricks:

http://www.topazlabs.com/infocus/infocus_workflowtips.pdf

I played around with your Santa girl for a minute, and I've attached what I was able to achieve in about 5 minutes.  I would take more time, however I want to show that it can be a quick process if needed and I'm a little rushed for time myself :). 
First, for any image that has noise or jpeg artifacts, the best results will be seen if it is run through DeNoise or DeJPEG first (I chose not to here for time constraints...but usually I would have). When I downloaded and opened your example, I noticed immediately that the girl's elbow had become the focal point in the image and her face and hair had become fuzzy.  Because of my experience with InFocus so far, I've learned that if only part of your image is out of focus (her face), the clear/in focus areas of your image will generate high amounts of artifacts (the settings of InFocus are applied to the entire image, not just the out-of-focus areas).  Therefore, I knew I needed to selectively use InFocus on her face and parts of her hair.

Once I had selected the area I mainly wanted to bring into focus, I took it into InFocus.  First, I used the Generic Blur type, however was unable to find a setting that really worked.  I also tried the Out of Focus blur type, as I usually try these two before moving on to the Unknown/Estimate Blur type.  However I did end up in Unknown/Estimate Blur type.  The important thing to realize about this blur type is that you will probably need to try several different settings and areas/zooms of your image before optimal results are seen.  With your example, I started out at a 100% zoom, trying almost all of the Blur Radius options before zooming in to 200%....this pattern continued until I reached 400% zoom, with the settings I've attached in the screen shot....this is where I felt the best results for this image was.  As a guideline, it is best to find an area of your image that has strong lines and is the area you are trying to bring into focus (with a large image, it may take some time to find the area/zoom that will produce the best results).

I pressed OK and brought the selection back into Photoshop.  While I am not ecstatic about how her eyes turned out (they seem a bit animated at 100%), I believe it is an improvement...note that her hair surrounding her face has been enhanced as well....view it at 66 or 50% for best results.  I did no other adjustments or sharpening, which I would usually do....probably an overall general sharpener, avoiding her face of course.

From this email I both learned a bit and discovered that it wasn’t impossible to save the shot, so I gave it a try myself on the same photo to see if it would really work – or if it was just smoke and mirrors.The shot you see at the beginning of this section is the result – along with some additional enhancements I’ll discuss below. While I wouldn’t send the result in to Maxim for the cover of their Christmas issue, I’m satisfied that it is a save that is usable for personal use. Because it is a human and we are drawn to eyes on humans, this makes it the toughest subject we can throw at InFocus, so I think it did okay for the subject matter. If this were building or some shot where you can’t see eyeballs like you see on the Topaz web site, I think the results would have been much better than this.

Deconstructing the Save

Here’s how I go the results you see in the after shot above:

  1. The original photo had skin defects that I didn’t want to show in this article so I cheated and just ran Imagenomic’s Portraiture on the background layer to quickly fix up the skin.
  2. I didn’t want to have to deal with noise from this ISO 800 shot so I ran Topaz DeNoise 5 (a big improvement over DeNoise 3 reviewed ages ago on this blog).
  3. Next up I ran InFocus just on the face as Nichole had suggested as you can see in the shot below:

    with the following settings:

    alt
  4. As you can see from the shot above, it wasn’t exactly a perfect save even in InFocus, but when I would toggle between the original and the preview and I looked at the thumbnail I felt I had done as much as I could do so the rest would be up to sharpening later in the workflow.
  5. To sharpen the photo I decided to use Topaz Lab’s Detail with its Bold Detail preset as a quick way to get some detail in the face. If I wanted to spend time with this photo I might have used InFocus again or done some manual tuning in Detail. Here’s my settings:

    Topaz Detail
  6. I still wasn’t crazy about the color so I ran Topaz Adjust 4 and used the Mild Color Pop preset as shown here:

    Topaz Adjust
  7. Now normally I’d use Viveza 2 as I did in my ColorChecker article, but this photo was just for this article – not for my portfolio so I saved and was going to just call it a night. However the background was really bothering me, so I decided that instead of using the Quick Mask tool and the selection techniques I learned in The Photoshop Channels Book, that I’d try to see how easy the new Topaz Labs ReMask 3 really was at extracting the girl from the background (see my ReMask article here).
  8. With my nice mask I just needed a decent background so I decided to turn to my favorite background app – onOne Software’s PhotoFrame. Here’s a screen shot from its UI of the the background I chose:

    onOne Software PhotoFrame 4.6
  9. I moved this layer underneath my mask, set its fill to 25% (see the layer pallete at the top of this section) to adjust it from from red to pink and that was it.

Here’s another inline copy of the save with the before on mouse over and the after on mouse out:

Mouse over to see before, mouse out to see after
Photo Save After InFocus and Friends
Mouse over to see the before shot

Can anyone get these results? (The Dublin Pub Shot Test)

It’s great that I was able to bring life back into a crappy photo, but I began to wonder if I could pull the same results off on one where I didn’t have any help. I decided to try my Dublin Pub shot (used in previous reviews) where the bartender didn’t do such a good job with the shot. The results are below and you can click to get a larger version:

Mouse over to see before, mouse out to see after
After InFocus and basic sharpening
(Hover to see the before & click for a larger version)

Although it is tough to see from this small version (please click for a larger version), I think this is a big improvement and saves the shot! This photo was still just a little out of focus unlike the previous photo in this article, so I think this is more realistic about what you can really do with InFocus. Here’s my settings:


InFocus Settings

If you want to compare this photo to the original, Focus Magic or Sharpener Pro then then check out my Sharpener Pro article and click the images to get large versions that you can download and compare.

Overall I’m happy because bartenders and others that might take a shot for me when I’m travelling can now screw up a little and I can just fix it later for that keepsake travel photo like you see here.

Does it work with other shots too?

Well the answer is – it depends. I found that for some shots I couldn’t get good results (i.e., blurry shot taken while in the moving elevator on the Space Needle), but others that had more predictable motion were recovered quite nicely (like the pub shot above).

With this in mind I would expect the novice user of this product to have mixed results. If you are detail oriented and are willing to tinker for a while I think you can probably get some nice saves (please link to them to this article or my flickr group if you do).

Conclusion

InFocus does indeed work for some photos, but not all of them. It isn’t a magic bullet that you can run and automagically have your photo fixed as it does require tweaking.

I had the best luck with the Unknown/Estimate option which requires you to click the Estimate Blur button every time you change the Blur Radius and Edge Softness sliders. For slightly out of focus shots it will generally be a slam dunk, but for difficult blur scenarios (my Mrs. Claus girl here) then it’ll take some time and some compromises to get something out of the shot.

If your shot is an important keepsake or sentimental shot then this product is totally worth its low price after you’ve saved just a few shots that might have gone in the garbage. I definitely think this product is worth its low price (especially if you get the bundle) to us occasionally to fix your out of focus photos, and it is way better than Focus Magic or Sharpener Pro at deblurring images. 

Special Offers

Click here to see a complete list of Topaz Software products that qualify for my 15% Off Topaz Labs Discount (also found on the Discount Coupon Code page) when you use the coupon code RONMART. The full bundle offers the best value if you plan to purchase several of the Topaz products.

onOne Software also has a 15% off discount on PhotoFrame when you use the coupon code RMART20.

Additional discounts for other products mentioned in this article and updates to these codes (if they don’t work) can be found on my Discount Coupon Code page.

Disclosure

I was given free evaluation copies of the software used in this article under no obligation from the companies that provided it. I have chosen to write about my experiences using these products based on my own natural workflow that found me using these products.

If you purchase any products using the links in this article, I may get a commission. I appreciate you supporting this blog by using the links!

Tuesday, October 19, 2010

Deals of the Week: Tamron Rebates, Redipix.com, Imagenomic & Trey Ratcliff HDR DVD Workshop discounts

I’ve tried hard to have my articles stick to reviews and education, but I’ve been getting bombarded with some great deals to stimulate this tough depression we are in so I thought I’d collect them all and pass them along as a new Deals of the Week concept. Feel free to leave comments if you like this and would like me to continue it, or if you hate it and would rather me not do these in the future.


Tamron Rebates

Between now and November 31st, 2010, B&H has instant rebates of up to $150 on Tamron lenses (including its popular 18-270mm).


REDIPix.com (prints) now offers 10% OFF ALL orders!

Effective today, REDIPix.com has changed their policy and is now offering 10% off all orders to readers of this blog when you use the code RONM when checking out. Check out my review where I love the great job they did with my landscape shot, and check out this cool new Gallery Wrap Dazzle which is actually BACKLIT!!!! I’m going to have to get one of those as they are just too cool!
 

Imagenomic now offers 20% OFF!!!!

Imagenomic, makers of Noiseware (winner of my Noise Reduction Roundup) are also offering 20% off all their products when you use the discount coupon code RONMART when checking out!


HDR DVD Workshop by Trey Ratcliff discount ENDS SOON!

Time is running out for the discount on this series! From now until October 30th, when you USE THIS LINK to get to Trey Ratcliff’s website and enter the promo code, you can save up to 20% off his super successful HDR DVD series (which I will be reviewing soon). Here’s the codes:

  • USE THIS LINK and enter 55BASICDVD to save 10% OFF of the HDR DVD - Basic Edition
  • USE THIS LINK and enter 66PREMIUMDVD to save 20% OFF of the HDR DVD - Premium Edition

Check out my review of Trey’s HDR DVD Workshop – I loved this series and think you might too!

Friday, October 1, 2010

Topaz Labs Software Updates & Discount Coupon Code

This blog has offered a 15% discount off Topaz Labs products using the promo code RONMART, but from now until October 20th you can save 20% on the Topaz Labs Bundle when you CLICK THIS LINK and use the discount code enhanced. This offer is only for the bundle, so use the discount code RONMART to continue to save 15% on any of these products sold separately:

Simplify
Adjust
DeNoise
DeNoise
Detail
Detail
ReMask
ReMask
Simplify
Simplify
Clean
Clean
DeJPEG
DeJPEG

Here’s where you’ll find the coupon code in the shopping cart, but remember you MUST CLICK THIS LINK for it to work:

Topaz Labs has also created this handy landing page where you can learn more about their products and here’s a list of some of the great new updates to the bundle:

  1. New Windows Installer:
    1. 1 download file and 1 installer for both 32-bit and 64-bit.
    2. No need to uninstall previous versions.  The new installer will search your system for old versions of the software and remove them before installing the new version.
    3. Enter your bundle key only once to register all products simultaneously.
    4. Auto updater.  Get the latest software updates instantly.
  2. Option to disable (hide) the preset preview thumbnail, substantially reducing the startup time of programs (especially for those of us with tons of presets!)
  3. Snap / Recall buttons reintroduced into all of the bundle programs!  Save up to 99 snapshot settings for comparison.
  4. Preset enable / disable option.  Option to enable or disable (by clicking “Hide”) the preset preview processing at program startup.
  5. Enable / disable tool tips.  Option to enable or disable the pop up tool tips.

See my reviews of Adjust and DeNoise on this blog!

Monday, July 20, 2009

REVIEW: Topaz Labs DeNoise 3.0

In response to my Noise Reduction Software Roundup article, several readers commented that I should try out Topaz Labs DeNoise. I had never heard of Topaz Labs, so this was a new revelation for me. Initially, I did download Topaz DeNoise 2.x and was very unimpressed, so I didn’t bother to write an article. However, recently I had a chance to play around with DeNoise 3 and the results were much better. This article is a quick review of the product using some of the same images and methodologies, but not exactly the same format.

How does it work?

Of the products reviewed in the previous round-up I’d say this user-interface is probably closest to the winner – Noiseware, but not in a good way. The user-interface here is just just basic programming with only one real “feature” and that is its presets section with a visual preview (that isn’t dynamic). Here’s a quick look:

Topaz Denoise 3 - click for a larger image

I wasn’t very impressed with the user-interface, but then again that’s what I do for my day job so I might be a bit biased. However, what I did find was that there were a variety of UI quirks (like a menu button that displayed a context menu) and just flat out bugs (like sliders that begin to vanish due to z-order issues when you drag them all the way to the right).

However, if there’s one redeeming feature of the UI (albeit with a odd quirk – more on that later), is that several presets on how you can do noise reduction are featured on the left hand side which show you the results on your image. This was a nice touch that I felt that some of the other programs in the round-up might  benefit from adding to their user-interfaces. It does have a bug though in that the default position of this thumbnail is seemingly chosen at random and when you pan in the window it doesn’t update. However, if you hit the refresh button all is well again. Auto-refresh on mouse-up might be a good idea in the future.

The user-interface is limited to just a handful of sliders that control the impact of noise reduction on the image, and all but the super smooth preset seem to introduce a odd artifact that reminds me of looking a snowflake under a microscope. It’s really quite bizarre, and something that made me completely dismiss the 2.x version. However, the “super smooth” preset obliterates all noise to create a plastic-like appearance to the image which some will like and others will dismiss as too destructive to image detail.

Noise Reduction Roundup Images

Here’s the exact process I used:

  1. Open CR2 in Photoshop CS4 32-bit on Windows Vista 32-bit
  2. This launches ACR 5.2, go to the Detail tab and set Noise Reduction to 0 (XMP data from disk has cropping info – XMP was generated from Lightroom 2.3 where I catalog my files)
  3. Open object at Original Size
  4. Duplicate the layer and name it Denoise 3
  5. Save PSD
  6. Apply the Super Smooth preset the layer. I chose this preset as the others introduced the weird artifact mentioned earlier which I found to be an unacceptable modification of the existing noise.
  7. Save PSD
  8. File | Save As… JPEG and choose 12 when the dialog comes up.
    • For Chicago, I created a Text layer watermark and showed both the image and watermark layers.
  9. Open PSD’s of the cropped images from the previous article series and add a new layer for Denoise 3 add it to the composite image.
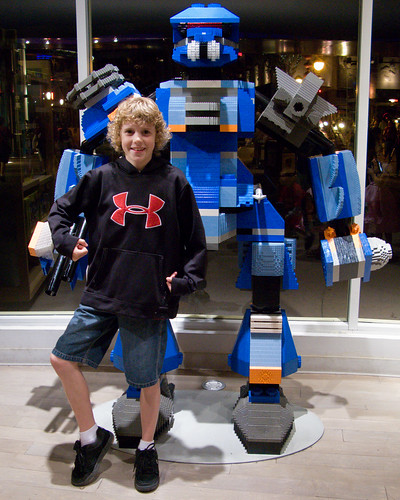
Canon G9 @ ISO 400

Here’s a shot I took with a Canon G9 at ISO 400 which was fairly noisy. Hover over the shot below to see the before and after (pay attention to the top of the image to see the bad noise in the original). This is straight out of camera with no post-processing, so it still needs a little work (especially sharpening). Clilck the image for a larger version:

Mouse over to see before, mouse out to see after

While it did a great job of removing noise, it also removed details like the flooring and Lego seams. However, the image is clean so at a quick glance it looks very good. I do notice a bit of a color shift as a result of the loss of detail (i.e., the blue streak in the right corner). Here’s a comparison to the other products from the roundup (click for a larger version):

Click for a larger version

There's no doubt this is the smoothest most noise free image, but some valuable details are definitely lost.

Canon Rebel XTi @ ISO 800

Here’s the Tokyo shot used for the round-up that is quite forgiving of aggressive noise reduction. Pay attention to the grid lines on the building in the back of the scene on the bottom left side of the image when you hover in and out below. Click the image for a larger version:

Mouse over to see before, mouse out to see after

Again, this is a noise free image after the modification but there’s a loss of some color and detail, but this image seems to live without them fairly well. Here’s a close up that compares Denoise 3 to other round-up products:

Click for a larger version

Canon 5D Mark II @ IS0 2500

Pay attention to the little girl’s hair when you hover in and out below (click for a larger version):

Mouse over to see before, mouse out to see after

The hair detailed and fabrics are destroyed, but otherwise this image is fine with the loss of some detail. Of all the images here, I think this one is least suited for Denoise 3’s super smooth preset as most will find the detail loss in the hair to be unacceptable.

In the blow up below you definitely see that there’s no need for skin softening techniques as the skin is stripped of detail: 

Click for a larger version

Canon 1D Mark III @ ISO 3200

Pay attention to the building on the left side of the image when you hover in and out below (click for a larger image):

Mouse over to see before, mouse out to see after

There’s a big loss in the gold color in the image after noise reduction above, so again I found this image to be less suited for Denoise 3.

In the blow up below the loss of detail in the carvings on the tower is pretty intense, but the sky cleans up very nicely. Click for a larger version:

Click for a larger version

Conclusion

As I mention in the noise reduction roundup, noise reduction is a very subjective thing. Some will consider the results that Denoise 3’s super smooth preset to be the superior choice because it does indeed remove the most amount of noise. Others may find the artifacts in the other presets acceptable, and chose to use those settings. However, I believe many will question the loss of detail or artifacts and will prefer the winners of the roundup Noiseware (1st) and Dfine (2nd) because of their ability to save critical details while maximizing the amount of noise removed. Still others will continue to prefer Noise Ninja as printing is more forgiving with noise than big displays, and it offers the widest range of noise reduction options on the market.

Like all noise reduction products you can tweak the controls to suit your needs, but I found the user-interface of Denoise 3 to be the least enjoyable user-interface to use. It’s functional, but obviously designed by a developer for geeks without typical consumer level usability testing. My recommendations for Topaz Labs moving forward would be to:

  1. Try to settle on something a little less aggressive than Super Smooth and get to the bottom of the artifacts appearing in the other presets. Since you offer downloadable presets, this is something that would be easy to retrofit into the existing product (well done).
  2. Invest in a good user-interface expert to give the UI a major overhaul so that it is consistent with standard user-interface paradigms (menu’s belong up top, not behind menu buttons, and the whole use / layout of buttons is poor throughout the UI).
  3. Work on the performance after you apply a filter (and ideally have an option to apply the effect on a new composite (think opt/ctrl+alt+shift+e) layer.
  4. Consider a Lightroom add-in version.
  5. Keep doing what you are doing very well – the presets with thumbnails is an excellent idea.

Special Offer

Purchase your copy of Topaz Labs Adjust at 15% off the normal rate when you use the discount found on my discount coupon code page.