Showing posts with label Noise Reduction. Show all posts

Tuesday, March 15, 2016

Topaz DeNoise 6 is Now Available (Special Offer until March 20)


Only $49.99 with coupon code NOISEFREE (until March 20, 2016)

I’ll do a review at some point in the future, but I wanted to get this offer to you as it is only available for a limited time. They have some cool before and after effects on their web site, so click here to learn more.

Other articles you may enjoy

Here’s some of my Topaz Labs software reviews:

If you enjoyed this article, you may also enjoy these articles:

Disclosure

If you make a purchase using links found in this article, I may make a commission. It doesn’t cost you a penny more, but it does help to support future articles like this.

Thursday, February 13, 2014

REVIEW: Imagenomic Noiseware for iOS


Noiseware - Noise reduction for your iPad and iPhone

If you’ve been following my blog then you know that I’m a huge fan of Noiseware (Tutorial) as it is a critical component of my digital workflow. I’m happy to announce that this great noise reduction software has finally made its way to iOS devices so you can clean up those noisy iPhone and iPad images using a lightweight version of this awesome noise removal software.

Noiseware for iOS by Imagenomic is a long time coming and the perfect companion to Snapseed users who want to do quick edits on the fly without bringing those images to their computer.

UI Walkthrough

UI Overview (via in-app help button)

In typical mobile app style, the UI is very simple and follows many natural behaviors mobile device users are accustomed to. You simply open your file from your device (or take a photo) and noise reduction happens right away with the preset selected at the bottom of the screen. Press and hold to see the before and release to see the after. It’s simple, but it’s effective.

Get started with a new photo or one from your saved images on your iOS device

Once you are done you simply tap the top right corner to save to your camera roll or share via your iOS devices registered share methods (i.e., Facebook, AirDrop, AirPrint, eMail, Twitter, etc..).

Save to your device or share right away

When you save there is a noticeable delay, but noise reduction that has complex algorithms to remove the noise without destroying the detail in your image takes time – it’s worth the wait!

Save is a little slow, but worth the wait

Does it really work?

Oh heck yeah! Check this before and after out (using default settings):


Before noise reduction


After noise reduction

If you use Noiseware for Photoshop then you are probably wondering how this noise reduction compares. Well I was too so I took the before image above and ran in through Photoshop and discovered that the “default” noise reduction is performs the same as the Full (Stronger Noise) preset in the Photoshop and stand alone versions of Noiseware. Here’s that image:


Noiseware for Photoshop using Full (Stronger Noise) preset

To my eyes (looking at the antennas) the detail preservation and noise reduction is better on the computer than in the app, but the performance of the app is close enough for most typical phone images. If you consider yourself to be a iOS artist with your camera you may still want to process your images in Photoshop, but the rest of the world will be pretty happy with the results from this app.

Real World Sample

Here’s an image I took in Las Vegas as it came out of my phone:


Click for the original - Copyright Ron Martinsen - All Rights Reserved

In case you are wondering what that light is on the top left – that’s the beam of light coming out of the roof Luxor hotel (and yes I was wishing I could turn it off <g>).

The following images may be clicked to view the original screen capture image from my phone:


Default Preset


Weak Preset


Strong Preset


Night Shot Preset


Custom Settings

Now the cool thing about custom setting is that you can turn on more aggressive noise reduction and you can change the strength of the noise reduction (using filter value). While I wouldn’t use it here, you can change the exposure directly here.

Snapseed

Snapseed is the app that caused Google to buy Nik Software and there’s a good reason why – it’s the king of photo editing on iOS devices. While it’s very tough to edit on the small screen of the phone, it’s still impressive what can be done very quickly as shown in the after result here:


Final Version after 2 minutes of SnapSeed editing

You can click the image above to view the full size version and click here to do the same with the before version. While this handheld shot has issues, you can certainly see the potential for improvement with my quick edit here.

In case you are wondering what happened to the Luxor beam of light, I hid it in the darkness by putting a U-Point control in SnapSeed on the beam and darkened the brightness. It was simple, fast and effective. On an iPad much better results are certainly a given, but I limited myself to my phone for this review.

Snapseed by Google is a pretty cool product and worth checking out if you don’t have it already. Click here to see my introduction post when this product was launched or use the link below to visit the AppStore to learn more about Snapseed:

Conclusion

While not as powerful as its Photoshop sibling, you get some great results in a hurry for a very reasonable price. Now I wouldn’t try to replace my Photoshop version of Noiseware with this, but it certainly gives me one less reason to bother editing an iOS photo on another device.

While I wish that zoom out feature would show me my whole image on my iPhone, I can live with this quirk. I’d also love to see this app work faster, but I’m happy to wait if faster means more detail destroyed in my image.

Moving forward if I have an iPhone or iPad image that I care about, I’ll probably hit it with Noiseware for iOS if it needs some noise reduction, then finish off with SnapSeed as I have done in the past. They make a great phone photography tag team!

I HIGHLY recommend this product!

A word about other operating systems

Before I get a lot of emails, the answer is No. At this time this product is not being developed for Android or Windows mobile, but if the iOS version does well it’s reasonable to think that other platforms could be a possibility in the future. 

Where to order

Other articles you may enjoy

If you enjoyed this article, you may also enjoy these:

Here's some other useful apps you might enjoy:

Disclosure

If you make a purchase using links found in this article, I may make a commission. It doesn’t cost you a penny more, but it does help to support future articles like this.

I am a featured photographer for Imagenomic due to my long standing appreciation of their products which I do use in my digital workflow. I do not receive any compensation for endorsing Imagenomic products nor am I compensated for being one of their featured photographers.

Saturday, July 13, 2013

PhotoThoughts: Contemplation

Please Click to Like on 500px if you like this photo
Contemplation – Copyright Ron Martinsen – All Rights Reserved (500px link)
Model –
QaioQaio Jade

This shot was taken back in 2011 with a Canon 5D Mark II at 1/100 sec at f/2.8, ISO 1600 at 70mm (70-200mm f/2.8L IS II) on a Manhattan rooftop. The model is also an incredible wedding photographer based out of New Mexico who happened to be in town at the conference we were both attending. She was kind enough to nearly freeze to death (this was late October) on the breezy rooftop while we rattled off a number of shots.

What I love about this shot is the expression of the model’s face along with the light that grabs your attention to her face and incredible stomach. This model has no major skin flaws and there’s no digital diet going on here, so editing was pretty simple. Here’s the before (from in-camera RAW) and after:

Before & After

Here’s my layers that show what I did here:

Photoshop CS6 Layers

Here’s each layer explained:

  1. Noiseware Default – Noise reduction using Noiseware using the Default setting.
  2. Hairs – Content aware healing of stray hairs
  3. Portraiture – Skin Softening using the Medium Preset to help tone down the goose bumps
  4. Brilliance / Warmth – Color Efex 4 effect to warm the skin tones and background lights
  5. HPF Eyes and Teeth – An overlay layer with High Pass Filter set to 3 to make the eyes and teeth shine a bit more
  6. Fix Background – Remove lines and spots from the railing
  7. Darken Background – I used Viveza to darken the background and then selected the railing areas using the blue channel to create a a simple mask that only got the areas I wanted. I applied the mask to the image to avoid making my file overly large since I didn’t need that extra Viveza data. I also noticed that I missed a little underwear imprint on the belly so I removed that on that layer.
  8. Only apply Tonal Contrast to the skin above the waist and the city lights. I could have applied the layer, but I was done so I just stopped there.
  9. Not shown here, but I did output sharpening using Sharpener Pro on the image uploaded to the web.

Conclusion

This editing could have been done in Photoshop Elements, but I used CS6 just because that is what I’m used to. This is a pretty basic edit that took about an hour with most of the time spent on the Hairs layer.

The lighting was one Westcott Apollo triggered using a Pocket Wizard Mini TT1, Flex TT5 and AC7 with a 580 EX II flash. I’d like to thank Clifford Pickett for getting me access to the roof and providing the lighting gear, as well as assisting. Kaethe Mari was also an awesome assistant on this shoot who also doubled as a model (see Travel Photography: Photographing People At Night In New York City (Manhattan)).

Other articles you may enjoy

If you enjoyed this article, you may also enjoy these:

Disclosure

If you make a purchase using links found in this article, I may make a commission. It doesn’t cost you a penny more, but it does help to support future articles like this.

Wednesday, August 8, 2012

Imagenomic Noiseware, Portraiture & RealGrain Updated (15% Off Coupon Code)

Ron’s take on the new updates

Imagenomic has done a web site refresh and updated their products recently, so I thought I’d weigh in on the changes.

Noiseware gets a much needed visual appearance boost to match the more modern look of Portraiture. Functionally it appears to be mostly the same as far as the UI is concerned, but Imagenomic claims better noise reduction performance and results. From what I see the results are still the best in class as they always have been, so it’s still a great product that is a must for all photographers.

Portraiture seems unchanged at this point.

I’m not a Real Grain user so I didn’t run any tests on it yet.

Here’s the official press release with all of the details of the updates:

PRESS RELEASE: Imagenomic Announces Release of Noiseware 5 and Updates to Portraiture and Realgrain plugins

New Version Provides Faster Processing Speeds, Improved Algorithm, Unlimited Presets and History Control, and 64-bit compatibility for Mac OS X
Free Upgrade / Updates for Noiseware 5, Portraiture and Realgrain plugins for All Licensed Owners of Software

New York – July 12, 2012 – Imagenomic, an independent software vendor specializing in digital imagery enhancement solutions, has announced the release of Noiseware 5 plugin, the latest generation of its award-winning noise correction technology. Noiseware 5 features several new and improved enhancements, including a faster core algorithm that retains more image detail, a newly-designed user interface and controls, the ability to create an unlimited number of presets, and a new history control for an unlimited number of history steps. In addition, Noiseware 5 plugin provides 64-bit native support for Mac OS X to complement the existing compatibility for Windows systems, as well as full compatibility with Adobe Photoshop CS6.

"We know our customers have been looking forward to Noiseware 5 plugin and we are gratified by the enthusiastic feedback we have been receiving from the industry and the end-users. The progressive evolution and the continued improvement of Noiseware's core algorithm embody Imagenomic's commitment to a leadership position when it comes to the quality of the processed image, the ease-of-use, and the processing speed", explains Art Ghazaryan, Co-CEO and COO. "We are also pleased with the additional improvements and features we included with this update. The new preset manager, user interface and history controls will enhance the user experience with a product that has been an industry favorite for quite some time. Current owners of Imagenomic's Noiseware Professional plugin will be able to upgrade to Noiseware 5 at no cost to them."

Improved Processing Speed: The Noiseware 5 plugin offers improved multi-core support that renders processing speeds that are up to four times faster than version 4.0, and with its 64-bit compatibility for Mac OS X provides additional productivity benefits.

Improved Algorithm: An advanced algorithm has been incorporated into Noiseware 5 that
allows photographers to retain greater image detail and is up to 25% more effective in
reducing image noise.

New Preset Manager: The Noiseware 5 plugin now provides users with an unlimited number
of preset capabilities, along with an unlimited number of categories for easy-to-find settings
for most every type of photography and shooting environment they may encounter. In
addition, photographers can now store notes and other details regarding specific presets and
have the ability to import and export data.

New History Control: Noiseware 5 now includes a history control, which allows
photographers to create an unlimited number of history steps to manage levels of noise
reduction and return to earlier renditions as well as the ability to save them as presets.

Pricing & Availability

Noiseware 5 plugin replaces the Noiseware Professional plugin and is available for MSRP of $79.95. Noiseware 5 is free for existing customers of Noiseware Professional plugin. New users can try Noiseware 5 on a free 15-day trial basis. The Noiseware Standard plugin has been discontinued. A discounted upgrade pricing will be available for existing users of the Noiseware Standard plugin edition who wish to upgrade to Noiseware 5. Imagenomic will continue to support the users of the Standard plugin edition. Imagenomic also released minor updates to Portraiture and Realgrain plugins to ensure full compatibility with leading industry applications. These updates are free for existing users of Portraiture and Realgrain plugins.

My Reviews & Special Discount Offer

You can enjoy my discount off Imagenomic products when you click one of the following links:

and enter the coupon code RONMART2012 like this:

SNAGHTMLa62d657

You may also enjoy seeing these reviews of

Disclosure

If you make a purchase using links found in this article, I may make a commission. I’ve also been provided copies of the aforementioned products for the purpose of performing a review.

Tuesday, August 7, 2012

Imagenomic Noiseware Professional (Noise Reduction Roundup 3 of 5)–Updated 8-7-2012

 NoisewareBox

See the bottom of this article for a 15% discount offer on this product.

This article refers to version 4.1.1, but as of 8/7/2012 with version 5.0, I still consider it the best noise reduction software product on the market. 

Ever heard of Scott Kelby (founder of NAPP)? Well, if you’ve been reading this blog you sure have because he’s the biggest and best Digital Photography, Photoshop & Lightroom book author on the planet. Well when Scott says something is good, I listen and he recommends Imagenomic Noiseware Professional in his Lightroom 2 for Digital Photographers and The Adobe Photoshop CS4 Book for Digital Photographers. After spending a month with this product, I understand why. This product has the best automatic mode of any product I have ever used. It seems to have the best algorithm for knowing what to sharpen and what to leave alone and how to avoid destroying the sharpness of your image in the process of trying to make that noise go away.

How does it work?

While the user-interface of this product is fairly intimidating, the good news is that it is so damn smart that you really don’t need to use it! Here’s what it looks like on Window Vista system, but it is available on Mac OS as well:

Click to see a larger version It’s smoking fast and the Settings up at the top left corner of the screen were sufficient enough for my needs. These settings are like presets of the sliders below, so Night Scene as shown in the image above is simply raising the Noise Reduction values. This is very much like presets in Adobe Lightroom, and a brilliant way to make the complex simple. For those wanting more control, there’s a wealth of options and ways to set measure points. However, I found that I didn’t need it. This is a run and click OK solution that I just store on a merged (CTRL+SHIFT+ALT+E in Photoshop) layer so I can undo if I change my mind later.

Noise Reduction Roundup Images

This product is one of three excellent after-market products that I am reviewing as part of my Noise Reduction Roundup article.

Initially I was processed the original images in Canon’s Digital Photo Professional (DPP) 3.5. When one of the product engineers raised a concern about JPEG compression I decided that it made more sense to import the RAW into Photoshop via Adobe Camera Raw (ACR) 5.2. I then used that single PSD to work on all the photos.

Here’s the exact process I used:

  1. Open CR2 in Photoshop CS4 32-bit on Windows Vista 32-bit
  2. This launches ACR 5.2, go to the Detail tab and set Noise Reduction to 0 (XMP data from disk has cropping info – XMP was generated from Lightroom 2.3 where I catalog my files)
  3. Open object as a Smart Object at Original Size
  4. Duplicate the layer twice
  5. Rasterize the third layer & copy 3 more times
  6. Name each layer (original, acr, photoshop, noiseninja, dfine, noiseware)
  7. Save PSD (these are huge)
  8. Apply corresponding filter to each named layer (using layer comps to define each layer and hide other layers) using default values (run filter, press OK when dialog appears)
  9. Save PSD
  10. Switch to each layer (using layer comps) and do a File | Save As… JPEG and choose 12 when the dialog comes up (although by accident I did 10 on Tokyo for all of them).
    • For Chicago, I created a Text layer watermark and showed both the image and watermark layers.
  11. I realized that these images had the wrong color profile, so I had to re-open them all, apply the sRGB color profile and save again at JPEG 12.

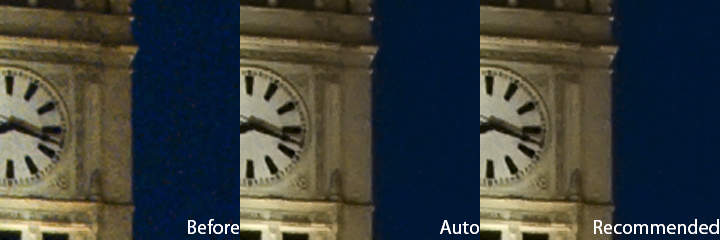
The images below are part of the roundup images. The original link shows a JPEG 12 version of the original with no noise reduction added (the default setting is always to add a little). The Auto link was processed on a duplicate layer using the automatic settings (i.e., the same results you’d get if you ran the filter and just hit OK right after installing this product). This image was saved as JPEG 12 in Adobe Photoshop CS4. The Suggestion version was processed the same way, but with the instructions found below the links.  As you can see from the images below the results are outstanding. Hover over images to see before and after (using auto) results, but you have to look very carefully. Hints about where to look are included for each image, but its best to click the hyperlinks to see the full size images and switch between tabs in your browser to see the differences. You may download and compare them in Photoshop, but please delete them when you are done comparing.

This article includes a before, auto and suggested 100% crop to compare the differences. For the best results, click on these images to view them at 100%.

The final article will include six 100% crops next to each other so you can more easily see the differences together, so stay tuned to this entire series for the best results.

Canon G9 @ ISO 400

Here’s a shot I took with a Canon G9 at ISO 400 which was fairly noisy, but thanks to Noiseware you can see how nice it cleans up. Hover over the shot below to see the before and after (pay attention to the top of the image to see the bad noise in the original). This is straight out of camera with no post-processing, so it still needs a little work (especially sharpening):

Mouse over to see before, mouse out to see after

You MUST click to view the original for an accurate comparision

Original Auto Fix Imagenomic Suggestions
 
David McDonell of Imagenomic offered the following suggestions to improve the Noise Reduction improvements of this photo:
  1. Set the Preset to Night Scene.
  2. In the Tonal Range tab, go to the group called Noise Level and set the slider to Shadows +20.
Canon Rebel XTi @ ISO 800

Pay attention to the building in the back of the scene on the bottom left side of the image when you hover in and out below:

Mouse over to see before, mouse out to see after

You MUST click to view the original for an accurate comparision

Original Auto Fix Imagenomic Suggestions
David McDonell of Imagenomic offered the following suggestions to improve the Noise Reduction improvements of this photo:
  1. Set the Preset to Default.
  2. In the Tonal Range tab, go to the group called Noise Level and set the slider to Shadows -20.
Canon 5D Mark II @ IS0 2500

Pay attention to the younger girl’s hair and the older girls cheeks when you hover in and out below:

Mouse over to see before, mouse out to see after

You MUST click to view the original for an accurate comparision

Original Auto Fix Imagenomic Suggestions
David McDonell of Imagenomic offered the following suggestions to improve the Noise Reduction improvements of this photo:
  1. Set the Preset to Default.
  2. In the Tonal Range tab, go to the group called Noise Level and set the slider to Shadows -5.
Canon 1D Mark III @ ISO 3200

Pay attention to the building on the left side of the image when you hover in and out below:

Mouse over to see before, mouse out to see after 

You MUST click to view the original for an accurate comparision

Original Auto Fix Imagenomic Suggestions
David McDonell of Imagenomic (at the time this was originally written) offered the following suggestions to improve the Noise Reduction improvements of this photo:
  1. Set the Preset to Night Scene.
  2. In the Frequency tab, go to the group called Noise Level and set the slider Mid Freq to 0.
  3. In the Frequency tab, go to the group called Noise Reduction and set the slider Mid Freq to 60%.

Conclusion

This is the product of choice recommended by Photoshop guru, Scott Kelby. I hadn’t heard about this product until he mentioned it in one of his books, and I’ll admit that my expectations for it were low. After all, Noise Ninja was king in my book, so how could this product compete with that? Well, the reality is that this product blew me away and yielded out of box results that knocked my socks off. This is how the default noise reduction should be done in my book, so it is very easy to recommend this product. The user-interface offers lots of powerful adjustments, similar to Noise Ninja, but it offers some ease of use features like its settings list which allows you to select some common user scenarios and get a new automatic result. I wish it had a noise brush or U-Point controls to help with selective noise reduction, but the reality is that I can easily do that myself with a layer mask (as I typically did with Noise Ninja in the past).

15% Off Discount Offer

Be sure to enter the coupon code RONMART2012 when you check out for a 15% discount on the following versions:

Use the links below to view other articles in this roundup:

Disclosure

If you make a purchase using links found in this article, I may make a commission.

Monday, April 9, 2012

Canon 5D Mark II vs Mark III–Image Quality Comparison

I’ve been seeing other reviews making the claim that the image quality between the 5D Mark II and 5D Mark III is the same, but my anecdotal results made this claim seem absurd. As a result, I thought I’d do a more controlled test to separate fact from fiction to see how much the quality differential between the Mark II and Mark III really is.

How I Tested


The only thing that changed between the test were the camera bodies

I set up my GT1541 tripod with my Really Right Stuff head and mounted the 70-200mm f/2.8L IS II USM set to 200mm. Doing it this way would give me a super sharp lens, but also remove a lot of variables as I could change bodies without changing anything on the lens.

For my first test I turned off IS, manually focused using Live View on the Lord of the Rings book and then tested both cameras using a +0EV exposure in manual mode with manual ISO. I did not adjust the focus or any variables during the entire test.

When I saw the results, I re-shot the 5D Mark II again this time by refocusing using Live View to make sure the focus wasn’t off. It didn’t appear to be, so when I did the test again I got identical results. I even tried again using auto focus with the AF point on the same spot, the results were worse.

I had reset both cameras back to factory defaults and shot in manual, so the only variable was Auto White Balance (AWB) which I used for both. I also used a bubble level on both cameras hot shoe to make sure that they were set the same and I took care to make sure the ball head didn’t move during the testing.

When taking the shots I used mirror lockup and a 2 second timer exposure to avoid any issues with vibration.

The net result is that I think this is as controlled as is needed to draw valid conclusions about the results.

UPDATE: I shot with JPEG Fine + Full RAW, but this article only compares the in-camera JPEG results. To see RAW results, visit Canon 5D Mark II vs Mark III–Image Quality Comparison Part II–RAW Conversion.

The Results

You can find the full gallery of results at http://ronmart.zenfolio.com/5dm2vs5dm3, but very quickly I found the results I needed to prove my gut feeling. If you look below, you’ll see a comparison of ISO 100 and 6400 between the two cameras using the same identical lens and settings, and it is clear that the 5D Mark III is significantly sharper!

At ISO 100 I expected them to be close, but the results were staggering. I knew the 5D Mark III was better, but this blew me away:


5D Mark II - ISO 100

5D Mark III - ISO 100

At ISO 6400 I expected the Mark III to have an edge, but I felt the difference was huge in favor of the Mark III:


5D Mark II - ISO 6400

5D Mark III - ISO 6400

At ISO 25,600 the Mark III shows a bit more noise than the 5D Mark II at 6400, but the Mark III has the edge in detail and sharpness.  When you apply the Landscape preset of Noiseware then you end up with an image that is quite usable.


5D Mark II - ISO 6400

5D Mark III - ISO 25600 After Noiseware

5D Mark III - ISO 25600 Before Noiseware

I think this clearly demonstrates that the in-camera JPEG quality of the 5D Mark III is significantly sharper and has more detail. Everything else from the Auto White Balance (AWB) to exposure seems to be the same, but there’s slightly more dynamic range in the Mark III images.

Conclusion

Other reviewers may have focused heavily on the RAW comparisons which I’ve done here, but these are the images you’ll see when you look on the back of your camera and do a 100% zoom to see if you’ve got the shot. They are also what you’ll see on your videos unless you change  the picture style to faithful.

I think this proves that the in-camera results are significantly better. I observed this level of improvement without doing actual measurements with my 5D Mark II vs the new 5D Mark III, and now with another camera loaned to me for this article. Assuming there were no mechanical issues with either 5D Mark II tested, I think the only real complaint one could leverage against the 5D Mark III is that it’s too darn expensive. Beyond that it’s the best Canon camera I’ve ever used, and certainly worth the upgrade in my book.

Order yours today from Amazon, Adorama or B&H.

Related Articles

I’ve got more to come on the 5D Mark III including a big article just for parents. Check back to learn more!

Disclosure

I may make a commission if you make a purchase using links found in this article.

Friday, July 15, 2011

Photo Thoughts–Editing Seattle with Nik Software

If you missed the Nik Software webinar by Janice Wendt (see here), I’ve created a video where I try to replicate what she did based on my own notes from her presentation. This results in my workflow being a more choppy than it typically is, but hopefully you’ll still get something out of it.

I recommend you view these videos in full screen using HD and turn your sound volume level up.

I begin by using Dfine to do noise reduction on the image to prepare it for the rest of its editing journey:

Play in HD

Here’s part two where I edit the image using Viveza:


Play in HD

and finally here’s part III where I finish up using Color Efex:


Play in HD

Nik Software Product Reviews

You can see Ron’s reviews on Nik Software products below:

To hear Nik Radio’s interview of Ron (9/23/10 episode #41), click here.

Special Offer

To get a discount just enter the code (see my discount coupon code page for updates if this doesn’t work):

Shopping cart code subject to change

If you did everything correctly you should see the correct price. My code also works for other versions – not just upgrades, so save on most Nik Software products when you use this code!

Prices subject to change without notice. I will get a commission and you’ll get a discount if you purchase using my code, so help us both by using the code!

NOTE: If any other codes are listed please choose REMOVE and enter mine as it’s the best deal you can get for this product!

Nik Software customers in Europe should contact europe@martinsen.com to get more information about the discount.

Disclosure

Nik Software is a partner of this blog. If you make a purchase using my code, I may get a commission. Please support this blog by using my coupon code. This is a video I created based on the content of the webinar presented by Janice Wendt at Ron’s request to Nik Software as a public service to his readers.

Friday, December 31, 2010

Holiday Gift Guide 2010 - Part I of II (Updated: 12/31/2010)–LAST DAYS!!!!

LAST CHANCE on some of these offers!

This time of year I have a lot of people ask me about gear and what to get, but I find myself so busy that I usually provide some lame recommendation or point to an existing article on my blog. This year I decided to team up with some of my partners, especially B&H, to provide a more comprehensive list of things you can put on your wish list for now and in the future.

The products featured in my 2010 Gear Guide are mostly products that I have used and recommend. There are a few educated guesses based on information that I have and/or my access to pre-released products. However, the real goal here is to provide some ideas on products that I’d recommend to anyone shopping for the camera junkie in their family, or products I either have or would like to own myself.

I hope you enjoy my selections in this two part series and wish you the best of luck for getting all the gear you wish for from your loved ones this holiday season.

Trey Ratcliff’s HDR Video Tutorial (NOW as low as $84.15!!!)


Kyoto Alley - Copyright © Trey Ratcliff  (posted with special permission)
Post-processing by Ron Martinsen

I loved the fact that I was able to create the results you see in the above photo after watching the HDR Workshop DVD by Trey Ratcliff of StuckInCustoms.com myself using Trey’s techniques on his unprocessed image. Now Trey is offering three versions with the base downloadable version as low as $99, the Basic for only $219 and the Premium for only $379. Click here to learn more about each version and save while this offer lasts! The other good news is that the $99 version is downloadable for instant gratification!

I also have a special offer where you can save an additional 15% ALL StuckInCustoms products when you use my discount coupon code RONMART15 which can be applied on top of the savings listed above for the lowest prices ever!

This is a great gift for your photography junkie friends to keep them from hurting your eyes with bad HDR like I demonstrated in my HDR Efex Pro review!

HDRSoft Photomatix (15% Off)

Photomatix is the defacto standard for HDR these days and is also offered at a discount on this blog (see the Discount Coupon Code page for details). It is used heavily during the HDR Tutorial series mentioned above, so you’ll want to own it to get the most of these tutorials. I always try Photomatix first when doing my HDR images.

Topaz Software

 infocus_interface
Topaz Labs InFocus

HDR Workshop DVD by Trey Ratcliff of StuckInCustoms.com features Topaz Adjust quite a bit and I used it myself more often after watching that series, but now Topaz has come out with another tool that may become a staple in my collection – it’s called InFocus (click link to see my review). With InFocus, you get a simple, yet super powerful sharpening tool capable of recovering lost detail and restoring clarity to blurry images. It also includes micro-contrast detail enhancement controls which allows users to refine detail sharpness and edges. It’s a much better product than Focus Magic and offers some features typically only possible with HDR software. I reviewed it and found it to save some shots that I’d normally trash!

Topaz has also updated ReMask, its popular tool fore creating complex masks. I used it in my InFocus review and loved it! My review will be coming soon but I should point out that until 1/2/2011 you can save $20.00 off and get it for only $49.99 when you CLICK HERE and use the code SuperMask. You can use my normal Topaz Labs Discount (also found on the Discount Coupon Code page) on ALL other Topaz Labs products.

To learn more about all of the many Topaz Labs products click here.

Imagenomic offers 20% off

Check out my Discount Coupon Code page for details on how to save 20% off all Imagenomic products including the winner of my Noise Reduction RoundupNoiseware! It also includes one of my favorite skin softening products Portraiture.

Nik Software (12/20/2010 – 1/3/11 NEW Special Offer)

'Tis the Season for Snowflakes and Sales

These are products that I literally use every day (see my Photographer’s Notebook for documented examples) and couldn’t live without! Here’s the discounts for the limited time (ONLY from 12/20/2010 through 1/3/11) when you use the code rmartinsen when checking out (as shown in this article):

  • Complete Collection Ultimate Edition $439.95 ($160 savings) – these are big savings so if you have been on the fence now is the time to act as this bundle (which now includes 64-bit editions for Photoshop, Lightroom & Aperture as well as the hot new HDR Efex Pro
  • Complete Collection Lightroom/Aperture Edition $239.95 ($60 savings) – Great value, but only get it if you never plan to get Photoshop.
  • Color Efex Pro 3 Complete $224.95 ($70 savings) – I couldn’t live without this product. Dynamic Skin Softener, Tonal Contrast, Polarizer, Reflector Effects, Graduated Neutral Density, Color Stylizer, Skylight Filter and more – I love em and can’t live without them!
  • Dfine$74.95 ($25 savings) – Despite coming in second by one point in my Noise Reduction Roundup, I find myself using this product more than the winner (the excellent Imagenomic Noiseware) simply because the U-Point controls save me when doing selective noise reduction (common for me). 
  • HDR Efex Pro $139.95 ($20 savings) – This is one of the hottest products on the web right now to create HDR images, so if you’ve been frustrated by Photomatix – super simple HDR that doesn’t have to look cheesy is now possible!
  • Silver Efex Pro $149.95 ($50 savings) – I mention it in my Advanced Black & White article because it’s true – nearly 100% of the pros I’ve talked to in my Printing Series swear by this product as being their go to product when converting color images to black and white. It converted me from a B&W hater to someone who enjoys creating them with this product now (see my Photographer’s Notebook for examples).
  • Sharpener Pro 3 $149.95 ($50 savings) – Sure you can use USM in Photoshop and get good results and Lightroom 3 now includes PixelGenius sharpening, but I still find that nothing is more brain dead to use than this product as I simply make my output selection and it just does the perfect job every time. This is the only tool I use for sharpening my professional photos and nothing else is worth looking at when it comes to print sharpening.
  • Viveza 2 $149.95 ($50 savings) – See the sexy girl shot later in this article? I was struggling with the hair and the lighting in a few places so I spent 90 minutes using masks and adjustment layers to correct the problem. I still wasn’t happy so I disabled the layers and tried doing the same thing again Viveza 2. In 5 minutes I was done and I only need 5 U-Points to get the exact results I was looking for. I love this product and it’s situations like this that remind me why I don’t use it enough!!!!
SPECIAL RONMARTBLOG.COM Bundle

Nik Software is also offering a special for this blog that you won’t find everywhere on the web. From 12/20/2010 until 1/3/11 you can get HDR Efex Pro and Dfine 2.0 together for just $199.95 (a savings of $60) ONLY when you use the code RMARTINSEN-BNDL

The annual sale is now expired but you can check out my Nik Software or Discount Coupon Code pages for my normal blog discount (15% when you use the code rmartinsen at the time of this writing).

onOne Software Perfect Photo Suite 5.5 (UPDATED: 12/18/2010 – New Offer expires 12/31/2010)

onOne has a big release update (free to many existing users) for its suite formally known as the Plug-In Suite. It’s now called the Perfect Photo Suite and you can check out more about it here. You can also check out my new review of PhotoTools 2.6 which demonstrates some of the features of PhotoFrame and PhotoTune from this bundle as well!

My blog offers a 15% off all onOne Software products via the link on the Discount Coupon Code page, and until 12/31/2010 you can save $100 off Perfect Photo Suite 5.5 when you use the special code RONM15.

ExpoDisc, RayFlash and Rogue Flash Benders – All 15% Off!!!

imageimage
image

ExpoImaging is offer 15% off when you use the coupon code ronmart09 at http://expoimaging.net.

Cradoc Software’s fotoQuote & More – now 30% off

image

Cradoc Software's fotoQuote is the product I use when invoicing commercial clients for usage rights for my work. Their fotoKeyword Harvester and fotoBiz products are quite popular as well.

You can see my full review of fotoQuote in my article How much is my photo or video worth?. They have several other great products for photographers as well, so explore their web site and see if you should take advantage of the first sale I've ever seen on these products!.

Click here to get 30% off any Cradoc Software products before January 7th, 2011

Think Tank Photo Camera Bags (Special Offer)

Receive a FREE GIFT from Think Tank Photo

Airport Security v2.0 has to be my favorite bag of the year, but the reason why there are so many bags out there is because different occasions call for different bags. There really is no one-size-fits-all solution as I thought when I used to scoff at photographers who had a closet full of bags. I find myself using my Urban Disguise Series bags the most often but my Modular Components with the Digital Holster 30 are my go to setup for sports. I still love my Streetwalker Pro and Glass Taxi’s too, so despite the redundancy I’ve been unable to give either one up! Of course there’s the Hydrophobia 70-200 for conditions like today when the snow is pouring down as well as the Seattle rain, and the most used bag in my collection isn’t for camera’s at all – it’s my Artificial Intelligence 17. My 5D Mark II also uses the Camera Strap, so you see it really is tough for me to live with just one bag!

These bags make wonderful gifts and if you buy them direct from Think Tank Photo you’ll get a no hassle return or exchange policy as well as a free gift (see the Discount Coupon Code page or the Think Tank Photo page) AND you can avoid sales taxes in most locations!

ColorByte ImagePrint (10% off)

If you print with an Epson printer (and in the near future, even Canon printers), you owe it to yourself to stop wasting time looking for the best paper profiles or generating your own and just get ColorByte ImagePrint. Without question, it’s the best way to get the best prints possible out of your Epson printer and you are very fortunate as this product never goes on sale. In fact this blog is the ONLY way you can get a discount on this product (according to ColorByte), so check out my review and get the details on how to get this 10% discount while it lasts (it is currently set to expire on 12/31/10) via my friends at JVH Technical (the best place to buy large format printers if you are in the Seattle area).

QImage Ultimate Holiday Promo (10% off)

QImage Ultimate

QImage was my find of the year as it is the best layout program I’ve used – ever. It saves me time like few products do (i.e., Viveza 2 is another),. It’s a decent RIP (but you provide your own profiles and it’s for Windows only). Use this link and save over 10% off in this exclusive discount to readers of this blog.

LensRentals.com – Rent at a discount before creating your holiday wish list

Canon TS-E 24mm f/3.5L II

I was lusting for Canon’s TS-E 24mm f/3.5L II Tilt-Shift Manual Focus Lens for EOS Cameras, so before putting it on my personal holiday wish list of things I’d love to get, I rented it from my friends at LensRentals.com where this blog offers an exclusive 5% off discount that you can’t find anywhere else. I loved the lens, but the manual focus got old quick so I decided to take it off my list. No buyers remorse and no returns to deal with, so it was a brilliant move that saved me money in the end. I highly recommend you try this out if you are on the fence on anything (including camera bodies, lighting, etc…) on your own holiday wish list this year!

You must visit the Discount Coupon Code page to get the latest coupon code as it changes regularly. Please do not post this code or share it on the web (link to my page instead).

Conclusion

I’d like to thank all of my partners here, many of whom offer their only discounts on the web through this blog, for their generosity in bring these offers to you on my favorite products. I do not recommend products I do not love, so if you see it in this series then you can rest assured that I’d feel confident giving the product as a gift to a close family member or recommending that they spend their hard earned money on these products.

Happy Holidays to everyone of all faiths!

Be sure to visit Part II of Ron Martinsen’s Holiday Gift Guide 2010 on ronmartblog.com!

***** Don’t forget to visit part II by clicking this link *****

Disclosure

I may get a commission if you make purchase using the links provide in this article. Thanks for supporting this blog by using the links!