Showing posts with label 1.07 billion colors. Show all posts

Wednesday, September 26, 2018

REVIEW: NEC PA271Q-BK 27" 16:9 Color-Critical IPS Monitor

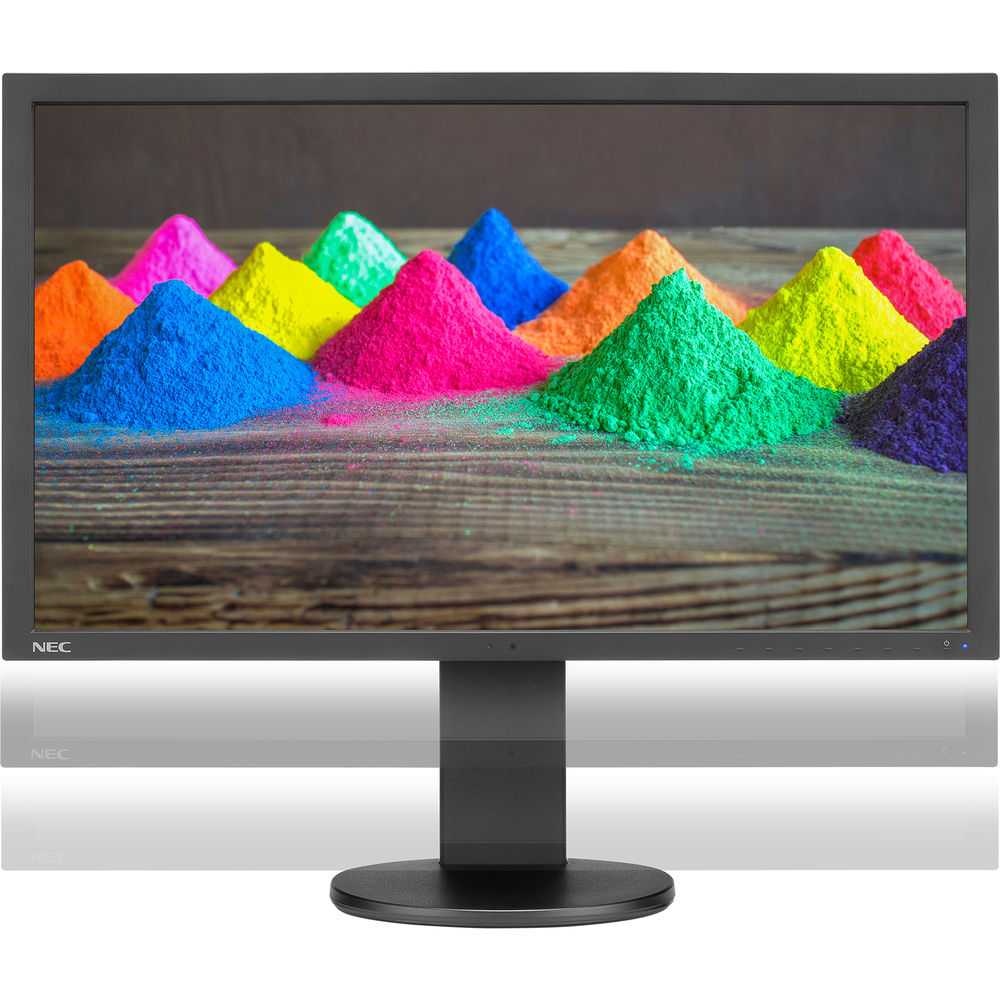
NEC PA271Q-BK 27" 16:9 Color-Critical IPS Monitor

Since December 2014, my primary display has been my huge NEC PA322UHD which I've loved for the screen real estate. However, when I read about the latest PA series display with its improved color accuracy, I had to try it out. 

While I'll admit, that I miss the huge 32" 4k display for its size, I have appreciated that this display is much more color accurate which is very important when doing color critical photo editing and soft proofing.

Photoshop looks spectacular on this 16:9 aspect ratio WQHD resolution display that is 2560 pixels wide by 1440 pixels tall (or 109 ppi):

Plenty of space for Photoshop CC 2018

In fact, if you have a compatible video card you can even enjoy over a billion colors by enabling 30 Bit Display

image

What this will do is eliminate banding in grayscale or color images when you use good video cables that can support it! However, be careful with this if you'll be printing because no printer made supports 30 bit printing, so it can cause you to miss some banding issues which could occur during printing.

For everyday use Excel 365 still goes out to a whopping AM61:

Easily show all cells to AM61 in Excel 365

So while it might not be 4k it's still plenty of screen real estate to get a lot more done than traditional 1080p or 1920x1200 displays.

Inputs Galore

This display features lots of I/O ports both on the bottom (shown in silver on the left below) and on the side (shown in black on the right below):

imageimage

In fact, this is what you get:

1 x DisplayPort
1 x Mini DisplayPort
2 x HDMI
1 x USB Type-C
3 x USB (USB 3.1) Input
3 x USB (USB 3.1) Output

To learn more about the specs of this display be sure to visit the PA271Q product page.

NaViSet Administrator 2™

Want to do an Ethernet management of your NEC displays? No problem, check out the control you have using the NaViSet Administrator software:

  • Remotely adjust almost any parameter or setting found within the On Screen Display menu
  • Gather valuable information pertaining to a Windows computer such as model name, OS version, memory and CPU (Windows version only)
  • Any information that is gathered about connected devices is stored in a local database and can be exported for later review
  • Automatically issue email alerts if a diagnostic error is reported by a device or a setting has been changed
  • Schedule periodic polling for singular or multiple devices at specific times or on demand
  • Sort connected devices into groups to help organize collections of display and computers
  • Assign an electronic Asset Tag to a device to provide a secure method of tracking an product over a network

Click here to see a video to learn more about what you can do.

Easily Switch Between 2 Computers with 1 Mouse & Keyboard

This display acts as a KVM switch so you if you are like me and you have a Macbook Pro and a Windows PC that you want to use with this display and a single mouse and keyboard, then it's no problem. Just press the input button to go back and forth between the two as shown here:

Calibration Settings

image

I calibrate to the settings shown above and set my preferences to use 52 calibration and profile steps. Here's the information summary for this display after calibration:

image

An impressive 0.25 Delta E beats even the best Eizo's that I've tested. What this means in simple terms is that the color accuracy on this display is phenomenal.

Learn more about this display in this short 40 second video:

Conclusion

This is the most color accurate, fastest to color critical temperature, display I've used in years. For Eizo fans looking for a cheaper alternative where you sacrifice nothing, this is the display for you!

Now I want a 32" UHD version of this display, because I love this one so much that it would be hard to go back to my 4K display again!

Simply put, if you care about color accuracy and a display that is going to hold your calibration settings plus come up to temperature quickly, then this is the display for you!

Where to Buy?

CLICK HERE to learn more or buy today on B&H or click here to find it on Amazon.

Other articles you may enjoy

If you enjoyed this article, you may also enjoy these:

Enjoy these and more on the Reviews tab as well as Ron's Recommendations.

Disclosure

If you make a purchase using links found in this article, I may make a commission. It doesn’t cost you a penny more, but it does help to support future articles like this.

Monday, July 25, 2011

Guest Blog: Understanding 10-bit Color by NEC’s Art Marshall

NEC Display Solutions launched our first 10-bit color LCD, the 24” MultiSync PA241W, in February 2010. One of the questions that we are asked regularly by people evaluating all of our MultiSync PA Series models is “what is the difference between 8-bit color and 10-bit color?” and that is generally followed with “How do I get 10-bit color?” Ron and I have been discussing this for a while and, thanks to his feedback, we’ve put together something that I hope answers those basic questions.

Overview of LCD Color

(This is intended to give you a brief overview of the way that LCDs create color. For much more detail on LCD technologies, see the Wikipedia article on LCDs.)

Understanding how the computer creates color in an LCD is important to getting the most color from the display. Generally LCD pixels are made of 3 colored “subpixels”: red, green and blue (RGB). The LCD combines these subpixels based on the information that the computer sends over the video card. The amount of bits of color that the computer sends controls the number of colors that can be represented by the display, and the computer sends data for each of these three colors.

8 bit color: Typical desktop displays support 8 bits of color data per RGB channel. This means that there are 256 (8 bits) of possible values for each of the colors and combined the display can produce 16.8 million colors (256 x 256 x 256). This is also known as 24 bit color.

Why 30-bit color is better than 32-bit

10 bit color: MultiSync PA Series displays, when used with a compatible video card, support 10 bits of color data per RGB channel. This yields 1024 values for each color and a total of 1.07 billion (1024 x 1024 x 1024) possible colors that can be represented. This is also known as 30 bit color.

Side note: older display technology featured 32-bit output. This was actually a combination of 8 bits for each RGB channel as well as an alpha (transparency) channel. Comparing this to today’s technology, 30-bit technology is true 30 bits of color data compared to the 24 bits of color data in the older, 32-bit technology.

I have a 10-bit LCD, now what?

8-bit color display of dice courtesy of NEC

10-bit color display of dice courtesy of NEC

8-bit color

10-bit color

It turns out that every element of the combination of application software, operating system, video card, video connection and display must support 10 bit color in order to achieve true 10 bit color output.

Several video cards from major manufacturers including ATI (R6xx, R7xx, R8xx ATI Radeon hardware) and NVIDIA (Quadro series with DisplayPort, not Quadro FX) support 10 bit color. In addition, you need a DisplayPort connection to connect the video card to the display.

To enable 10-bit color on an AMD / ATI video card, click here. [Ron likes this doc better]

To enable 10-bit color on NVIDIA video cards click here. [Ron – nVidia calls this feature Deep Color in their drivers]

Finally, you need both operating system and application support for 10-bit color. 10-bit color is only available on computers running Windows XP, Windows Vista and Windows 7. MacOS versions including 10.6.x do not support 10-bit color output.

Application support for 10-bit color is constantly evolving. 10-bit color is typically only supported by software that uses either OpenGL or DirectX. Contact your software vendor for questions on 10-bit color support.

Most typical desktop configurations are limited by some component in the system and can only produce 8 bit color. For example, you could have a 10-bit LCD, 10-bit capable video card, DisplayPort video connection and Windows 7 operating system but without an app that can generate 10-bit color data, you will not see the advantage of those extra bits of data. By using the correct software, an operating system, video card and display that support 10 bit color, you can produce over 1 billion colors.

If you have an NEC MultiSync PA Series display, you can download a sample application (for Windows only) to see if your system is displaying 10-bit color. [Maximize and ALT+TAB between windows for the best result]

I hope that this helps. Contact me on Twitter using @Art_Marshall or post any questions in the comments!

Art Marshall is the Product Manager for Professional Desktop Displays, including the award-winning MultiSync PA Series, at NEC Display Solutions of America.

You can find more about NEC Display Solutions on twitter @NEC_Displays, on Facebook at http://www.facebook.com/necdisplay or at http://www.necdisplay.com/

Ron’s Reviews of NEC PA Series Displays

Click here to read Ron’s reviews of the 24 & 27” PA Series, or click here to read Ron’s review of the 30” PA series.

Photoshop & 10-bit Color Depth Support (by Ron)

While it isn’t very well documented (here’s the closest hit I found), both Photoshop CS4 & CS5 for Windows support 10-bits per channel color depth (30-bits total) by enabling the correct option in Open GL as shown in the following sections. I’m not currently aware of any support in Lightroom for this feature.

These directions will ONLY work if you are running a compatible video card using the correct cables (dual link DVI or DisplayPort) to a compatible display (like most, not all, NEC PA Series).

Enabling 10-bit Per Color Channel (30-bits total) in Photoshop CS4

SNAGHTML149cb279
Step 1 – Click Advanced Settings under Enable OpenGL Drawing

image
Step 2 – Match your settings as shown above (DO NOT check Color Matching)

Enabling 10-bit Per Color Channel (30-bits total) in Photoshop CS5

SNAGHTML14aeda73
Step 1 – Click Advanced Settings under Enable OpenGL Drawing

SNAGHTML14b9e6e1
Step 2 – Choose Normal or Advanced Mode and leave the check boxes checked

NOTE: I’ve got this working on my system before, but as of the time I wrote this article I could not get CS5 to work (CS4 on the same system worked fine). Each time it has been more challenging in CS5 to get this to work and has required multiple restarts of Photoshop to get accurate results.

Testing 10-bit Support in Photoshop

Download Ramp.psd from AMD (web search if link is broken) and open it in Photoshop. If you see this dialog:

image

just click OK. On a properly configured system you’ll see the correct results even using sRGB.

As the dice example above shows, in 8-bit you’ll see segments that clearly define the different shades of gray. In 10-bit per channel color you’ll see a smooth white to black gradient with no hint of any segments. If your video driver isn’t very good it can fail, and some buggy video drivers require you to restart Photoshop or even your system to get this to work properly.

NOTE: If you switch the settings on and off in a single session of Photoshop, you won’t see any changes unless you force a repaint so zoom in and then zoom back to actual pixels again to see the changes (again, ONLY on a properly function video driver).

A Word About 10-bit Per Channel Color Depth & Printing

The world of printing is way behind display technology, so Ron’s advice for those doing print soft-proofing is to DISABLE 10-bit per channel (30-bit total) color support from Photoshop. The reason why is that you’ll hide banding effects that might show in your print as many (not all) printers still only print in 8-bit using a much smaller color space, even if you enable 16-bit printing. This will result in printing surprises and therefore is not recommended.

More About High Color Support on Windows XP & Greater

To understand how and why Windows can support this advanced color mode when the Mac can not, please read this document. It helps to understand what is possible by software that may not support advanced color today. Please forward this link to your software vendor to help spread the word (i.e., educate them) on how they can add advanced color support to their products.

Disclaimer

NEC is a partner of this blog and has provided Ron with loaner PA series displays to review (all of which have been returned). Ron also owns a NEC PA series display that he purchased at B&H with no discount or assistance from NEC. Ron may get a commission if you make a purchase using links originating from this blog.

Friday, June 24, 2011

REVIEW: NEC PA301W 30” Display

NEC PA301W Monitor

NOTE: This model is being discontinued and has been replaced by the PA302W. Click here to go to that review now. Here’s an index of my NEC reviews not covered by this article:

When I wrote about the NEC PA Series earlier this year the response was overwhelming. I got lots of questions and lots of emails from those who bought the PA241W-BK or PA271W-BK who said they loved them. Of course for some of you asked me “what about the big 30” display”, to which I had little to say. I explained that I had heard that they weren’t as good as the 24 or 27 inch displays, but that I hadn’t actually used one myself.


My Desktop Configuration with a GTI Lightbox, PA301W and PA241W in Portrait Mode

I’m pleased to say that I’ve had the luxury of using the PA301W since March and NEC had to remind me to pony up the money to buy it or send it back. It’s with regret that I’m choosing to send it back, but not because it isn’t a blast having such a huge monitor.

I’m sending it back because for $1149.95 (at the time of this writing) I can get the PA271W-BK which I feel performs better than paying $2169 (6/23/11 @ B&H) for the PA-301W-BK. Those extra 3 inches aren’t worth $1000 to me, and the time it takes to get the 27” up to operating temperature is about 50% less. For a photographer that means that you can calibrate your display at operating temperature and work at a later time 50% faster because you aren’t waiting for the display colors to normalize.

PA301W, PA271W and PA241W Excel Overlays
Does Size Really Matter?

Don’t feel insecure by going three inches shorter with the PA271W because you don’t lose any width as the graphic above demonstrates. Instead you just lose a little height which can easily be compensated for by using my favorite configuration – a PA241W in portrait orientation to the right of the PA271W. Here’s how it breaks down:

Display Resolution Max Excel Cell
PA241W 1920x1200 AC47
PA271W 2560x1440 AM60
PA301W 2560x1600 AM67

As you can see, you only are getting an extra row that’s 160px tall (or 7 more cells in Excel), but for those pixel peepers out there that is an extra 409,600 pixels. 

Performance

Aside from the aforementioned warm-up time, and a nasty color shift at startup, this display performed very well. I was able to successfully view 10-bit per channel color on it (Windows only) and calibrate it with both a ColorMunki and i1XTreme using NEC’s SpectraView II software (required). It worked fine with my MacBook Pro and Windows 7 64-bit systems using DisplayPort connections.

Conclusion

Overall I enjoyed this display and it was nice to have the extra space. Once the display got to operating temperature it performed well and was wonderful for proofing large landscape prints. As I mentioned earlier though, for the price I’d much rather spend the money and get a PA271W-BK and a PA241W-BK which results in a lot more space and two outstanding monitors that are a brilliant together in a color managed photography workflow.

I will say that this display BLOWS AWAY the Apple 30” Cinema HD Display which is only capable of up to 16.7 million colors versus this display which can do 1.6 BILLION colors (via DisplayPort on PC only at this time). It also doesn’t have the annoying reflection problems of the Cinema HD. It also has significantly better contrast, response time, viewing angle and more so if you have a Cinema HD and want to upgrade – this is MUCH better than anything Apple has to offer – even the new Apple 27” LED Cinema display!

No matter which display you get, I highly recommend getting a ColorMunki to calibrate both your display and printer. They make a great team! I also would get the hood for the landscape display (doesn’t work on portrait orientation)

To learn more about this display, visit NEC’s website or visit B&H. 

Where to order

Order your NEC PA Series display by clicking any of the following B&H links:

NOTE: Use the links below to see the newer models and links for both Amazon and B&H for those new models

Other articles you may enjoy

If you enjoyed this article, you may also enjoy these:

Disclaimer

NEC loaned this display to me for a few months so I could experience it in every day life and review it. I did return this display and NEC had no influence on this article in any other way.

I may get a commission if you purchase using links in this article, so please support this blog by coming back and clicking my links when you are ready to order.

Monday, June 6, 2011

REVIEW: Eizo ColorEdge CG243W 24” IPS 1.07 billion color LCD Display

*** This display has been replaced by the Eizo CG246-BK ***

The Eizo ColorEdge CG243W is a high quality display that is made in Japan by Eizo employees. It is not outsourced to China like the competition, and built to the highest standards. Eizo is so confident that this differentiation results in a superior build quality that this display comes with a 5-year warranty.

Eizo is so committed to superior quality that each unit is inspected and measured at 25 intersection points to ensure perfect uniformity from edge to edge before it leaves the factory. Here’s the report that came with my evaluation display:

From this report you can quickly see how meticulous they are in their quality control, but read on to realize that there’s so much more when you dive into the details.

Features Deep Dive

In this section I’ll dig into some of the advanced features that make this a fantastic monitor, but I’ll try to break the geeky terminology down into concepts that most people can understand. Hopefully I can help you to see why these things make a difference. 

Go Beyond TrueColor with 10-bit Color (1.07 billion simultaneous colors)

You can get 10-bit per color channel via the DisplayPort (when paired with a 10-bit per channel video card). What this means is that you get over 1 billion colors shown simultaneously (versus 16.7 million with traditional 8-bit per channel, 24-bit displays).

In plain English this means that instead of 256 shades of Red, Green and Blue you typically sein in Photoshop, you now get 1021 shades of Red, Green and Blue each. The practical application of this is that you won’t see any banding of any type when viewing even the most complex gradients on the screen.

It should also be noted that few PC’s and currently no Apple computers (as of 3/22/2011) come with 10-bit per channel (30-bits total) video cards. What this means is that it will require most users to get a new video card for the best possible results.

I didn’t have access to a 30-bit video card so I used a DisplayPort to my MacBook Pro and DVI for my PC for 24-bit color (8 bits per channel). I have seen 30-bit video and it is amazing, so I wish I could have tested this. I can say that despite this fact, I was still very impressed with what I saw with only 8-bits. The banding was non-existent in practical applications and very difficult to notice on the most complex test patterns.

My advice is that if you can get a 10-bit video card (shipping with some computers and Lenovo laptops these days), then do it. You can find some of the available choices in this whitepaper, but I’m sure there are more by now. Ironically, some can be found for as little as $100, but I won’t list any here as I can not comment on the quality of the cards available.

It is confusing when searching for these cards because they are 10-bit per channel but referenced typically as 30-bits (10-bits each for the Red, Green & Blue channels). ATI calls this technology 30-bit Display Pipeline and nVidia calls it 30-bit Color Technology. Geeks can learn more about this technology in this whitepaper from nVidia.

Brightness & Color Uniformity

Eizo ColorEdge Digital Uniformity Equalizer (DUE)

Eizo has a technology they call Digital Uniformity Equalizer (DUE) (whitepaper) that was introduced back in 2006 with the CG221 and is present in the CG243W. Put simply, this technology ensures edge to edge color uniformity and based on my experience with Eizo and other monitors, I can tell you that this is one feature that I couldn’t live without now.

Eizo ColorEdge Digital Uniformity Equalizer (DUE) 

If you are looking for reasons to justify Eizo’s premium price, this is certainly one of them. Just like you would pay more for a lens with great edge to edge sharpness, this feature is valuable in your photo editing to have edge to edge color uniformity.

16-bit 3D LUT (Advanced Print Soft Proofing Support)

This display features a programmable 16-bit 3D LUT (whitepaper) which put simply means it is suitable for highly accurate soft proofing for prints. These 3D LUT’s do hardware calibration instead of software calibration (which is what X-Rite or DataColor software does). This calibration process bypass the software calibration in the operating system (i.e., the color curves in your graphics card are just zeroed out via the ICC profile) and the actual calibration occurs in the display itself. The advantage to this is that you can calibrate it on one system (i.e., a Windows 7 system like my desktop) and use it on another system (like my MacBook Pro) and the display is still calibrated perfectly for both systems.

It should be noted that to properly calibrate a display like this you must have a compatible calibration device plugged into the display and a cable going from your computer to the display during calibration. Some other products have this feature, but require software purchased separately – Eizo’s come with ColorNavigator at no extra charge to do this for you.

Paper Mode

Eizo ColorEdge Paper Mode Measurement

Eizo feature a technology called Paper Mode (whitepaper) which sounded really cool when I read about it because it is suppose to help you do more accurate soft proofing. When I tested it out (which wasn’t easy as it expects you to have three hands), I found it to be less than useful. I tried it with both Epson Exhibition Fiber and Hot Press Natural papers and both times it came back suggesting I use 4000 K as my white point and 30 cd/m2 as my brightness which would result in a horrible viewing experience. While cool in theory, I didn’t find this feature to be useful at all, but read about it and decide for yourself. Perhaps there was user error on my part since I am not an octopus or perhaps my Solux lights caused the results to be skewed.

On-Screen Button Guide

It’s funny how sometimes the little things make a big difference, but what really surprised me is how easy and intuitive I found the Eizo On-Screen Button Guide to be in every day use. While the other displays I have owned have power buttons that are hard to find in the dark and are easily mistaken for other buttons, the Eizo lights up a guide on the display when you push a button that makes it easy to find the button of your choice. Since I used this display with a MacBook Pro I found the location and easy of use of the Signal button (shown as S above on the left) to be exceptionally helpful).

Hood Design

This display comes with a very high quality hood that has a thick felt interior lining to prevent reflections or light contamination. It attaches securely to the display, but has two limitations that were very disappointing to me:

  1. When calibrating you can’t close the top hatch which introduces light contamination. To remedy this I would put a piece of cardboard over the hatch. I prefer other designs which have a trap door much better.
  2. This model only supports the hood in landscape orientation, and I was using it portrait orientation for the first half of my review. I much prefer the CG245W hood design which works in either orientation.

Calibrating with ColorNavigator 5.4.2

ColorNavigator is the free calibration software included with this display that is free for life. Unlike most free software that comes with hardware, this is a good one that is excellent for getting the best results from your display. It not only helps with calibration and validation, but it also monitors your system so if something changes the video card gamma it will (based on your preferences) change the settings back to ensure that your display stays calibrated. I found little touches like this and the fact that it played nice with other calibration software on the system to be a welcome surprise!

At first I found the calibration process to be a little confusing because the default target in the software for printing is for a brightness of 80 cd/m2, a white point of 5000 K and a gamma of 1.8.  While that may be good for some people, for my eyes it sucks, so I created a target for 100 cd/m2, a white point of 6500 K and a gamma of 2.2 (all of which are pretty common defaults for most).  Once I got a target suitable for my preferences I was in business, and this is where the Eizo displays really shine.

I’ve calibrated with my ColorMunki and i1XTreme (an i1Pro) and both worked without any problems with ColorNavigator 5.4.2.

Validation

Honestly, I didn’t know jack about validation before I got this display to review. However, after speaking with the gurus at Eizo I was able to learn that other models of this caliber have this feature. Validation allows you to compare your current monitor settings against its calibrated settings to see how much your monitors colors have shifted since you last calibrated. This is pretty cool because it goes beyond that annoying reminder you get from calibration software that mindlessly tells you to calibrate your display every X weeks.

This feature actually measures the colors against the last calibration to come up with a delta-E of all of the measured colors for a quick report to see if your display is holding its color accurately over time. You can also use it to measure what your display is doing right after you turn it on like I did in the 2nd test above that shows an uncharacteristic (for Eizo) 4.1 Max delta-E. This anomaly occurred because I ran the validation on a cold display after it had been turned on for only one minute, but despite this fact those values aren’t too bad compared to others I’ve tested at even up to 40 minutes after startup!

Validation seems to be quicker than calibration, but both require a calibration device and similar process so I found it more useful to validate than calibrate if you want that sanity check that  your monitor really is calibrated accurately.

Here’s a link to my last validation report that was done 35 minutes after the display had been turned on.

Fine Tuning with Manual Adjustments

For those who want the ultimately control you can calibrate and then tweak to your hearts content with the manual adjustments shown in the dialog above.

Performance is where this display shines

One of the things I instantly noticed was the fact that this display turns on and shows an image that looks to be mostly accurate in just 3 seconds (compared to 6 to 7 seconds for competing monitors – and their colors look very bad at that point). However, this display even in as little as 1 minute after being turned on had reasonably good results in its validation report thanks to its patented backlight sensor (see below). Sure it wasn’t perfect after a minute, but shortly after it was spot on. Similar tests done with other monitors even after 35 minutes still had maximum gray scale Delta E’s of over 4 and white points of nearly 2.

What this means in the real world is that when you turn this display on that by the time you can start Photoshop and load your first file your display will be ready to do reasonably accurate complex photo editing, whereas other displays really require 40 minutes or more to get to that same point. Most people don’t realize this so the net result of failing to recognize this issue is that you could end up wasting a lot of time editing your image only to realize the results are oversaturated or the gray scales are off after your display has reached its proper operating temperature. THIS IS SIGNIFICANT!

I don’t know about you, but I typically just come up to my display, turn it on, and get to work. In fact, since I never turn my computer off I typically have Photoshop running and just resume from where I left off. This partially explains how I get myself in trouble with shots like this, because I edited it before my other display was displaying colors as it had been calibrated to do.

If your monitor has a 3D-LUT and your its software supports validation, it can be very useful to do a validation after 1 minute, 15 minutes, 30 minutes and an hour just to see how much things can change while your display heats up. Since most displays do not have a technology like Eizo’s DUE, then this I can be extremely problematic at the edges where the color is already inconsistent.

Auto Brightness Stabilization (Patented Backlight Sensor)

A sensor is placed in the backside panel of the monitor with a hole for light transmission which helps to maintain brightness stabilization. More importantly it helps it to stabilize the brightness soon after you turn the display on for consistency over time.

Built-in Thermometer for Temperature Control

Another cool feature that helps the Eizo have an edge uniform color stabilization is its built-in thermometer that measures ambient temperatures. By making adjustments it can prevent unanticipated heat that can impact the color hue.

High temperature and /or brightness can cause the tone curve characteristics of an LCD to change as well as brightness and color stability. The tempo sensor controls the tone curve characteristics  as well as brightness and color. This feature isn’t mentioned on the website for the CG243W, but it exists. It is mentioned on the CG245W web page under the topic Brightness and Color Temperature stability, but the CG243W has this feature too.

UPDATE from Eizo

There is a firmware update for this display that adds support for connecting your HDSLR directly to the display to play 1080i via HDMI to DVI adapter.

Ordering

*** This display has been replaced by the Eizo CG246-BK available at B&H***

Conclusion

The Eizo CG243W is an outstanding display with excellent color depth and superior performance. Its designed to meet the strict standards of medical imaging where accuracy is essential, and the complex requirements of accurate soft proofing.

While there are cheaper alternatives like the NEC PA Series that perform extremely well, there are little details that explain why Eizo’s are still the standard by which all other displays are judged. It isn’t obvious at first and it took me over two months to full appreciate, but they are there and they do make a difference.

I’m a car guy and I like to speak in analogies, so the best one I can think of (for those who know this one) is that this display is like a Porsche 911. Sure statistically there may be others displays that are like the Corvette that stack up well on paper (and even in some cases exceed) the performance of the 911, the devil is in the details. When you use and experience the two you can immediately quantify the difference that is hard to put on paper but is easily experienced in your hands and your butt. For the people who appreciate these types of differences, the Eizo will satisfy your highest standards of quality. For the bargain hunters that would defend the Corvette, then there are other choices which will save you a significant amount of money.

My advice is that if your wallet can handle it, get the Eizo – it’s still the best product on the market when it comes to image quality and performance. It’s build quality and warranty will also ensure that it will be the last display you need to buy for at least the next 5 years and probably much more.

For more information, brochures and videos visit http://www.eizo.com/global/products/coloredge/cg243w/index.html.

P.S. Yes, it is a sad day that I’m boxing this up and sending it back to Eizo. Despite what you might think, the donations to the blog and sales don’t quite cut it to buy nice toys like this so I had to part with this one. I do appreciate your reading this blog though so I can enjoy testing cool products like this for you!

Disclosure

I was provided with a loaner Eizo CG243W for review for about 60 days. I may also get a commission if you make a purchase using the links in this article. Thanks for supporting the blog by using my links!