Showing posts with label comparison. Show all posts

Saturday, August 24, 2024

REVIEW: FUJIFILM X100VI - Is it better than you smartphone?


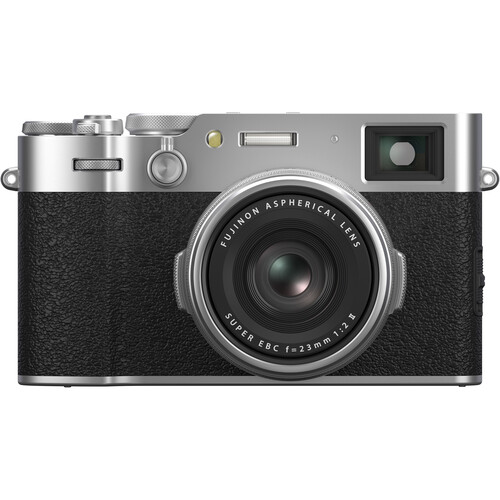
FUJIFILM X100VI 40.2MP APS-C with 23mm f/2 Lens

It’s been since 2019 that I’ve reviewed a Fujifilm camera and that’s a shame. I forgot how much I’ve enjoyed the Fujifilm platform. If my memory serves me correctly the original X100 was the first X series camera I ever reviewed!

While there are numerous improvements that addressed my complaints of the early x100 and x100s, the form factor and purpose remain the same – and that’s a good thing. What’s more, the support for teleconverters means that you can get a little more functionality out of this fixed length permanently attached lens – if you so desire.

Overview

You can click the photo at the top of the article to get all the specs at B&H, so I’m not going to bore you with that. I’m also going to get closer to the modern era by introducing this camera with a video overview instead of a wall of words:

It’s a super well built and designed camera that really has few faults for someone interested in this formfactor and feature set.

Real World Images

Click here to see a gallery of some of the photos I took using the X100VI during my time reviewing it. As usual, these are all straight out of the camera with one notable exception. This camera supports HEIF, but Zenfolio doesn’t provide a good way to give you direct access to them, so I had to convert all HEIF files to JPEG (when applicable). Inline images were resized by Zenfolio, but you can download full size originals of the images that Lightroom converted from HEIF to JPG for inclusion in this gallery.

Here are my thoughts on a few photos that I found worth discussing:

Here’s one of the first pics I took with this camera right out of the box with the camera default settings and before I bothered to read the manual to refresh my memory on how to set the autofocus point:


f/2 @ 23mm for 1/125 sec at ISO 1250

As you can see the bokeh is fabulous and the detail is quite good in the raindrops despite, literally pointing and shooting like a newbie to cameras would do! If you want to know what do you really get over a cell phone, here’s a good place to start looking!

I was also pleased that for ISO 1250 that it looked this good to begin with. This particular photo was the exact in-camera JPEG as I hadn’t discovered yet that it supported HEIF at this point in the review.

Here’s another impressive handheld shot at only 1/35 sec yet the gloomy day required ISO 8000! The detail and default processing was amazing:


f/5.6 @ 23mm for 1/35 sec at ISO 8000

I was super impressed with the detail of the fine grain details in the center of the flower that didn’t get destroyed by in-camera noise reduction, and the default color was fantastic!

Here’s a jaw dropping example of the quality of this lens and the in-camera images event at ISO 5000:


f/6.4 @ 23mm for 1/35 sec at ISO 5000

I’m very pessimistic these days about lugging cameras around as cell phones have become so good, but this definitely reminded me that I might need to spend more time with the latest cameras again as this was a very impressive result!

Here’s a pretty boring photo, but again these were camera default settings doing pure point and shoot (except I did manually set the aperture). In this case I was too lazy to lay on the ground, so I just held the camera down at the level of the slug, tapped the screen like I’d do with my phone and took several photos:


f/8 @ 23mm for 1/35 sec at ISO 5000

This did pretty good knowing how I took the shot – especially with a 23mm lens not known for being a good focal length for macro photography.

On a camping trip to the North Cascades in Washington, I woke up to see this beautiful scene so I grabbed the camera and just did a quick snap before going back to bed.


f/16 @ 23mm for 1/35 sec at ISO 800

This shot would be one of my first experimentations with a large f stop number to see if there have been massive improvements with diffraction, but ultimately that didn’t appear to be the case.

A little later I’d try again (below), but still the trees in the background are pretty soft for f/16:


f/16 @ 23mm for 1/35 sec at ISO 500

In brighter conditions at a low ISO, the f/16 results were significantly better so the poor quality of the previous two photos may have been attributed to the fog and losses caused by noise reduction.


f/16 @ 23mm for 1/40 sec at ISO 125

By this point I had also enabled the Velvia film simulation mode which Fujifilm is famous for, and it did not disappoint. The colors were amazing for this scene – if you like vivid images. If not, there’s a wide variety of film simulations to suit your taste.

I love the Velvia film simulation in the woods, but some might be turned off with how it crushes some of the shadow areas as shown at the base of the trees in this shot:


f/11 @ 23mm for 1/35 sec at ISO 2000

It also gives the water a more of an unnatural tint so some might find it better to manually process a shot like this from raw to get the best results.

Without resorting to manual settings or flash, I just took this picture of Kai (yeah, he’s grown up) the way a newbie would using default settings:


f/2.8 @ 23mm for 1/150 sec at ISO 125

This is a type of shot where modern phones with their in-camera HDR can’t be beat – the results are very disappointing, so amateurs will need a better understanding of light (e.g., turn Kai into the light and avoid harsh backlight) or they’ll be frustrated compared to what they see they can accomplish with their phone.

Case in point, here’s what a iPhone 13 Pro photo of Kai taken in the same exact spot looked like straight from the phone:


Apple iPhone 13 Pro f/2.8 @ 9mm for 1/121 sec at ISO 64

So, if your goal is to take advantage of the shadows and get a more creative lighting shot then iPhone will be frustrating, but if you want a no brainer shot that is easy and just does HDR perfectly, it’s still tough to beat the best smart phones.

Here’s another example where the lighting was much more favorable:


f/4 @ 23mm for 1/250 sec at ISO 125

Yet, despite great light and God’s soft box being out in full force, with no exposure compensation the image was rather dark. Again, compared to the iPhone where the results were much more pleasing:


Apple iPhone13 Pro f/1.5 @ 5.7mm for 1/1377 sec at ISO 50

Right after this shot I started experimenting with the eye auto focus feature and got a much better result:


f/2 @ 23mm for 1/480 sec at ISO 125

This made me suspect that the default metering was to blame, so had I changed that setting I could have got results that are actually superior to the iPhone.

This also made me think about selfies – the feature that smart phone users seem to love the most. While I was out on the lake with my wife, I took a shot of my ugly mug completely blind but using the eye auto focus feature:


f/4.5 @ 23mm for 1/35 sec at ISO 160

This time, despite the sun setting with mediocre light, it did great. I’m also pleased to report that my old face didn’t destroy the camera. The Velvia mode made my skin appear a little more red than I’d like, but the rest of the scene looked great.

I was very satisfied with the quality of the lens and the super sharp details found in so many of the photos I took:


f/8 @ 23mm for 1/35 sec at ISO 500

This combined with great high ISO performance and visually satisfying colors (IMHO), made me happy to have this camera with me for my trip to the mountains.

I got a chance to give the burst mode a shot out on the ice, and while my framing was terrible, the results were good for this class of camera. Shooting on ice is tough so this is where you’ll need to experiment with the exposure compensation (+2 in this case), the white balance (florescent), and much more:


f/2.2 @ 23mm for 1/500 sec at ISO 1250

For the shots in this series I used the eye autofocus to see what it could do and I was satisfied with the results. I sucked, but the camera did its part. The iPhone was much easier to use, but I preferred the color I got using the X100 VI.

Video

While I did experiment a little bit with the video features, those who know me know that I’m not really a videographer. As a result, I can only say that it offers a wide variety of formats and settings that are certain to be superior to results found on a phone,

Viewfinder

The viewfinder on this camera supports both optical as well as digital, and that’s a good thing. The optical offers a traditional photography experience whereas the digital offers a way to see photos as they will appear on your computer or phone even in the harshest sunlight. It also provides a way to save battery when you elect to enable the EVF and turn off the rear display.

Conclusion

Once again I was reminded of the magic of Fujifilm and wasn’t disappointed one bit. Thanks to the Q menu, the touch screen and great controls, I was able to quickly dial in my favorite settings in a hurry to get the shots that I wanted. While I haven’t included many of those photos here for personal reasons, I do find this to be an extremely easy camera to use for those who understand the settings and features it offers.

I never had any battery life issues and could easily go a few days under normal usage without having to worry about recharging. When I did, I appreciated the support for USB-C to get a quick charge right in the camera.

Overall, this is a camera for photographers – not newbies – mainly because the best results will be achieved by knowing how to dial in the best settings. If you want smartphone results, use a smartphone, but if you are wanting better control over the lighting, color, shadows, and shutter speed, then this camera is going to be much more satisfying to use. If that's you, then I highly recommend this camera. 

Where to Buy?

CLICK HERE to learn more or buy today, or click here see other great cameras in the Fujifilm X-Series line up.

Disclosure

If you make a purchase using links found in this article, I may make a commission. It doesn’t cost you a penny more, but it does help to support future articles

NOTE: This site requires cookies and uses affiliate linking to sites that use cookies.

If you enjoyed this article, please support future articles like this by making a donation or saving money by using my discount coupon codes. Either way, your support is greatly appreciated!

This blog is intended for freelance writing and sharing of opinions and is not a representative of any of the companies whose links are provided on this site.

The opinions provided are of Ron Martinsen alone and do not reflect the view of any other entity

Sunday, May 17, 2020

REVIEW: Sony a7R IV with with 24-105mm Lens

Sony Alpha a7R IV Mirrorless Digital Camera at B&H

shown with Sony FE 24-105mm f/4 G OSS Lens
also sold in kit form

When I reviewed the Sony a7R III in 2017 I declared it my camera of the year. I was literally blown away with it, so I was a bit shocked when the IV came out and I started hearing rumblings of it being inferior to its predecessor. After all it had gained almost 19 more megapixels and had performance improvements that were sure to make it better, right?

Read on to see if more is better or if Sony ruined a good thing.

Camera Body Thoughts

You can read about all of the big features on Sony’s website, but my real world observations were that the viewfinder is definitely very good and the joystick feel is now excellent. My favorite feature – eye AF – now works without requiring special setup or holding a button and even features support for specifying which eye it should focus on or you can still have it decide using the auto feature. Lastly the lock button on the exposure compensation is a welcome addition to avoid accidental changes.

Other than that, really this feels like mostly the same camera now with loads more megapixels.

I did not try the Pixel Shift Multi Shooting feature on this camera or the III, even though it sounds interesting. If any readers have had great results with this feature, then I’d love for you to post links to your favorite shots on my Facebook page alongside the post for this review.

Imaging Edge Desktop


Imaging Edge Desktop Editor

I don’t keep up on every detail around Sony, but I noticed that Sony offers an option besides my recommendation of CaptureOne for Sony (or CaptureOne Pro). Their raw editing software is called Imaging Edge Desktop that is super crude, but gets the job done if you don’t have anything else. I do think its better at raw processing Sony files than Adobe Lightroom / Camera Raw, but my favorite is still Capture One to bring back the most details from Sony ARW files.

Bookshelf

For my long-time fans of the blog, I thought I’d throw in a bookshelf shot here (more available in the gallery) to show the razor sharp detail in the Lord of the Rings book, great color and excellent detail in the shadows.


f/8 @ 105mm for 15 sec at ISO 100

With 61 megapixels you get super shallow depth of field, so you’ll notice even at f/11 that the books on the edges are out of focus, so its a good thing this camera and lens perform well at f/16 & f/22 as you are definitely going to need those apertures!

Real World Shots

With the death of my father just days before my review unit arrived and lockdown for COVID-19, it was very tough getting decent shots for the review. As a result, my apologies for the larger number of kids shots vs more interesting landscape shots. I literally had to visit a closed park and hike straight up hill for 800 feet to get any landscape shots at all!

All of the photos are 100% unedited in-camera JPEG originals. Generally speaking I tried to shoot with camera default settings, but I did adjust the white balance to daylight or shade for landscape shots. I also enabled eye AF auto as well as face priority which I’ll discuss in sample photos below.

You may download and view the photos associated in this article while your browser is open to this article, but you permission to have the images locally ends when you navigate away from this article. All images are copyright Ron Martinsen – all rights reserved – so you may not edit, print, alter, republish or link to any of the photos in this article without my ink on paper notarized signature.

For the full gallery of photos, visit https://photos.ronmartblog.com/sony/a7Riv.


f/4 @ 105mm for 1/320 sec at ISO 100

My 4 year old daughters first shot with this camera was spot on thanks to great eye AF


f/4 @ 105mm for 1/400 sec at ISO 100

Even rush attacks from my daughter with hair and hand distractions had a good keeper rate,
but if you pixel peep these images aren’t as tack sharp as those from the a9 or a7R III


f/5.6 @ 105mm for 1/640 sec at ISO 100

The advantage of more megapixels is better bokeh, but the challenge becomes less depth of field


f/5.6 @ 105mm for 1/640 sec at ISO 100

Perhaps I’ve grown to used to my iPhone XS Pro, but I often forgot to do some exposure compensation to adjust for the meter really sticking faithfully to a 18% gray exposure in its default multi metering mode


f/5.6 @ 105mm for 1/400 sec at ISO 100

Switching to center metering mode vs spot worked better for scenes like this


f/5.6 @ 105mm for 1/125 sec at ISO 640

Even seemingly static shots like this with virtually no wind required a handful of shots to get a fairly sharp image without boosting the shutter speeds – which I tried to avoid given the mediocre ISO high performance (as shown in the next shot)


f/4 @ 24mm for 1/400 sec at ISO 10000

The overall dynamic range seemed less than the a7R III or the D850.
Compare to a similar shot taken with a Nikon D850 under similar conditions.
Notice how the D850 did a much better job with the details outside the window.
Also observe at 100% how bad the image quality and noise is on the face.


f/5.6 @ 78mm for 1/80 sec at ISO 2500

As good as eye AF is, the foreground bunny and eyes closed seemed to trip it up


f/5.6 @ 78mm for 1/80 sec at ISO 2500

When I shot a similar shot without the bunny in the foreground it did much better


f/5.6 @ 105mm for 1/125 sec at ISO 400

Lots of gallery shots including this one and the one below prove that hair distractions often aren’t an problem for the excellent eye autofocus


f/4 @ 80mm for 1/640 sec at ISO 100

In super harsh direct sunlight I got mixed results with multi metering, but overall it was good enough especially since the raw images support a whopping 15 stops of dynamic range which means almost any sharp shot can be saved


f/4 @ 105mm for 1/500 sec at ISO 400

In harsh midday sun I once again felt like this camera was underperforming compared to what I’m used to enjoying from my iPhone XS Pro but its still about the same as what I saw with the a7R III.  Once again, its pretty easy to correct if you shoot RAW.


f/5.6 @ 105mm for 1/320 sec at ISO 5000

The advantage of so many megapixels is that you can preserve a lot of detail even after aggressive noise reduction which is a good thing as ISO 5000 shots are definitely going to need Noiseware if you are doing anything with the shots besides posting them small like this online


f/5.6 @ 105mm for 1/320 sec at ISO 6400

In my opinion, ISO 6400 is my usable limit for this camera – in ideal lighting conditions


f/5.6 @ 75mm for 1/30 sec at ISO 2500

There’s great flexibility in the auto white balance setup, but even the default is reasonable for everyday snapshots like this taken under tungsten lights.
The extra megapixels definitely help bring out the texture of the red maguro


f/8 @ 24mm for 1 sec at ISO 100

Daylight white balance is pretty warm even with standard creative style so I never even tried landscape or shade white balance during this review period


f/5 @ 83mm for 1/100 sec at ISO 5000

Gorgeous bokeh that is buttery smooth is definitely a benefit  you get with 61 megapixels
as shown here on a shot from my Peak Design Travel Tripod review


f/5 @ 43mm for 1/50 sec at ISO 1600

This is a tough scene due to the dark blacks and bright iPhone XS Pro LCD, but multi metering actually did an admirable job. I could easily make this shot perfect with some raw editing and layer masks.


f/16 @ 30mm for 4 sec at ISO 100

Without the tilting LCD this shot wouldn’t have been possible.
See a behind the scenes of this shot in my Peak Design Travel Tripod review.


f/16 @ 24mm for 2.5 sec at ISO 100

Another down low shot made possible thanks to the tilting LCD.
See a behind the scenes of this shot in my Peak Design Travel Tripod review.


f/8 @ 36mm for 1.3 sec at ISO 100

Generally cameras start to lose sharpness after f/8 due to diffraction, but not here.
Compare this f/8 shot to the f/16 shot below
See a behind the scenes of this shot in my Peak Design Travel Tripod review


f/16 @ 36mm for 6 sec at ISO 100

I was pleased to see that f/16 kept the sharpness of the in-focus f/8 subjects while offering sharpness to the f/8 out of focus subjects thanks to minimal detail loss.
Simply put, f/16 (and even f/22) can be used without concern – if you can keep the ISO low.
See a behind the scenes of this shot in my Peak Design Travel Tripod review


f/9 @ 46mm for 2 sec at ISO 100

I was playing around using the Peak Design Travel Tripod as a tabletop tripod for this shot and got an impressive result. Given the importance of keeping the ISO low on this camera, I’d strongly urge you to bring a tripod everywhere you take this camera to avoid going beyond ISO 6400.


f/9 @ 49mm for 4 sec at ISO 100

I moved the flowers in to better light with less distractions and got great detail on the center of the flower with highlights that are easily recovered with the raw file.


f/5.6 @ 105mm for 1/500 sec at ISO 400

It surprises me how weak the in-camera JPEG’s are, but I guess Sony gave up making improvements there knowing that the 15 stops of exposure adjustments possible with the RAW file make it ridiculous to not shoot raw with this camera.


f/5.6 @ 105mm for 1/500 sec at ISO 1600

Ask a 10 year old to find a prop that we can use to test eye AF, and this is what you get.
You get the point though – even with a clear distraction, eye AF does a stellar job for about 80% of the complex scenarios like this that I threw at it. It might miss a frame or two, but more times than not it nailed it like this.


f/5.6 @ 105mm for 1/500 sec at ISO 3200

I was super pleased that photo bombing big brothers didn’t confuse the auto focus either.


f/5.6 @ 105mm for 1/500 sec at ISO 3200

Once again, while my daughter waved a stick in front of her face the eye AF never faltered…


f/5.6 @ 105mm for 1/500 sec at ISO 3200

This one frame was the only one that focused on the stick, but that’s what I’d expect with AF sensitivity set to 5 (most responsive) as it was in this case. The default or slower most likely would have kept the eye in focus.


f/5.6 @ 105mm for 1/500 sec at ISO 800

I’m used to Canon’s default Evaluate metering on my 1DX II prioritizing the focus point, but the default multi metering here and another similar shot always did a scene average which still results in hot spots and the subject being too dark. Again this is all savable with the RAW, but its a theme that demonstrates that Sony expects you to shoot raw and spend a lot of time fixing these in-camera issues unless you are very diligent in your manual adjustments on a per shot basis.
Sadly enabling Face Priority in Multi Metering mode did not solve the problem in cases like these.


f/5.6 @ 105mm for 1/500 sec at ISO 1250

Yeah, another eye AF test – I just couldn’t help but try to trip it up but it almost always nailed it.
Thankfully the IV does it automatically with an option to prioritize which eye like Fujifilm offers, without having to hold a special button as was required with the III.


f/5.6 @ 105mm for 1/250 sec at ISO 1250

I registered both kids faces with my daughter as the #1 priority. However, my son was in the #2 spot so the camera alternated between the two subjects as shown in this series of shots.


f/5.6 @ 105mm for 1/250 sec at ISO 1250

Since my son was in the #2 spot for registered faces, the camera sometimes would choose him over my daughter who was registered in the #1 slot.


f/5.6 @ 105mm for 1/250 sec at ISO 1250

When I unregistered my son’s face, I had a 100% success rate with the camera prioritizing her face over his. This feature is available on many Sony models and as a parent I can’t emphasize enough how much I love this feature – especially with photo bombing big brothers!


f/5.6 @ 105mm for 1/250 sec at ISO 800

I know I keep going on about the metering, but in this shot the meter just blows the exposure on the dress and cheek highlights


f/4 @ 105mm for 1/320 sec at ISO 100

When I switched from multi-metering to spot metering with focus point link enabled it did a better job but at the expense of the entire background. Canon shooters who appreciate partial metering or how Canon does spot metering are going to struggle like I did with getting perfect metering in-camera. That said, I was happy with how this one came out even if it wasn’t my intent to completely lose the background.


f/4 @ 105mm for 1/250 sec at ISO 500

My daughter was dancing around behind the tree while winking and once again the eye AF feature did a great job.


f/4 @ 105mm for 1/250 sec at ISO 500

Auto white balance on overcast days had mixed color results with this shot being taken a few minutes apart from the shot below.


f/5.6 @ 105mm for 1/125 sec at ISO 1000

Here the auto white balance color was outstanding whereas above it was fairly blue so I wondered if face priority in multi being enabled not only helped the exposure but the skin tone colors for this more close up shot than the one above.


f/5.6 @ 105mm for 1/250 sec at ISO 2500

Take moments apart from the two previous shots, the average result in real world shooting was that auto white balance does a pretty good job.


f/11 @ 77mm for 1/160 sec at ISO 100

This studio shot gave the IV and this lens the opportunity to show their strengths – and it did in the detail in the eyes and the hair. However the extra megapixels showed how unforgiving the depth of field is at f/11 as the bunny belly is completely out of focus. This is to be expected, but its something to consider when shooting in the studio as you are going to want lenses that are razor sharp from f/11 to f/16 – at least.


f/9 @ 52mm for 1/125 sec at ISO 100

I cranked up the lights to try to freeze the action on some hair spin shots but my decision to open up to f/9 cost me too much depth of field so my previous point applies. If you are going to have a dynamic studio shoot with this lens, I’d recommend staying closer to f/16 than f/8.


f/9 @ 105mm for 1/100 sec at ISO 100

Ok, I admit this shot is mostly here because its cute but I was happy that eye AF saved me from having eyes that were out of focus. Her eye lashes are razor sharp which is exactly what you want in a shot like this, so I was happy the camera did the right thing without me having to put any thought into it.
For the record, she was sad because the studio chair was scary high. She took the next shot shortly thereafter, so she recovered quickly.


f/11 @ 105mm for 1/125 sec at ISO 100

A 61 megapixels camera is always going to find its happy place in the studio under ideal lights so the strength of this camera and lens camera combo shined for this shot. Even a thin stray hair over the camera right eye is tack sharp at 100% Here the softness on the neck and body work brilliantly to direct the viewers eye to the face exactly like you’d want it.
Yes, if you are a studio photographer you are going to enjoy this camera – especially if you pair it with amazing glass like the Sony FE 90mm f/2.8 Macro G OSS Lens or SIGMA 85mm f/1.4 Art Series .


f/14 @ 32mm for 3.2 sec at ISO 100

For fun, the gallery has several series of shots where only the aperture differ.
Enjoy comparing this f/14 version to the f/16 version and the f/22 version.


f/22 @ 31mm for 6 sec at ISO 100

I have no reservations shooting this camera at f/22 but I sure wish this camera had the built-in focus stacking that I enjoyed in the Fujifilm GFX 50s.


f/5.6 @ 71mm for 1/160 sec at ISO 12800

Buttery smooth bokeh is an advantage of 61 megapixels no matter how bad the high ISO noise is – especially when showing small version of the the massive files.


f/22 @ 32mm for 13 sec at ISO 100

This shot, taken with a circular polarizer, had loads of detail and deep greens – especially when viewed at 100%.


f/22 @ 27mm for 15 sec at ISO 100

Same scene photographed with the camera nearly touching the water using the Peak Design Travel Tripod. It obviously needs a perspective adjustment because I had issues with the viewfinder sensor making the LCD screen go black because the viewfinder was too close to the legs. I’m sure there’s a way to disable it, but I wasn’t able to figure it out deep in the backwoods while standing in the water for this shoot. If you buy one of these cameras, don’t be like me – learn how to disable this feature if you plan to shoot shots like these!

Conclusion

Well we’ve been down this road before where more megapixels doesn’t always mean a better camera. Yes, I loved the extra megapixels in the wonderfully fun to use Fujifilm GFX 50s but more often than not the extra megapixels end up being a disappointment as a primary everyday camera as I observed  with the Nikon D800 and the Canon 5DsR.  It seems Sony wasn’t concerned about that and decided to leapfrog all of these cameras by offering a whopping 61 megapixels (9504 x 6336 pixels), but would this result in mediocre autofocus performance and poor high ISO performance as I’ve historically observed?

The short answer is sadly, yes.  Don’t get me wrong, this is a great camera but you do make tradeoffs that I wouldn’t make – especially for this price point.

I’d gladly still take a Sony a7R III over a IV any day of the week. The extra megapixels have only made the ISO performance above 800 below average by todays standards and increased the number of out of focus shots I got even in bright lights both outdoors and in the studio.

This camera simply isn’t for me. If was going to go with more megapixels I’d still opt for the Fujifilm GFX 50s, but if I wanted the best camera I’ve ever used then I’d have no reservations “stepping down” to the much more affordable Sony  a7R III or the sports machine gun that is the a9 II (see my Sony a9 review).

I will say that I did enjoy the range of the Sony FE 24-105mm f/4 G OSS Lens , but I’d need to test it with a different camera to really render a final verdict. I was terribly disappointed with the Sony FE 24-70mm f/2.8 GM Lens when I reviewed it with the a6500 and a9, but I also loved the Sony Vario-Tessar T* E 16-70mm f/4 ZA OSS Lens that some Sony fans hate. I will say the 24-105 covers a focal range that I most enjoy when carrying only one lens, but given the constraints of a 61 megapixel sensor I’d love to retest it to get a better feel for its true performance.

I also wish that I had a Sony FE 90mm f/2.8 Macro G OSS Lens or SIGMA 85mm f/1.4 Art Series to use for this review as that would have given me the most accurate picture as to just how good this sensor is in terms of resolving detail, but I still don’t recommend the a7R IV based purely on its autofocus and ISO performance despite what other fanboy and paid advertising sites say about it.

Where to Buy?

To learn more or buy today please use the following links:

Other articles you may enjoy

If you enjoyed this article, you may also enjoy these:

Enjoy these and more on the Reviews tab as well as Ron's Recommendations.

Sales Tax Reimbursement with Payboo

Don’t forget, with the B&H Payboo card most buyers can get the sales tax reimbursed. Click here to learn more.

Disclosure

If you make a purchase using links found in this article, I may make a commission. It doesn’t cost you a penny more, but it does help to support future articles like this.

NOTE: This site requires cookies and uses affiliate linking to sites that use cookies.

If you enjoyed this article, please support future articles like this by making a donation or saving money by using my discount coupon codes. Either way, your support is greatly appreciated!

This blog is intended for freelance writing and sharing of opinions and is not a representative of any of the companies whose links are provided on this site.

The opinions provided are of Ron Martinsen alone and do not reflect the view of any other entity