Showing posts with label Eizo. Show all posts

Wednesday, September 26, 2018

REVIEW: NEC PA271Q-BK 27" 16:9 Color-Critical IPS Monitor

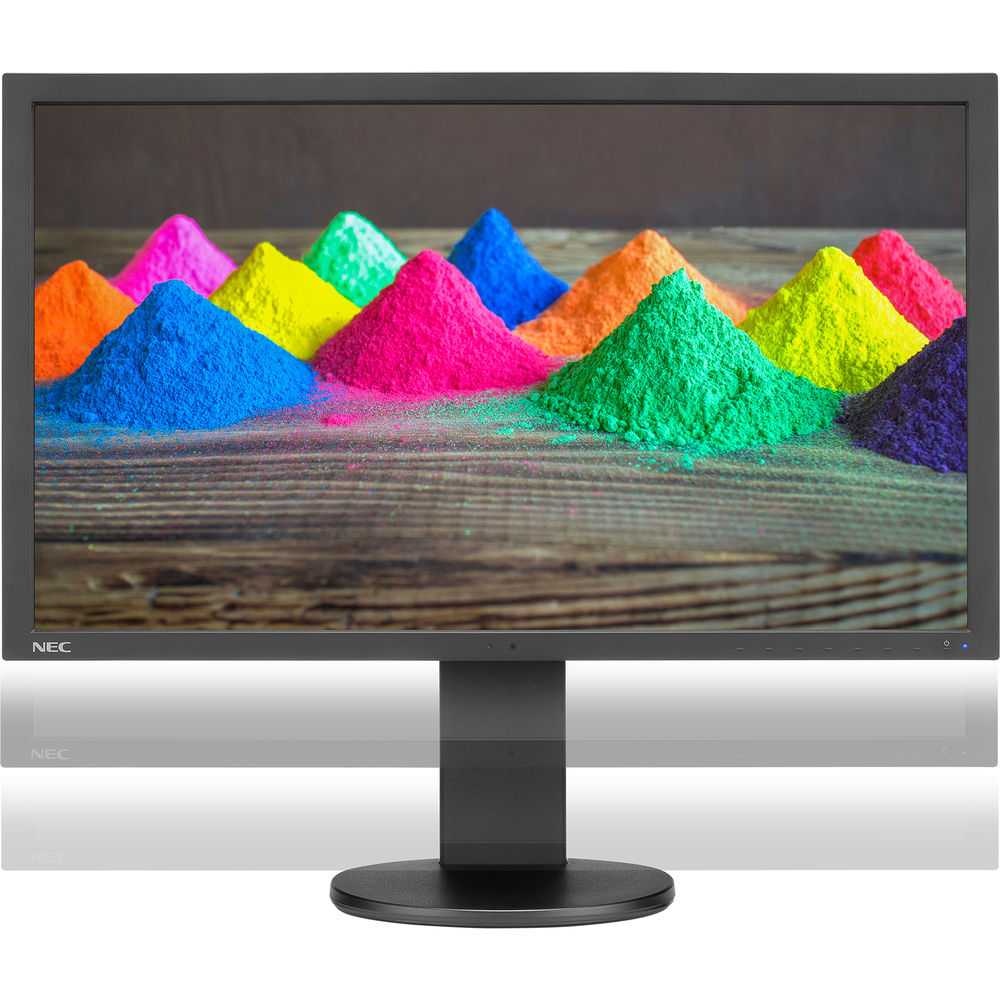
NEC PA271Q-BK 27" 16:9 Color-Critical IPS Monitor

Since December 2014, my primary display has been my huge NEC PA322UHD which I've loved for the screen real estate. However, when I read about the latest PA series display with its improved color accuracy, I had to try it out. 

While I'll admit, that I miss the huge 32" 4k display for its size, I have appreciated that this display is much more color accurate which is very important when doing color critical photo editing and soft proofing.

Photoshop looks spectacular on this 16:9 aspect ratio WQHD resolution display that is 2560 pixels wide by 1440 pixels tall (or 109 ppi):

Plenty of space for Photoshop CC 2018

In fact, if you have a compatible video card you can even enjoy over a billion colors by enabling 30 Bit Display

image

What this will do is eliminate banding in grayscale or color images when you use good video cables that can support it! However, be careful with this if you'll be printing because no printer made supports 30 bit printing, so it can cause you to miss some banding issues which could occur during printing.

For everyday use Excel 365 still goes out to a whopping AM61:

Easily show all cells to AM61 in Excel 365

So while it might not be 4k it's still plenty of screen real estate to get a lot more done than traditional 1080p or 1920x1200 displays.

Inputs Galore

This display features lots of I/O ports both on the bottom (shown in silver on the left below) and on the side (shown in black on the right below):

imageimage

In fact, this is what you get:

1 x DisplayPort
1 x Mini DisplayPort
2 x HDMI
1 x USB Type-C
3 x USB (USB 3.1) Input
3 x USB (USB 3.1) Output

To learn more about the specs of this display be sure to visit the PA271Q product page.

NaViSet Administrator 2™

Want to do an Ethernet management of your NEC displays? No problem, check out the control you have using the NaViSet Administrator software:

  • Remotely adjust almost any parameter or setting found within the On Screen Display menu
  • Gather valuable information pertaining to a Windows computer such as model name, OS version, memory and CPU (Windows version only)
  • Any information that is gathered about connected devices is stored in a local database and can be exported for later review
  • Automatically issue email alerts if a diagnostic error is reported by a device or a setting has been changed
  • Schedule periodic polling for singular or multiple devices at specific times or on demand
  • Sort connected devices into groups to help organize collections of display and computers
  • Assign an electronic Asset Tag to a device to provide a secure method of tracking an product over a network

Click here to see a video to learn more about what you can do.

Easily Switch Between 2 Computers with 1 Mouse & Keyboard

This display acts as a KVM switch so you if you are like me and you have a Macbook Pro and a Windows PC that you want to use with this display and a single mouse and keyboard, then it's no problem. Just press the input button to go back and forth between the two as shown here:

Calibration Settings

image

I calibrate to the settings shown above and set my preferences to use 52 calibration and profile steps. Here's the information summary for this display after calibration:

image

An impressive 0.25 Delta E beats even the best Eizo's that I've tested. What this means in simple terms is that the color accuracy on this display is phenomenal.

Learn more about this display in this short 40 second video:

Conclusion

This is the most color accurate, fastest to color critical temperature, display I've used in years. For Eizo fans looking for a cheaper alternative where you sacrifice nothing, this is the display for you!

Now I want a 32" UHD version of this display, because I love this one so much that it would be hard to go back to my 4K display again!

Simply put, if you care about color accuracy and a display that is going to hold your calibration settings plus come up to temperature quickly, then this is the display for you!

Where to Buy?

CLICK HERE to learn more or buy today on B&H or click here to find it on Amazon.

Other articles you may enjoy

If you enjoyed this article, you may also enjoy these:

Enjoy these and more on the Reviews tab as well as Ron's Recommendations.

Disclosure

If you make a purchase using links found in this article, I may make a commission. It doesn’t cost you a penny more, but it does help to support future articles like this.

Sunday, July 24, 2016

REVIEW: NEC MultiSync PA322UHD-2 32” 3480 x 2160 Pro 4k Photo/Video Editing Monitor (UPDATED: July 2016)

NEC PA322UHD-BK-SV 32" Widescreen LED Backlit Color Accurate IPS Monitor with SpectraViewII
NEC PA322UHD-BK-SV 32" Widescreen LED Backlit
Color Accurate IPS Monitor (Shown with SpectraView II)

When I was a kid there were two ground breaking HBO specials by the comedian Eddie Murphy called Delirious and it’s sequel RAW. These were a uncensored stand up comedy programs like nothing anyone had ever seen on TV before (at that point). As a minor watching them when my parents were sleeping I found it to be rib cracking funny to watch and 30 years later I still quote numerous bits from these movies. Why am I telling you all of this? Well because my first thought when I first started my PA322UHD review unit was a direct quote from these movies – “goonie goo goo”. My jaw literally dropped when I saw this glorious 32” beast come to life, and if you knew my full history with 4K displays dating back to 2010 you’d realize that is a very hard thing to do!

Right out of the box I was able to calibrate this display with my NEC SpectraSensor and SpectraView II 1.1.18 on my Windows 7 system to a staggering 0.26 Delta E. What this means in non-Geek terms is that this display was able to be calibrated – on it’s first try out of the box – to a level that is almost an identical match to the reference target white point. This is one of the lowest Delta E’s I’ve seen on a display right out of the box, so this puts this display up there with the best Eizo display’s I’ve used.

image
Delta E: 0.26!!!

So let’s see what NEC has to say about the features of this display:

The ultimate in reliable, accurate color. The 32” MultiSync PA322UHD is the benchmark desktop display for color accurate work, from photography to pre-press to videography. Featuring a UHD resolution (3840 x 2160) IGZO technology IPS-type panel with wide gamut white LED backlight, this display provides 99.2% coverage of the Adobe RGB color space while consuming less power than comparable displays. Packed with features and backed by a 4 year warranty with Advanced Exchange, the MultiSync PA322UHD will reliably deliver high quality, accurate images simply and beautifully.

    • Superior screen performance (1000:1 contrast ratio, 3840x2160 UHD native resolution, 350cd/m2 brightness)
    • 14-bit 3D internal programmable lookup tables (LUTs) for calibration
    • Picture in Picture and Picture by Picturemodes increase productivity by displaying two or four sources simultaneously
    • MultiProfiler™ software provides complete control over the five picture modes, including the loading of any ICC profile directly into the monitor for optimal color space matching
    • DisplaySync ProTM controls two computers with only one keyboard and mouse
    • Wide connectivity includes two DisplayPort with 10-bit support, four 10-bit HDMI, two DVI-D inputs as well as a USB hub (new -2 model includes HDMI 2.0 support)
    • NaViSet Administrator 2: Free software solution that greatly eases administration and management of larger display device installations
    • Available with SpectraViewII Color Calibration Kit (PA322UHD-BK-SV)

Now let’s look closely at that 99.2% coverage of the Adobe RGB color space claim with the Color Gamut overlay that shows the Display’s color gamut on the outside and the faint triangle on the inside as Adobe RGB:

image

That doesn’t look like 99.2% to me – it looks to be > 100%. However, there might be some tiny bit of red missing that is hard to tell from this graph, but what I can tell you is that if you are doing color critical work – this is THE display to have! This is as good as I’ve seen boys and girls!

If you read my review of the NEC EA244UHD 4k Display, then you can safely assume that nearly every negative comment I made about that display has been properly addressed by this display. Specifically, this is a BRILLIANT display for photo and video editing that has proper physical buttons (instead of the EA series annoying non-tactile touch controls) and it’s physically large enough that Photoshop is actually readable! If you haven’t read that review, I encourage you to do so now as I won’t be repeating a lot of points about 4k / UHD and video cards.

To learn more about NEC 4k UHD, I’d encourage you to check out this web site that they have created.

Warning: This beauty is a beast!

This is definitely the dream display for photographers and videographers, but beware – it is HUGE!  Weighing in at a whopping 45+ lbs (20.5 Kg) and 29.3 inches wide – you need a LOT of space on your desk (or a seriously heavy duty monitor arm). It really is big enough where I’d replace a traditional 2 x 24” display setup with just this one to avoid having to cross displays. As a result, don’t plan on putting this on some flimsy desk – it will destroy it!

White Point Matching/Copy

image

One interesting feature of this display for those who are doing color critical work is that it features the ability to copy the White Point from one display to another. This is important because it helps you to have an exact match between two displays to reduce the variation between displays.

To learn more, see Page 33 in the English manual.

UPDATE: New PA322UHD-2 Model

Kai Birthday-25
PA322UHD-2 (left) vs PA322UHD (right)

In May 2016, NEC replaced the PA322UHD with the PA322UHD-2 model which looks identical at first glance, but on the side you see the key difference (shown on the left above). The new model now features HDMI 2.0 support including a new HDMI 2.0 port on the side. This is important because the best resolution and refresh rate on the previous model could only be achieved via DisplayPort, but its now possible with HDMI as well.

If you have the older model, don't fret unless you need HDMI 2.0 support because the performance of this display is otherwise identical.

Conclusion

When I imaged what 4k UHD would be like on a display, this is what I was expecting. With incredibly accurate color, excellent edge to edge consistency (which is shocking on such a huge display), and a physical size that helps make 3480 x 2160 readable on poor behaving legacy apps (like Photoshop on Windows 7) – this is without question the best 4k UHD display I’ve seen to date. I am simply blown away and will be crying like a baby when I have to send this one back to NEC!!!!

My only gripes about this display are the massive weight and cost. At more than 2x the cost of the EA244UHD (as of this writing), is it really that much better? In my opinion – ABSOLUTELY. However, that’s more money than I can afford for a display, so I’d have a hard time justifying the cost of a display like this at this price. Hopefully as time passes we’ll see it drop to the sub $2500 range where it at least will start approaching the cost of a good DSLR.

NOTE: For more information about UHD video cards, 4k Netflix, Photoshop in 4K & more, then I highly recommend you read this past review of the PA322UHD’s cheaper sibling.

Long Term Report - July 2016

I've had my PA322UHD for over a year now, and I can easily say this has been the most enjoyable display that I've used in my entire lifetime.

I have a lot of experience with display technology and devices that can output 4k and beyond, but many still lack the edge to edge color quality and color consistency over time that this display offers.

Using this display is a bit like watching a Harry Potter movie because it's like looking at photo that is alive on your display. The screen resolution is very close to print resolution, so if you want a display that looks as good as a 15x27"+ size print - THIS IS THE DISPLAY YOU WANT!

I've also appreciated the matte finish of the display which minimizes reflections, and the color accuracy and quality appears - to my eyes - to be superior to the Apple 5k displays (which have an extra 1k due to the width / aspect ratio).

Where to order

Click here to learn more or order on B&H’s web site. My friends at Amazon have it available here. I STRONGLY encourage you to use the NEC SpectraSensor (or equivalent X-Rite) and ONLY the SpectraView II software with it to get an accurate calibration. As a result, if you don’t own a sensor or the SpectraView II software, then I’d strongly suggest that you consider the bundled version with the sensor and software. You can also buy the SpectraView II software here if you already own a 4k wide gamut compatible sensor from X-Rite or DataColor. Please note that this software is only designed to work with NEC displays.

WARNING: If you want the new -2 model, be sure to check for "MFR # PA322UHD-BK-2" when ordering. If you purchase via B&H, you can place your order and call or email to confirm that you will get the "MFR # PA322UHD-BK-2" model. This will only be a short time issue though after inventory is depleted as  only the new model is shipping now.

Other articles you may enjoy

If you enjoyed this article, you may also enjoy these:

Disclosure

If you make a purchase using links found in this article, I may make a commission. It doesn’t cost you a penny more, but it does help to support future articles like this. NEC provided me with a loaner display for testing and reviewing, but I don’t own it. My love of NEC PA series displays has also led to be being featured on their website.

Tuesday, February 7, 2012

Choosing The Right Display Calibration Device (Updated 2/9/2012)

The X-Rite i1Display Pro, ColorMunki Display, NEC SpectraSensor Pro and Eizo (DataColor) EX1 are all current wide gamut colorimeters NOT spectrophotometers. The purpose of this article is to demystify a lot of confusion about display calibration devices on the market and educate you on some new models to let you know which display calibration device is right for you.

WARNING: I go super geeky at first to help clear up terminology and massive confusion, so if you know what you want and can’t deal with the geeky stuff then page down until you see a picture of the product you want to buy or research.

Profile vs Hardware LUT Calibration

What this means is that they are designed to calibrate your display against a series of colors swatches for which the display calibration software used knows exactly what value the sensor should read for each swatch.

The results of this data obtained by the sensor is used by the display calibration software in one of two ways:

  1. To create a display profile (most common) – this is where the display calibration software does what it can to adjust your display to show colors accurately and it creates a lookup table of differences in a file a profile. In simple terms it’s like having yellow paint that is supposed to look green so you keep a measurement of how many drops of blue you mix into the yellow paint until it is the shade of green that you want. The profile is that sheet of paper where you jotted down the information about how much blue is needed. Your computer operating system uses these profiles to work with your display card and monitor to make color adjustments to the red, green and blue channels to render color more accurately. This method works well, but it is system dependent and can’t be dynamic.
  2. To perform a display LUT Adjustment (a.k.a., programming the LUT) – Expensive and advanced displays improve upon the model above to actually write this data into the monitor hardware itself so that the monitor can do a better job than your OS at rendering accurate color. The method has the advantage of allowing you to use the same display with different computers without the need to calibrate because your operating system is bypassed for color rendition. This is less common on inexpensive displays, but very common on high end displays best suited for photography.  The downside to this design is that you usually need to the proprietary software by the display maker (i.e., NEC SpectraView II, Eizo Color Navigator or EasyPIX, etc…) as other third party software (i.e., the software included by X-Rite or DataColor) is sometimes not able to program the display LUT directly and will resort to creating a display profile (very bad when using a LUT based display). X-Rite has partnered with Eizo so that its latest software can program Eizo displays that are compatible with ColorNavigator can be programmed with i1Publish, but NEC still requires SpectraView II.
A Word About NEC & Eizo (proprietary) Display Colorimeters

The NEC SpectraSensor Pro is a colorimeter built by X-Rite specifically for NEC to calibrate wide gamut displays built by NEC using its proprietary SpectraView II software. The Eizo EX1 is a colorimeter built by DataColor specifically to calibrate Eizo displays using its EasyPIX software. They both can be used with their corresponding software to program the LUT of supported displays and therefore are offered as bundle when buying Eizo and NEC displays.

These colorimeters are just fine as they have been developed and tested under the supervision of the display maker to ensure they are able to program the monitors LUT using their proprietary software.

NEC SpectraView (i1 Display) Colorimeter

NEC used to also offer a special version of the i1 Display as shown below that supported wide gamut display calibration (the X-Rite i1 Display DOES NOT support wide gamut):

If you are a NEC display owner with one of these devices (or are considering buying one used), you do not need one of the products discussed in this article as it will still calibrate your NEC wide gamut display accurately. NEC and X-Rite will eventually phase out support for this product, so I wouldn’t invest in one at this point. Using today’s software and this hardware you should be able to accurately display any NEC display that supports SpectraView II, so an upgrade is only necessary in the future when you upgrade your operating system and/or SpectraView software to a version that no longer supports this device (won’t happen overnight).

Spectrophotometers – Display and Printer Calibration


Spectrophotometers like the ColorMunki PHOTO
calibrate displays plus create paper profiles

Click here to read an article that does a good job at explaining the difference between a colorimeter and a spectrophotometer.

A spectrophotometer can be used to create paper profiles which is the process where you print out color swatches of known RGB values it and then measure the colors using a spectrophotometer to compare what color actually gets printed. The operating system, the printer, the inks and paper you use all combine to contaminate the color that ultimately ends up on the paper, so a printer paper profile used in conjunction with a display color profile (or calibrated LUT) is critical to get the colors you see on your screen to look the same way on the paper that comes out of your printer.

This is a tricky process due to all of the variables that come into play, which is why X-Rite created a great product called the ColorMunki PHOTO (which is a spectrophotometer, NOT a colorimeter like the ColorMunki Display (discussed later in this article) along with its proprietary software to make this whole process work smoothly. I talk about this in my color management article, but know that currently this is the most easy to use and accurate method for getting your prints to look like what you see on your display (excluding the limitations of your display).

If your goal of reading this article is to match your prints with your display then my advice is to  go get a ColorMunki Photo from Adorama or B&H as that’s a color management workflow issue. Advanced print master (discussed in my printing 101 eBook) will use even more advanced and complex products like these:


B&H sells the i1iSis – an expensive spectrophotometer


i1 Pro shown with a
i1iO Automated Scan Table

X-Rite has replaced the i1XTreme I reviewed with thei1Photo Pro UVcut Professional Color Management for Photographers and offers the i1iO Automated Scan Table (shown above with a i1 Pro attached). It also offers the i1Sis which is only used for fast creation of paper profiles so a separate colorimeter is required.  It should be noted that this device is offered in a non-UVcut version as well.

Now before you go out and get a spectrophotometer besides the ColorMunki PHOTO, be aware that you will invest thousands of dollars and lots of time so mere mortals are going to find their money best spent on a product like ColorByte ImagePrint (new version 9 is awesome) that just has all the profiles you need available on demand so you are back to only needing a colorimeter to calibrate your display.

Colorimeters

Okay if you read the stuff before this then I’m sure your head is spinning. I’m happy to say that I won’t get too geeky from here on in as I’ll simply focus on which “gizmo” you need to make your display to the best job it can at showing colors accurately.

WARNING: If your display sucks, a colorimeter may not help!!!!

Please keep in mind though that colorimeters aren’t miracle workers. If you are using a crappy display you got free with your computer, then it may not be able to display color accurately no matter what you do. I know that on paper many displays seem like they are “just as good” but as the saying goes “there’s lies, damn lies and statistics”.  Statistics do not tell the whole story my engineer friends, so if you are serious about color management then you’ll need to invest a good wide gamut display (and no you can’t get one off eBay for $100). Here are a few models that I’ve used and have witnessed them display color as accurately as possible with todays technology:

  1. Eizo ColorEdge CG243W – The best photography display I’ve ever used, but also the most expensive. If you have a Ferrari or Rolls Royce sitting in the garage, then this is what you want to buy. Joking aside, it doesn’t get better than this.
  2. Eizo FlexScan SX2762W – You insist on Eizo quality but can’t stomach the price? Then this display is a nice alternative.
  3. NEC PA Series – If you a working middle class grunt who wants near Eizo quality for a fraction of the price, then this will rock your world. I use the PA241W and love it, and only a trained eye will see the difference between this an a Eizo.

I’m told HP has DreamColor displays that are fantastic too, but I’ve had such bad luck with HP products over the last decade that I’d recommend sticking with highly trusted brands like Eizo and NEC.

If you must choose a different brand then you’ll want an IPS display that can display at least 95% of the Adobe RGB color gamut, has a DisplayPort (even on the PC), has a programmable LUT for hardware calibration, and supports a minimum resolution of 1920x1200 (not 1080). 10-bit color is an added plus. If the display you are researching lacks any of these features then I’d advise you to keep shopping.

X-Rite i1Display PRO – (Ron’s Favorite)

Click to visit X-Rite for more info on the i1Display Pro
i1Display Pro ($269.00 MSRP – Adorama, B&H)
Professional Display Calibration for the Most Demanding Color Perfectionists

In the summer of 2011 X-Rite released two new calibration devices to replace their popular X-Rite i1 Display 2 and Pantone Huey PRO colorimeters – neither of the older units supported wide gamut display. The i1Display Pro and ColorMunki Display have the following in common:

  • Wide gamut color calibration
  • X-Rite ADC [Advanced Display Control] to control supported hardware to ensure the highest quality results.
  • Support profiling projectors (i.e., Canon SX-80 Pro Photography Projector) and includes a tripod mount to assist with calibration in large venues
  • Multiple Displays Supported (but more advanced via software for the i1Display Pro)
  • Flare Correct™ compensates for flare light falling on the surface of the display (but honestly I hate this feature <g>)
  • The ability to measure the ambient light to include that data in your profile when your display is not in an ideal viewing environment with a hood
  • and more….

Unique to this model is the bundled software is based on the all new i1Profiler software (which I’ll be reviewing soon). It can run in both a simple mode as well as advanced mode which means this solution can grow with you as your color management skills improve.

This model has advanced multiple displays support that also is useful in workgroups where you need all of the displays in your facility to be viewing colors the same way. Now based on my experience is that you need all of the same series displays built and purchased at the same time for the best result, but that’s not usually possible so this does the best job that I know of at getting you in the right ballpark.

This device will work with the latest version of NEC’s SpectraView II and Eizo ColorNavigator calibration software.

Here’s how to set the preferences for this device in NEC’s SpectraView II:

Click for a larger image

It should be noted that if you use a NEC display that supports hardware calibration then you must use SpectraView II and therefore can not (and should never) use X-Rite’s included software. Windows 7 will automatically detect and install the “i1Display 3” driver and it will work the next time you start SpectraView II and change your calibration sensor preferences as shown above.

If you have a photography business, then this is the device you need.

X-Rite ColorMunki Display – the photography hobbyist ideal solution

Click to visit X-Rite for more info on the ColorMunki Display
ColorMunki Display ($189.99 MSRP Adorama, B&H)
Advanced Display Calibration Made Easy for Color Perfectionists

Simply put, if photography is your hobby and not your profession then this is a great solution for you at a reasonable price. The software is a little more user friendly with no advanced mode, but the colorimeter device itself is identical so the end result of calibrating your display versus a i1Display Pro will be identical on a single display. The i1Display Pro has advantages for multiple displays, but this device supports multiple displays as well so don’t get too hung up on that point.

I like this device because its easy to use and it typically just works (unless you are like me and you are using 6 different devices without rebooting <g>).

Here’s a video walkthrough of the ColorMunki Display calibration process on a MacBook Pro in Easy Mode:


Click here to play in HD. Viewing in full screen is recommended.

Here’s another video walkthrough showing the Advanced Mode:


Click here to play in HD. Viewing in full screen is recommended.

NEC SpectraSensor Pro (NEC Display Owners Only)

NEC SpectraSensor Pro

If you currently own or will in the future own a NEC display that supports hardware calibration and you don’t have a calibration device already, then this is device you’ll want to buy. In fact, if you haven’t purchased your display yet then I’d advise that you purchase the bundle that includes it with your display (only one per computer needed).

When using SpectraView II it can be a little confusing choosing the sensor type if the Auto-Detect button doesn’t work properly (usually it does) or if you have more than one sensor installed. The reason why is because you must choose “XRite iOne Display Pro (i1D3)” as the sensor type as shown here:

image

The software actually reads the model information from the device so you can tell that this is really the NEC SpectraSensor Pro device, but it can be confusing so it’s worth mentioning that here.

Eizo EX1 by Datacolor (Eizo FlexScan Owners Only)

For the last month or so I’ve been using a Eizo FlexScan SX2762W for the purpose of doing my review. To my dismay the only way it could be calibrated was using Eizo’s EasyPIX solution which bummed me out as Eizo’s Color Navigator software is much better. However it worked well enough, so if you own (or are buying) an Eizo FlexScan SX2762W (or equivalent) then go for the bundle and get this.

This is just a Datacolor Spyder 3 rebranded so I was actually able to use it with my NEC SpectraView II software to calibrate my NEC PA241W (note you must physically plug it into the display you are calibrating when doing hardware calibration). Here’s how to configure it in the preferences:

Click for a larger image

NEC SpectraView II Calibration Comparison on a NEC PA241W

To compare the devices in this article I used the NEC SpectraView II software because it does a good job working with a large variety of sensors, it has good reporting info, and the hardware calibration means that no operating system issues will skew the results. With that said, here’s my calibration settings:

NEC SpectraView II Target Settings

The Eizo EX1 (Datacolor Spyder 3) was the sixth device I have used to calibrate this display on this machine so SpectraView is pretty good about letting you most of the popular colorimeter sensors on the market. For as long as I’ve been in the computer industry, I’m honestly shocked I was able to get all but one of working on one machine in harmony without my system crashing – well done X-Rite!

In the sections that follow I’ll discuss how a variety of products performed when calibrating this display. To be fair I had the display turned on for over 6 hours before doing the calibration so the display was fully up to temperature. My methodology for testing on a 64-bit Windows 7 system with was as follows:

  1. Making sure that NEC SpectraView II wasn’t running, I’d plug one and only one sensor directly into the same USB port on the NEC PA241W.
  2. I’d launch the software, go to Edit | Preferences and click Auto Detect to make sure that the sensor type selected was correct. I visually confirmed the model name as well.
  3. I’d run the calibration and also confirmed that the sensor shown during the placement step was the same as what I was using.
  4. At the conclusion of the calibration I pasted the results in this article. I ran each test two or three times more to see if it was statistically any different.
Eizo EX1 (Datacolor Spyder 3)

Eizo EX1 (Datacolor Spyder 3) SpectraView II Information Summary

This was by far the worst result and multiple runs didn’t produce significantly better results. When analyzing a calibration the first thing you want to do is look at the Delta E value. Many say that 2.0 or less is acceptable, but closer to 0.50 or less is realistically possible these days. Chromix has the following statement in their definition of Delta E:

A Delta E of 1 or less between two colors that are not touching one another is barely perceptible by the average human observer; a Delta E between 3 and 6 is typically considered an acceptable match in commercial reproduction on printing presses. (Note: Human vision is more sensitive to color differences if two colors actually touch each other.)

The 1.20 Delta E below my expectations because I’m accustomed to looking at a calibrated display that typically has a Delta E of 0.50 or less. The targeted 6506K white point is being calibrated to 6633K which in practical terms meant my display had an unusual blue cast to it and was not calibrated accurately enough for print soft proofing.

The contrast ratio (the larger the first number, the better) was lower than expected as well at 258:1. As a result I have to give this device, on this display using this software (which granted it’s not purposely built for) a UNSATISFACTORY grade. This device plugs in and runs, but I wouldn’t recommend it for accurate color calibration on this display using this software.

Of course I’ll be fair in reminding you that this device is designed for use in calibrating an Eizo FlexScan SX2762W with the EasyPIX software, so I am using it in an unsupported fashion. When using it on the Eizo with the EasyPIX software I got a Display Luminance of 99.7 and a temperature of 6507K. Easy PIX doesn’t report contrast ratio, but overall the results were acceptable on the Eizo. There was still a touch more of a blue cast on the Eizo than the NEC, but I’d say this device does well for what it is designed for, so perhaps there’s some tweak in it for Eizo that doesn’t translate well to NEC and/or SpectraView.

If you are considering a Datacolor device I’d suggest borrowing a friends Datacolor Spyder 3. You can’t return calibration devices so do your own tests to make sure you are happy before purchasing if possible. In fact, the the new Spyder3 Elite might perform better, so try it if you can.

X-Rite ColorMunki PHOTO Spectrophotometer

Click here to learn more about the ColorMunki Photo on X-Rite's Website

X-Rite ColorMunki PHOTO SpectraView II Information Summary

I was unable to test the ColorMunki Display colorimeter due to the OS not recognizing it for some reason. I plugged it in and tested on my MacBook Pro and Lenovo W510 with no problem so it was an issue specific to my Windows 7 system and this device (perhaps because I had installed the i1Display Pro).

At any rate, I was curious to test its big brother the ColorMunki PHOTO to see how this spectrophotometer would do compared to its big brother, the i1Pro. I ran the test three times and got statistically the same result each time so I was a little disappointed to see that the Delta E was 0.94. Of course this is below 1.0 so in theory this is acceptable.

Ironically with this one the contrast ratio was 615:1 so I’m not sure what to make of that result. The white point was only 14K off its target and the luminance was just 0.4 over 100.0 so to my eyes the result seemed ACCEPTABLE.

NEC SpectraSensor Pro

NEC SpectraSensor Pro SpectraView II Information Summary

This device is made by X-Rite for NEC so it should do the best job, right? I must admit that I was shocked when I ran the results and saw that the Delta E was 0.72. At 6543k and a contrast ratio of 513:1, the calibration felt “about right”, but the data proved it was off more than the maximum 0.50 Delta E that I prefer to see for everyday use. Ironically if I used the i1 Pro sensor type in the preferences dialog I was able to get the Delta E to drop to 0.68.

The Delta E was well below 1.0 so I’m going to give this device a GOOD rating.

My only explanation here is that there’s probably some manufacturing tolerance that comes in to play so this is probably considered within specification so it shipped. Your copy might be better than my copy so I wouldn’t consider this to be a wide enough margin for you to refrain from getting this. In fact, I’d let price be your guide because as I said – under 1.0 is going to be impossible for most to notice.

X-Rite i1 Pro

Note, the UVCut version was used in this test, but a non-UV version exists.

Click here to learn more on the X-Rite Website

image

This is the most expensive sensor I have on hand, but it is a spectrophotometer so it can do paper profiles too. It did a VERY GOOD job with a 0.32 Delta E and a 469:1 contrast ratio. Of course it cost about 4 to 5 times as much as the other devices so it should do well right?

X-Rite i1Display Pro

X-Rite i1Display Pro SpectraView II Information Summary

Before running these tests my gut feel was that this was the best device, and my testing verified that was correct. In fact I ran this test 3 times just to make sure I wasn’t making a mistake. With a Delta E of 0.23 it performed the best and gave me the result that to my eyes seemed most accurate when soft proofing. Again, there’s probably some variation from unit to unit, but it’s no doubt this one is a dandy.

Conclusion

X-Rite is an industry leader in color management solutions, and a brand I trust. This article simply confirms my belief in their products is valid.

My bottom line advice is that if you aren’t going to be doing your own printing then you don’t need a spectrophotometer. If you are using a monitor that supports hardware calibration then get whatever bundled calibration device is offered with it and the display makers software. If you are going to be doing software calibration then go for the i1Display Pro (Adorama, B&H) if you can afford it, but if not then go for the ColorMunki Display (Adorama, B&H).

Amateur printers should get a ColorMunki PHOTO (Adorama, B&H) as the best cost effective solution. See my color management article to learn why. If you are print master then I’ll have more for you soon in my i1Publish article, so stay tuned to this blog to learn more.

Disclosure

Eizo, NEC, and X-Rite all provided me with calibration devices used in this article. The Eizo EX1 was not intended for this testing, so it was only included because I had it on hand. If you make a purchase using the links in this article I may get a commission, so thanks for supporting my blog by using my links when you are ready to make your purchase.

Tuesday, January 3, 2012

REVIEW: Eizo FlexScan SX2762W–27” Wide Gamut IPS Photography Display


Eizo FlexScan SX2762W

In early January 2011 Eizo had a press release for the FlexScan SX2762W that seemed to be too good to be true – a IPS LCD panel with a native resolution of 2560 x 1440, a maximum brightness of 270 cd/m2, contrast ratio of 850:1, 6 ms gray-to-gray response time and 178° viewing angles – without the typical several thousand dollar Eizo price tag!

Here are some key features:

  • Wide color gamut reproduces 97% of the Adobe RGB color space.
  • 10-bit display allows the monitor to show 1.07 billion colors simultaneously from a 16-bit look-up table (LUT).1
  • Digital Uniformity Equalizer (DUE) compensates for fluctuations in brightness and chroma uniformity that are characteristic of LCD panels.
  • EIZO-patented technology stabilizes the brightness after start up or coming out of sleep mode.
  • Integrated sensor counteracts the influence that changes in ambient temperature have on the display of color tones.
  • On-screen button guide for easy adjustment in dark work environments.
  • USB 2.0 hub with one upstream and two downstream ports.
  • Consumes less than one watt in power save mode and no power when turned off.
  • Simulation of two types of red-green (protanopia and deuteranopia) and one type of blue-yellow (tritanopia) color blindness.3 This allows designers to ensure their color schemes can be recognized by people with all types of color vision.
  • Limited five-year manufacturer's warranty.4

All of these features add up to a nice display that seems to be more consumer focused than their other offerings. One such feature is its EcoView sensor. This feature puts the display in sleep mode when you aren’t actively moving in front of the display. I had to disable this feature as apparently I don’t move much when I’m working and for photography you want the display running at full operating temperature when you are working, so this feature really isn’t for Photographers.

How does it compare to the CG243W?

The Eizo CG243W (replaced by the CG246-BK) is the best monitor I’ve ever used – period. While the SX2762W is nice because it offers a big honking amount of screen real estate and lots of cool new eco friendly features that make it cheaper to operate, I just never liked it as much as the CG243W. I’m probably biased as the CG243W was my first long-term personal experience with Eizo displays, but this display didn’t have that super high-end feel of the CG243W.

From what I can tell, this is not a hand inspected display like the CG series so it doesn’t come with an inspection report. The out of box quality of my test unit was outstanding (no dead pixels, calibrated very well out of the box, and fantastic edge to edge performance).

How does it compare to the NEC PA Series?

See my NEC PA Series article for comparison details.

Very unhappy with the calibration story

Let me state up front that this display supports the superior hardware calibration design and can be calibrated accurately. I just hate how that process works with this display.

Eizo tried to make this display easier to calibrate with its own Eizo branded EX1 Color Sensor, but honestly I hated the EasyPix calibration software. It also really annoyed me that it kept a window open all of the time so my task bar (instead of the system tray) was always occupied with a running app that I couldn’t close. I already own 4 other sensors, yet this display requires you to use their sensor to calibrate which is honestly just lame.

If you haven’t invested in a calibration solution then this shouldn’t deter you as the software works fine and using their sensor makes it very easy to calibrate your display accurately. However, I think hard core calibration geeks with existing hardware will be very frustrated as I was. Eizo users who have used Color Navigator will probably be rather upset at the dumbed down solution of the EasyPIX Software. I give Eizo kudos for trying to simplify the calibration process, but I absolutely dread this product,

WARNING: This display (like all good high-end displays) requires hardware calibration, so you may NOT use a third party calibration solution or software to calibrate it. Doing so is virtually useless.

Ordering

I recommend that you order the FlexScan SX2762W from B&H, Adorama or Amazon. At only $1469 (as of the time of this writing) it’s a screaming deal for an Eizo! A hood is also available.

Conclusion

If you are used to an Infiniti or Lexus car and you end up in a Nissan or Toyota that is functionally equivalent to the luxury brand, you can’t help but still think that the product you are in is inferior. Now a data analysis might suggest they are identical, but there’s that subjective thing that keeps getting in the way. This is basically how I feel about this display.

It’s a good product that performs well and is a true Eizo display, but it feels a bit like some magic is missing. I’m sure if I looked at it objectively I’d have to pinpoint my feelings on my desire to have more control over the calibration process using my preferred calibration hardware, so it really isn’t anything to do with the monitor itself. As a result, I think I can honestly give this display a solid recommendation as I can’t imagine anyone not loving the great picture it offers (especially when calibrated) as well as its great size and feature set.

I’d say that Eizo faithful are still probably going to be happier spending the extra money on something like a CG275W, but this display is half the cost of that so it’s hard not to choose this model instead. That’s the magic that NEC has enjoyed with its PA Series, and after having this display side by side to an NEC PA Series for a couple months, I’d say that the picture quality is probably better on this display. Given the superior warranty and Eizo’s good name, it’s tough not to spend the extra bucks and go for the SX2762W.

Disclosure

I was provided with a loaner display for review. I may also get a commission if you make a purchase using the links in this article. Thanks for supporting the blog by using my links!

Thursday, September 15, 2011

Eizo CG223W–Lowest Price on the Web

*** This display has been replaced by the Eizo CG246-BK which is available at B&H for the best price on the web. ***

Disclosure

I may get a commission if you make an order using this offer.

Monday, July 25, 2011

Guest Blog: Understanding 10-bit Color by NEC’s Art Marshall

NEC Display Solutions launched our first 10-bit color LCD, the 24” MultiSync PA241W, in February 2010. One of the questions that we are asked regularly by people evaluating all of our MultiSync PA Series models is “what is the difference between 8-bit color and 10-bit color?” and that is generally followed with “How do I get 10-bit color?” Ron and I have been discussing this for a while and, thanks to his feedback, we’ve put together something that I hope answers those basic questions.

Overview of LCD Color

(This is intended to give you a brief overview of the way that LCDs create color. For much more detail on LCD technologies, see the Wikipedia article on LCDs.)

Understanding how the computer creates color in an LCD is important to getting the most color from the display. Generally LCD pixels are made of 3 colored “subpixels”: red, green and blue (RGB). The LCD combines these subpixels based on the information that the computer sends over the video card. The amount of bits of color that the computer sends controls the number of colors that can be represented by the display, and the computer sends data for each of these three colors.

8 bit color: Typical desktop displays support 8 bits of color data per RGB channel. This means that there are 256 (8 bits) of possible values for each of the colors and combined the display can produce 16.8 million colors (256 x 256 x 256). This is also known as 24 bit color.

Why 30-bit color is better than 32-bit

10 bit color: MultiSync PA Series displays, when used with a compatible video card, support 10 bits of color data per RGB channel. This yields 1024 values for each color and a total of 1.07 billion (1024 x 1024 x 1024) possible colors that can be represented. This is also known as 30 bit color.

Side note: older display technology featured 32-bit output. This was actually a combination of 8 bits for each RGB channel as well as an alpha (transparency) channel. Comparing this to today’s technology, 30-bit technology is true 30 bits of color data compared to the 24 bits of color data in the older, 32-bit technology.

I have a 10-bit LCD, now what?

8-bit color display of dice courtesy of NEC

10-bit color display of dice courtesy of NEC

8-bit color

10-bit color

It turns out that every element of the combination of application software, operating system, video card, video connection and display must support 10 bit color in order to achieve true 10 bit color output.

Several video cards from major manufacturers including ATI (R6xx, R7xx, R8xx ATI Radeon hardware) and NVIDIA (Quadro series with DisplayPort, not Quadro FX) support 10 bit color. In addition, you need a DisplayPort connection to connect the video card to the display.

To enable 10-bit color on an AMD / ATI video card, click here. [Ron likes this doc better]

To enable 10-bit color on NVIDIA video cards click here. [Ron – nVidia calls this feature Deep Color in their drivers]

Finally, you need both operating system and application support for 10-bit color. 10-bit color is only available on computers running Windows XP, Windows Vista and Windows 7. MacOS versions including 10.6.x do not support 10-bit color output.

Application support for 10-bit color is constantly evolving. 10-bit color is typically only supported by software that uses either OpenGL or DirectX. Contact your software vendor for questions on 10-bit color support.

Most typical desktop configurations are limited by some component in the system and can only produce 8 bit color. For example, you could have a 10-bit LCD, 10-bit capable video card, DisplayPort video connection and Windows 7 operating system but without an app that can generate 10-bit color data, you will not see the advantage of those extra bits of data. By using the correct software, an operating system, video card and display that support 10 bit color, you can produce over 1 billion colors.

If you have an NEC MultiSync PA Series display, you can download a sample application (for Windows only) to see if your system is displaying 10-bit color. [Maximize and ALT+TAB between windows for the best result]

I hope that this helps. Contact me on Twitter using @Art_Marshall or post any questions in the comments!

Art Marshall is the Product Manager for Professional Desktop Displays, including the award-winning MultiSync PA Series, at NEC Display Solutions of America.

You can find more about NEC Display Solutions on twitter @NEC_Displays, on Facebook at http://www.facebook.com/necdisplay or at http://www.necdisplay.com/

Ron’s Reviews of NEC PA Series Displays

Click here to read Ron’s reviews of the 24 & 27” PA Series, or click here to read Ron’s review of the 30” PA series.

Photoshop & 10-bit Color Depth Support (by Ron)

While it isn’t very well documented (here’s the closest hit I found), both Photoshop CS4 & CS5 for Windows support 10-bits per channel color depth (30-bits total) by enabling the correct option in Open GL as shown in the following sections. I’m not currently aware of any support in Lightroom for this feature.

These directions will ONLY work if you are running a compatible video card using the correct cables (dual link DVI or DisplayPort) to a compatible display (like most, not all, NEC PA Series).

Enabling 10-bit Per Color Channel (30-bits total) in Photoshop CS4

SNAGHTML149cb279
Step 1 – Click Advanced Settings under Enable OpenGL Drawing

image
Step 2 – Match your settings as shown above (DO NOT check Color Matching)

Enabling 10-bit Per Color Channel (30-bits total) in Photoshop CS5

SNAGHTML14aeda73
Step 1 – Click Advanced Settings under Enable OpenGL Drawing

SNAGHTML14b9e6e1
Step 2 – Choose Normal or Advanced Mode and leave the check boxes checked

NOTE: I’ve got this working on my system before, but as of the time I wrote this article I could not get CS5 to work (CS4 on the same system worked fine). Each time it has been more challenging in CS5 to get this to work and has required multiple restarts of Photoshop to get accurate results.

Testing 10-bit Support in Photoshop

Download Ramp.psd from AMD (web search if link is broken) and open it in Photoshop. If you see this dialog:

image

just click OK. On a properly configured system you’ll see the correct results even using sRGB.

As the dice example above shows, in 8-bit you’ll see segments that clearly define the different shades of gray. In 10-bit per channel color you’ll see a smooth white to black gradient with no hint of any segments. If your video driver isn’t very good it can fail, and some buggy video drivers require you to restart Photoshop or even your system to get this to work properly.

NOTE: If you switch the settings on and off in a single session of Photoshop, you won’t see any changes unless you force a repaint so zoom in and then zoom back to actual pixels again to see the changes (again, ONLY on a properly function video driver).

A Word About 10-bit Per Channel Color Depth & Printing

The world of printing is way behind display technology, so Ron’s advice for those doing print soft-proofing is to DISABLE 10-bit per channel (30-bit total) color support from Photoshop. The reason why is that you’ll hide banding effects that might show in your print as many (not all) printers still only print in 8-bit using a much smaller color space, even if you enable 16-bit printing. This will result in printing surprises and therefore is not recommended.

More About High Color Support on Windows XP & Greater

To understand how and why Windows can support this advanced color mode when the Mac can not, please read this document. It helps to understand what is possible by software that may not support advanced color today. Please forward this link to your software vendor to help spread the word (i.e., educate them) on how they can add advanced color support to their products.

Disclaimer

NEC is a partner of this blog and has provided Ron with loaner PA series displays to review (all of which have been returned). Ron also owns a NEC PA series display that he purchased at B&H with no discount or assistance from NEC. Ron may get a commission if you make a purchase using links originating from this blog.