Showing posts with label Speedlites. Show all posts

Thursday, January 15, 2026

Canon R6 Mark II Review: Killer AF, Amazing High-ISO JPEGs & Legacy Lens Love (2026 Update)

Camera ReviewRonMartBlog

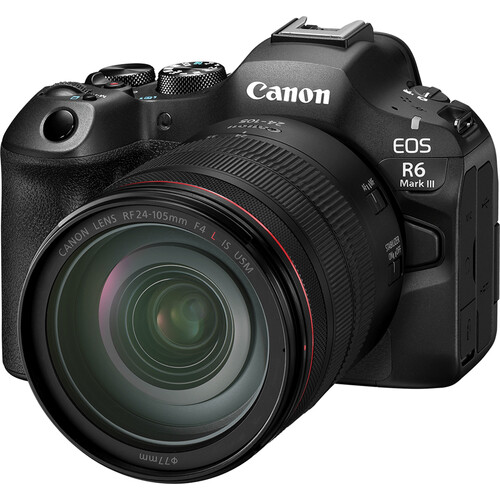
REVIEW: Canon R6 Mark II & RF 24-105 f/4L IS USM

Phenomenal autofocus, outstanding in-camera JPEGs at high ISOs, and great support for legacy EF lenses and flashes makes this a nice upgrade for those sitting on the fence.

REVIEW: Canon R6 Mark II & RF 24-105 f/4L IS USM product photo
REVIEW: Canon R6 Mark II & RF 24-105 f/4L IS USM — click to check current price / availability

✅ Pros

  • Excellent in-camera JPEG quality especially at high ISO (up to ISO 20,000+ with impressive detail retention)
  • Fast, reliable autofocus that rarely hunts—even with legacy EF lenses—and outperforms older pro bodies like the 1DX Mark II
  • Pivoting LCD is very handy for macros in difficult shots, great for screen protection, and perfect for awkward angles
  • Strong IBIS (In-Body Image Stabilization) + lens stabilization for sharp handheld low-light shots

⛔ Cons

  • In 2026, it trails newer bodies (e.g., Nikon Z6 III, Sony a7 V, Canon R6 Mark III) in buffer depth, rolling shutter, and burst rates for fast action
  • Even at street prices around $1,999 body-only new (or $1,800 used/refurb), it's pricey compared to aggressive competition in a shrinking market
  • DPP 4 is painfully slow for raw processing, despite being optimized for Canon files
  • Limited 4K 60p recording time due to potential overheating in extended clips (common for the model; external fan helps if video is priority)
  • ⚖️RAW shadow recovery / dynamic range isn’t class-leading if you push files hard (vs. some Sony a7 and Nikon Z bodies)

TL;DR ⚡

For dedicated Canon shooters, the R6 Mark II delivers outstanding high ISO performance. Combined with IBIS and lens stabilization, it enables slower shutter speeds for still subjects, reducing ISO for cleaner images. See my full review for more info on how it compares to the new Mark III.

R6 Mark II: Pro-level performance and stabilization—without the Mark III price tag.

Table of Contents

  1. Who it’s for and who should skip
  2. Video review
  3. Real World Shots
  4. Sample Video Recorded on R6 Mark III
  5. Observations
  6. Difference between the R6 Mark II and Mark III
  7. Recommended products
  8. Closing thoughts
  9. Related articles

Test Context

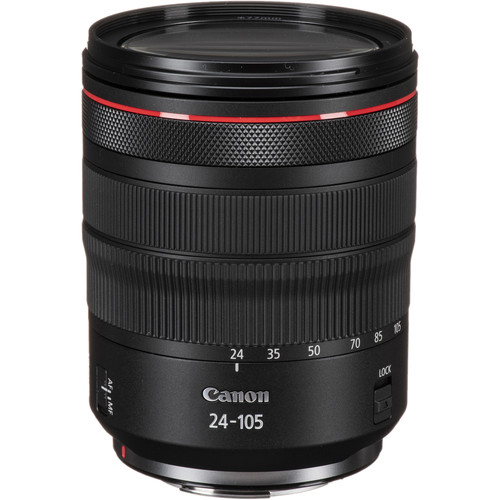
  • Main lens: RF 24–105mm f/4L IS USM
  • Legacy EF lenses used: EF 70–200mm f/2.8L IS II, EF 11–24mm f/4L, EF 100mm f/2.8 Macro USM
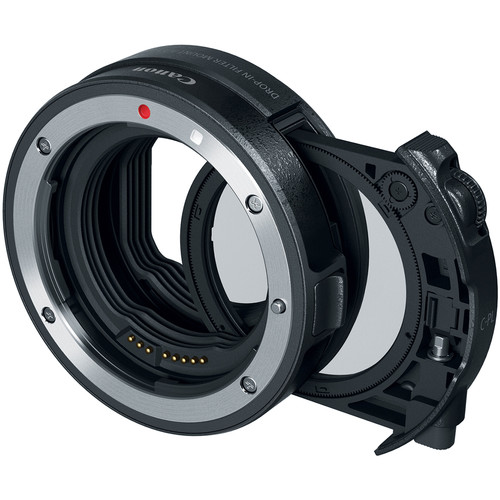
  • Adapter: Canon Drop-In Filter Mount Adapter EF–EOS R (circular polarizer)
  • Scenes Reviewed: Everyday life, macro + close focus, long exposures, low-light indoor, and a "distraction torture test”
  • Files: JPEG + RAW (CR3) + HEIF (.HIF) & MOV
  • Firmware Version: 1.5.0 (Lens 2.0.6)
  • Lightroom Classic Version (for triaging RAW): 15.1 (Camera Raw 18.1)
  • Digital Photo Professional: 4.20.11.0
  • Photos Taken: 1770 (3549 files)

Who it’s for

  • Parents looking to get great shots of their kids in difficult sports conditions
  • Events photographers who often have lots of low-light handheld shots
  • Canon EF lens owners looking to upgrade to a newer camera body (while keeping their existing glass)

Who should skip

  • Those who have to have the latest and greatest gear
  • Studio and landscape photographers who prioritize pixels over autofocus performance
  • If you already invested in Sony, Fujifilm or Nikon, there's not enough here to warrant a platform switch

Video Review 🎥

If the player doesn’t load here, watch on YouTube.

Real World Shots 📷

The photos below are real-world samples. Click any photo to open the original size.

Click here to view the entire gallery of images taken for this review.

The 24-105 minimum focus distance was quite usable.

Real-world shot 1
f/5 for 1/100 sec at 70 mm ISO 320 [0 EV, Pattern metering, No flash, Aperture priority with RF24-105mm F4 L IS USM]

However, I found myself wishing this was a f/2.8 lens quite often to get more bokeh in the background. Click the photo to open the original size 👆

Manual focus peaking was needed to get sharp focus for this shot, but it worked great.

Real-world shot 2
f/4.5 for 1/320 sec at 98 mm ISO 640 [0 EV, Pattern metering, No flash, Shutter priority with RF24-105mm F4 L IS USM]

The wind really gave the autofocus its only fits during my testing, so the focus peaking made it easy to see when the wind was calm enough to take the shot. Click the photo to open the original size 👆

The Canon Drop-In Filter Mount Adapter EF-EOS R with Circular Polarizer Filter worked great with my legacy Canon EF70-200mm f/2.8L IS II USM lens.

Real-world shot 3
f/7.1 for 1/125 sec at 120 mm ISO 8000 [0 EV, Pattern metering, No flash, Aperture priority with EF70-200mm f/2.8L IS II USM]

I rotated the circular polarizer to eliminate the reflections on the leaves and stump to make a more vibrant image. I quickly became a fan of having filters on the camera side of the lens instead of on the end of the lens. Click the photo to open the original size 👆

The in-camera JPEG processing of ISO 20,000 is awesome

Real-world shot 4
f/13 for 1/160 sec at 130 mm ISO 20000 [-0.33 EV, Pattern metering, No flash, Aperture priority with EF70-200mm f/2.8L IS II USM]

I quickly fell in love with the fact that I don't need to worry about hitting high ISOs with this camera. The noise reduction is impressive while still maintaining plenty of details as shown in this low-light shot. Click the photo to open the original size 👆

My very old EF100mm f/2.8 Macro USM lens worked great with the Canon Drop-In Filter Mount Adapter EF-EOS R with Circular Polarizer Filter

Real-world shot 5
f/13 for 1/125 sec at 100 mm ISO 6400 [0 EV, Pattern metering, No flash, Aperture priority with EF100mm f/2.8 Macro USM]

I had no issues with both auto and manual focus with this super sharp but very outdated lens Click the photo to open the original size 👆

I was happy to see my legacy Canon EF11-24mm f/4L USM, one of my most expensive lenses, worked great with the R6 Mark II's autofocus system!

Real-world shot 6
f/20 for 2.5 sec at 24 mm ISO 100 [-1 EV, Pattern metering, No flash, Manual with EF11-24mm f/4L USM]

The circular polarizer came in handy on this long exposure shot as did the articulating LCD which kept me from having to get into funny positions. I just rotated the LCD so I could see it easily no matter what position my camera was in! Click the photo to open the original size 👆

Another long-exposure shot that highlights the sharpness of this lens even at f/14

Real-world shot 7
f/14 for 1/2 sec at 63 mm ISO 100 [-1 EV, Pattern metering, No flash, Manual with RF24-105mm F4 L IS USM]

I currently own a legacy 24-70 and two variants of the 24-105 lens, but this new RF made me want to get rid of all of them as it performed very well with super crisp images worthy of the L designation. Click the photo to open the original size 👆

Cigar lounges are a visual treat in person, but they give cameras fits

Real-world shot 8
f/4.5 for 1/60 sec at 50 mm ISO 12800 [0 EV, Pattern metering, No flash, Aperture priority with RF24-105mm F4 L IS USM]

I was pleased that the autofocus never had any problems and didn't hunt for something to lock onto. The in-camera JPG was great and the off colors accurately reflect what I saw in person as well, so it nailed the color even with the AWB setting. Click the photo to open the original size 👆

In-camera color accuracy was fantastic

Real-world shot 9
f/9 for 1/80 sec at 32 mm ISO 12800 [0 EV, Pattern metering, No flash, Aperture priority with RF24-105mm F4 L IS USM]

I might be sounding like a broken record, but Canon's strength has always been its in-camera color quality and this was no different. It's an exact replica of what my eyes were seeing at the time. Click the photo to open the original size 👆

Even at ISO 8000, the textures of the cigars were excellent.

Real-world shot 10
f/6.3 for 1/80 sec at 70 mm ISO 8000 [0 EV, Pattern metering, No flash, Aperture priority with RF24-105mm F4 L IS USM]

I've been so happy with my iPhone over the past few years that I'm not breaking out the big camera anymore, but the resolution and crispness especially at high ISO with this camera has me rethinking that decision. Click the photo to open the original size 👆

This was my token f/22 shot that is more about having a lot of things to look at than it is photography. Overall, the wind hurt this shot quite a bit but I also believe diffraction was the bigger enemy here. There's no substitute for more megapixels for stuff like this as I've shown in my 50 and 100 megapixel Fujifilm reviews.

Real-world shot 11
f/22 for 8 sec at 24 mm ISO 100 [0 EV, Pattern metering, No flash, Aperture priority with EF11-24mm f/4L USM]

For this shot I was using my legacy EF11-24mm lens and the light conditions were constantly changing, but in the Northwest this was about as much sun as I could get so I was happy to capture it! Click the photo to open the original size 👆

f/16 looks great as long as you don't pixel peep at unrealistic zoom levels

Real-world shot 12
f/16 for 1.6 sec at 24 mm ISO 100 [0 EV, Pattern metering, No flash, Aperture priority with EF11-24mm f/4L USM]

I focused on the sign and again was using my sharpest lens in my bag for this shot Click the photo to open the original size 👆

I used the right eye autofocus and despite my daughter's hair partially obscuring it, and it did great.

Real-world shot 13
f/5.6 for 1/100 sec at 95 mm ISO 5000 [0 EV, Spot metering, No flash, Aperture priority with RF24-105mm F4 L IS USM]

For those new to this feature, the right and left eye refer to the subject's right and left eye - not photographers right or left. This is something that you need to think about when using that feature as it's easy to get it confused. That said, auto eye priority works great most of the time too. Click the photo to open the original size 👆

This was a hard shot to capture and the result is nothing to write home about, but what impressed me was that the autofocus never hunted around trying to lock onto the inscription - despite the fact that I struggled to see it!

Real-world shot 14
f/6.3 for 1/60 sec at 53 mm ISO 6400 [+2 EV, Pattern metering, Flash fired, Aperture priority with RF24-105mm F4 L IS USM]

Autofocus in difficult conditions that used to trip up the best of cameras is no longer a thing, so I never dealt with focus hunting even when using my older lenses. What's more, I almost never needed manual autofocus, and when I did it was for creative reasons. Click the photo to open the original size 👆

Another tricky one just above

Real-world shot 15
f/6.3 for 1/60 sec at 81 mm ISO 6400 [+2 EV, Pattern metering, Flash fired, Aperture priority with RF24-105mm F4 L IS USM]

In both cases, the autofocus just worked like it was any other subject - which was great! Click the photo to open the original size 👆

I had the wrong white balance settings for this shot, but I was pleased with the exposure of the blackberries at 0 EV against the bright pineapple in Canon's Evaluate metering (aka pattern) mode.

Real-world shot 16
f/5.6 for 1/60 sec at 43 mm ISO 4000 [0 EV, Pattern metering, No flash, Aperture priority with RF24-105mm F4 L IS USM]

A better white balance and partial metering would have been a better choice, but the CR3 raw file leaves plenty to work with after the fact. Click the photo to open the original size 👆

It's the winter in the Northwest, so there's little light to speak of. As a result, I was pleased to see how much detail was still left in the top of this hat even at ISO 8000.

Real-world shot 17
f/5.6 for 1/80 sec at 63 mm ISO 8000 [0 EV, Pattern metering, No flash, Aperture priority with RF24-105mm F4 L IS USM]

Yet another example of why I loved the 24-105mm so much - super sharp images and great image stabilization for handheld shots. Click the photo to open the original size 👆

ISO 8000 was so good on that last shot, I decided to push things and give ISO 10,000 a shot

Real-world shot 18
f/4 for 1/125 sec at 105 mm ISO 10000 [0 EV, Pattern metering, No flash, Aperture priority with RF24-105mm F4 L IS USM]

Once again, the in-camera JPEG didn't disappoint. However, I can still leverage the raw and Imagenomic Noiseware to get it even more sharp if I wanted to edit this image. Click the photo to open the original size 👆

Photographs on your typical ice rink are always terrible due to the poor lighting conditions and distractions in the background, but I was super impressed with the eye autofocus and AI Servo performance with my legacy 70-200mm during this torture test.

Real-world shot 19
f/4 for 1/320 sec at 102 mm ISO 5000 [0 EV, Pattern metering, No flash, Manual with EF70-200mm f/2.8L IS II USM]

Lots of distractions in the foreground and background kept showing up, but the AF almost never missed a shot and stayed in sharp focus of my daughter's eyes even when I struggled to see where she was. Click the photo to open the original size 👆

I've got countless distractions shots like this where the AF did a great job tracking my intended subject and never getting tripped up.

Real-world shot 20
f/2.8 for 1/320 sec at 135 mm ISO 2000 [0 EV, Pattern metering, No flash, Manual with EF70-200mm f/2.8L IS II USM]

I was extremely pleased with the performance, even though people were ruining any chances of a getting a good photograph! Click the photo to open the original size 👆

Another distraction example and there's more in the review gallery, but the AF never lost sight of my intended subject.

Real-world shot 21
f/2.8 for 1/320 sec at 200 mm ISO 8000 [0 EV, Pattern metering, No flash, Manual with EF70-200mm f/2.8L IS II USM]

I can say with confidence that the R6 outperforms my Canon 1DX Mark II in terms of AF performance in every way. Click the photo to open the original size 👆

This is a horrible photo, but what's impressive is that the eye autofocus actually stayed on the eye of the moving and partially obscured subject

Real-world shot 22
f/4 for 1/400 sec at 91 mm ISO 1600 [0 EV, Pattern metering, No flash, Manual with RF24-105mm F4 L IS USM]

I threw a lot at this AF system and it passed with flying colors. Click the photo to open the original size 👆

Yes, its true, auto eye AF even works on closed eyes!

Real-world shot 23
f/4 for 1/640 sec at 105 mm ISO 4000 [0 EV, Pattern metering, No flash, Manual with RF24-105mm F4 L IS USM]

In the past you'd have a sharp focus of a basketball and blurry subject, but not with the R6 Mark II. Click the photo to open the original size 👆

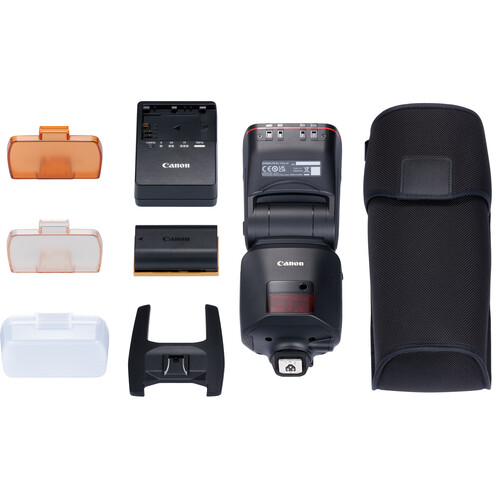
I didn't get enough time with the amazing Canon EL (Version 2) Flash, but this was all that flash with no third party modifiers.

Real-world shot 24
f/5.6 for 1/60 sec at 72 mm ISO 3200 [0 EV, Pattern metering, Flash fired, Aperture priority with RF24-105mm F4 L IS USM]

It's heavy, and its expensive, but the battery makes it a always ready when you need it super performing flash. If I was shooting event photography, I'd definitely buy this flash. Click the photo to open the original size 👆

After taking a photo with my iPhone, I decided to see if I could improve upon it by getting a shot that the iPhone would never get - a sharp focus on the brush as paint is applied.

Real-world shot 25
f/4 for 1/60 sec at 96 mm ISO 160 [-0.67 EV, Pattern metering, No flash, Manual with RF24-105mm F4 L IS USM]

Spot autofocus saved the day and I got the shot that I was hoping to get. Click the photo to open the original size 👆

Unhappy with the darkness of the last shot, I tried again and once again spot AF had no problems getting my desired result.

Real-world shot 26
f/4 for 1/100 sec at 105 mm ISO 320 [0 EV, Pattern metering, No flash, Manual with RF24-105mm F4 L IS USM]

In retrospect I wish I would have tried this shot at f/9 to get both the brush and hand in better focus together, but that's all on me not the camera. Click the photo to open the original size 👆

Notice how in-camera HEIF (.HIF) files render in Lightroom versus the CR3 thumbnail/default rendering.

Real-world shot 27
In-camera generated HEIF files don't look good in Lightroom Classic (in my testing)

I’m not sure if this is a Lightroom issue or a camera firmware issue from not being on the latest version. Leave a comment if you have more details on this issue. Click the photo to open the original size 👆

4K Video Example - Northwest Stream

If the player doesn’t load here, watch on YouTube.

1080p 120fps Slomo Video Example - Northwest Stream

If the player doesn’t load here, watch on YouTube.

Observations

Battery Life & Ergonomics

In mixed stills shooting (with occasional bursts and LCD use), I got about 2000 images (about 1000 shots) per LP-E6NH charge—solid for a mirrorless body. Grip is comfortable for long sessions, weather-sealing held up in light rain/Northwest drizzle, and the EVF is bright and clear. IBIS makes handheld low-light easy.

Still Worth It in 2026?

Launched in 2022, the R6 Mark II now often sells new for ~$1,999 body-only (or less refurbished/used around $1,800). It’s a fantastic value for EF lens owners avoiding a full system switch. If you want the absolute latest (better buffer, sensor readout, video endurance), the R6 Mark III is the step-up—but this one still punches way above its age for sports, events, and family action.

Difference between the Mark II and Mark III (AI Generated)

Image Quality & Resolution

The most notable difference is the sensor. The Mark III offers a 32.5MP sensor compared to the Mark II's 24.2MP, providing greater flexibility for cropping and larger prints. This extra resolution, however, can result in slightly more noise in high ISO scenarios compared to the Mark II's clean low-light performance.

Video Enhancements

The Mark III is a significant upgrade for videographers. It introduces internal 7K RAW recording and Open Gate recording, which uses the entire sensor area for flexible aspect ratio cropping in post-production (e.g., for social media vertical video). It also adds a full-size HDMI port, Canon Log 2, and professional tools like waveform monitoring. The Mark II is a capable everyday video camera with crop-free 4K 60p, but lacks these advanced features.

Speed & Buffer

Both cameras shoot at an impressive 40fps with the electronic shutter. The Mark III pulls ahead with its CFexpress card slot (alongside an SD slot), which allows for a much larger buffer capacity (around 150 RAW shots vs. 75 on the Mark II) for extended burst shooting. It also has a more robust implementation of the Pre-continuous shooting feature.

Autofocus & Stabilization

Both use Canon's effective Dual Pixel CMOS AF II system. The Mark III benefits from an enhanced AF algorithm and the "Register People Priority" feature, which allows you to prioritize focus on specific registered faces. It also offers a slight bump in in-body image stabilization, up to 8.5 stops.

Closing Thoughts

I’ll admit I was late to the game reviewing this one—it originally launched in 2022—but it’s still a very relevant camera today, especially if you’re coming from older Canon DSLRs with EF glass and have been waiting for the right moment to upgrade. If you’ve already moved to the R series, the gains here are more incremental and may not justify the cost.

That said, if you value Canon’s ergonomics and its consistently excellent in-camera JPEGs, this camera earns its keep. Autofocus stayed locked on even in ugly, low-contrast situations, and high-ISO performance was strong enough that I rarely felt forced into shooting RAW. When I did, RAW + Imagenomic Noiseware produced results that easily meet 2026-level expectations.

If you still find yourself wanting more—faster everything, more headroom, and the newest refinements—then stepping up to the Canon R6 Mark III makes sense. Either way, the Canon RF 24–105mm f/4L IS USM remains a rock-solid everyday pairing that fits this body perfectly.

👉 Click here to learn more

Thursday, June 11, 2015

Getting Started in Boudoir Photography (SPECIAL OFFER)


Art of Boudoir Photography with Speedlights eBook 

Go on, admit it – at least once in most of our lives we dream of being behind (or even in front) of the camera for a sexy photo shoot. In fact, I’d bet if someone did an anonymous survey and found out the REAL reason why many people bought their DSLR is so they could possibly live that dream one day. Of course deep dark secrets and reality are two separate things, so few admit it and even fewer actually get a chance to do it.

I think one of the reasons why people never try doing these sexy shoots is because they simply don’t know where to begin or what to do. Let’s face it, it takes enough courage to ask a partner or model to pose for you, but then you have to know what you are doing right?

Well everyone starts off with no experience at some point in their life, so don’t feel embarrassed or ashamed if you make a mistake – models (especially significant others) understand. In fact, I can’t recall ever having a situation where a model wasn’t a pleasure to work with and actually made me feel more comfortable than I expected.

The Art of Boudoir Photography by Michael Zelbel

I recognize that some people really want to study up so that they seem in control and know what they are doing, so I’m please to tell you that I’ve found the first (and only one that I know of) book that really does a brilliant job of educating you on “Boudoir” (read naked <g>) Photography from start to finish. I mean practical stuff too – this isn’t another “hey, check out my great nude portfolio of hot models that will never give you the time of day” books. The only book I’ve read so far that I can truly recommend is The Art of Boudoir Photography by Michael Zelbel.

Here’s a censored peek inside of The Art of Boudoir Photography by Michael Zelbel, but you can click here to get an uncensored view:

This book is extremely well done – it covers everything from A to Z and has tons of practical advice and useful diagrams. Now from the pictures, you are probably thinking “oh this is just another boobs book”, but honestly it covers almost everything you’ve probably fantasized about once or twice.

In short, if you’ve looked at most popular sexy shots and wondered “how did they get that shot”, odds are this book is going to show you exactly how you can do it – with equipment that you can actually afford!

In addition to the eBook itself, there is a mobile PDF that you can use on your phone for your shoot. More importantly there’s a brilliant “cheat sheet” that shows you a bunch of pose ideas:

I’ve found it extremely helpful to just show your model a photo and say “I want to do this kind of shot”, and honestly the worst they’ll say is “I’m not comfortable with that.” Believe it or not that’s actually rare and most will try to give you something close to what you want if they say no, so this cheat sheet is probably worth the price of the book alone. After all the first time can be scary so when the cat has your tongue, you can just point and say “how about this”.

What if I want to shoot the opposite sex?

All of the core concepts in this book apply no matter what sex you intend to shoot. What may change are some of the poses which may make the cheat sheet a little less helpful, but with the ideas here you can quickly do an image search on Bing or Google and build your own little list. Tip, you may need to turn Safe Search off but only do that at home as you’ll get XXX when you do.

I’m a model, will this book help me?

YES! Understanding where your photographer is coming from, what shots they may want you to do, and how to prepare for a shoot is invaluable for your photographer. You can skip over the geeky camera talk, but much of the book goes into outfits and poses that

Getting the gear to get the shots

Lastolite Joe McNally Ezybox Hotshoe - 24 x 24" (61 x 61 cm)

Well I’m assuming since you are hear that you already have a camera, but if you don’t check out my Which DSLR Should I Buy? article. Any lens will work, but typically ones that focus fast in low light work best. My Which Lens Should I Buy? article offers recommendations, but if your space is big enough I’ve found the 70-200mm (Adorama) lenses to offer the best AF performance. Sure a nifty 50mm or a dreamy 85mm will be awesome when you get the shot, but they typically have bad minimum focus distances and horrible low-light AF performance. What this means is that you end up with lots of occasions where you press the shutter release and nothing happens because your lens can’t get the focus, and nothing scares a model (or spouse) off faster than you lingering around without them hearing those shutter clicks!

  • Flashes [2 or 3] – You’ll need at least two flashes and something to trigger them, so I found three was best as the flashes also make great flash controllers. Canon shooters should opt for the 600EX-RT (Adorama) while Nikon shooters should go for the SB-910 (Adorama). Sure there are cheaper options, but once you start doing this stuff you quickly realize how anything less than two good flashes can be very frustrating. Some cameras can trigger flashes (i.e., Canon 7D Mark II), so you can hold off on a flash if you already have a flash trigger.

    I do not recommend the Canon ST-E2 (Adorama) as a trigger when working with models, but the ST-E3-RT is very good with the 600EX-RT.
  • Westcott 43" Umbrellas [2] (Adorama)  – You’ll want two and this is my personal favorite. If you can get the Lastolite Joe McNally Ezybox Hotshoe - 24 x 24" (61 x 61 cm) that is even better for shots where you need to isolate the light to a region of the body.
  • Umbrella Swivel Adapter [2] (Adorama) – For each umbrella you’ll need one of these PLUS something to mount your flash on. Personally, I like to use the shoes that come with your flash to stand them up and just screw them into the included brass stud.
  • Manfrotto 5001B Nano Black Light Stand - 6.2' (1.9m) [2] (Adorama) – You’ll also need two or more of these, and trust me they are worth every penny. Sure there are cheaper stands, but these collapse up very nicely which make them easy to transport to off-site shoots.

I’m just an amateur, what do I need to know about my gear and photo post-processing?

If you are still struggling with your camera then check out my Which Books Should I Read? article to brush up on your skills. If you have the photography down, but not the Photoshop then my What Photoshop Books Should I Read? article is a must. 

My favorite book for photo retouching is Professional Portrait Retouching Techniques for Photographers using Photoshop. If you don’t have Photoshop and only have Lightroom then you are going to at least need some Skin Softening software, so I highly recommend Portraiture. Color Efex includes a Dynamic Skin Softener filter, but I like Portraiture (to avoid the wax figure look).

I DO NOT recommend Portrait Professional. Sure the ads are very convincing and the trial even got me excited, but when you actually use it you’ll quickly discover it’s not its all cracked up to be. More importantly, you’ll end up with amateur looking results that aren’t tremendously fast to achieve over doing it manually once you get the hang of it.

What if I want to print my photos?

Well if they are simply R rated, then you shouldn’t have any trouble getting them printed at most places. If they are a bit more risqué then I recommend playing it safe and printing them yourself. Printing isn’t as straight forward as you might imagine, so you might want to pick up my Printing 101 eBook to help you get the most out of your printer investment.

Ron’s Personal Tips

Honestly, I don’t do a ton of nudes as I have little use for them on my blog. However, I have done it and I’ve worked with many who do as well. Here’s some practical tips I highly recommend:

  1. ALWAYS get a model release – even if it is your significant other – so you can protect yourself if for any reason your photos should get stolen and end up on the Internet. This article is a good place to start and learn more, but I personally love using the easyRelease app on my iPhone. It keeps up with industry changes and is accepted by stock agencies. It also supports Android as well.
  2. ALWAYS take a photo of their ID – require a drivers license, passport or state issued form of ID. If your model doesn’t have it then cancel or reschedule the shoot as you do not want to accidentally end up photographing a minor who is pretending to be an adult. You can just take a quick shot of their ID with your phone or camera to prove that you checked it. If your model has privacy concerns – too bad – find another model. Any legit model will not have a problem with this.
  3. NEVER, EVER, EVER photography a minor – I know this is a “no shit Sherlock” statement, but if your model is minor then they better be wearing a parka or something close to it as you don’t want to ruin your life doing a swimsuit or boudoir shoot with the 17 year old model that “looks like she’s 21”.
  4. Know who you are photographing – Communicate with your model in advance. Find out about tattoos, scars, current hair color & length etc… to avoid surprises at the shoot. Most models change appearance for their shoots and Photoshop may have removed that big tattoo or scar you didn’t know about.
  5. Expect an escort – A smart model will always bring an escort to the shoot. It is best to have the escort wait outside the door so you can focus on the shoot and avoid extra stress or an immature escort. Setting them up on the TV with a soft drink usually works for most. For those who insist on being in the studio / room simply put them in a chair in the corner and ask that they not make eye contact or speak with the model during the entire shoot.
  6. No jewelry or contacts – I can’t tell you how many shoots have cost me hours in Photoshop or were ruined because I didn’t notice my model’s clear eye contacts or crooked necklace. Earrings catch the light and can frequently ruin a shot if you aren’t careful. As a rule, I say all jewelry (including belly button rings, etc…) should be removed.
  7. Pre-shoot instructions – Always give your model an idea of what is going to happen in the shoot and what your expectations are. In addition, you can ask them to not wear products that you might be allergic to or might cause issues in the shoot (i.e., generally less makeup is best). It’s best to exchange cell phone numbers as well in case the shoot must be rescheduled or someone is sick. Check the number you are given in advanced too as some give phony numbers until they are sure you aren’t creepy. Finally, make sure your model does not wear tight fitting garments or elastic in any place that you intend to photography as those marks can be a challenge to fix in Photoshop. 
  8. Pay attention to the makeup – Make sure the model (or makeup artist) brings extra of all makeup that will be used in the shoot. Models should freshen up often as lipstick on teeth, crooked fake eyelashes, half worn off lipstick or powder will kill you in post processing. It happens on every shoot, so be aware during your shoot of what is going on. Eyelashes in eyes are common too, so chimp your camera at 10x zoom to double check.
  9. Consider Assistants – Assistants can save your life with reflectors and reduce your stress, but for boudoir shoots your beer buddy isn’t going to cut it. You want an experienced assistance that is the same sex as the model. If you don’t have one, consider approaching another photographer of the same sex as the model to work with and split the costs of the shoot.
  10. Make your model comfortable – Shoots are stressful when a photographer and model come together for the first time – no matter what you are doing. It’s even worse when you are doing this type of photography, so talking to your model in advance is essential. It can be via phone, chat or email but prove to your model that you aren’t a creep looking for a new girlfriend. In addition, your shoot should be in a safe location with a place for your model to change. Finally, you should always have a robe for your model (most will bring their own) and something for them to drink (bottled water is best – even if they say no). I also find letting your model play their favorite music on their phone can help them relax.

There’s dozens of more tips I could give, but these are the most helpful ones to get you started.

Where to find models, make up artists (a.k.a., mua), etc…?

Model Mayhem (aka MM) is the place to go. Even top pros are using it these days and the best part is that it is free. You typically should schedule one shoot that’s just casual portrait stuff before you ask a model to do a sexy shoot, but some will do it the first time for a fee. Free models are in abundance, but if your model does a good job you should tip the going rate you are quoted from other models on MM.

TIP: Please don’t be a jackass – too many “guys with cameras” (GWC) have ruined models for good photographers by just wanting to shoot porn or paying rates far beyond the reasonable and customary rate. Talk to other photographers before you get started and remember that you will scare off models and get no shows if you are a creep.

Conclusion

I highly recommend The Art of Boudoir Photography by Michael Zelbel. I wish I had it when I got started photographing models – even though I wasn’t doing nudes. His advice is practical for all photo shoots and budget model photography. In fact, this article started out as a book review and grew into more as I tried to answer the questions I get all of the time from photographers wishing to work with a model for the first time – for any purpose.

Special Offer

Click here and use the code RMSAVE20 to save 20% off this book.

Other articles you might enjoy

Disclosure

I may get a commission if you make a purchase using links in this article. I do not condone any illegal activity or mistreatment of any human being. Please obey all laws and respect the will of your model at all times.

Wednesday, June 10, 2015

Lighting Tips on a Budget by Rogue and 15% Discount Offer!

Click to learn more on B&H
Rogue Flashbender 2 Portable Lighting Kit

My friends at Rogue have been creating awesome products for flashes that have been all the rage for years now, but their web site has been rather simplistic to say the least. To address this shortcoming they’ve launched a new site this past April that now features a bunch of videos and blog articles to help you to master their full suite of affordable light modifiers.

Rogue New Lighting Blog and Videos

However, the really cool part is that they’ve extended the ronmartblog.com 15% off discount from their old site to this new site so you can save on their huge lineup of products.

Cool Videos Filtering Feature

Isn’t it frustrating when you watch videos that don’t really apply to you because they use too many products you don’t have or want? Wouldn’t it be great if you could filter the videos to only include what you have or what you are interested in? Well here’s a great solution on Rogue’s Video Page:

Click to go to the videos page

How to save 15%

Click here to see their full list of products and add any items you want to the cart, then begin the checkout process which begins with an order summary like this:

CLICK the discount code link

Be sure you click the link to enter the discount code. Once you’ve done that, enter my discount code which currently is ronmart09 and CLICK APPLY as shown below. If that doesn’t work then check my discount coupon code page for the latest code. If that still doesn’t work then contact me.

Enter the discount code and click APPLY

If you did everything right you should see the discount code and the amount deducted along with a summary at the bottom similar to this:

If you do it right, you should see your discount like this with a summary at the bottom

What’s new for FlashBender 2

If you’ve already been using FlashBender products or have read my previous reviews, then you’ve probably wondered what’s new for version 2. To help with that I’ve created this slightly underexposed image to highlight the difference in the reflective surfaces:


New (left) vs Old (right)

While it is immediately obvious that the new system to attach the FlashBender to the flash is smaller and more secure, what’s less obvious at first glance is that the material used on the reflective surface is lighter and thinner – but just as effective. The net result is a lighter and more secure product.

If you’ve used the first version of the Rogue XL Pro Lighting Kit that I reviewed, you’ll be happy to know that the new one uses the new FlashBender 2 system and includes an egg crate grid as shown below:


New Egg Crate Grid Feature on FlashBender 2 XL Pro Lighting System

The left shot shows it attached and the right shows that this is the same system as v1 with a carrying case a egg crate attachment.

Be sure to use my previously mentioned coupon code to pick any of these up on the Rogue website or at B&H.

KelbyOne

Other articles you may enjoy

If you enjoyed this article, you may also enjoy these:

Disclosure

If you make a purchase using links found in this article, I may make a commission. It doesn’t cost you a penny more, but it does help to support future articles like this.

Sunday, February 24, 2013

Canon Video Gold Mine on YouTube

Canon Videos on its YouTube Landing Page

Canon North America has done a fabulous job of consolidating all of its videos in one place at http://www.youtube.com/CanonUSA.  I’m very impressed with the structure and design of this site, and the quality of the material is fantastic!

If you haven’t discovered this resource yet, you are missing out!

Other articles you may enjoy

If you enjoyed this article, you may also enjoy these:

Disclosure

If you make a purchase using links found in this article, I may make a commission. It doesn’t cost you a penny more, but it does help to support future articles like this.

Monday, September 24, 2012

What’s Hot in Photography & Photo Editing Books – Part II

The surprise success of my article last week entitled “What’s Hot in Photography & Photo Editing Books”, has inspired me to do a part II to cover the remainder of the huge stack of books that has piled up in my studio.

I haven’t had a chance to read these cover to cover, so my feedback is based on partial reads and skimming these books. Put another way, if a friend asked me “should I get this book?”, then what I’d tell them is what I’ve said below for each book.

The Digital Negative: Raw Image Processing in Lightroom, Camera Raw, and Photoshop by Jeff Schewe (a fellow NEC featured photographer is a book that when I first saw it I thought “oh crap, not another lame book on using RAW”. After all, using Lightroom’s develop module or Adobe Camera RAW isn’t rocket science, so it’s hardly worth an entire book of its own. However, Jeff does a great job of diving deeper than any resource I’ve seen. In fact, he dives so deep I’d go so far as to say that this book is NOT for photographers, but rather computer geeks (especially programmers & engineers) who want more detail behind the "what & why” behind a lot of Adobe Camera Raw/Lightroom features.

In the end I really liked what I saw in this book, so I will be taking the time to read it from cover to cover. I give this a easy Highly Recommended for Geeks ONLY. Warning: Non-Geeks are likely to have their heads explode if they try reading this, so don’t say you haven’t been warned!

Advanced Underwater Photography: Techniques for Digital Photographers by Larry Gates is a good book for those who not only want to know more about how to use their camera underwater, but also want to know more about underwater lighting so they can capture images that don’t suck. Recommended for those looking to improve their underwater lighting skills.

Nikon Speedlight Handbook by Stephanie Zettl is NOT the Nikon equivalent of Speedliter's Handbook by Syl Arena, nor is it as good as On-Camera Flash Techniques. However, those who find Joe McNally’s books like Sketching Light to be inspirational, but not necessarily very educational will probably like this book. It’s not bad and has lots of useful info for Nikon shooters, so if you want to learn more about your flash and some common modifiers then it’s probably worth picking this one up. Recommended for lovers of On-Camera Flash Techniques who want more depth on Nikon specific gear than Neil or Joe McNally offer.

Master Posing Guide for Portrait Photographers: A Complete Guide to Posing Singles, Couples, and Groups by J.D. Wacker is a bit more of a primer / handbook than a guide because it’s pretty short on details in most of its chapters. However, for those who are struggling with poses and looking to get some tips, it’s a decent book.

The author appears to be a pretty solid high school seniors portrait photographer from what I see in the sample images in the book, so if you are doing that type of work this book will be especially helpful. Recommended for portrait photographers who are just getting started.

50 Lighting Setups for Portrait Photographers: Easy-to-Follow Lighting Designs and Diagrams, Vol. 2 by Steven H. Begleiter didn’t impress me much. If you think “wow, that’s awesome light” from what you see on the cover, then perhaps this book might be for you. However, as I thumbed through the book I saw lots of lighting that made me think “hum, I don’t care for that much.”


Flash Techniques for Location Portraiture: Single and Multiple-Flash Lighting Techniques by Alyn Stafford reminded me of 50 Lighting Setups for Portrait Photographers: Easy-to-Follow Lighting Designs and Diagrams, Vol. 2 in the sense that it also had lots of lighting setups that reminded me of the local Sears Portrait photographer setups. This author did a good job of describing his work and what he uses to get the shot, but the actual shots made me often think – “uh, no thanks.”

Doug Box's Available Light Photography: Techniques for Digital Photographers starts off with a gorgeous woman on the front with great lighting, and when you thumb through it you quickly see that this photographer knows how to control light to make great perfect exposures with rich color. Unfortunately this book is not as deep on education as it is on discussions of his successful shots (much like a McNally book), but it’s still seems to be an interesting read for those looking to improve their available light skills AND who have little experience with reflectors, diffusers and black flats.

Painting with Light: Lighting & Photoshop Techniques for Photographers by Eric Curry reminded me of the great videos by Dave Black on KelbyTraining.com. I first saw Eric’s work in Rangefinder magazine and was mesmerized, so I was jazzed when the publisher sent me a copy of this book.

What you find inside this book is a collection of great images with masterful lighting, and seemingly useful instructions on how to get similar shots yourself. Complete breakdowns and details are included. Personally, I can’t wait to read this book more carefully so I’m tossing it in the highly recommended category.

500 Poses for Photographing Children: A Visual Sourcebook for Digital Portrait Photographers by Michelle Perkins is a pure picture book with zero useful education in it. It’s really design for those who are looking for inspiration by example and it includes about 350 or so great photos, so my hats off to Michelle for some solid work. However, mixed in with the good is some serious suckage as well, so it’s tough for me to recommend this book. Instead, I have to say that if you are fresh out of ideas and want to see photos that are pretty decent, then perhaps this is book for you. However, with the ability to see great photos on the Internet and Pintrest so easily, I’m struggling to see why anyone would really need this book? Perhaps to show it to clients who aren’t computer savvy?

Christopher Grey's Posing, Composition, and Cropping: Master Techniques for Digital Portrait Photographers is actually one of the few books in this lineup that focuses more heavily on education than self promotion/bragging. It certainly isn’t the in-depth style of The Photographer's Eye: Composition and Design for Better Digital Photos by Michael Freeman, but it doesn’t bore me to tears like Freeman’s book either. Instead, I’d call this a decent primary for those who just want the author to get to the point and show me some examples. As a result, I actually give this a recommended for beginners.

The Best of Senior Portrait Photography: Techniques and Images for Digital Photographers by Bill Hurter contains a collection of excellent Senior Portrait shots that I think Seniors would love to have taken of themselves. As a result, this book could be a good selling tool for clients to say “thumb through here and tell me what you want”. Of course, where the book fails is that there is not much depth in explaining how to get the shots, but I still give this book a recommendation for adult portrait photographers (not just senior portraits).

Video Nation: A DIY guide to planning, shooting, and sharing great video from USA Today's Talking Tech host by Jefferson Graham just turns me off from the beginning because the book fails to grab me with the cover and early chapters. That said, there seems to be a wealth of information in here – especially for those on a budget who will be filming with consumer point and shoots and iPhones. It’s not for me, but it seemed to do okay on Amazon so it might not be that bad.

Bill Hurter's Small Flash Photography: Techniques for Professional Digital Photographers contains gorgeous images with brilliant lighting, so for some that may be enough to warrant the cost of the book (especially if you like Joe McNally books). It also goes into pretty decent depth on the tools of the trade, but it’s no substitute for the brilliant book On-Camera Flash Techniques. Overall though I’d give this a recommend as a good book for showing a lot of the light modifiers and great results possible with small flashes.

Flash and Ambient Lighting for Digital Wedding Photography: Creating Memorable Images in Challenging Environments by Mike Chen is a decent book in a very crowded book category, but this book has some nice illustrations and discussions that may help things click for some readers. It didn’t make my recommended list, but only because I was trying to be conservative in my choices. It actually seems to be a decent book worth checking out the next time you are at the library or bookstore.

LED Lighting: Professional Techniques for Digital Photographers by Kirk Tuck is actually a new and unique genre of lighting book that I found very exciting. LED lights are improving, but keeping up on all of the products out there is mind numbing! As a result, I enjoy how this author takes the time to show what’s the industry tricks of the trade and common products, as well as showing a vast array of alternatives. I will definitely read this cover to cover, so I can easily recommend it.

500 Poses for Photographing High School Seniors: A Visual Sourcebook for Digital Portrait Photographers is like deva vu for those who have seen 500 Poses for Photographing Children: A Visual Sourcebook for Digital Portrait Photographers by Michelle Perkins. Sure the age group has changed, but it’s really just a dump of a bunch of great images to help provide inspiration for those stuck in a rut (or who wish to share ideas with clients). There’s no education in the book, so you are on your own in getting the shot – but the inspiration could be worth the price alone for some people. Personally I think a Bing image search would be just as effective though.

Landscape Photography: From Snapshots to Great Shots by Rob Sheppard is well written and follows the great formula of the “from snapshots to great shots” books. Unfortunately though I found the images included in the book to be very unimpressive and uninspiring which made me question the credibility of the author. In fact, this book was one that I was trying to read from cover to cover, but gave up after three chapters because I just couldn’t get into the images being presented to me in the book. Rob Sheppard has great credentials, but just as I thought when I saw him speaking at the Nik Summit in San Diego, he seems to be behind the times and lacking the image quality of modern day top photographers.  

Other Articles You May Enjoy

Disclosure

If you make a purchase using links found in this article, I may make a commission. These books were randomly sent to me to me by the respective publishers. As mentioned earlier, there aren’t enough hours in my days to read all of these so this is simply a high level overview of my impressions of these books after casual “bookstore style” thumbing through these books. Recommended books are the ones I’d probably buy if I were at the bookstore, and they are ones I hope to read cover to cover.