I’m writing today because I had a need for an affordable ring light for use with my iPhone and I wanted to tell you what I thought about it.
In my world these days it’s becoming increasingly rare for me to need to use my DSLR, so like a lot of people I frequently use my phone camera for internal use only product shots and education videos. That said, for amazing as modern smartphones are for creating phenomenally good HDR images and pulling off amazing results in low light, sometimes you just need more light to get your desired results.
In my case, I found myself wanting something that would allow me to interact and record a tutorial video or review of something I was interacting with, but I still wanted to see my cell phone while I was doing it. I also wanted the light to be very good – you know, like pretty much every YouTuber these days!
When I started looking for options, the prices were more than I wanted and some of the purchases I made from Amazon were pretty bad. As a result, I reached out to my friends at B&H to leverage their expertise to find something that worked well but also didn’t break the bank.
My key criteria were:
Affordable
Diffused light
Ability to control the temp
Big enough to use for products as well as face lighting
Ability to see my phone screen while recording, so this meant a phone mount as well as a pivot arm design.
This shot was taken using JPEG only (doh) and mixed light (ambient light was tungsten with sources in front and behind the subject and edited heavily in Lightroom to make it suck less:
Kai was struggling with the brightness, so I cranked it down low enough for him to tolerate it. If it wasn’t a quick and dirty shot (and a bit of luck with the dog), I probably would have taken a bit more time to make it much better. That said, that is what I like about this light – it allows me to do a lot better than my cell phone with very little effort. It makes experimentation much easier than traditional lighting methods thanks to the lightweight portable stand and battery powered light with adjustable temp and brightness!
A Closer Look
Here’s a closer look at the ring light itself:
Excellent diffusion panel on the front
Plenty of hot shoe mounting points for the camera adapter
Notice the inside and outside hot shoes all over things thing. It’s also shown with the batteries installed (included on some bundles), but it also includes the ability to just plug it into an outlet which saves weight.
Camera adapter could easily fit my iPhone 13 Pro with extra space left over
The camera adapter can be placed in any of the hot shoe mounts, but I elected to put it in the 6 O’clock spot. One side is spring loaded, so it supports many phones. My unit had a pretty strong spring, so I could only get it to open to just under 3 inches in width.
The hot shoe phone adapter could easily be moved to where I needed it
With this setup, I could peek through and interact with the lens on the table while monitoring the video Notice how the captured content has drifted off the table!
Remember, my goal here was to test the ability to record where I was both interacting with and viewing the video of with an object on a table using my iPhone. I hate video editing, so I’ll spare you that boredom and just show a shot that I did with the iPhone 13 Pro and enhanced with Topaz AI:
iPhone 13 Pro static image taken using the ring light configured as shown previously
As a lighting tool, it did great. Where it failed miserably (as you can see if you look carefully in the prior image is that the ring light would drift and often overshoot the table. This seems to be due to the lack of any sort of teeth or serrations on the adjustment knob, so I really grew frustrated at this problem. While it might be fixed by adding a rubber washer or something, know that going in won’t “just work” for this scenario, It’s fine when upright vs this extreme angle with the weight of the camera on it, so if your goal is to do a podcast or more practical angles, then it will be great.
Testing in Complete Darkness
I wanted to test with a real camera in a normal scenario where the camera isn’t hanging from the hot shoe. For that scenario, it did great.
Light makes up for the lack of shutter speed, so I decided to push things to the limit, and this time using RAW, to see what I could do. Here were my light settings:
61% brightness in total darkness at 5400k
Even though the room was lit (by the ring light) for the shot, it was done at night with no ambient light beyond the Christmas tree for this shot.
For fun, I decided to use the Passport ColorChecker to make sure the foreground color was as accurate as I could get it, but for those who are new to the complexities of lighting – that only impacts the subject (Kai) and has zero impact on the ambient light on the background.
Canon 1DX Mark II f/2.8 @ 70mm for 1/10 sec at ISO 100 from RAW
Here’s a behind the scenes look but I didn’t make any effort to get accurate colors or light for this shot:
The camera was on its own tripod for this series and just shooting through
Conclusion
For the price of about 1 to 2 tanks of gas these days (at the time this was written), I think this ring light offers a lot of bang for the buck. Its ease of use, portability and overall quality of light were way more than I was expecting.
Will it keep up with my studio lighting? No, but it’s great for on the go video that is all to common these days with social media influencers who need professional looking light when on the camera as well as when interacting with products.
CLICK HERE to learn more or buy today. Don’t forget that you can apply for the Payboo card and get special financing to make it easier to purchase in these difficult times.
If you make a purchase using links found in this article, I may make a commission. It doesn’t cost you a penny more, but it does help to support future articles like this.
NOTE: This site requires cookies and uses affiliate linking to sites that use cookies.
If you enjoyed this article, please support future articles like this by making a donation or saving money by using my discount coupon codes. Either way, your support is greatly appreciated!
This blog is intended for freelance writing and sharing of opinions and is not a representative of any of the companies whose links are provided on this site.
The opinions provided are of Ron Martinsen alone and do not reflect the view of any other entity
Sometimes a product is so good that people who use it become instant fans and they are eager to tell everyone they know about it. Great examples include game consoles, the iPhone, Netflix, etc..
As you’ve probably noticed, I’m not reviewing much lately because my personal life has been dedicated to my family and my work life has been quite busy. However, when I tried this product out, I loved it so much that I knew it was time to get another article out as quickly as possible.
I think what won me over so quickly on this one was that my friends at B&H sent me a review unit that included a great support stand (which consists of several parts sold separately) and a battery pack with charger that makes this entire unit wireless. What you see in the picture is all you need and you can take it anywhere, set it down, turn it on, and voila you’ve got great light. What’s more, you can adjust the light temperature and brightness to give you subtle lighting improvements that are hardly noticeable or you can crank it up if you really want to bring your eye color out to the max!
Examples
My bedroom chair is one of my favorite places to have video conference calls when working from home or talking with friends, but I almost never turn my camera on because the light is just blah as shown here:
To be fair, this was actually a rare sunny day in the Pacific Northwest and the light is much better than normal but the challenge is the back lighting and the harsh side lighting. If I was taking a professional photo I’d use an reflector and be in good shape, but this is live video so that isn’t especially practical. However, with my Raya 9” light, I can give new life to my Herman Munster-like dark inset eyes as shown here:
Yes, I may have overdone it a bit with the brightness and the warmth, but you get the idea. I now have nice catchlights that bring out the color of my eyes better and improve the experience quite a bit.
Now, I know some of you are probably saying – heck, that before is way better than the lighting I have at my office, I’d take that any day so I don’t see the value here. Ok, that’s fair, so how about a more common problem of overhead light that casts shadows over your face like this:
versus something more evenly lit across the face like this?
Now, imagine I get that light up higher (to address the camera left eye shadow) and possibly throw a handkerchief or other softening material over the light to make it light without the harsh highlights? You get the idea, that it can make a big difference without much effort but if you do put some effort into it then it can be as professional as you want it to look – for not that much expense.
Even outdoors, where light isn’t splashing all over shiny countertops and stainless refrigerator doors I was able to take an acceptable lighting scenario like this:
into a subtle, but improved lighting on my eyes with catchlights like this:
This sunny day sitting under the deck umbrella just got a whole lot better with this portable light – without any wires cluttering up the space. I didn’t need to worry about wires that the dog would chew on or trip on to bring my light down at the worst possible time. It just worked as easy as it was to bring my phone (in this case) or laptop to a outdoor environment to enjoy a online meeting with friends.
How it works
So the “trick” here is two big batteries that look like what some of us might recognize from camcorders in the 90’s. They are those two big rectangles in the middle of the light that hold a lot of power but also add weight to help stabilize the light so that it’s not falling over with the lightest breeze outdoors.
The two orange knobs control light temperature and brightness. If you aren’t going to be moving it around then you can skip the batteries and go for the power cord that comes with the light and never have to worry about charging anything, but for me the batteries make it so mobile that I want to use it everywhere around my house.
Here’s everything you need based on the picture above:
Oh, did you notice something cool in that title? Yes, the base is a big magnet so if you have something metal to set it on then it’s rock solid. I stuck it on my refrigerator, but my wife didn’t like that too much (but hey, it worked!).
If you just want to mount it to your desk and forget it, then ignore all of that above and just get this and use the power cord that comes with the light:
Yeah, but how does it work with video?
I hate video editing, so here’s a video I did using just my iPhone and the Raya light outdoors on my deck. Please forgive the poor reduction in video quality and horrible color after YouTube’s terrible video compression when viewing on a PC, but it’s less terrible on iPhones:
If you are a content-creator, you might be interested in the full Livestreaming Kit.
Why should you care what I think?
Many of you who have followed this blog may not realize that my primary job has always been in high tech at a company you’ve definitely heard of. With 6 years of experience in building cutting edge video conferencing solutions for the biggest companies on the planet, I know a thing or two about the challenges many users face when collaborating with others over video.
Typically, my photography life outside of work doesn’t directly cross paths with my day job, but when B&H contacted me to say they had a cool personal light for photography and video conferencing, I couldn’t pass up the chance to check it out. What I didn’t expect is that it would be a wireless solution that would allow me to have great light wherever I landed with my laptop or even phone to have a meeting!
I am not allowed to endorse items for work, so I can’t mention who I work for or what I work on (but it’s easy to figure out). As such, this is my personal opinion formed outside of work using personal products for personal meetings with friends and relatives, but after this is done I do plan to show my friends at work and use it to enhance my personal meeting experiences.
If you make a purchase using links found in this article, I may make a commission. It doesn’t cost you a penny more, but it does help to support future articles like this. I was not paid to do this review, but I was allowed to keep my review unit.
NOTE: This site requires cookies and uses affiliate linking to sites that use cookies.
If you enjoyed this article, please support future articles like this by making a donation or saving money by using my discount coupon codes. Either way, your support is greatly appreciated!
This blog is intended for freelance writing and sharing of opinions and is not a representative of any of the companies whose links are provided on this site.
The opinions provided are of Ron Martinsen alone and do not reflect the view of any other entity
I've been using this product since it first came out and still to this date there's nothing I like more. Check out the free demo for Photoshop and Lightroom to see for yourself - it really makes skin enhancements a simple one minute step in your photo editing workflow.
If you make a purchase using links found in this article, I may make a commission. It doesn’t cost you a penny more, but it does help to support future articles like this.
NOTE: This site requires cookies and uses affiliate linking to sites that use cookies.
If you enjoyed this article, please support future articles like this by making a donation or saving money by using my discount coupon codes. Either way, your support is greatly appreciated!
This blog is intended for freelance writing and sharing of opinions and is not a representative of any of the companies whose links are provided on this site.
The opinions provided are of Ron Martinsen alone and do not reflect the view of any other entity
\We’ve all seen the ads that show incredible resizing that seems to recover tiny photos into something better than before, but honestly I don’t believe ads like that. The skeptic in me sees source images that appear to be blurred with heavily sharpened after images which don’t tell the tale of what really happened. It makes no sense to me how an image could get better on upsizing, but I do see how upsizing could improve to get closer to the original source image by with improved algorithms that understand what data is lost on downsizing.
To help separate fact from fiction, I decided to take an engineering approach to do an analysis of how the resizing tools I have at my disposal really perform. To do this I started with an original image at full size, then created scaled down versions at 50 percent and 25 percent in Photoshop. I then took these smaller files and upsized them at 2x and 4x to see how they compared with their original file to better understand what was lost.
I took the full-size original JPEG’s and downsized them in Photoshop using the Save for Web (Legacy) feature with the settings shown in the above screen shot with the percentage set to 50% and 25% using Bicubic Sharpener. Its been my experience that this technique works best for downsizing in Photoshop, but your results might vary if you chose a different technique. To avoid hard to interpret data, I intentionally avoided using Photoshop and its “auto” option as then I’d end up with Forrest Gump downsizing.
I then passed the 25 percent version into the software below for a 4x upsizing and the 50 percent version for a 2x upsizing and compared these results against the original. If you have a better way, then stop reading and go for it. The remainder of this article is for those who agree with this approach and are curious about the results / my findings.
A Little Background Info
I’ve been writing about Topaz Labs products since July 2009 and ON1 (then onOne) since PhotoTools 1.0 in 2008. As a side note, onOne acquired Genuine Fractals in 2005 for what many still think is the best resizing software ever built.
I’ve also been using Photoshop since version 6.0 in 2000, so I know these products well and have relied on them for quite some time. That said, advancements in resizing don’t happen very often so my last article on the subject was in 2013 when onOne Perfect Resize 7.5 came out. In that article I also compared Lightroom and Alien Skin BlowUp, but I’ve long abandoned both for resizing when making prints.
I will say that Photoshop CC 2018 drastically improved its resizing, but I didn’t write about it since I still thought that ON1 still had the best product on the market. However, curiosity did get the better of me so I decided to do a software comparison for the first time in years to satisfy my need to know which is best.
This product is optimized for batch processing of high quality resizing, so I really appreciated the clean UX and ability to customize each line item separately vs a batch where all must be done the same exact way. You can also multi-select to change some or all of the items in the batch to the same settings.
Simply put, this is how every UX should be for batch processing – I LOVE IT!
My biggest gripe is that the preview rendering is painfully slow so I turn it off normally. However, it is nice if you want an idea of what kind of results you are going to get in advance on a particular region of your image.
After you’ve set up your batch processing, go to bed or go watch a movie – its going to be busy for a while!
Yeah, Gigapixel AI does a great job but at a huge cost – its painfully slow. Granted my Windows photo editing system isn’t a $53,799+ USD Apple Mac Pro (at the time of this writing) which certainly will be much faster, but my system still performs better than most i5 based laptops on the market today. It also enjoys 32 GB of RAM and dual M.2 SSD’s, so this is the first product I’ve used on that really made me wait.
When I first started doing this test I was using Gigapixel AI 4.4.2, but then I upgraded and re-ran my tests using 4.7.1. I noticed a 62% increase in performance of version 4.7.1 on the 2x upsizing of the 50 percent files and a 46% increase in the 4x upsizing of the 25 percent files. As a result, I can definitely say that Gigapixel AI 4.x users should upgrade to 4.7.1 or later for a significant increase in performance. The Canon 5Ds file sizes did increase to 20% larger for the 25 percent file and 7% for the 50 percent file when using 4.7.1 vs 4.4.2, but the quality of the 50 percent version seemed identical. The 25 percent version seemed slightly better with the 4..4.2 version, but only when pixel peeping at 100%.and not enough for me to give up the performance improvement of the newer version.
My conclusion is you should definitely upgrade to the latest version as the time savings are significant without a measurable Impact in quality. To see for yourself, view the 4.4.2 version of the files in the gallery against the original and the scale-2.00x & scale-4.00x versions created in 4.7.1.
While it was formerly a separate product, ON1 has incorporated resize as a feature in its standalone UX for quite some time. You can also access it directly in Photoshop as a nicely integrated feature via File | Automate | ON1 Resize 2020 which is my preferred way to use it. The UX is simple and they have some nice presets for resize.
My favorite feature is its gallery wrap feature which is a must have if you do that type of work, but sadly its not even an option in Topaz Labs Gigapixel AI.
Performance wise its pretty close to on par with the performance of Photoshop itself, so for the past decade its been my go to solution for resizing images prior to printing.
Overall Resize Performance
Times shown for Gigapixel are in minutes and seconds All others were 0 minutes and the seconds value shown after the first semicolon
As I would have suspected, Photoshop is the fastest followed by ON1. That said, I think if you were working natively in ON1 as your end to end workflow then ON1 might be the fastest, or at least comparable to Photoshop.
Yes, Topaz Gigapixel is painfully slow despite making significant improvements in the current release. However, its batch processing support is excellent – by far the best of the pack – so you could realistically set up a bunch of files to convert and kick off the job before you go to bed and all files would be resized by the morning. Photoshop and ON1 don’t have the luxury if your target destination is JPEG and you want to resize by percentage.
Overall File Size Changes
This is stats for nerds who want to see how big the files are after the resize compared to the original. The Original column are the sizes of the the source file then the sizes saved to disk after being downsized in Photoshop.
All percentages shown are relative size to the original for each section. From a file size standpoint, ON1 gets the closest to the original size which is what I’d consider the best case scenario. Gigapixel has the most data, but that might be able to get reclaimed by re-saving the file in Photoshop as JPEG compression will reduce file sizes on each save.
Image Quality
This section briefly discusses my findings for 2x and 4x resizes using a series of 5 test images.
This image taken with a 50.6 megapixel camera presents a huge challenge thanks to the gradient in the background as well as the details in the jacket, the blown out white spot on the shirt and the detail in the hair and iris of the blue eyes.
This was probably the worst performance for Photoshop of all of the tests done. To be fair, I didn’t try every interpolation method it offers so Photoshop performance could probably be improved with a more patient comparison of all of the methods it offers. That said, Gigapixel is on par with the original even when doing a 4x upsizing.
2x Resize
Gigapixel was clearly the best, but in this case Photoshop and ON1 were about the same and did an excellent job. Neither was as good as Gigapixel, but close enough that I wouldn’t leave Photoshop to use Gigapixel unless my target output was a large print.
Focus Bracket Flower
This image was made from a focus stack made with the Fujifilm GFX 50s at f/11 @ 64mm for 1/100 sec at ISO 100 using fifty-eight 1 step frames! The pollen detail and shadow details are impressive so its a great image to see how much gets lost and restored after resizing.
Like the 5Ds image, I thought the Gigapixel 4x upsize was mistaken for the 2x upsize because the quality was so good that it nearly matched the original. I had memories of Blade Runner when doing this comparison, so it made me realize the some things are worth the wait if the best details are necessary.
Photoshop didn’t do very well and ON1 disappointed me quite a bit here.
2x Resize
Gigapixel was amazing with the upsize – its additional sharpening made it look better than the original to me! Photoshop came in last of the pack, but not bad by any means.
Landscape
Fujifilm GFX 50s using GF32-64mm F4 LM WR lens f/10 sec at f/5.6, ISO 100, 64mm
Probably the weakest image of the bunch, I included this one due to the bokeh in the background and all of the details in the moss. I was also curious to see what would happen to the blown highlights and crushed blacks after resizing as those are typically the places that resizing does a horrible job.
This proved to be the toughest test for ON1 as it was definitely worse than Photoshop. For a moment, I thought I had accidentally run Topaz Labs Simplify on ON1 as all the detail left the bark and green branch as shown above. Even Photoshop retained more detail, so this was a huge surprise for me.
2x Resize
This were much better here where Gigapixel was the best, but ON1 still had an advantage over Photoshop.
Studio
Fujifilm GFX 50s using GF32-64mm F4 LM WR lens 1/125 sec at f/10, ISO 100, 64mm
This image has the advantage of a solid white background so in theory there shouldn’t be new background artifacts introduced, but it has the challenge of a blue eye and a suit and tie with a challenging pattern.
ON1 had the worst performance on the eye by far, but the rest of the image was good. Next up was Photoshop which did a decent job, but the image above is misleading until you click it to view it at full size as the details in the eyelashes and iris are clearly better in the Gigapixel image.
One disappointing discovery is that Gigapixel did have a flaw on one spot of the jacket, but everything else looked good. This was caused by me turning on Face Refinement for this file only AND it only happened on the 4x upsizing – not the 2x. When I ran it again with Face Refinement turned OFF the problem didn’t happen. Since there is a workaround and this is a pattern that was easily corrected in Photoshop using content aware healing, I didn’t consider it a huge issue. However, it is something to look out for when resizing when using the Face Refinement feature.
2x Resize
All were excellent, but Gigapixel had a little extra sharpening that made it better than the original. Not an obnoxious amount, but enough to make me just say wow. Next up was ON1 which had an almost perfect match to the original but was just a tiny bit softer on the eye lashes. Photoshop did a good job but it was definitely the worst of the bunch.
The Sony a7R III has a high quality sensor but the lowest megapixels in this lineup with only 24.2 mp. This is offset by is phenomenal dynamic range and arguably the sharpest lens in this lineup, The bookshelf shot is my long-standing test of dynamic range and performance win the shadows and specular highlights. There’s a little distortion on the left side of the image caused by my sensor not being 100% perpendicular to the bookshelf, but its still a good source image for resizing thanks to the texture details, highlights on the books, patterns in the spine of the blue strip poker book and the wood in the shadows.
Once again, Photoshop was stronger than ON1 because its text anti-aliasing algorithm was much stronger (which makes sense given their history in typography). However, Gigapixel really blew me away in how well it brought not only the text back but the details of the pages of the spiral bound book as shown above.
2x Resize
Once again, standard results – Gigapixel made the original look soft, ON1 did a good job and Photoshop was respectable but could benefit from additional sharpening.
Overall Image Quality Results
To help quantify my findings I created this report card. I gave a score of 10 to images that were hard to distinguish from the original (or in some cases better than the original), a 9 to an image that was excellent with only a minor softness that could easily be fixed with sharpening. 8 is pretty close to 9 but again, softer – but most likely corrected with unsharp mask. Anything below 8 is what I’d consider unacceptable results that I would only use for scenarios I don’t care about (e.g., Facebook posts).
I did use the Face Refinement feature for the Gigapixel Studio shot, but I included a version with it turned off to address the only major artifact I found in all of my testing. Since this was an easy workaround, and both images with and without were excellent, I didn’t deduct points for the final result. I could have arguably given it a 7 with face refinement on, but it was such an easy one second fix with content aware patch or healing (and there was a workaround to eliminate it) I focused on the overall result which was easily the best in class.
Overall Photoshop did a good job and for the upsizing I chose the Auto interpolation option as that’s how I typically use it in real life. With a little effort and sharpening some of those numbers could probably get a 1 point boost, but I got tired of resizing images as I quickly discovered what the best product was.
See for yourself
CLICK HERE to download and pixel peep the images yourself. You can review the images for as long as your browser is open and on this review, but you should delete all downloaded images after navigating away from this article.
ALL images are copyright Ron Martinsen – ALL RIGHTS RESERVED. You may not print, edit, upload, relink, modify or otherwise use any of the images in this article or in the gallery without an ink on paper signed contract with Ron Martinsen.
My recommendation is to use Lightroom to pixel peep as I’ve done here in this video:
Conclusion
If your objective is the best quality and you aren’t doing gallery wraps, then Topaz Gigapixel AI is without question the product you want to use. Yes, its painfully slow, but its results are worth the wait.
No, I don’t think its upsizing isn’t as amazing as the ads might suggest, it is the real deal and worth at least using the trial version to see for yourself.
ON1 Photo RAW 2020 has many reasons besides resize to own it, and it is a good overall alternative for those who don’t wish to own Adobe products. As a result, if you’ve got it then I think for most scenarios its good enough – and its fast. It also has a wonderful gallery wrap feature, so I’ll probably continue to use it for its speed.
Not every resize needs to be pixel peeper perfect, so in those cases (which is most common for me), I’ll probably continue to use Photoshop (or Lightroom Export resizing). However, this reminds me that when quality matters that its worth the time for me to collect my images and send them over to Topaz Gigapixel before I go to bed.
If you make a purchase using links found in this article, I may make a commission. It doesn’t cost you a penny more, but it does help to support future articles like this.
NOTE: This site requires cookies and uses affiliate linking to sites that use cookies.
If you enjoyed this article, please support future articles like this by making a donation or saving money by using my discount coupon codes. Either way, your support is greatly appreciated!
This blog is intended for freelance writing and sharing of opinions and is not a representative of any of the companies whose links are provided on this site.
The opinions provided are of Ron Martinsen alone and do not reflect the view of any other entity
I’ve been following Skylum Software since its MacPhun days and along the way they have made many products that I’d put into the camp of “good, but still not there yet”. Luminar is definitely one of those products that has a lot of great photo editing features, but it’s always lacked my beloved U-Point controls in the Nik Collection (now by DxO). This is important because often times you want to make local edits to specific features of your photo, but not globally across the entire photo. While Photoshop and Luminar offer masks to help with this, they are cumbersome to create especially along the edges of the mask against complex subjects like tree branches with leaves or hair.
Luminar 4 addresses this with what it is calling Artificial Intelligence masking and it nothing demonstrates this better than its new sky replacement feature. While this isn’t far from the only new feature in Luminar 4, it’s the one that is worth talking about first as this really is breakthrough technology that makes me excited for Luminar now and in the future.
Here’s an example of a photo of a beautiful valley in Switzerland that I took this last October. This unedited version isn’t bad, but it’s a little hazy and lacks the impact of what it felt like when I saw it in real life:
To address this, I used the AI Enhance feature with an auto generated luminosity mask with the AI Accent light filter to enhance the details and overall color of the image. I then used the Color and Details Enhancer filters to make the image feel a bit more crisp. Lastly, I used the Landscape Enhancer to Dehaze and boost the foliage a bit. This set me up for what I think is one of the biggest improvements – the AI Sky Replacement – where I used the Blue Sky 4 preset for a subtle but believable improvement:
In less than a minute I got improvements that were good enough for me to call this one done. However, I like to tinker so I kept experimenting with skies. My wife was watching me do this and she encouraged me to use the Blue Sky 6 preset for leading lines that pull your eyes into the mountains:
Changes like these are subjective so I polled my Facebook friends and most found Blue Sky 6 to be the best choice, while some aligned with me found Blue Sky 4 to be more believable.
In retrospect, I think both are believable if you don’t know of the original image. What’s more, it’s feasible for this scene to have clouds of this nature, so I don’t consider this to be a change that misrepresents the area – it just misrepresents my luck with the clouds this day.
What’s more, my sensor was as dirty as hell due to changing lenses in the wind so I lucked out and got about a hundred dust spots in the sky removed when I replaced the sky – without any effort on my part. I’ve seen Luminar 4 fans getting the same benefit by using sky replacement on power lines and other distractions in the sky. This s a huge time saver, and I find it quite believable – especially with the wealth of adjustments you can make to this filter:
So yes, I can easily say that this feature is a hit and delivers a huge value in your digital workflow making this a no-brainer investment or upgrade if you do outdoor photography.
Yeah, but what about…
Using your own sky photos? Yes, you can.
Complex backgrounds with only one click? Yep, no problem as shown here:
Now this horribly bad looking photo isn’t believable as we’ve put a bright blue sky into an overcast day, so there’s still work to do. However, I wanted to illustrate the power of the AI masking (which is more easily appreciated with darker sky colors) so I had to include it.
What about people?
Here’s a photo I took in 2015 for my RX100 IV review that I never bothered to edit because it would have been too much work to mask around Kai’s hair. With the AI Face Enhancer, AI Sky Replacement and a few other minor adjustments I got a much improved image with about a minute of editing:
Take note that I’m using the Blue Sky 4 preset in three images in this article, but the sky is different for all of them – this because this isn’t a simple image substitution but an AI application of the sky that keeps the horizon in mind. In this case it did miss a spot in the bottom left corner, so it’s not quite perfect – but it’s still pretty damn good. As I show in my video below, problems like this sometimes are easily solved by adjusting the horizon in this filter. However, this one can’t be corrected this way.
In this case, I like how the leading lines of the clouds all draw you into Kais’ face. However, you have to be careful about default processing choices because it’s easy to get dark skies like this. To address this problem be sure to experiment with the Sky Exposure setting as well as making sure that AI Sky Enhancer is 0 in the AI Enhance Essential filter.
I also use the AI Face Enhancer remove skin flaws, enhanced lips & whitened teeth (both exaggerated for effect), pulled his jaw line in and more without me doing any face masks or object mapping. It just works with no hassle and that’s huge!
Video Tutorial
To demonstrate a lot of concepts in Luminar 4, I chose this image that I thought would be the ultimate test:
If you have 10 minutes to spare, you can see how I edited this image using Luminar 4:
Conclusion
While I do think the Windows version is unacceptably slow at times on my desktop computer, it’s still usable. I’m also still a fan of Lightroom, so I don’t want Luminar to be my digital asset manager so I find having to open photos using Edit Single Image and close them by right click remove to be unnecessarily cumbersome.
With these gripes aside, this is an impressive piece of software that does appear to be doing some advanced image analysis with AI above and beyond anything I’ve used to date. This alone makes it worth a look to help speed up your digital workflow. As such, I can highly recommend this product and I look forward to great improvements to come in the future.
If you make a purchase using links found in this article, I may make a commission. It doesn’t cost you a penny more, but it does help to support future articles like this.
NOTE: This site requires cookies and uses affiliate linking to sites that use cookies.
If you enjoyed this article, please support future articles like this by making a donation or saving money by using my discount coupon codes. Either way, your support is greatly appreciated!
This blog is intended for freelance writing and sharing of opinions and is not a representative of any of the companies whose links are provided on this site.
The opinions provided are of Ron Martinsen alone and do not reflect the view of any other entity

 Angler Bi-Color Ring Light Kit with Light Stand (18")


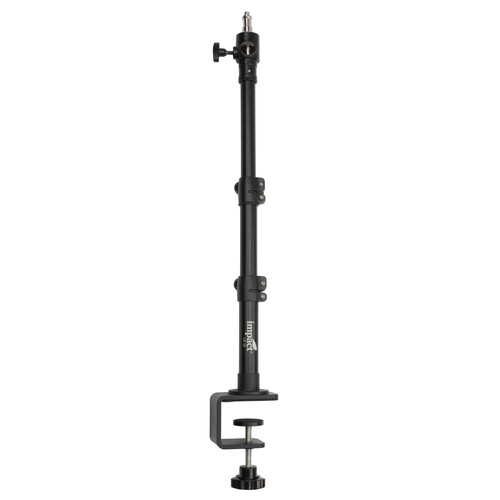
 I used a Impact C-Stand along with a grip head and extension arm