Sometimes a product is so good that people who use it become instant fans and they are eager to tell everyone they know about it. Great examples include game consoles, the iPhone, Netflix, etc..
As you’ve probably noticed, I’m not reviewing much lately because my personal life has been dedicated to my family and my work life has been quite busy. However, when I tried this product out, I loved it so much that I knew it was time to get another article out as quickly as possible.
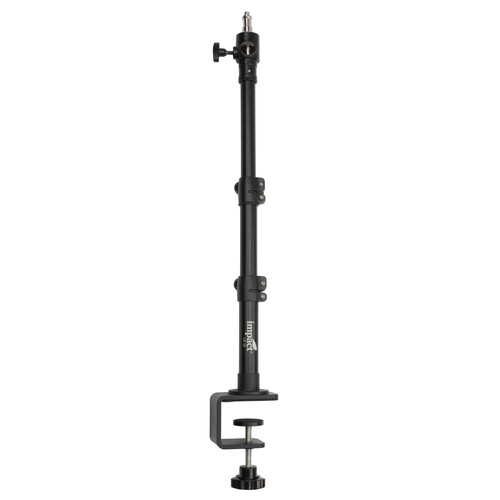
I think what won me over so quickly on this one was that my friends at B&H sent me a review unit that included a great support stand (which consists of several parts sold separately) and a battery pack with charger that makes this entire unit wireless. What you see in the picture is all you need and you can take it anywhere, set it down, turn it on, and voila you’ve got great light. What’s more, you can adjust the light temperature and brightness to give you subtle lighting improvements that are hardly noticeable or you can crank it up if you really want to bring your eye color out to the max!
Examples
My bedroom chair is one of my favorite places to have video conference calls when working from home or talking with friends, but I almost never turn my camera on because the light is just blah as shown here:
To be fair, this was actually a rare sunny day in the Pacific Northwest and the light is much better than normal but the challenge is the back lighting and the harsh side lighting. If I was taking a professional photo I’d use an reflector and be in good shape, but this is live video so that isn’t especially practical. However, with my Raya 9” light, I can give new life to my Herman Munster-like dark inset eyes as shown here:
Yes, I may have overdone it a bit with the brightness and the warmth, but you get the idea. I now have nice catchlights that bring out the color of my eyes better and improve the experience quite a bit.
Now, I know some of you are probably saying – heck, that before is way better than the lighting I have at my office, I’d take that any day so I don’t see the value here. Ok, that’s fair, so how about a more common problem of overhead light that casts shadows over your face like this:
versus something more evenly lit across the face like this?
Now, imagine I get that light up higher (to address the camera left eye shadow) and possibly throw a handkerchief or other softening material over the light to make it light without the harsh highlights? You get the idea, that it can make a big difference without much effort but if you do put some effort into it then it can be as professional as you want it to look – for not that much expense.
Even outdoors, where light isn’t splashing all over shiny countertops and stainless refrigerator doors I was able to take an acceptable lighting scenario like this:
into a subtle, but improved lighting on my eyes with catchlights like this:
This sunny day sitting under the deck umbrella just got a whole lot better with this portable light – without any wires cluttering up the space. I didn’t need to worry about wires that the dog would chew on or trip on to bring my light down at the worst possible time. It just worked as easy as it was to bring my phone (in this case) or laptop to a outdoor environment to enjoy a online meeting with friends.
How it works
So the “trick” here is two big batteries that look like what some of us might recognize from camcorders in the 90’s. They are those two big rectangles in the middle of the light that hold a lot of power but also add weight to help stabilize the light so that it’s not falling over with the lightest breeze outdoors.
The two orange knobs control light temperature and brightness. If you aren’t going to be moving it around then you can skip the batteries and go for the power cord that comes with the light and never have to worry about charging anything, but for me the batteries make it so mobile that I want to use it everywhere around my house.
Here’s everything you need based on the picture above:
Oh, did you notice something cool in that title? Yes, the base is a big magnet so if you have something metal to set it on then it’s rock solid. I stuck it on my refrigerator, but my wife didn’t like that too much (but hey, it worked!).
If you just want to mount it to your desk and forget it, then ignore all of that above and just get this and use the power cord that comes with the light:
Yeah, but how does it work with video?
I hate video editing, so here’s a video I did using just my iPhone and the Raya light outdoors on my deck. Please forgive the poor reduction in video quality and horrible color after YouTube’s terrible video compression when viewing on a PC, but it’s less terrible on iPhones:
If you are a content-creator, you might be interested in the full Livestreaming Kit.
Why should you care what I think?
Many of you who have followed this blog may not realize that my primary job has always been in high tech at a company you’ve definitely heard of. With 6 years of experience in building cutting edge video conferencing solutions for the biggest companies on the planet, I know a thing or two about the challenges many users face when collaborating with others over video.
Typically, my photography life outside of work doesn’t directly cross paths with my day job, but when B&H contacted me to say they had a cool personal light for photography and video conferencing, I couldn’t pass up the chance to check it out. What I didn’t expect is that it would be a wireless solution that would allow me to have great light wherever I landed with my laptop or even phone to have a meeting!
I am not allowed to endorse items for work, so I can’t mention who I work for or what I work on (but it’s easy to figure out). As such, this is my personal opinion formed outside of work using personal products for personal meetings with friends and relatives, but after this is done I do plan to show my friends at work and use it to enhance my personal meeting experiences.
If you make a purchase using links found in this article, I may make a commission. It doesn’t cost you a penny more, but it does help to support future articles like this. I was not paid to do this review, but I was allowed to keep my review unit.
This blog was started as a convenience to me so I could stop hunting through my sent items folder and forwarding friends the same emails over and over again. I never intended for it to become a second job or something that would attract millions of readers. It just happened.
Along the way when I found myself working from 10:00 PM - 4:00 AM+ Sunday through Thursday's to cover the topics my readers asked to write about, I realized that there should be something in it for me. As a result, ronmart.blogspot.com - the email archive - became ronmartblog.com - the online review business. My goals shifted from simply writing about whatever came to mind to focusing on articles that would likely yield a return on my time investment.
During this transition I still kept to one principle - this blog would be different than most review sites in that it couldn't be bought and paid for. As a result, I resisted accepting advertising and instead rewarded products that I loved with free banner space. I resisted sponsored articles by giving the constant requests a price I knew they'd reject to make them go away for good. I resisted fake guest bloggers who wanted to write about unrelated topics just to boost their own sites, despite the fact that their presence could help push me higher in Google page rankings.
Simply put - I dismissed the games that many other sites played, and focused on only two mechanisms for income as a way to compensate my family for the grumpy guy that I'd become from lack of sleep. I accepted donations and I leveraged referrals as a mechanism to get compensated when my readers purchased products that I recommended. I thought this was fair, and despite the fact that nearly EVERY site on the web also does this - I disclosed that I was doing this.
When the holiday seasons sales would come around, I started by sharing deals because I wanted my friends to know about the deals that I honestly thought were worth sharing. However, I got flooded with requests to post deal offers and eventually became so disgusted with it that I moved to a mostly opt-in model with my deals newsletter. I got sick of the blog being a deals billboard, so I only used the blog occasionally for special deals that I felt good about posting - for my friends - and left the rest (which still about 1% of the deals I get daily in email) to my newsletter.
By not spamming you with deals, by not taking sponsored articles, and by not taking paid advertising - I lost a ton of potential earnings (to the tune of $50k+ per month from some single advertisers alone) and I lost a lot of web traffic and subsequently Google page ranking.
However, I think I won because I stuck to my principles and remained a legitimate blog - not a bought and paid for snake oil salesman - despite being sometimes accused of being just that.
For this holiday season I once again find myself with a dilemma - sacrifice thousands in earnings to keep my blog clean of more holiday sales crap, or join the crowd to avoid being assimilated.
Ara - my youngest of 4
My regular readers have probably noticed that I don't write like I used to anymore as I decided to sleep again after the birth of my daughter, Ara, in October 2015. I've returned to writing only about stuff for fun and mostly given up my second business - despite being a father of 4 and single breadwinner who certainly could use the extra income.
Me with Taylor - My oldest of 4
Conclusion
This was an unplanned article that was written out of disgust of all of the holiday sales spam that I get bombarded with. While I hope people have noticed that I've been refraining from those types of activities this year, odds are you haven't given it a seconds thought. As a result, I'm pointing it out so you can take a moment to think about which blogs and influencers you can trust this holiday season and which ones are simply out to make a buck.
I wish all my remaining faithful readers a safe and happy holiday season.
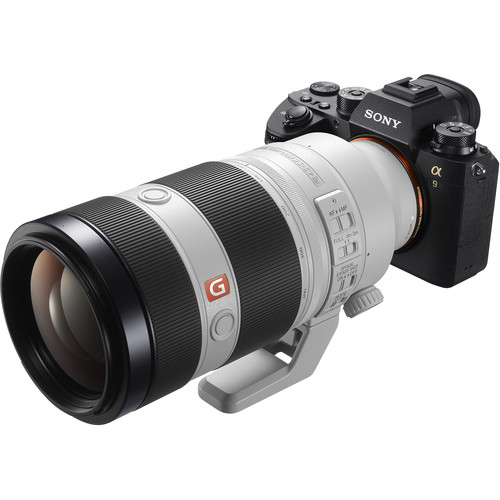
Sony a9 shown with the 70-200mm I've used the kit 24-70 f/2.8 GM for my review
Henri Cartier-Bresson was famous for capturing The Decisive Moment in many of his images. When I got this camera and heard of its claim of 20fps shooting with a buffer that could hold hundreds of images, the first thing I thought was this might be a camera that helps mere mortals to increase their odds of capturing their own decisive moments in everyday life - in a high resolution image (vs video frame capture). If so, this would be a game changer.
Read on to see if this camera lives up to the hype and accomplishes that goal, or if it's yet another case of fan boy hype all over again.
I read a lot of stupid things on the internet, but one that really cracks me up is when people make the argument that this camera (and its siblings like the a7 and a7R II) are smaller or more compact.
Since I'm currently only shooting with a Canon 1D X Mark II, I had to use the only normal body DSLR I have on hand - a Canon 6D Mark II review unit for a comparison. I wanted to show how physically a a9 is roughly the same size as a common DSLR. This isn't a comparison of the features of these two cameras as they are totally different, but I did want to illustrate how this camera and especially the lens is very similar to what you'll get with your average DSLR.
One gripe I have had against the Sony a series is that their attempt to make a more compact profile just limits the better grip experience you get with a Canon or Nikon DSLR, so I do wish Sony would actually bulk them up a bit to make them more comfortable to hold with heavier lenses.
Another thing you'll notice about this Sony is that it finally gets a joystick (which sadly isn't present on the 6D Mark II for reasons that perplex me). This plus an exposure dial on top and just more buttons and knobs in general make this my favorite Sony camera body ever!
Overall, I loved this body which features:
A very good electronic viewfinder that shows exactly what you'll get when you shoot
The best coverage of AF points (especially at the edges) of any camera I've ever used
Excellent programming options for 8 buttons and even the joystick press event and the dial. As a result, getting this camera dialed in the way you want it without hunting through Sony's annoying menus is easily accomplished
An exposure compensation dial that makes it Fujifilm easy and fun to use (although it does get bumped out of its setting easier than I'd like)
A dial for drive modes and focus modes that Nikon lovers will feel right at home with
An articulating LCD screen that helps when shooting from odd angels, but sadly doesn't rotate where you can see it if you are in front of the camera doing group shots
Dual card slot, although one only takes SDXC II if that is your preferred format
and much more
Simply put, haters of Sony's annoying menus can set this camera up where they don't need to use those menus to successfully shoot out in the field. This is CRITICAL for sports photography, and something Sony has definitely done right.
The first thing I wanted to know when I unboxed this camera was "is this burst mode for real"? I've seen other cameras that made this claim and only delivered on low resolution images. I've also seen other smoke and mirrors tricks that resulted in something that was a marketing claim, but not something that could really be used.
I built this blog because I hated all of the fan boy hype and lies in the mainstream media for photography that made big claims that failed to materialize when I invested my money on those products.
In this video, I prove beyond a shadow of a doubt that the Sony a9 is the real deal and it deserves credit for doing something no other camera I've ever tested has accomplished:
As a follow up to the video, you can find all 222 frames taken in the video in this gallery here. You are free to download and examine them to your hearts content, even though they are intentionally boring. :)
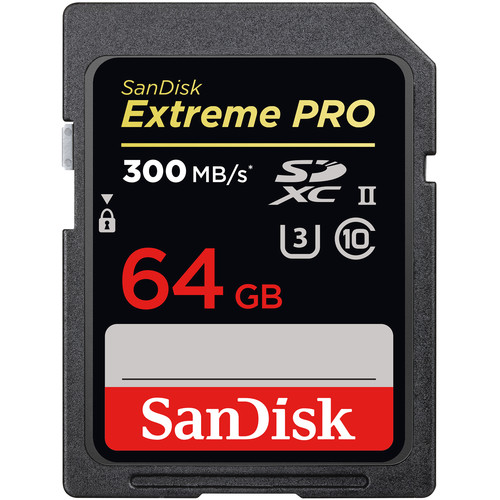
As I mentioned in the video, I did do RAW+JPEG on a common SDHC I 95mb/s card so your performance will only get better if you use the recommended SDXC II cards as shown above. I also didn't upload the RAW's simply due to bandwidth cost and download policies (login required) of the service where I host my images.
I took over 6000 shots with this camera which is extremely easy to do when you have a burst mode that is this rapid. Here's a link to a gallery that contains a random selection of some of the throw away burst sets I took while following my son around for various activities.
While I know there's some concern about the 12-bit images you get when using the electronic shutter in full burst versus the mechanical shutter in a slower burst mode (which offers 14-bit images), I can say in real world applications it doesn't make any difference. The value of getting the shot also more than makes up for the 2-bit difference that no viewer of our image will see (or should see if your capture doesn't suck).
I had a lot more bursts than these, but I only wanted to include throw away sets so readers are free to download and examine them to their hearts content.
Metering Issues - Room for Improvement
f/5 @ 70mm for 1/1000 sec at ISO 320 (unedited) Despite doing okay for most frames, the metering was totally off for this frame Sadly this happened more than it should for a camera of this price point
Despite advances made by Nikon and Sony in performance, one thing that keeps me on the Canon platform is the metering performance of my 1D X Mark II. If you take enough frames in a burst then odds of having a shot worth publishing is high, but having images that are way off on the exposure can lead to a lot more hassles editing or in some cases an unsalvageable shot.
In the shot above and many in this article you'll notice how the exposure is way off. Yes, I could have used exposure compensation to fix the problem, but the fact is that this is a weakness of the Sony and Nikon platforms that Canon definitely does a better job with. Like Nikon, using spot metering can help - but this camera only does spot metering from the center and not from the AF point so that's a huge fail for sports photographers who need precise metering on their target no matter what happens in the background.
If I could make only one wish to Sony for what they can fix in the next version of this camera, metering would definitely be that wish. See Canon's Evaluate Metering with an emphasis on the AF point for a case study on how metering should be done.
Swing Test
If you are a parent, you know how hard it is to get decent shots of your kids on the swing. Cameras are improving every year, but this is still a real world torture test for any camera. However, the a9 performed extremely well with hundreds of in focus images to chose from. Here's a few examples:
If you have kids and and can afford this camera, it really is the perfect tool to get the perfect shot for just about any action your kids will do.
Handling Obstructions
The downside of photographing in public places is that someone always walks in your darn shots - especially when you are in burst mode. While it can be frustrating since you'll have editing to do, it's even more frustrating when the camera changes focus and you miss a series of shots that are impossible to capture again.
Fortunately the default settings of this camera are very good at keeping the focus point where it belongs - especially if you stick with the Flexible Spot S on your subject. Here's a few unedited examples of shots that could have been ruined, but weren't as the default AF-C settings give your original subject the priority.
This is great for a default setting, but if you are shooting sports like Basketball where you want the AF to change quickly to different subjects you can easily dial that in too. Sony on it's first attempt has effectively matched the Nikon D5, and one upped the D5 and 1D X Mark II by offering more focus points all the way to the edges to help increase your odds of getting the shot.
The Decisive Moment - Guaranteed
PLEASE NOTE that ALL images in this article are copyright Ron Martinsen - All Rights Reserved. You may view the associated original images while this article is open in your browser, but you must delete them when you are done. You may not print, edit, re-post, or otherwise any images in this article without written permission.
What I love about this camera is that when you see an opportunity where you know there's going to be a great decisive moment of the series that you want to capture, your odds of getting it are almost 100%. Even in my case where I was using the wrong lens and due to water I had to stand far back, I knew I was going to get the frame I wanted with this camera so I just planned to crop and took the shot anyway. I chose this frame, but I had tons to choose from so I could have had Kai in the water or just out of it - I had the shot no matter which artistic decision I decided to go with. That's incredibly powerful!
The rest of the shots in this section are all 100% unedited and appear exactly as they came out of the camera. Click on any to view the in-camera JPEG original file, or visit this gallery for more.
f/2.8 @ 28mm for 1/500 sec at ISO 100 I wanted a shot with a little edge flair, bouncing backlit hair and a nice shadow to the edge Accomplished on the first attempt
f/2.8 @ 59mm for 1/2000 sec at ISO 1600 I wanted to capture a great facial expression and the peace sign with his eyes in perfect focus Accomplished on the third attempt
f/4 @ 70mm for 1/2000 sec at ISO 2000 Kai was having a happy day and I caught an expression that However, the meter failed me but I can fix that in post-processing
f/2.8 @ 44mm for 1/2000 sec at ISO 3200 I wanted to capture an expression of unbridled enthusiasm of a boy jumping off a rock Accomplished on the first attempt
f/2.8 @ 70mm for 1/2000 sec at ISO 2500 A big swing, parallel to the ground with a spot on smile - done Now if that darn lady wasn't in the background - thank goodness for content aware fill :)
f/2.8 @ 70mm for 1/500 sec at ISO 1600 I wanted to capture Kai running away from his little sister - done Accomplished on the first attempt better than I imagined with Ara appearing under his arm in a hug/headlock type subliminal gesture
f/2.8 @ 70mm for 1/500 sec at ISO 1600 And sometimes you just get a funny shot that may not be what you are going for, but any shot that evokes an emotion response is worth keeping (My Facebook friends loved this one)
The Downside
It might surprise you that I only spent a few hours shooting with this camera over 6 separate days of reviewing. I've been crazy busy, so I just don't get to review and blog like I used to, yet I still managed to take 6000 frames of photos worth about 60GB of disk space (excluding a lot of deleted RAW's).
Fortunately if you are using the electronic shutter, there's no fears about shortening the life of your camera like a mechanical shutter, but it can do some damage to your hard disk and backup storage in a hurry! It can also be problematic while you are on vacation, unless you buy A LOT of large capacity memory cards.
I also found it painful going through so many images in a burst that looked alike (see examples here), so often times I found myself going down to the lowest burst mode or switching to mechanical shutter just to slow things down. This is even true on my much slower Canon 1D X Mark II, as often times you simply don't need so many shots in a burst.
That said, in practical use you'll find that the high speed electronic burst mode is fantastic when you need it - but you'd be wise to save it for only when you really need it.
If you make a purchase using links found in this article, I may make a commission. It doesn’t cost you a penny more, but it does help to support future articles like this.
Unless noted, ALL shots in this article are unedited and come straight out of the camera as shown. In-camera JPEG's were used with in-camera Creative Style (vivid) and White Balance (shade) being leveraged to give shots an improved color over the camera default.
My friend Michael Zelbel just finished writing his all-new eBook Low-key Bodyscapes.
Get all the tips, tricks, instruction and inspiration you need for shooting awesome low-key body photos. It's all in the eBook, and includes:
Versatile low-key lighting setups
Many examples for well-tested poses
Reliable camera settings
Effective postproduction for low-key
Working skillfully with models and clients
How to come up with creative image variations
Shooting both, black & white and Color
Creative color gels that look perfect on skin
His favorite gear for low-key bodyscapes
50% Launch Discount
If you get your copy of Low-key Bodyscapes right now, then you take advantage of the the discount he offers until the end of 2016. The normal distribution at regular price will start on January 1st.
Low Key Bodyscapes Videos
Here's some videos that give you an idea of what's in the book:
Michael's past eBooks were the inspiration behind some of my past experimentations with clients, so I was excited to hear that he wrote something about bodyscapes. It's a topic that I think a lot of people are interested in, but not enough has been written about how to actually do it.
One of the big advantages with the approach Michael takes in this eBook is that he demonstrates how to accomplish these type of shots with simple speedlights and umbrellas as well as low cost light strip solutions. This means you don't have to spend a fortune to get the results he gets!
Finally, Michael's style is inviting for beginners and targets them as well as those on a modest budget, so don't expect to see or need tens of thousands of dollars worth of gear and a crew of assistants to get the results he shares in his book. It's perfect for the hobbyist who wants to get started in this area, or just have a little fun with the Mrs. around Valentines Day!
Printing Series - Great if you want to print your own bodyscapes!
Disclosure
If you make a purchase using links found in this article, I may make a commission. It doesn’t cost you a penny more, but it does help to support future articles like this.
See the bottom of this article for a special offer for ronmartblog.com readers.
Behind the Scenes Video/Review of KelbyOne
Were you ever curious what is behind the scenes for KelbyOne?
Click here to see trailers for many of the classes and click here to see a list of the top photographers in the world that are instructors. You can also click here to see all of the courses that are available.Here’s a list of the top courses over the past 90 days (as of 11/29/16):
Scott Kelby’s SLIM System
Scott Kelby’s Removing Distracting Images
Karen Hutton’s Finding your Voice
Thomas Grubba’s Real Estate Photography
Kristina Sheik’s Portrait Retouching in LRCC
Scott Kelby’s Lightroom Killer Tips
Scott Kelby’s Photoshop Techniques every Lightroom User Needs to Know
Gabe Biderman’s Night Photography
Scott Kelby’s Designing with Type
Scott Kelby’s 10 Essential Landscape Techniques
Check out my new behind the scenes video to see how it works:
ronmartblog.com Special Offer
Get CLICK HERE for the latest offer as the terms change regularly now.
THIS CODE AND OFFER MAY CHANGE in the future, so be sure to contact me if you have any problems.
Other Articles You Might Enjoy
Discount Coupon Code Page – More discounts that are even better than this – some of which are exclusive to ronmartblog.com readers!
I was provided a free membership to KelbyOne.com to evaluate the service for this article. I may also get a commission if you sign up using my special offers or use my links, so thanks for supporting this blog by using my special offers and links!
My best friend in New York, Clifford Pickett, has been blowing everyone away with his amazing iPhone photography, so I asked him if he could join us for a guest blog to share his images and some of his story.
I hope you enjoy it as much as I do!
Gear, Sex and Money
by Clifford Pickett
It’s easy to say it’s not about the gear.
Gear is no different than sex and money, it’s only important when you don’t have it. Maybe in that order too, if you’re a photographer. However, sometimes all of that gear ends up being a distraction. I’m no different, you should see my man cave! And many of you reading this, if your honest with yourself, you can probably relate to what I'm saying. After all, how many times have you been fiddling with gear and missed a shot while your significant other captured it with a cell phone?
I’m not preaching here, I’m leveling with you so please hear me out.
I just spent the past week at the Photo Plus Expo, which I highly recommend to those have never been to one. There were beautiful prints on display, created by amateurs as well as some of the biggest names in the business. They were stunning! These galleries were spread throughout the show, some presented by Canon and Nikon, some by paper manufacturers and others by the event space itself.
Let’s be honest though, that’s not what the show was for – it’s exists to sell you photography products. That’s cool, but noticeably missing underneath many of those beautiful prints were any details about how the photo was made, what camera, what lens, what settings, and more importantly, actually how the photo was made.
It makes you ask yourself, "What was Joe McNally thinking when he shot that image and why?". Where was Jay Maisel standing? What was thought process? Which lens did he use? However, this info was often missing, but why? The answer is that these photos stand on their own, so no one really cares what gear they used. The gear was necessary, but It’s not important for the viewer of that image.
Buying a Nikon SB-910 won’t help me shoot like Joe and buying a D5 won’t help me shoot like Jay. It’s all about the image!
Of course, I’m not the first one to say this, I know. But seriously, some of the most amazing images ever made for the past decades were taken with cameras much less sophisticated and capable that what we carry around in our pocket.
It feels like capability has given way to complication. It distract us. It gets in the way. Scientists have proven a direct linear correlation between the number of buttons on a camera and our ability as artists to create a meaningful piece of art. (Just kidding, they haven’t <g>). But what if we only had one camera? One lens? One button?
Apple Challenged Me
Last year, Apple reached out and asked me to give a presentation on photography at their Grand Central Store. My mission, if I chose to accept it, was to inspire people to go out and take photos of the fall season.
My first thoughts were to showcase how I use my iPhone as a tool; to navigate, to geocache, to call my girlfriend and explain why I’m not home yet, to determine locations and times of day to shoot, to look up the weather so I can call my girlfriend to explain why I’m not home yet. Then I thought, what if I use my iPhone as a camera? Honestly, never considered it.
It turned out to be the perfect timing as the iPhone 6S came out with a much better camera in it, so I took to trip through New England with my A7R and my iPhone, shooting both. I was using my Sony, but I was also seeing just how far I could push my iPhone as a camera. After reviewing my images, I was shocked just how well the iPhone performed! The results were seriously impressive and were a big hit at the Apple store.
I had a gallery show shortly after and printed several pieces from the iPhone, and people couldn’t believe it. Seriously, they wouldn’t believe it!
I found myself having long conversations with strangers about how capable it is and how much fun it was to shoot, sort of convincing myself while convincing them that it’s not about the gear. It was strange because they weren’t photographers and didn’t care, but they appreciated the enthusiasm. However, I was a photographer and I did care!
Time to put skin in the game
Over the last year I’ve been having more fun, working lighter and faster, and shooting more. I was thinking about photography in an entire new way, and shooting with with my phone.
No, it doesn’t matter what phone you're using either, so long as it’s the brand new iPhone 7 or the Google pixel phone - ha, ha, just kidding!
Since my debut with Apple, I’ve shot commercial campaigns, done gallery shows, licensed images around the world and of course even taken pictures of my two cats. The best part though, and the reason why I’m writing this article, is to share how much fun it was! I want you to know how much I learned about photography by, you know, doing it!
Spoiler Alert
The pictures you see in this article are not as sharp or clean as those I wouldn’t have taken with my big boy camera, but that's not the point. The point is that the only reason I took those picture at all, was because I was out shooting. I was focusing on what mattered, and not obsessing about noise, depth of field, etc... I was deep into the experience of making a photography and focusing on the light, color, composition, and most importantly – the experience.
I should note that I do spend time in Lightroom to help give my images that professional look, but I don't spend nearly as much time as you might think thanks to my fine-tuned workflow.
Responsibility sucks
Gear is critical up to a point because we do need a minimum dynamic range, an acceptable noise floor and a reasonable degree of sharpness – but only up to point. After that it's a distraction because rest of what makes a photograph is on us, the photographer.
What I really learned while shooting with the iPhone was how to focus on what really matters. The experience and then color, light, gesture and composition. After that, at the very bottom, just below taxes and my dentist, the aperture, shutter speed and ISO. You begin to focus on what’s in front of you, not how to capture it.
So this year, when Apple called again. I left all my gear at home and jumped in the car with nothing but my iPhone and few pair of underwear and my drone – I can’t leave home without that. You can't imagine how great it feels not to have to pack your gear, charge your batteries and struggle with which lenses you’ll bring (only to bring them all anyway).
This experience was stress inducing in a way only a photographer can understand. To stand at the shores of Nova Scotia after a 17 hour drive and find myself looking at an amazing sunrise with just my phone in my pocket. And my underwear. And my drone.
You learn a lot about your camera when it’s always with you
I have learned about the limitations of using a smaller sensor and fixed lens and how to overcome them. In future articles, if there’s an interest, I’m happy to share tips and techniques, apps and gear that I use to expand the capabilities of the iPhone. iOS Apps like Cortex Cam to stitch 99 photos to instantly to effectively remove noise in low-light situations or Pro Cam 4 to auto-bracket RAW photos to maximize dynamic range and how to stitch photos in perspective to create much higher-resolution images.
A funny thing happens when you start to seriously photograph with your phone. You take it less seriously. So do others. There’s no pressure, it doesn’t have to be perfect. It shouldn’t. There’s much less baggage, literally and figuratively. And how amazing is it to go out and shoot with nothing to carry and no bag to carry it it. I liken it to being a cook and not having to worry about the dishes. It’s all the fun with none of the compromise.
I won’t be selling my A7R Mark II anytime soon, at least until the next hot camera that comes out that begs for me to buy it!
When I was at my last exhibit, with all of those prints on the wall at the show, I realized how odd it was that none of them were my iPhone shots. I still hadn't let go of the pixel peeping and deep analysis of what type of photo is "good enough" to go on display, but my attitude is definitely changing. It'll also be very interesting to see in a year if I've finally been able to let this go and show the world, in print, what I'm happy to show you here in this blog article.