Saturday, March 31, 2012

Red River Polar Pearl Metallic Now In Rolls (Cash Discount Offer)

A Distorted View of New York (c) Ron Martinsen - ALL RIGHTS RESERVED
Red River Polar Pearl Metallic
is my preferred paper for my popular Manhattan Nightscape print
Copyright Ron Martinsen – ALL RIGHTS RESERVED

Red River Polar Pearl Metallic is now available in rolls! Best of all you can get ANY Red River paper at a discounted price when you use my discount coupon code. Visit http://www.redrivercatalog.com/landing/ronmart/ or my discount coupon code page for details.

If you are fan of Epson’s Exhibition Fiber or Luster, then you’ll definitely love UltraPro™ Satin Photo Inkjet Paper.

If you’ve never tried Red River papers before then consider getting their Photographer's Choice Sample Kit.

Disclaimer

I may get a commission if you make a purchase using links in this article. I also was provided with sample paper to test for this review.

NOTE: This site requires cookies and uses affiliate linking to sites that use cookies.

If you enjoyed this article, please support future articles like this by making a donation or saving money by using my discount coupon codes. Either way, your support is greatly appreciated!

This blog is intended for freelance writing and sharing of opinions and is not a representative of any of the companies whose links are provided on this site.

The opinions provided are of Ron Martinsen alone and do not reflect the view of any other entity

Tuesday, March 27, 2012

First Look: Canon Speedlite 600EX-RT Flash

wwCanon Speedlite 600EX-RT Box Contents
Canon Speedlite 600EX-RT Box Contents

Today my Canon Speedlite 600EX-RT flash arrived from B&H, so I thought I’d share a few quick thoughts about it.

Big Honkin’ Manual

The first thing you notice when you open the box is that the new manual looks like the car navigation system manual – it’s huge! Of course it’s three manuals in one because it’s localized in English, French and Spanish so the truth is that it’s only 1/3rd of the visual size. Inside it looks more like a camera manual than the cryptic flash manuals of the past, but it’s still just about the facts so don’t expect to learn how to use the flash from this book.

Built-in Gel System

Something new for this flash is the addition of the built-in gel filter holder that has been the mainstay of the SB-900 and SB-910 Speedlights from Nikon. It’s a nice design that features a carrying pouch, but the truth is that this too little to late for me as I’ve already moved on to the Rogue Gels which I like a lot more for their variety of colors, organization, more compact pouch and flexible use with any flash. I applaud Canon for playing catch up, but it’s a token effort as you only get two gels with the flash and with the $29.95 SCF-E1 replacement kit. What the heck? What a checkbox only feature! Despite its solid construction, I’ll stick with my Rogue gels.

Improved Case Design

You can see in the photo at the top of this article that the case design has changed, and while I’d call it a minor change it’s significant. Now thanks to the Velcro strap in the back you can easily attach your flash to your camera strap or backpack if you were so inclined. I’m not sure I’d do it, but I can see how in a pinch that could be useful.

580EX II Comparison

While I didn’t have time for a full review, the burning question on my mind as well as many others is “how does the 600EX-RT compare to the 580EX II”? Physically it looks a little larger but for oddly enough feels a tad lighter. In practice it feels a lot more like using a SB-910 from Nikon than a Canon flash, but Canon users will feel right at home. When controlling via the 5D Mark III’s menu it’s a snap to use, as is the 580EX II, but the difference is that it’s also super easy to program the 600EX-RT off the camera using the back of the flash controls (shown above) versus the Morse code required by the 580EX II. I love the new design and it’s a snap to use without even opening the manual (which is impossible with its predecessors). It’s also a heck of a lot easier to use than Nikon flashes too.

Simple Flash Power Test

I just wanted to see what sort of power I had with zoom min and max as well as how each flash would handle ETTL, so I took some sample shots. If you are using an iOS device you’ll have to tap the photo to see the “mouse over” shot and then tap on another photo to see the “mouse out” in that previous spot. With that said, all of these shots were taken for 1/60 sec at f/16, ISO 100, 16mm (16-35mm II) using a Canon 5D Mark III. Here’s how things worked out:

Mouse over to see 580EXII, mouse out to see 600EX
200mm Max Zoom on 600EX (mouse out)vs 105 Max Zoom on 580 EX II (mouse over)

The 600EX-RT has a 200mm zoom to match Nikon’s SB-900, so this is a big improvement over the 105mm on the 580EX-II. Hopefully Canon learned from Nikon and we won’t have any overheating issues. In my limited testing the flash performed well with no signs of overheating. Clearly you get more focused light with the 600EX which also features a lightly longer barrel than its predecessor.

Mouse over to see 580EXII, mouse out to see 600EX
20mm Min Zoom on 600EX (mouse out)
vs 24 Min Zoom on 580 EX II (mouse over)

The 600 had a little more spread (even at 24mm) so the extra power was obvious.

Mouse over to see before, mouse out to see after
Full ETTL on 600EX (mouse out)
vs Full ETTL on 580 EX II (mouse over)

Again, on ETTL the 600EX showed off its better zoom and had a little more even light without as much vignetting as the 580EXII.

Overall for this test it was no surprise that the 600EX-RT showed off its strengths, but honestly in practice this is going to be less of an issue in most normal scenarios. Sure if you are Joe McNally this might make a difference, but for mere mortals you’ll rarely take advantage of the extra oomph offered by the 600. It’s also likely (although I didn’t test) that the 600 will drain batteries faster, so there’s a downside too.

Real World Shots

I didn’t have much time, but I thought I’d take a quick crack at seeing if the new flash made any difference on a real world shot. With that in mind I threw my 100mm macro on the 5D Mark III and dialed it in for 1/60 sec at f/22, ISO 1600 to see how the two flashes compared in ETTL mode. I also boosted the flash exposure compensation by +2 on both and bounced on the ceiling / wall behind me. Here’s the results:


600EX-RT


580EX II

The net result was that they both performed equally well with the 600EX-RT having a slightly softer and diffused light (a good thing) than the 580EX II.

What about the radio wireless?

Check out these articles for more info:

Conclusion

So far what I’m seeing is a flash that catches up with Nikon’s SB-910 and performs better in every way than its predecessor. However, I can buy a 580EX II for $469 (with the current rebate that expires on 3/31/12) and the new 600EX-RT costs a whopping $629! That’s $160 difference and the new Pocket Wizard III (which doesn’t have ETTL) only costs $139. So, if you can forego the ETTL radio wireless support, you can buy a 580EX II AND a wireless transmitter for about the same price (without the rebate). Now having wireless ETTL does have its benefits and being able to control it from your camera (or computer with EOS Utility) is an added plus as well. However, for those of you with two or three flashes you can invest in a wireless ETTL system for your existing flashes (see here for a price comparison) for a little more than the cost of one of these flashes. Throw in a superior Rogue Gel system and you are good to go.

My advice is that if you are buying your first Canon flash then go for the new flash. It’s a good flash that will serve you well both now and as you grow into the system in the future. However, if you already own one or more flashes and aren’t prepared to toss them out to buy two or more of these (to take advantage of the radio wireless), then I see no point in buying them.

I’m still on the fence about keeping the one I’ve ordered or sending it back. It’ll take the radio wireless test to convince if I should keep them or not, but then I have to buy at least two so that’s a pretty significant investment for the owner of three 580EX II’s and a ST-E2 transmitter.

Order Now

Click here to order yours now and support this blog (it doesn’t cost you an extra).

Disclosure

I purchased this flash at full price for my personal use. If you make a purchase using links found in this blog I may get a commission.

NOTE: This site requires cookies and uses affiliate linking to sites that use cookies.

If you enjoyed this article, please support future articles like this by making a donation or saving money by using my discount coupon codes. Either way, your support is greatly appreciated!

This blog is intended for freelance writing and sharing of opinions and is not a representative of any of the companies whose links are provided on this site.

The opinions provided are of Ron Martinsen alone and do not reflect the view of any other entity

ATTENTION Adobe Lightroom 3 & Creative Suite 5.5Users–FREE UPGRADE

If you were one of the many who bought Lightroom 3 recently only to be bummed to see 4 come out so cheap, you aren’t alone. The good news is that you probably qualify for a free upgrade. Here’s how:

http://helpx.adobe.com/x-productkb/policy-pricing/upgrade-policy-product-announcement.html

This will apply to Creative Suite 5.5 users too since CS6 is almost out.

Ron

NOTE: This site requires cookies and uses affiliate linking to sites that use cookies.

If you enjoyed this article, please support future articles like this by making a donation or saving money by using my discount coupon codes. Either way, your support is greatly appreciated!

This blog is intended for freelance writing and sharing of opinions and is not a representative of any of the companies whose links are provided on this site.

The opinions provided are of Ron Martinsen alone and do not reflect the view of any other entity

Monday, March 26, 2012

Parents Rejoice – No More Dark, Blurry and Out of Focus Pictures! (Canon 5D Mark III Real World Shots)

Ask nearly any parent how they managed to get their DSLR approved by the significant other, and the answer is nearly always that they claimed they needed it to get better shots of the kids. That argument is valid too as kids are the toughest subject to shoot. Dark, blurry, and out of focus shots are the norm, so I tell parents that if you photograph kids you are a sports photographer.

I hate to say it, but its time to go back to your significant other and tell them you need a camera upgrade. I know it’s going to be painful, but this really is THE camera that is going to get you the shots you’ve been missing for years. I know this because I’m a dad, and even I’ve struggled with this problem when I was too lazy to go get my flash.

Any child of a photographer is typically camera shy after a while as the Mamarazzi chases them around the house pointing a big lens and obnoxious flash at them. However, if you can afford this camera with the sniper rifle lens (a.k.a., the 70-200mm f/2.8L IS II USM) then you are armed to do battle to get the shots that have escaped you until now.

Conquering the Blurry Shots

Click for the orignal
1/160 sec at f/2.8, ISO 12,800, 105mm AWB
Unprocessed – straight out of the camera

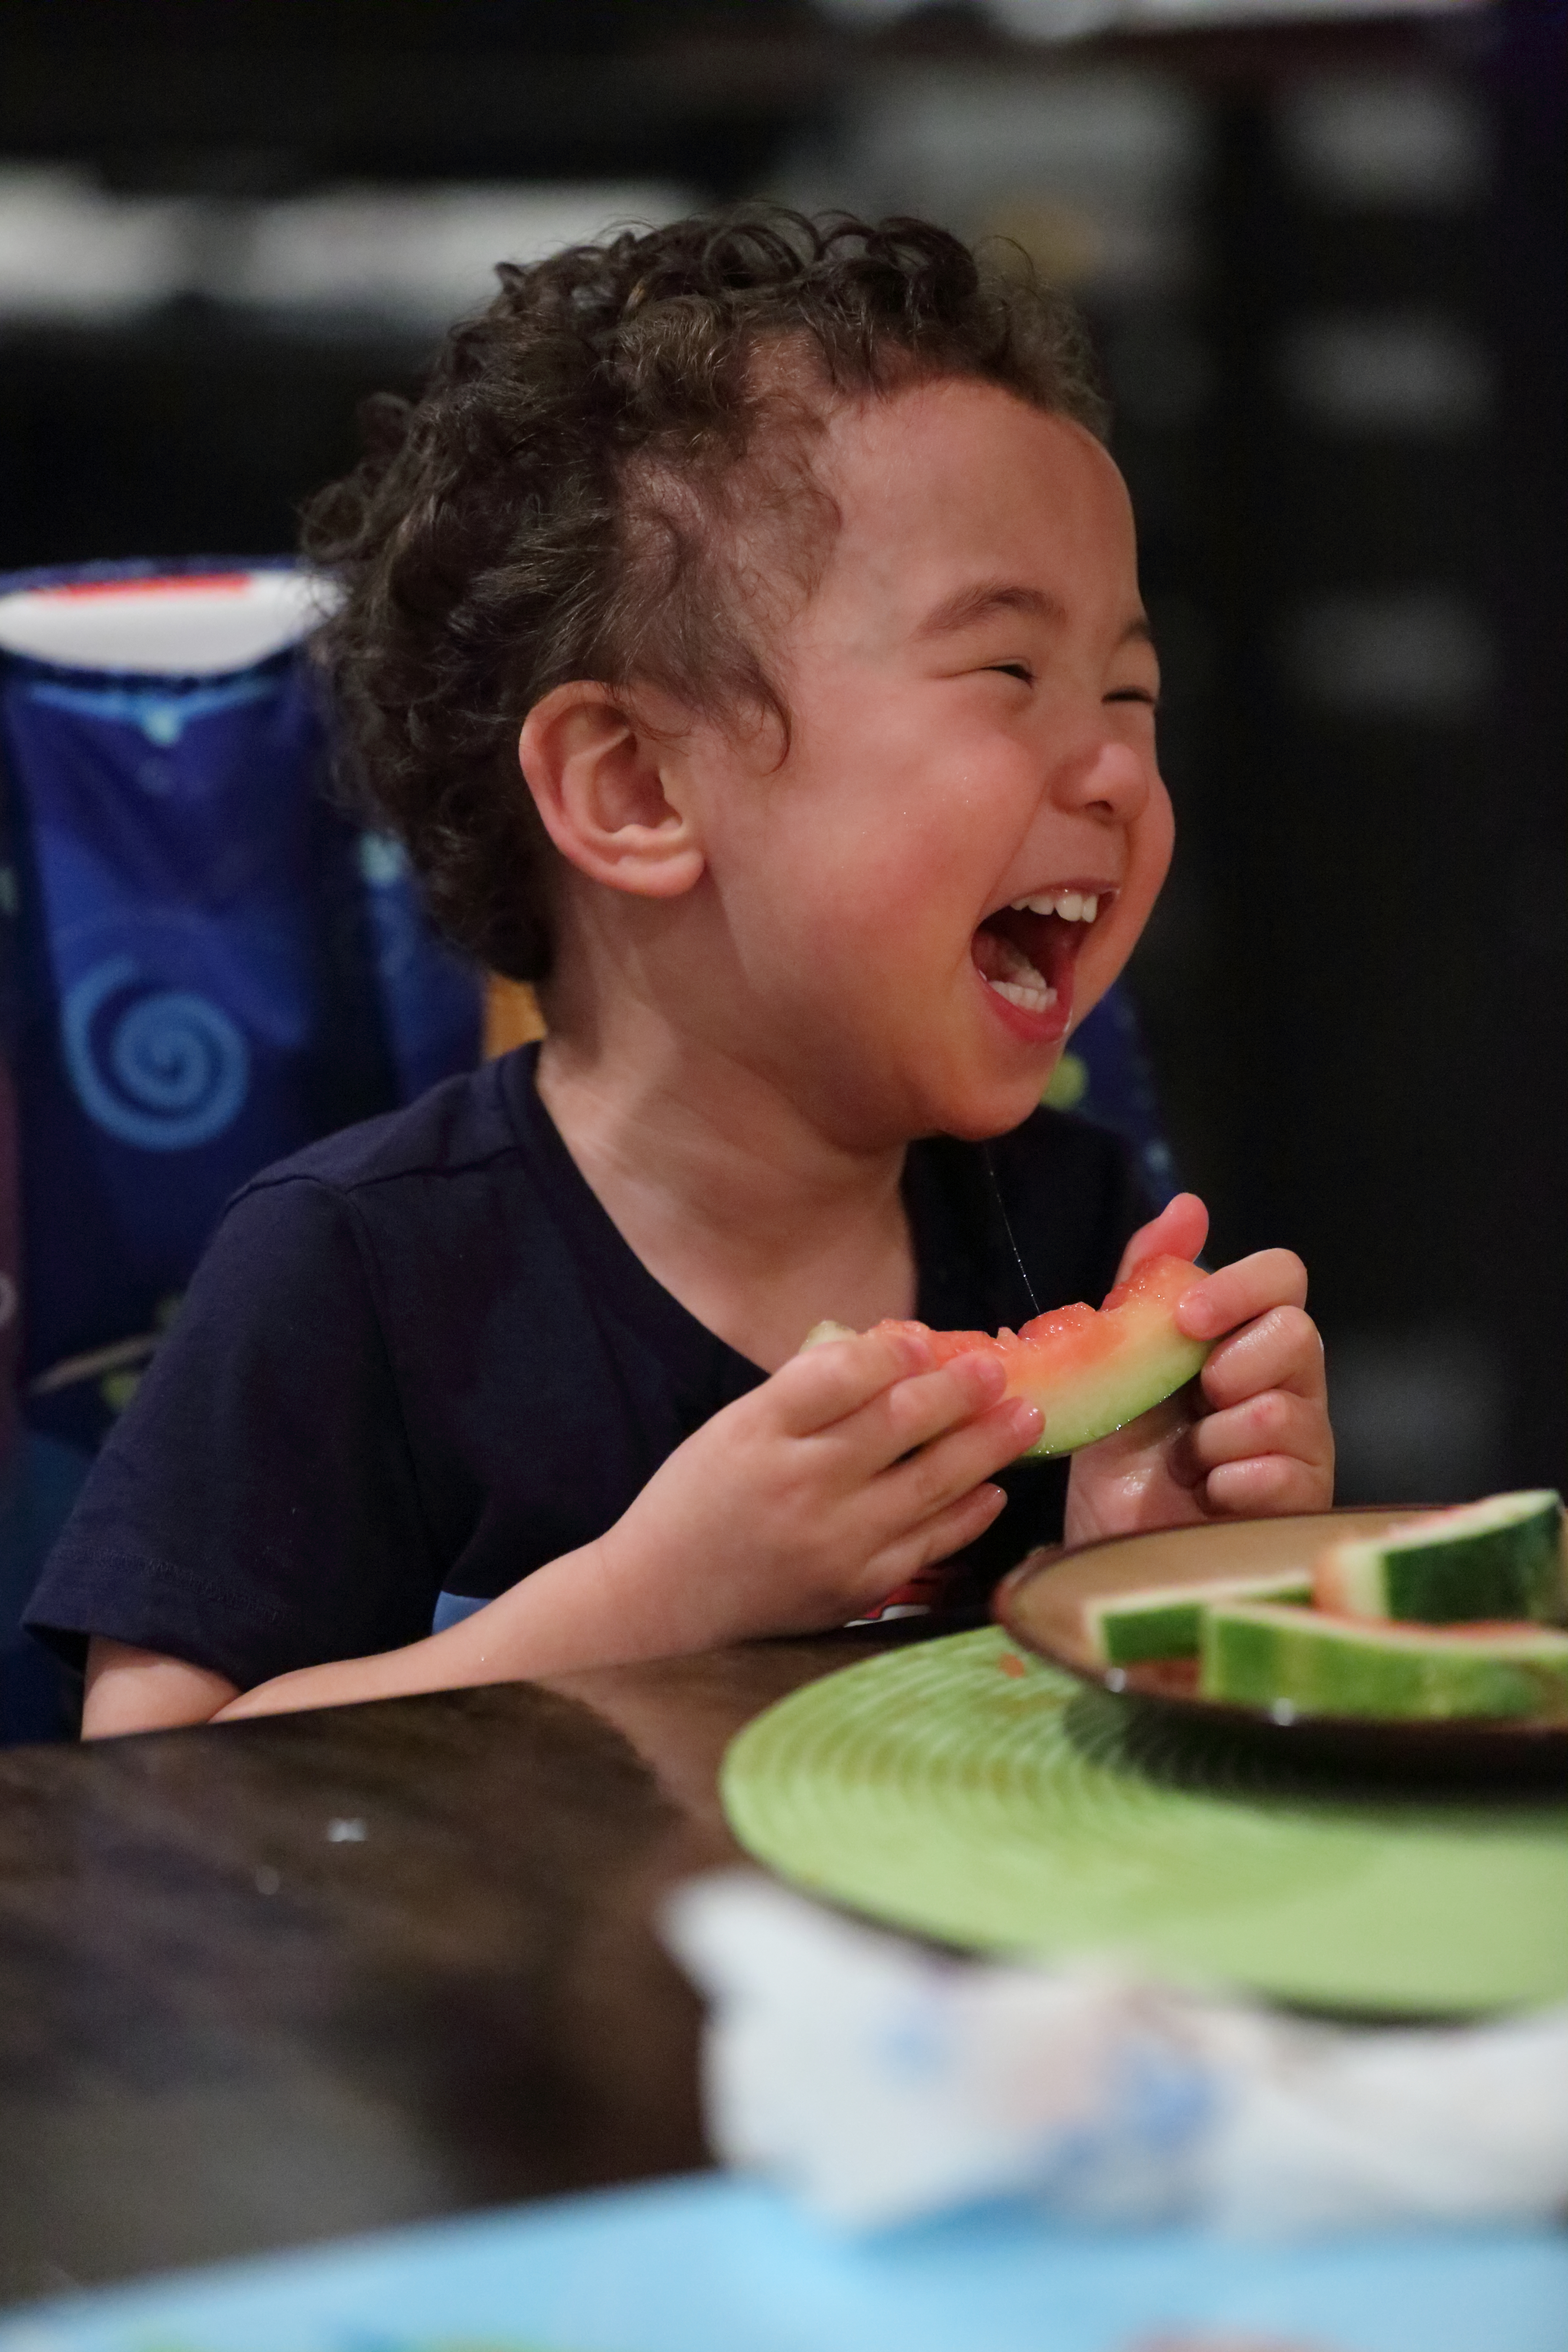
If you are a parent, this camera is a fantastic investment to get the shots your current camera always misses. The reason why is that your Auto ISO can now use a much larger range of values before. This impacts your shutter speed which you want high to freeze action, so that increases your odds of getting the shot. You can also set a minimum shutter speed (see below) to help increase your odds even more. This coupled with the better AF system (see the next section) means that parents who are too busy to go get the flash can fire away and still end up with a handful of shots for the family scrap book like the one above (instead of massive disappointment).

No More Blurry Pics – Try This


1/250 sec at f/2.8, ISO 160, 200mm

When you use Av mode the camera looks at your lens and sets the shutter speed to approximately 1/<lens focal length>. This means that if you are at 70mm it will typically set your shutter speed to 1/100 sec. Auto ISO helps, but if you are in a fixed ISO it can drop to speeds that are impossible to hand hold. The 5D Mark III has a new feature to help with this problem.

On the Shoot 2 menu the second entry is called ISO Speed Settings. If you press this you can scroll to the bottom and adjust Min. shutter spd. (range 1/250 – 1 sec plus Auto). What this does is prevent your shutter speed from dropping below 1/250 sec when you use Aperture Priority (Av) or Program (P) modes. Nikon and 1D series owners are used to this feature, but this isn’t available on most Canon bodies. Now if you’ve hit your maximum ISO (12,800 by default) then your camera has no choice to drop below this value to try to get the shot, so if this happens you simply need more light (ambient light, a flash, or a lens that lets in more light).

When you set your camera to this mode you can stay in Av mode for most of your kids shooting without worrying about the shutter speed dropping so low that most of your shots turn out blurry. Of course this just applies for small typical kid behavior as sports and other action will require shutter speeds faster than 1/250 sec. This is where the 1D X has an advantage as you’ll be able to set the minimum shutter speed to whatever value you like (up to 1/8000 sec), just like its sibling the 1D Mark IV.

You can also go change the Auto ISO range here to have a maximum of 25,600 instead of 12,800 so that your camera will use that extra stop of light if it needs it. This is what I do, but your choice to do so depends on how much noise you can tolerate in your images. Keep in mind though, noise is easy to remove with products like Dfine and Noiseware.

What about that nasty orange tint like in the shot at the beginning of this section?

In the shot at the top of this section I was using Auto White Balance (AWB) which generally creates great results, but under tungsten light it can be a harsh orange. If you used the tungsten white balance it would give you a shot that isn’t quite so orange. If you shoot in RAW (files with cr2 extension for Canon) you can do this in post processing. Here’s a RAW file processed with a more natural white balance:


Click to see a large version complete with drool

I did nothing more to this file than simply change the white balance, so as you can see it can make a big difference. You can’t do this with JPEG shots so this is why its always handy to shoot raw (or sRaw if you know you won’t be making large prints).

Crop the crap out of your shots without fear

There’s lots of cameras with lots of megapixels, but most have done so much in-camera damage to those pixels to get you that large megapixel count that the pixels are useless. If you crop and try to upscale your image with Perfect Resize there’s not much it can do. Resizing just makes those ugly pixels look big and ugly. However, this camera has 22.3 high quality megapixels at your disposal, so when you crop down there’s plenty of detail left in the image for up scaling.

Here’s a great example – even when your subject is being stubborn like in this shot below:


1/250 sec at f/2.8, ISO 250, 200mm AWB

There’s so much high quality data in the image file that you can easily crop the shot and have plenty of detail to work with. Here’s the shot with ONLY a crop (no post-processing whatsoever).


Crop to 1883px wide by 2825px tall – easily enough pixels for a high quality 16x24” print

When you click the photo for the original you can see the detail is outstanding, but you are only left with about 5 megapixels. However, it’s a very good 5 megapixels so when we use Perfect Resize to upscale the image to 50 megapixels (5759x8640 which is 16x24” at 360 ppi) there’s enough data to create a very usable file. Click this to open the 50 megapixel file and print it at 16x24. If you view it at 2 feet away you’ll find it’s as good as most images you see anywhere that size. If you take the time to sharpening for output it’s even better.

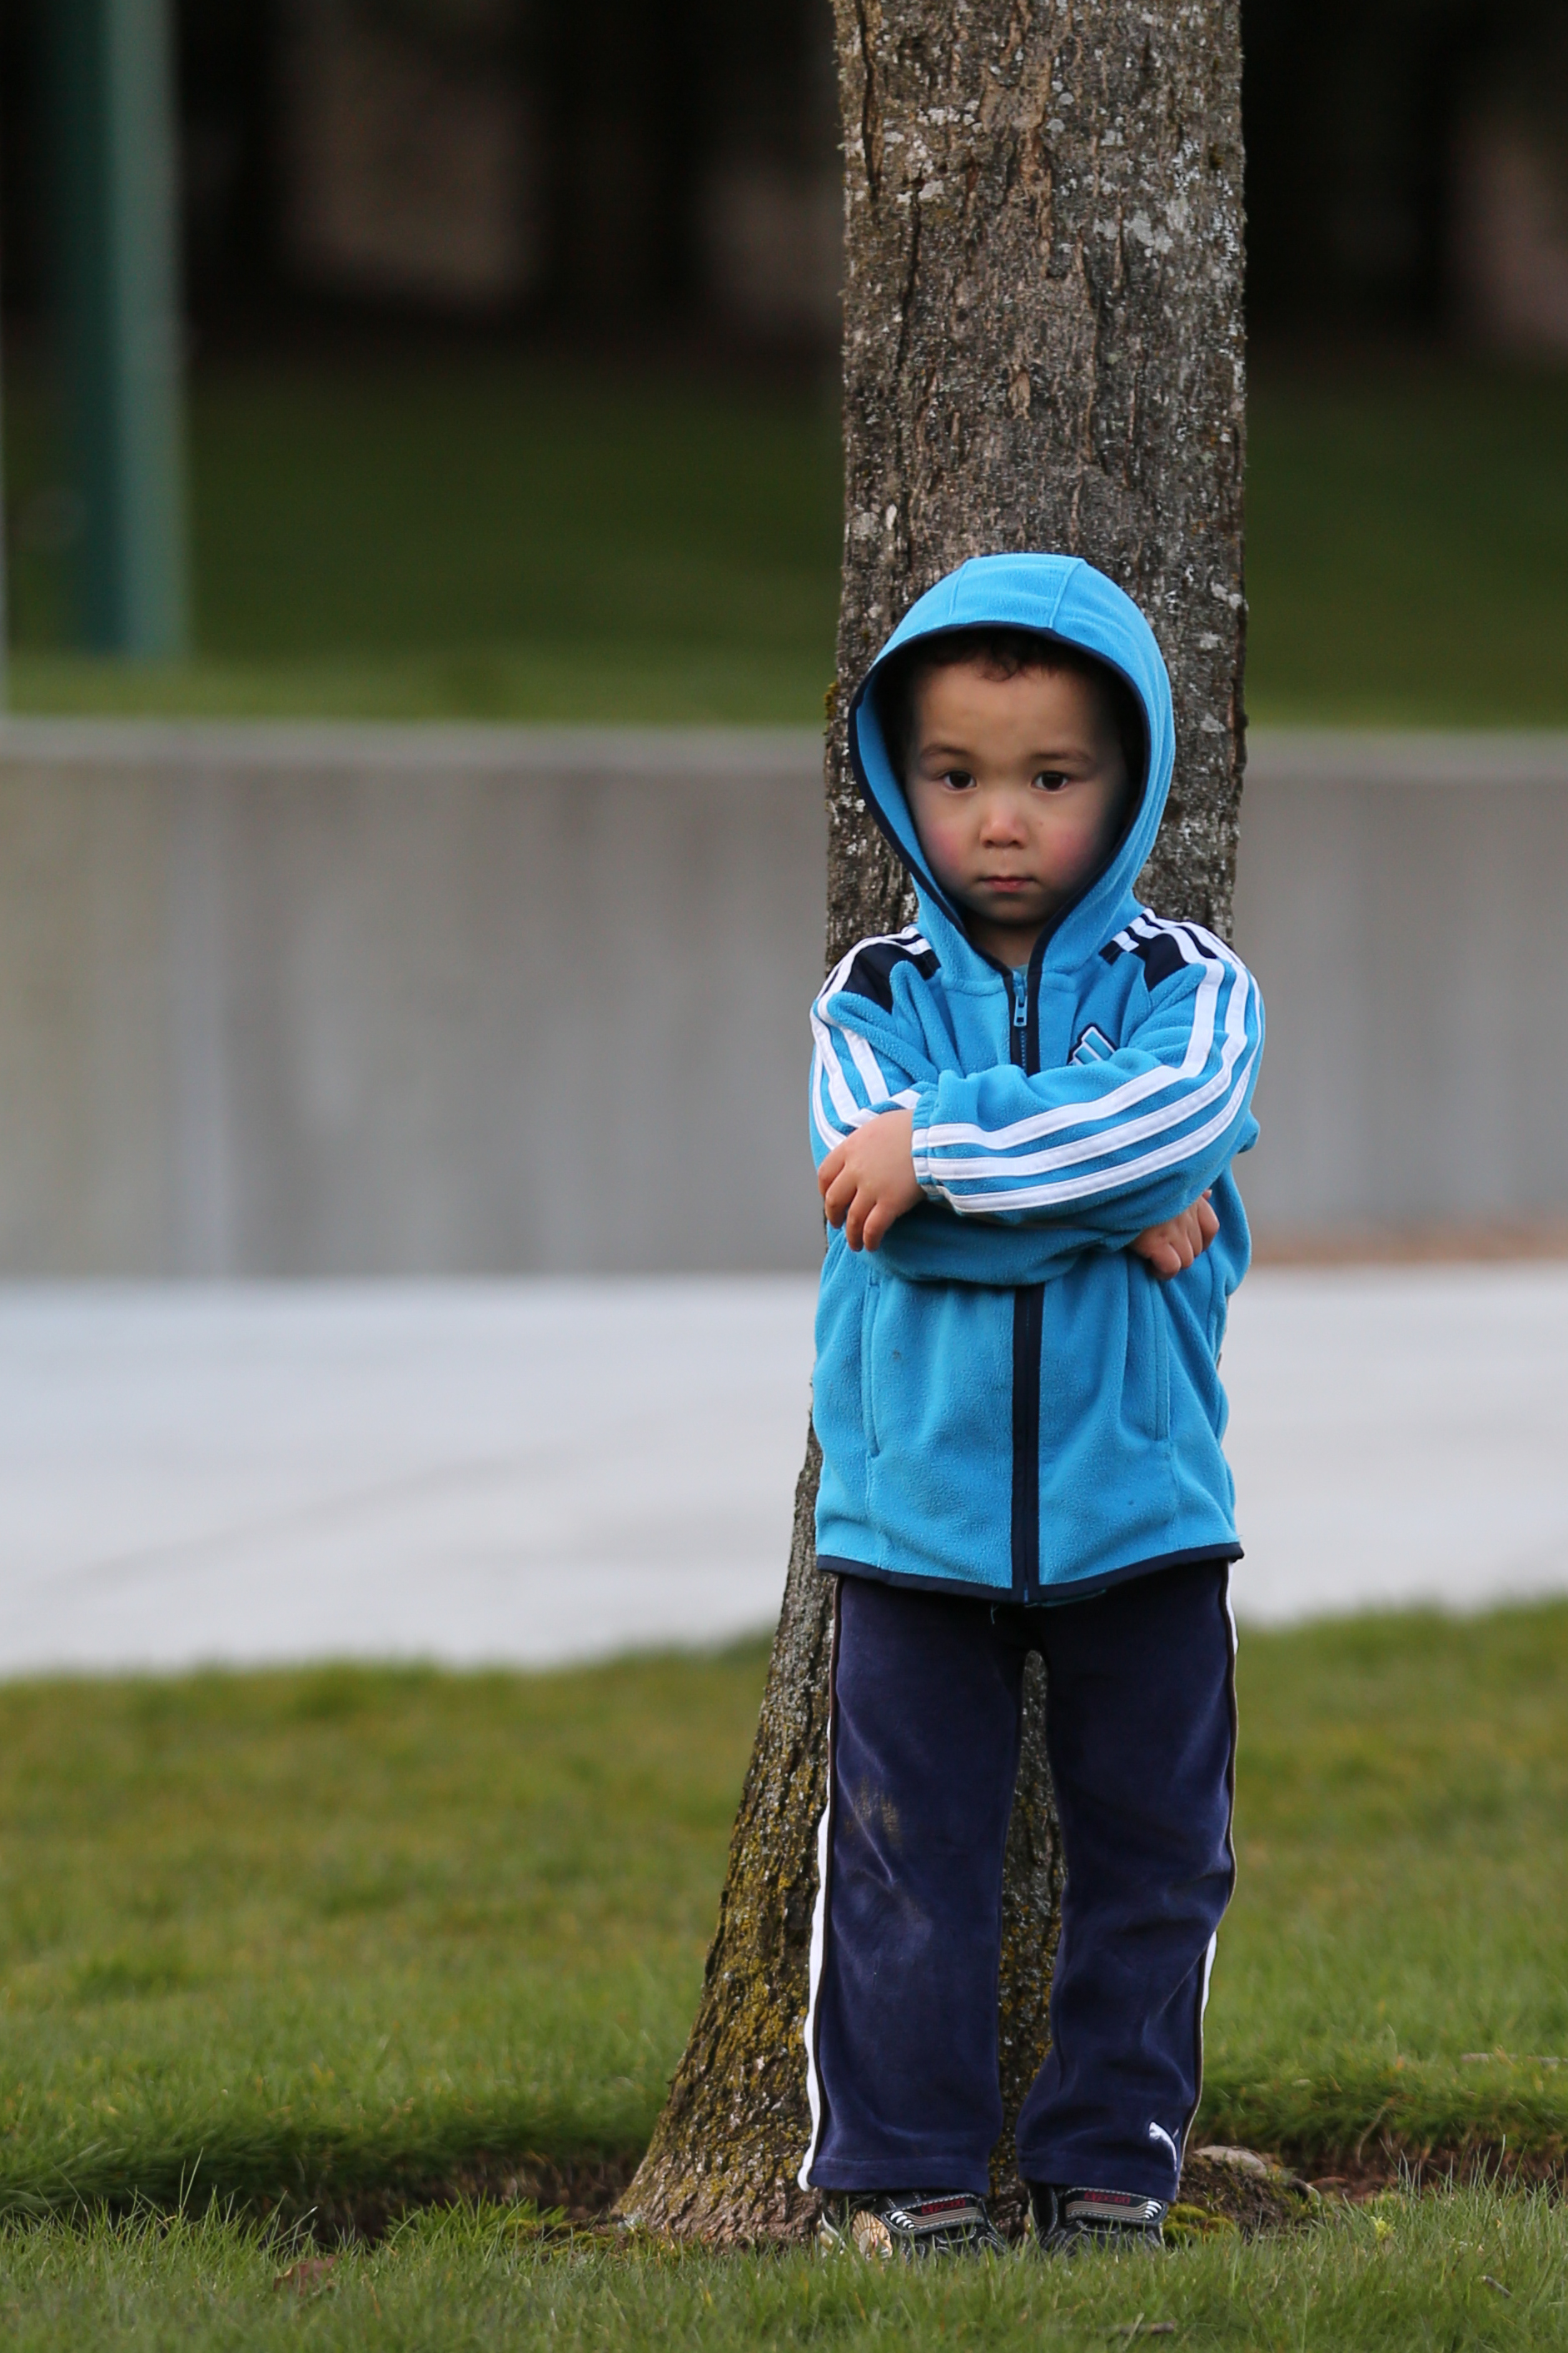
Autofocus Performance – The Swing Test

Action Shot - Click to view the original
Action Shot - 1/2000 sec at f/2.8, ISO 500, 70mm AWB

I was busy being Dad this weekend to my three kids so I didn’t get as much time as I would have liked to shoot, but I did get to play around with the 5D Mark III. I’m still getting used to the controls so I had a large number of user errors that I can’t blame on the camera (i.e., like forgetting about the minimum focus distance when doing this sequence, and failing to change the aperture to f/5.6+). These user errors were mainly due to me playing with so many variables that I just wasn’t paying enough attention to the basics, but with that said I was very happy with the performance. While I’ve got lots of in-focus and sharp shots (many more than this one which is a tad soft), most were pretty bad shots (eyes closed, subject not looking, etc…) so I decided to grab this shot here which is stronger compositionally than it is sharp. I’ve thrown some other sharp ones in the sample gallery for you to examine.

What this sequence taught me about the 5D Mark III is that the AF system is very flexible and very good – straight out of the box. It has the same level of auto focus complexity as the 1D Mark IV (which is so difficult to use I created a guide to help people), but the five AF presets help increase your odds of getting things right. Rather than jumping to my 1D Mark IV settings I experimented using only the defaults and found them to be good for most cases, but the swing test wasn’t foolproof (to be fair though, this is tough for the 1D Mark IV too). 

In a sequence like this your subject moves so fast that you can’t keep an AF point on any given point. If you go to full auto AF points then it will always choose something besides the eye, so it’s easy to get a crisp Adidas logo or shoe tread, but getting the eye in sharp focus requires a little work. In short, the camera does what you tell it to do but not necessarily what you want it to –after all it’s a machine, not a human. :)

I shot myself in the foot here though by failing to change the aperture to f/5.6 – f/8.0 to get more depth of field, and I needed to back away from my subject to address my 70-200mm’s minimum focus distance. However, once I settled on all of my settings, my model (my son) and assistant (my daughter pushing him) were gone. 

I wouldn’t say that I found the perfect AF setting for this sequence, but I got enough data to know that I can pull off a good sequence when I try this again. I don’t think any of the defaults are perfect for this difficult situation, but out of the box I got more usable frames than I have with any new camera to date. I’ve beat this performance with the 1D Mark IV, but I suspect if I tried those settings here (with the correct camera settings) I’d get results that were as good or better.

It cleans up real nice (in a Larry the Cable Guy voice)

Mouse over to see before, mouse out to see after
ISO 25,600 With (mouse out) and Without (mouse over) Processing

I’ve been playing around a lot with the higher ISO’s to see how practical they are in the real world. For the shot above you can click here to get the original in-camera JPEG with zero processing (orange cast is from AWB), and click here to get the processed (from RAW) version.

It doesn’t get any more real than this because the truly hardest shots to pull off are when you are around the house with kids and you aren’t ready with all of your gear. In this case there’s no flash and the only ambient light is the light coming in from the front window (which is a mix of a fluorescent street light and tungsten) and the tungsten coming off the fireplace to the camera left. To the naked eye this is a pretty dark scene (about 2 stops darker that it appears here).

The original is a bit rough around the edges, but I thought – what if I had to make that photo work? With that in mind I white balanced the RAW in DPP and exported a 16-bit TIFF to Photoshop CS5 for further processing. From there I did a curves adjustment (to brighten the face), Noiseware “Stronger Color” preset to cut some of the noise, and then I did a low pass of Portraiture to clean up the skin a bit. Finally I did some basic high pass sharpening (Sharpener Pro would work too).

While the final result wouldn’t be suitable for a billboard, I could easily do a 13x19” print with this. I’d probably clean up some of image and do more work on the eyes, but it’s a totally usable starting point.

The truth is that for “mom’s” scrapbook, I’d probably call the in-camera JPEG done. At the 4x6 print size, it needs no work beyond white balancing and sharpening.

The Holy Grail Feature NEW to the 5D Mark III

When I was shooting the Seahawks last December I remembered a problem that has always plagued me – when using the AI Servo drive mode, if the action stops my shots all come out blurry. If I switch to One Shot (which takes time fiddling with the AF drive settings) then I’m doomed if the action starts moving again. Since this happens between plays, then it’s near impossible to switch. As parents it’s even worse for us as kids change their movement patterns faster than pro athletes!

I talk to a lot of pro photographers. Some have celebrity status or years experience shooting high profile sports, but I’ve discovered that most do things out of habit or consensus (i.e., what everyone else is doing). To that end, the universal workaround for the One Shot/AI Servo switching problem has been to change the camera custom function to use the AF-On button for focus (instead of a half-press on your shutter release button).  This allows the photographer to control when the AF goes on and off.  It’s effectively a workaround to the fact that you can’t quickly switch from AI Servo to One Shot auto focus drive modes*. That was a fine workaround for slow AF systems, but on a sophisticated AF system like on the 5D Mark III (and the 7D, 1D Mark IV, etc…) its a waste because you lost most of the benefit of AI Servo (which is designed to work best with autofocus always on).

* = People using big lenses with an extra button on them could program their camera to do this, so bird shooters have been doing this for years. However, most of us can’t afford $5000+ lenses, so this is new for mere mortals – and for smaller lenses. It’s also a fact that many people with these big lenses had no idea they could do this using that button either (based on my recent informal poll).

Changing the Depth of Field (DOF) Button to Toggle the AF Drive Mode

The 5D Mark III features the ability to reprogram the DOF button to toggle your AF drive mode states between One Shot and AI Servo. Here’s how:

image
Here’s the button that we’ll make useful on your new camera

  1. Go to the C.Fn2:Disp./Operation menu (in the orange section) and scroll down to Custom Controls.
  2. When you press the SET button you see a bunch of options, but the most important one is the fourth one that looks like aperture blades.
  3. Press the SET button and scroll to the option that says One Shot <->AI Servo
  4. Press SET change it.

You can now press the menu button to get out or just start shooting. However, now you are set up for real success when photographing kids. Now when you press the DOF button on the front of your camera, you’ll temporarily toggle the auto focus mode while the button is pressed. This means that if you are currently in AF Drive One Shot and you press this button, then while you are holding it down you’ll be in AI Servo. When you release it you’ll return to One Shot. The inverse is true too, so if you are in AI Servo, then holding it down will put you in One Shot.

I know this is confusing, so I tried to create a video that shows how to do this. My apologies for the really crappy video, but it gets the point across:


AF Drive Mode Toggle

Now that you have that programmed, you can always remember that if your subjects legs are moving, then you use the AI Servo auto focus drive mode. If your subject stands in a fixed position then you should be in One Shot auto focus drive mode. You can set the AF Drive mode to whatever your subject will be doing the most and then use the toggle button on the front of your camera to switch to the opposite mode when needed. For my rough and tumble toddler I typically am in AI Servo mode while he’s running around and then I toggle to One Shot when he stops to play (or pout as was the case below).


1/320 sec at f/2.8, ISO 640, 185mm AWB

Now that I have this feature I think the 5D Mark III is worth the upgrade simply for this feature. My 1D Mark IV doesn’t have this feature and it needs it big time as sports shooting always requires switching between these AF drive modes. Action requires AI Servo, but between plays when people are standing around you need One Shot.

By using this feature you WILL increase the number of in focus shots. There’s a lot more to the AF system that’s required to get a high success rate of in-focus shots, but I’ll save that for another day. In the mean time if you only do this, you’ll be doing much better than you have in the past.

Using Silent Mode to capture the moment


1/320 sec at f/2.8, ISO 1250, 120mm AWB

The sound of the mirror slap is classic sound for a DSLR and when you own your first DSLR you enjoy hearing it. However, you quickly learn that it can scare a kid off or cause them to stop doing what the action that caused you to pick up your camera in the first place. As a result it can be a distraction – especially at memorable events (i.e., recitals, plays, religious events, etc…). Now with the silent mode (and new for the 5D Mark III – silent burst mode), you can limit the amount of mirror slap noise to capture those shots without drawing attention or distracting your subject. In this short video I show how to use it and how it compares to other modes:


Silent Mode Video

For those of you with 1Ds Mark III and 1D Mark IV’s, I can tell you that this mirror slap seems a tad bit louder and more mechanical sounding than what you find on the pro bodies, but it certainly works. In fact, I’d say it’s very similar to the sound of taking a photo while you are in Live View.

Parents, wedding and event photographers should be very pleased with this new feature!

To see more real world shots not posted here, visit http://ronmart.zenfolio.com/5dm3firstshots/hdd6bb28#hdd6bb28

More to Come

I’ve got more to come on the 5D Mark III including a big article just for parents. Check back to learn more!

Order Yours Now - Special Offer


5D Mark III (stand-alone body) from Adorama

Adorama also has kits in stock with the 24-105mm f/4L IS lens (which is what I use). They are also offering a great deal on Lightroom 4 ($50 off) and Eye-Fi ($15 off) if you buy them together with your camera.

B&H also has a sale which features a SanDisk 16MB memory card and an extra battery (plus other qualifying rebates) for only $3499 (with free shipping).

Disclaimer

I paid full-price for this camera (zero discount) and was not paid a penny for this article from anyone. I mention Adorama only because they got me this camera quickly so I could bring this article to you while others are still waiting for their packages to arrive.

If you use links in this article to make a purchase I may make a small commission.

NOTE: This site requires cookies and uses affiliate linking to sites that use cookies.

If you enjoyed this article, please support future articles like this by making a donation or saving money by using my discount coupon codes. Either way, your support is greatly appreciated!

This blog is intended for freelance writing and sharing of opinions and is not a representative of any of the companies whose links are provided on this site.

The opinions provided are of Ron Martinsen alone and do not reflect the view of any other entity

Canon 5D Mark III Real World Shots–In-Camera HDR, High ISO, Flowers, Nature, People & Cars

5D Mark III – Front with Battery Grip

All of the photos in this article are unprocessed photos that come directly from the in-camera JPEG file created by the 5D Mark III. All of these images are linked to a gallery of photos where you can view more info about the shot or download the original file that came from the camera (some files renamed for but otherwise untouched).

These photos are copyright Ron Martinsen - ALL RIGHTS RESERVED. You may not redistribute, link or otherwise consume without expressed written consent of Ron Martinsen.

Nice Dynamic Range and Color

I’ve been very pleased with the dynamic range and color I’ve been getting from the in-camera JPEG’s shown here:


1/200 sec at f/10 (handheld), ISO 3200, 100mm AWB


1/500sec at f/2.8, ISO 160, 70mm AWB

Garage Lighting – No Problem

Here I just snapped off a shot in the garage of a good looking car:


1/30 sec at f/4 (handheld), ISO 3200, 47mm AWB

Even at ISO 3200 the image looks clean (click for a link to the original). Garage conditions like this are tough, so I was impressed that without a flash I could get a shot like this.

High ISO with People

All of these are handheld shots with no flash.


ISO 12,800 AWB


ISO 20,000 AWB

The orange cast from auto white balance here is annoying but it can easily be fixed in DPP, Lightroom or Photoshop. I tested intentionally with the default settings and did not post-process this issue away.


ISO 2000 shot shows good dynamic range compared to predecessors


ISO 2500


ISO 8000


ISO 10,000


ISO 100


ISO 640


ISO 1000


ISO 4000

In-Camera HDR is pretty good

Here’s a single exposure as it came out of the camera “perfectly exposed”. The detail is good and the dynamic range of colors and exposure are decent, but even the X10 can out do this:


1/125 sec at f/11, ISO 200, 115mm AWB

Here is a handheld in-camera HDR shot using the Natural effect:


Auto Adjust Dynamic Range Setting with Natural Effect

This wasn’t my favorite example, but it’s one where you can see even with moving water and a slight breeze that the handheld HDR image alignment is pretty decent. This is in stark contrast to the G1X which is useless unless its on a tripod. It’s hard to believe these products come from the same company!

HDR Effects Samples

All of the following shots were shot hand-held and have not been modified from the in-camera result. No in-camera editing was done either. I suspect if I would have used a tripod and it wasn’t so windy then these results would have been much better, but I wanted a real-life experience for this article.


1/100 sec at f/8, ISO 800, 100mm
No HDR Effect – Single Exposure


HDR Effect – Natural


HDR Effect – Art Standard


HDR Effect – Art Vivid


HDR Effect – Art Bold


HDR Effect – Embossed

After my testing today I’ve got confidence in the “Auto” Adjust dyn range setting and the Natural effect. I figure I can always go for the extreme look later, but in-camera I want it to look natural.

Beware Moving Subjects

This is true of ALL HDR and is logical when you think about it, but for those who are new to HDR I thought I’d show you what can go wrong if you don’t think about what’s really happening in HDR mode. Here’s a setting that with a single exposure is okay but the sky is blown out:

To fix that we can do HDR but if we forget about having a shutter speed that can deal with moving people AND the Auto ISO to cover the range of exposure needed to get the shot at that shutter speed, then ghosts will appear:


Ghosts during HDR can sometimes be corrected (see below)

Ideally you want a clean shot, but sometimes that’s never possible. The best bet is to wait for the foreground subjects to leave, crank up your shutter speed, try again as I did here:


1/500 sec shutter speed used as the base for this HDR

This taught me that it’s best to be mindful of your situation and pay close attention to the shutter speed to get the best results.


Single Shot


HDR Natural – Handheld

Conclusion

I’m very pleased with the high ISO performance and features of the camera that allow me to get the shots that in the past would have been lost while I went searching for my flash. I’m feeling very comfortable shooting in manual and letting the ISO dictate the exposure, but I do find it tends to shoot one stop darker than I like with no exposure compensation. As a result I find myself dialing in the necessary ISO as needed.

I feel totally comfortable with using shots up to ISO 25,600 with anything at or below 6400 being as solid as ISO 1600 and below on my 5D Mark II.

I’m also impressed with the HDR mode which seems to work well even hand held. This is handy enough that I think I’ll do more HDR as there’s no post-process headache yet you can save the exposure to leave that option open if you like. I’ve come to love the EXR mode of my X10, so I’m pleased to have an option to get results that good from my DSLR and the benefit of it not being JPEG only (for the individual exposures – not the HDR image) is a big plus.

To see more real world shots not posted here, start here: http://ronmart.zenfolio.com/5dm3firstshots/hdd6bb28#hdd6bb28 

More to Come

I’ve got more to come on the 5D Mark III including a big article just for parents. Check back to learn more!

Order Yours Now - Special Offer

Adorama has a good deal on Lightroom 4 ($50 off) and Eye-Fi ($15 off) if you buy them together

Disclaimer

I paid full-price for this camera (zero discount) and was not paid a penny for this article from anyone.

If you use links in this article to make a purchase I may make a small commission.

NOTE: This site requires cookies and uses affiliate linking to sites that use cookies.

If you enjoyed this article, please support future articles like this by making a donation or saving money by using my discount coupon codes. Either way, your support is greatly appreciated!

This blog is intended for freelance writing and sharing of opinions and is not a representative of any of the companies whose links are provided on this site.

The opinions provided are of Ron Martinsen alone and do not reflect the view of any other entity

Friday, March 23, 2012

Canon 5D Mark III First Thoughts–WOW, Canon is BACK!!!! (REAL WORLD SHOTS)

f/11 @ 115mm, 1/15 sec (handheld), ISO 4000 (70-200mm f/2.8L IS II USM)
Click to download the original in-camera JPEG

I’ll admit for the last two generation of cameras, I’ve looked at my Canon gear and then looked at my Nikon’s friends high ISO shots and I’ve been very disappointed that I couldn’t get those results. When I reviewed the Nikon D7000, borrowed a friends D700, and used the D3s at the Olympics, I knew Nikon had the better product. Their ISO performance was impressive and their user controls made the cameras a joy to use. In fact, I often wondered if I should join legions of others and go to the Nikon camp.

5D Mark III ISO 25,600 - f/25 for 1/20sec Sample Imagef/25 for 1/20 sec at ISO 25,600 - 200mm (70-200mm f/2.8L IS II USM)
Click to download the original in-camera JPEG

My Nikon D3s envy has been eliminated as I now own the best performing high ISO camera my hands have ever held and my eyes have ever seen. Click on the shot above to see the unmodified in-camera JPEG that shows what ISO 25,600 looks like using camera default settings. HOLY COW!!!!!!!

Now naysayers will pick at that shot, but it is totally usable to me. However, if that doesn’t impress you then behold this at ISO 100 (again using the nasty part of the lens at f/18):

f/18 for 6 sec at ISO 100 - 200mm (70-200mm f/2.8L IS II USM)
Click to download the original in-camera JPEG

This camera is astonishing. It’s not just good, it’s incredible and way better than I expected. In fact, it’s so good it makes me wonder how the 1D X is going to be able to top this (beyond the obvious better battery life, different controls and fps). I certainly can’t see how it can be twice as good for twice the price!


100% Crop – Handheld
1/100 sec at f/2.8, ISO 1600 (
100mm macro – original)

Sadly I had a hard day at work today at the day job and didn’t get home until nearly 10:30 PM, but I had some time with it during a short break at work and this evening at home. Here’s my initial thoughts on some key areas:

  • In-Camera HDR – insane awesome – even handheld.
  • Build Quality –1D Mark IV like (this is no toy prosumer camera like the 5D Mark II)
  • Controls – BRILLIANT!!!! From the organization and the tactile feel, to the reprogramabilty of the hard buttons – WOOO-FREAKIN-HOOOO!!!!!!!!! I lust for NOTHING from Nikon here anymore!
  • Mirror Lockup – Accessible via first menu (great), but sadly not programmable to a hard button (I can live with that though)
  • AF performance – OUTSTANDING! This feels like the 1D X AF system that I saw in New York last fall – I can’t believe this camera has this much!!!!
  • Silent Mode – Works well, but doesn’t seem as quiet as the 1D Mark IV
  • Burst Mode – Yeah, only 6FPS but with a good memory card I was able to rattle off 32 shots tracking a car with only short pauses between shots after the first 6. I could totally live with this shooting kids sports.

There’s SOOOOOOOO much more in here than we’ve ever seen in a Canon Camera. Canon has FINALLY listened and picked up some of the goodness from Nikon and added SOOOOOOO much more usability to this camera.

Other than a big battery and faster FPS, I see no reason to keep my 1D Mark IV when I have this. This camera is a 100% pro body with just a smaller battery and an annoying knob instead of the pro buttons on the top.

It feels better built than the 7D in my opinion (and I previously thought that was the best overall consumer Canon body).

Other than EF-S support, I can’t see why Canon would do a 7D Mark II. With this there’s really no need unless they just want a fast FPS 5D Mark III with a crop sensor. However, if they do that then what’s the point of the 1D X? I just don’t see that happening.

I’m only looking through the rear panel LCD (which is very good but feels about the same as the previous gen), but ISO 25600 feels like ISO 6400 on the D7000 I reviewed last year. This is definitely a huge improvement over the 1D Mark IV and 5D Mark II.

I am extremely impressed and am wondering if I should even bother with the 1D X. I’ll still review one, but my need to purchase one just diminished DRASTICALLY!  I’m thinking I may just keep the 1D Mark IV and invest in the new 24-70 II lens.

AutoFocus Performance


Click for original and EXIF

I don’t smoke, but if I did and this camera was a woman I’d need a cigarette after what I experienced today! With the in-camera default settings, and handheld I just walked out the parking lot using my SLOWEST AF LENS EVER – the ORIGINAL 100mm macro and put the camera into Av and AI Servo and fired away. My first thought was “you’ve gotta be shitting me – this is as 5D!!!!!!” I was giggling like a schoolgirl that I just nailed a decent pano on my first try – HANDHELD (no monopod) and nearly all the frames were in focus. I thought this must be a fluke so I walked and instantly raised my camera and fired away at the that was passing immediately in front of me and check this out:


Click for original and EXIF

Yeah, I missed the car (my bad) but this was literally bring the camera up, quick pan and fire. I could only get two shots off but it just nailed it – with a dog slow old macro lens!!!!

I figured I could trip it up so I just pointed at a car and followed it (click here) until my view became obscured (bus drove in front of me). Despite it’s 6fps I was able to fire off 32 frames with no issues with the buffer (shooting RAW+JPEG) and I never had to wait. Sure it slowed down after the initial burst, but as you can see from this series it’s certainly good enough for kids sports, keeping up with toddlers, etc... I literally just pushed the button and tracked – nothing fancy here – still using the slow macro lens. Sure the first image was a touch out of focus, but the rest were pretty decent.

Go to the bottom of this article to see more info from Canon on how this AF system compares to the 1D Mark IV and 1D X.

Wedding, Event and Club Photographers

If you are a low light shooter that needs high ISO performance, this is your camera. However, this camera goes beyond just being usable at ISO 25,600. It also offers pro build quality, a sweet sensor, dual memory card (CF & SD) with redundant support, silent mode, great video, and more. It’s really quite impressive.

What about the RAW’s?

Well I’m sad to report that I don’t have a place to store the RAW’s where you can download them, but others online are sharing their raw’s so you can see more evidence of what I’m saying here. I can also say that Lightroom 4 doesn’t currently support importing them, so I had to use DPP to view the RAW files.

Really Right Stuff Users

I don’t use the L-bracket, but my 5D Mark II base bracket (B5D2 plate) worked fine on my 5D Mark III. I won’t be doing anything new for this camera.

More Sample Files


This Guy Loves the 5D Mark III!

Here’s more sample images:

Conclusion

I’ll do a more in-depth review with photos that don’t suck so bad, but I wanted to share my first impressions for those who are still on the fence. My initial impression is that this is the most enjoyable to use, well laid out, best performing (and easy to use) AF system, best high ISO camera I’ve ever used. It’s built like a pro camera and it is a suitable replacement for those with 1Ds Mark III’s. Personally

Order Yours Now - Special Offer (and IN STOCK!!!!)

Adorama still has units in stock (kit only) and they are even offering a good deal on Lightroom 4 ($50 off) and Eye-Fi ($15 off) if you buy them together.

See my unboxing video here

Disclaimer

I paid full-price for this camera (zero discount) and was not paid a penny for this article from anyone. In fact, I’m pissed at Canon for not getting me one to review in advance. I give Adorama props for delivering this unit to me fast (just many others).

If you use links in this article to make a purchase I may make a small commission.

NOTE: This site requires cookies and uses affiliate linking to sites that use cookies.

If you enjoyed this article, please support future articles like this by making a donation or saving money by using my discount coupon codes. Either way, your support is greatly appreciated!

This blog is intended for freelance writing and sharing of opinions and is not a representative of any of the companies whose links are provided on this site.

The opinions provided are of Ron Martinsen alone and do not reflect the view of any other entity