This is a big deal for those users who want to use paper from third parties like Epson where getting Canon ICC profiles' can be tough to come by. What’s more, ImagePrint has always been highly regarded as one of the best RIP’s in the business so if you have been wanting to get more tonal range out of your new PRO series printer then this is a big deal.
Check out my original review of ColorByte ImagePrint 10 for more details about this product and why it’s profile valet and hot folders make it an invaluable part of your print workflow if you make a living off of your prints.
Where to Buy?
Purchasing this product is a little unconventional because it requires a USB dongle to be plugged into your computer when you use this software. While you can purchase direct (please tell them you came from ronmartblog.com), I've arranged a special discount that I'd recommend you take advantage of instead. Here's details:
Get 10% OFF ImagePrint
I have worked a special arrangement with ColorByte to offer you the first ever discount that was made available for a blog several years back. ColorByte is offering a 10% off discount to readers of this article when you contact JVH Technical, LLC by phone or email. You can not get this discount through the web or ColorByte directly, so you must contact JVH and you MUST mention this blog in order to get the discount.
If you have any questions or concerns about this discount program, please don’t hesitate to contact me directly.
NOTE: This product does offer a 30 day money back guarantee as well as a free demo that will watermark your prints.
Other articles you may enjoy
If you enjoyed this article, you may also enjoy these:
QImage Review & Discount - an alternative layout product that I like but it leverages your OS drivers so I often export the image from QImage and print in ImagePrint
Disclosure
If you make a purchase using links found in this article, I may make a commission. It doesn’t cost you a penny more, but it does help to support future articles like this.
If you've followed along in my printing series, you know that I'm a fan of Red River Paper as a suitable alternative to more expensive papers. In fact, my article entitled Red River Paper vs Epson Papers has been one of my more popular articles because I offer my honest opinion on similarities and trade offs for going with Red River over various Epson papers. In fact, my last review entitled Red River Paper - San Gabriel Baryta Semi Gloss 2.0 I declared it just as good as the more expensive Baryta's.
It's no wonder that when Red River came out with their Palo Duro Etching paper a few months ago that they immediately reached out to me to get my thoughts on it. I printed with it and liked it right away, but I've been so crazy busy I haven't found time to write about it. Lucky for you and some insomnia after the baby waking me up in the middle of the night means that you'll finally get to hear my thoughts on this hearty fine art paper.
No Epson Comparison
While I've got a lot of Epson papers, for this review I only had 13x19 and 5x7 versions of this Red River paper. I have no other 5x7 papers to compare against and I can't scan 13x19 sheets, so this review will simply judge it on its own merit.
I will say that the closest thing I've used to this paper is the Hahnemühle German Etching, but that is still a very different paper that has no equal that I've seen (yet). I reference that paper because it's one that has a heavy texture, and that is something this paper definitely has - loads of visible texture. If that is something that bothers you, then stop reading as this isn't the right paper for you. However, if you can look at a canvas print and ignore the texture then read on.
Media: 100% cotton rag Weight: 315gsm Thickness: 21mil Coated: Microporous coated one side Color: Natural warm white tone Surface: Heavy textured matte
Pigment Ink Users: This media is designed for Matte Black ink
Archival Characteristics: Acid free, lignin free, OBA free, museum grade
Color gamut of Palo Duro Etching (larger) vs Epson Cold Press Natural (smaller)
Matte black ink on fine art matte papers are always going to have a smaller color gamut than photo black on resin coated papers, but the color gamut of the Red River ICC color profile for the Epson SureColor P600 completely consumes that of the excellent Epson Cold Press Natural as shown in the graph above. What this means is that you'll get better color across the entire color spectrum using Red River's profile with this paper than you will with Epson's.
The Canon PRO-1000 had a wide color gamut in the ICC profile that I used for my testing
Now before the hate mail comes in, for the record here's the Epson P800 profile compared to the PRO-1000 and it's smaller too:
and to counteract more conspiracy theories - here's the settings I used for the above graph where the PRO-1000 shows a larger color gamut than the Epson P800:
Here's a scan of 5x7 print made on the Epson P600 using the Red River profile on Paulo Duro Etching and you can see the color gamut is quite impressive for a matte paper:
It should be noted that my scanner couldn't pick up the full range of grayscale so I had to scan it twice to get the gray squares and the grayscale gradient is better in real life than what's shown in the photo. Simply put, the scan doesn't do it justice compared to what you'll see in real life.
At 21mil and 315gsm, this is no flimsy paper! It's got a hearty chalky feel with a noticeable texture. It doesn't flex easily and Red River recommends using the fine art media tray, but I was able to run it through the Auto sheet feeder on my P600 without any problem, so it's not unbearably thick!
Photo Quality
The following are unedited s of actual 5x7 prints made using my P600 (my dedicated matte black printer). In the first photo, this is Epson's Advanced Black & White mode of a color photo:
It was a little darker than I hoped so some of the details were muddy in the vest, but it looks better in real life than in the scan. Here's the color print which is remarkably close in tone to what I get using photo black and luster paper:
It should come as no surprise, this isn't a great paper for high fashion, but that's not its intent. Landscapes, abstracts, and images with lots of texture are the ones that will benefit the most.
Naturally the best type of image for this type of paper is going to be a images with lots of texture, so I've printed my famous Treehouse photo using both the P600 (above) and the Canon PRO-1000 (below) using ICC profiles provided by Epson and I was quite pleased with the real world results.
The wider gamut of the Canon comes through in the form of warmer tones and deeper blacks. In real life under a light box in ideal lighting conditions, the Canon really shines but in normal tungsten lighting conditions the Epson print doesn't feel as dark so it is easier to see some of the detail in the shadows. Simply put, both look good but if you have great lighting conditions then the Canon will produce the more visually pleasing print.
For Epson SureColor printers, the driver will be basically the same so here's the settings I chose:
I did Cold Press Natural so I could use the sheet feeder, despite Red River's recommendation for using Velvet because 5x7 paper can't be used for the manual feeder (required for Velvet).
No matter what paper you use, you have to set Paper Thickness to 5 in Paper Config(uration):
In all of my testing, I had no issues with the paper being scratched - even when I forgot the paper thickness set to 2. You'll also noticed below that I did LEVEL 4 (1440x1440 dpi) per Red River's guidance. 1440 does variable size dots vs 2880 which uses fixed size, so the lower resolution can still result in higher quality results which was my observation with this paper. As a result, I agree with Red River's recommendations:
In Photoshop I chose to do Perceptual rendering intent (despite my normal preference for Relative Colormetric) for the best results:
Mac settings look different, but the values are all the same so what you see here - despite looking very different - still applies to the Mac.
For the Cano - PRO-1000 I chose Heavyweight Fine Art Paper so I could use the Rear Tray (for the same reason as above for Epson - you have to do this with 5x7 paper). I also chose the highest quality which with the optional XPS (non-default for Canon) driver can result in better color fidelity:
On this page the key thing to remember is to click Advanced Settings and Color Intensity to Manual (then click Set):
For color you want None so Photoshop can apply the ICC profile without double color management:
For Advanced Settings you have to set Print Head Height to "Avoid Paper Abrasion" which just means this is thick paper:
Conclusion
This paper feels substantial in the hand with a hearty texture so some will perceive that as high quality and others will be think ugh, that's too chalky for me. However, that's the art of choosing the right paper for the right photo. When paired with a texture heavy image like the treehouse shot, it's a great choice that feels good in the hand.
This paper has the fine art "special" feel that separates it from your cheapo prints, so even a novice will know that this wasn't printed at your local discount warehouse or volume online print service. When commanding a premium price for your images, this is important so that's where paper like this really pays for itself!
Red River has done a good job of offering a museum quality paper at a reasonable price with excellent ICC profiles. As a result, this paper is an easy one to recommend to both Canon and Epson fine art printer users.
If you make a purchase using links found in this article, I may make a commission. It doesn’t cost you a penny more, but it does help to support future articles like this.
Print on Epson paper on a Canon PRO-1000 with ColorByte ImagePrint 10.0.16 & up
Back when I reviewed ColorByte ImagePrint 8 it made great prints, but the user interface - especially the mechanism for getting ICC profiles - was cumbersome. While this new user interface won't win any design awards, it's fairly straight forward to use. What's more, it requires a lot less clicking than printing directly from Photoshop using a operating system driver.
A word about sharpening
It should be noted that by default ImagePrint assumes you've sharpened your image and it won't apply any additional sharpening.
It has been my experience that Photoshop and especially Perfect Resize are much better at resizing images than letting ImagePrint do it, so if you let ImagePrint resize your images then they will be a little softer than what you'd get from the driver and Photoshop as you'll see below.
Corrections Window
To compensate for this you can use the Corrections feature (shown above) in ImagePrint to add sharpening, but my preference is to use Perfect Resize to the exact output size, and then sharpen in Photoshop before bringing the image into ImagePrint. This will give you the best resize and sharpness.
Color Prints Compared
The image in this section were printed on the same paper using profiles provided by Red River when printed from Photoshop and ColorByte when printed from ImagePrint. The original was a 3456 x 5184 pixels PSD using ProPhoto RGB 16-bit, and the same file was used in both Photoshop and ImagePrint.
All of the prints featured in this article were scanned with a Epson Perfection V850 Pro Scanner using Epson Scan software. Dust and lint was intentionally left on the bed to prove that it was in fact a scan of print. All prints look more vibrant in real life.
Click the images to see the full size original scans for more detail. For best results, open the originals in Lightroom or Photoshop and compare them side by side. Please leave your browser open on this article while you are doing the comparison and delete the images after you are done comparing.
Please note that it is near impossible to see any differences unless you are viewing at 100% or more, so do not use the thumbnails featured here to draw any conclusions.
All images are copyright Ron Martinsen - ALL RIGHTS RESERVED. You may not print, save, edit, or otherwise redistribute all or part of any of the images featured in this article.
The following print was done on the same paper, Red River Paper Palo Duro SoftGloss Rag with one printed using the best printer driver settings in Photoshop using the OS driver:
The net result is that the image in ImagePrint has a much more accurate sky color (better blues) and the tonal range in the reds is slightly better. Unlike the Epson, I didn't measure any improvements in shadow details which could be due to the experience ImagePrint has had building Epson drivers over the years.
The following print was done on the same paper, Red River Paper Palo Duro SoftGloss Rag with one printed using the best printer driver settings in Photoshop using the OS driver:
Like the Canon, the sky color was much more accurate (better blues) but in this case I felt the tonal range in the reds were much better. I also saw a slight improvement in the detail in the shadows:
Black & White Images Compared
NOTE: I'll do B&W image comparisons in the near future.
Video Review & Tutorial
I've created a simple 10 minute demo of how I like to use this product and what I like about it. I've avoided getting into too much detail as this is meant to be a basic overview along with my opinion instead of a fully featured tutorial.
NOTE: While I demo this product using Windows, there is a Mac version as well.
Want more videos?
The ColorByte home page features a list of videos that discusses what's new if you are upgrading, and it is helpful to go to the Exclusive Features and Tutorials pages to quickly learn about all this product has to offer.
Conclusion
At the end of the day this product isn't just using your printer driver - it is using its own version of a more advanced version of your printer driver to give you the best results possible. This low level control of your printer coupled with excellent ICC profiles really does result in the best print quality I've seen both in color as well as black and white prints. Of course if you are handy at creating very high quality ICC profiles and are happy with the results you are getting it might not be right for you, but that's the exception rather than the rule.
The utilitarian user-interface is painfully out of date and quirky, but it's functional and does its job well. The resizing is poor compared to what you get from Photoshop or Perfect Resize so external resize and sharpening in advance is his highly recommended.
Despite it's steep price, I highly recommend it for those who earn income off of their prints and wish to give their clients the best print quality possible. I don't recommend it for hobbyists unless you are very unsatisfied with the quality of the profiles you have now for your favorite papers, and you are willing to absorb the price for better results.
If price is the only thing holding you back, then see my discount below.
Where to Buy?
Purchasing this product is a little unconventional because it requires a USB dongle to be plugged into your computer when you use this software. While you can purchase direct (please tell them you came from ronmartblog.com), I've arranged a special discount that I'd recommend you take advantage of instead. Here's details:
Get 10% OFF ImagePrint
I have worked a special arrangement with ColorByte to offer you the first ever discount that was made available for a blog several years back. ColorByte is offering a 10% off discount to readers of this article when you contact JVH Technical, LLC by phone or email. You can not get this discount through the web or ColorByte directly, so you must contact JVH and you MUST mention this blog in order to get the discount.
If you have any questions or concerns about this discount program, please don’t hesitate to contact me directly.
NOTE: This product does offer a 30 day money back guarantee as well as a free demo that will watermark your prints.
Other articles you may enjoy
If you enjoyed this article, you may also enjoy these:
QImage Review & Discount - an alternative layout product that I like but it leverages your OS drivers so I often export the image from QImage and print in ImagePrint
Disclosure
If you make a purchase using links found in this article, I may make a commission. It doesn’t cost you a penny more, but it does help to support future articles like this.
Canon PRO-1000 11 Color + Chroma Optimizer Pigment Ink Printer
I'm a printing geek who loves getting those digital images off hard drives and on to paper, so when I do I want the highest quality possible. What's more, when I sell those prints to clients I want to do it once and be sure they'll be happy with the quality of that print for the rest of my lifetime as well as theirs. With the PRO-1000 printer I can create beautiful vivid prints that can stand the test of time as well as look great in a wide variety of lighting conditions. The reason for this is thanks to Canon's Chroma Optimizer technology which at first seems just like another ink, but when you see it in action it's more like magic.
What is Chroma Optimizer and how does it work?
If you search the web you'll find this definition:
The Chroma Optimizer reduces the difference in ink droplet height to form a flat and smooth ink layer. The result is evenly reflected light, deep blacks, and bright, saturated colors.
However, I found this obscure video to be a lot more accurate at explaining and actually showing how it works in real life:
The colors and blacks - especially in black and white prints - just pop thanks to this miracle of modern printing technology.
So this is the secret sauce that makes these prints look great, but like any printer a good print always requires a combination of a outstanding ICC profile and correct usage of the application and and printer driver settings to get the best result.
Hardware Observations
Physical Size & Weight
At 28.5 x 17 x 11.2" (72.4 x 43.2 x 28.4 cm) and 70.5 lbs (32 kg) this isn't some tiny desktop printer - it's substantial so you'll want to put it on a very solid surface and leave a little room behind it for the steep angle of the paper guide. What's more, if you don't have a strong back and arms then you'll want help getting this printer placed in your house.
It's a real imagePROGRAF
For those who have used Canon printers in the past, the PRO-1000 is a proper imagePROGRAF printer which means it's a professional quality archival printer meant to do the highest quality jobs for fine art prints - despite it's consumer division name.
Not to be confused with the PRO-1, PRO-10 and PRO-100 printers all of which were consumer grade printers with tiny ink cartridges and lower price points, this is a pro duty printer that tries to build on the success of the PRO-1 as well as addressing its many usability shortcomings.
Canon is also trying to align with its professional "L" lenses which use the famous red strip to indicate that they are for the pros, so this is how you end up with a name that seems like it could be worse than the PRO-100 (the lowest of the consumer photo printers). Confused, yeah, me too but ignore all that because what you get is a printer that looks awesome in real life and feels very well built.
Control Panel Operation
While it lacks the touch screen from the PRO-2000, from a usability standpoint this printer has been a pure delight to use. What's more, they have taken one feature from the consumer side that some might appreciate and that's the ability to print templates for things like graph or staph paper really easily. This does add some value in the household setting where you just have one multi-duty printer.
The buttons operate with a good tactile feel, the menus have been easy to understand, and it's got the right amount of access to stuff geeks care about.
Paper Handling
Tasks like paper loading have been great - to date I've not had one negative experience or print ruined using a wide variety of papers from as small as 4x6 to as large as 17x22 through the sheet feeder. I've tried plain paper up to hearty ILFORD GALERIE Prestige Smooth Pearl Photo Paper (12mil 325 gsm) and there's been no head strikes or scratches and no issues with ink being too heavy for plain paper.
Performance
I haven't done hard performance testing, but I will for my long-term report. For now a complex letter sheet size print is taking about 4 minutes to print out when doing one job at a time. It also takes the printer about 54 seconds to get going if it has been sitting idle and energy saving features have kicked in (longer if in full-sleep mode).
Software Observations
On the software side of things, everything just works for the most part so I've been quite happy.
Setup
Setup was brilliantly smooth and just worked without ever having to connect a cable or go through any hoops.
If you want to bypass the router for a faster direct connection you can, but I didn't find that necessary as overall performance has been reasonable.
After your printer is set up it offers you some tools that assist you in your printing tasks.
Documentation
After installing the printer you see the above page which looks nice and seems very helpful, plus you eventually end up here at the online manual which seems promising as well. Finally, there's even a bunch of video here that all inspire confidence. However, in practice it seems that Canon's attempt at trying to serve the needs of many printers with a limited amount of actual content behind the pretty buttons often results in documentation that leaves you wanting for more info.
With that said, most things "just work" so fortunately this isn't a huge issue in practice.
Interoperability
I've printed via the Canon Print app, AirPrint and Google Cloud Print as well as via Windows 10 using the regular and XPS drivers, and everything has "just worked". In fact, wireless printing has been so good that I haven't bothered to set up wired Ethernet or USB even though it supports both.
Accounting Manager
Canon PRO-1000 Accounting Manager
This has always been one of my favorite features of Canon printers because I love being able to see detailed job data, and in this case if I plug in the consumables cost then I can see exactly how much a print cost.
It works well and I love it. What's more, now I can see both my PRO-1000 and PRO-2000 jobs together or filter down to just what I want to see.
I love this and it is great for answering the question - what is my exact cost for this print?
My Canon PRO-1 printer was capable of making nice color prints and excellent black and white images, and its introduction of the chroma optimizer was a big deal. When I had clients in my studio and showed them prints from my Epson and PRO-1, they generally preferred the PRO-1 results thanks to its warmer tones and rich blacks.
With that said, the lack of an LCD made it a pain in the buns to figure out what was going on when things were out of sorts. What's more it loved to drink ink fast from its ink tanks that seemed like they were about the size of a pixy stick. Lastly, it's lack of wireless support made it a dated printer in the modern world not too much longer after it was released. Despite it's superior image quality, I still preferred the ease of use of my PRO-10 so my PRO-1 didn't see as much use as it would have if it was wireless with bigger ink tanks.
Now that I have my PRO-1000, I have no use for this printer anymore. Sure, it still produces great prints, but the PRO-1000 is just so much better in every imaginable way.
I've really enjoyed the PRO-1000 much more than I thought I would. I'm a huge Epson SureColor P800 fan boy so when I saw the specs for this printer I thought that Canon was playing catch up to build a 3880 with wireless networking support.
In practice I can honestly say that I like the prints I get from this printer more than I do from my Epson P800. Those are big words because I still really love my Epson P800 and didn't think this printer could outshine it. However, this printer has better software, a network wireless connection that doesn't break when you reset the router, and most importantly phenomenally good prints!
With what I have in my studio today, if I had a job to print $500 and up prints then they'd definitely go on the PRO-1000 - the prints are just too good not to do that.
Print Studio Pro
Print Studio Pro was designed for advanced users who wanted all of their driver settings in one easy to use view with layout management options available. In theory it all sounds good, but in practice I've found this app to be slow and cumbersome to use.
If I want to do complex layout I'll use QImage on the PC or fight with Lightroom on the Mac. If I want color management then I'll use Photoshop or Lightroom along with the driver, so while I appreciate the intention here - the execution of this app leaves me wanting for something more (and faster!).
That said, after wrestling with it you can get good prints and it's consistent between the PRO-1000 and PRO-2000 so that's handy if you are trying to train someone to print with both printers.
What's more you can do cool things like the imagePrograf series Export Module from Photoshop used to do like Pattern Print (aka variations) to test get a test sheet of thumbnails that illustrate what impact certain settings will have on the print without wasting a lot of ink and paper as shown here:
There is an even more advanced example here too, so this app offers value - I just wish it was faster.
ColorByte ImagePrint v10.0.17 & up (SOLD SEPARTELY)
Print on Epson paper with ColorByte ImagePrint 10.0.17 & up
ColorByte Software makes a RIP for this printer that is worth mentioning, despite it being a separate and significant expense. ColorByte Software has supported Epson printers for years, but it hasn't been until recently here that they finally supported their first ever Canon printer - the PRO-1000 (requires version 10.0.17 and up). In fact, I can easily say that the best prints I've seen come out of ImagePrint are the prints from the PRO-1000!
This product offers a wealth of custom paper profiles that have been optimized for various daylight conditions which means you can not only get a perfect color print, but you can also make sure it's going to look its best in the lighting conditions in which the print will be displayed (and yes, they have mixed condition profiles too). They also have profiles optimized for black and white for the best tonal range you can get out of this printer.
The quality of their paper profiles are outstanding and that alone would be worth the price when you consider the cost of a profiling kit and the hours you spend creating each profile. However, this product goes beyond that and controls the printer at the droplet level to yield the best tonal range possible for every paper type that it supports (and that's a lot and more are possible upon request).
I'll have more info on this product in an upcoming review.
Get 10% OFF ImagePrint
I have worked a special arrangement with ColorByte to offer you the first ever discount that has been made available for a blog. ColorByte is offering a 10% off discount to readers of this article when you contact JVH Technical, LLC by phone or email. You can not get this discount through the web or ColorByte directly, so you must contact JVH and you MUST mention this blog in order to get the discount. If you have any questions or concerns, don’t hesitate to contact JVH, ColorByte or contact me directly about this discount program.
Conclusion
In case you haven't noticed, I love this printer. It does what it sets out to very well - it prints gorgeous archival quality prints on sheet paper and doesn't' try to be anything more than that. It also does it in a "it just works" fashion which is greatly appreciated these days.
Yes, I wish it had a roll adapter like the P800, but other than that I think they are on equal footing with the PRO-1000 having the edge thanks to the chroma optimizer.
My only negative that I've noticed thus far is that compared to the PRO-2000 the images are slightly more yellow even when using the same exact paper and ICC profile. I suspect that despite having the same print head and ink set, there's some additional factors that are coming into play at the hardware level that cause the slight variation. I wouldn't say it is a negative thing as I tend to like warmer images anyway, but it's something to consider if you were thinking you could save time by using one profile for both the 1000 and it's larger siblings - you can't.
I definitely highly recommend this printer based on my experience so far, but let's see how it does with the long-term test. .
If you make a purchase using links found in this article, I may make a commission. It doesn’t cost you a penny more, but it does help to support future articles like this.
If you've followed my printing series, you know that I love printing quite a bit and that I've got a lot of time invested in both Canon and Epson printers. Both brands have their strengths and weaknesses, but I'm so excited about my two new printers that I had to write a quick blurb before the reviews are ready.
While I am disappointed that it lacks the roll support that my Epson SureColor P800 offers, and the larger ink set on the Canon (12 vs 8) means higher ink costs, so far that's where my concerns have ended. With excellent build quality, a much more durable finish that looks fantastic, and most importantly gorgeous prints sent seamlessly over wifi, I've been very happy in my early testing with this printer.
All of the ICC profiles I've tested for this printer from Canon, Red River Paper, and Ilford have been excellent so far.
Canon PRO-2000 24" Photo Printer with Optional Multi-Function Roll
I loved the prints I got from my iPF6300 and I loved the hard drive feature of the iPF6450, but the quality of the ICC profiles created for the 6450 never matched the quality that I enjoyed with the 6300. This meant that if I wanted a good print, I had to go through the effort of generating the profile myself.
For the PRO-2000, the print quality has been excellent and all of the ICC profiles I've tried so far have been very good. I did have one for the Ilford Galerie Prestige Smooth Pearl 310gsm paper that was slightly darker than I think it should have been, but the PRO-1000 profile was great so I think this was an anomaly. All of the Canon and Lexjet profiles have been great too.
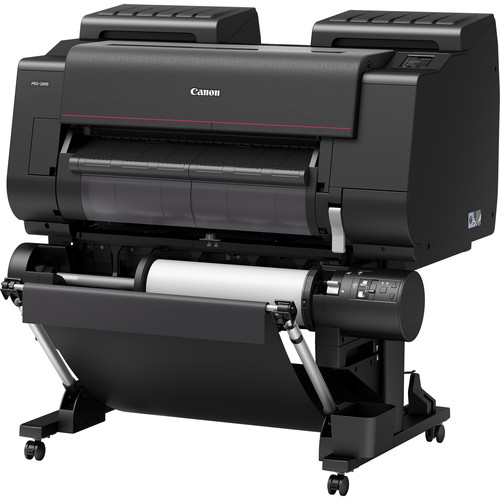
The optional multi-function roll support has been fantastic and loading sheet paper has gone very well so far. However, the biggest news here is that the phenomenally improved unibody construction makes this printer significantly more stable (and heavy) resulting in less movement and noise than its predecessors. This is a good thing and the looks of this printer just puts a smile on my face every time I walk into my studio - it's stunning to look at!
Features Video
Here's a great video that Canon did that shows how sweet these printer are, and much more is to come from me when I do my official reviews:
Black & White
Black & White support is on par with Epson Advanced Black & White (ABW)
One thing that Canon has always done an excellent job with is black and white prints, and the chroma optimizer makes those blacks look even more incredible.
The new Print Shop Pro software is like a scaled down RIP that replaces my beloved Canon Export Module, but you get to this one off the Automate menu in Photoshop to create print jobs with more features than the export module supported. Sadly it lacks the roll preview feature, but I'm getting used to it despite some quirks.
Pattern Print (aka Print Variations) lives on in both color and B&W
Initially I thought my beloved variations / print pattern feature was gone, but it's alive and well in both color and black and white modes. As usual it does better with big prints vs smaller sheets, but I got up to 45 thumbnails on a letter size sheet (not that you can see squat but it's possible).
Other than size, ink capacity and roll support, these printers seem to behave identically in every way. The software and print results have been identical which is a good thing for people who like to have a dedicated sheet printer to go with their big roll printers (which is great if you can afford it as you don't have to fight the curls on smaller prints).
Both supported easy to setup wireless and wired network printing. The PRO-1000 does have the added support for integrating with Google Cloud print and AirPrint, so that makes it handy for every day jobs as well. The PRO-1000 also features a night mode to make it a little quieter at night, but neither one made enough noise to wake my 13 month old daughter in an adjacent room with the doors open, so I wouldn't consider either model to be noisy.
I'm thrilled to have this combo in my studio!
Conclusion
I'm quite excited about both of these printers which is why I'm doing this early sneak preview. I've got a couple dozen prints under my belt with them but need more testing before I can draw any official conclusions. I can say that it's everything I liked about the PRO-1 print quality with the amazing LUCIA PRO ink set and the fantastic Chroma Optimizer has been very, very good so far. The Canon faithful should be extremely pleased based on what I've seen so far.
If you make a purchase using links found in this article, I may make a commission. It doesn’t cost you a penny more, but it does help to support future articles like this.