While I mention this topic in my Printing 101 eBook, not everyone has my book so I thought I’d respond to a readers email today via a quick “Ask Ron” article.
Question
Here’s essentially what today’s reader was asking:
How do I ship my prints and are there any problems with rolling papers – especially thick media like Epson Hot & Cold Press Papers? Would there be any issues to be concerned about?
Answer
Shipping prints is tricky because a lot of things can go wrong in transit. To minimize risk you’ll want to pack the print carefully and use a little extra stuffing paper to make sure the print doesn’t slide and shift in transit. I’ll list the steps on how I ship a print, but I’m starting at the point where the print is done so if you are shipping a canvas or are printing on a paper that scratches easily then I’ll assume you’ve already protected the print prior to shipping.
Here’s what I do…
Step 1 – Cover the print in Acid-Free Tissue

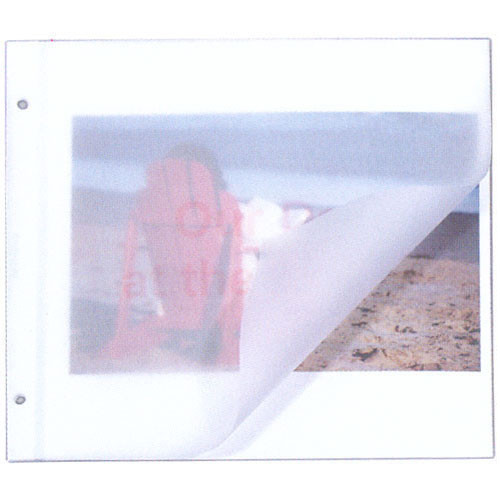
Lineco Buffered Acid-Free Tissue Paper
Lineco Buffered Acid-Free Tissue Paper comes in sheets (my preference) and rolls, and I use it all the time to protect prints even when I’m not shipping them. Once I take a print off the printer I put one of these sheets on top to protect the print from dust, scratches, etc… However, when rolling up your print for shipping then it really helps a lot to avoid damage from scratches which can occur during the rolling process.
Step 2 – Optionally place it in a photo bag

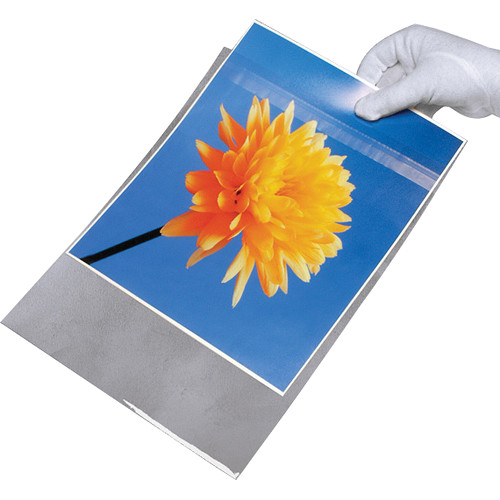
Lineco Archivalware Photo/Art Bags
After my print has degassed, I place it in a Lineco Archivalware Photo/Art Bags and leave the end open unless I have a special reason to close it. As a result, when shipping I use these bags for added protection. While it is somewhat redundant to do both, that’s what I do and it’s worked well for me. You can certainly skip one or the other, but I don’t.
Step 3 – Roll and Place in Mailing Tubes
When it comes time to pack up the print, the most economical way to go is using a mailing tube. A general rule of thumb is to get the biggest diameter tube that you can practically use as the less tight you have to roll then the easier it will uncurl when it arrives at its destination.
It’s highly recommended that you cut the tube to the length you need to avoid the print shifting in transit. If that isn’t possible or practical then you’ll want to use some more Lineco Buffered Acid-Free Tissue Paper to avoid damaging the edges of your print. DO NOT use newspaper to stuff the tube as the nasty ink will transfer to your print and ruin it.
Be sure to tape or staple the plastic caps as they will come out in transit if you don’t.
Alternatives to tubes?

Lineco Museum Quality Storage Box
While it is much more expensive and challenging to pack, some people prefer to ship their prints flat. If it’s just one print you can put it between a couple shets of cardboard and be in good shape assuming that you’ve taken the aforementioned protection steps. If you’ll be shipping multiple prints, then you might want to consider an exact fit Lineco Museum Quality Storage Box. I use the larger capacity version of these to store my prints at home too, so these can be purchased in a size that meets your needs.
Again, you’ll want to avoid room for the prints to shuffle so inserting a piece of foam core board or cardboard to fill the gap and taping the edges is recommended.
Tip for Signing Your Prints
I use Number 02 PIGMA Micron Ink Pens
I always recommend signing your print using archival PIGMA ink before sending it to anyone, and I personally leave print master notes on the back of the print to remind me of what I did to make that print in case I need to do a reprint in the future. You can learn more about this process in more in my Printing 101 eBook.
Tip for the Print Recipient

Curling is inevitable when shipping in tubes
When your customer gets the print, you can advise them to remove it from the roll and unroll it right away. Initially they will look like the prints in the photo above, so you’ll want to advise them to roll them the opposite direction and use the shipping tissue paper (and bag if you used it) to protect the print. Here’s a video that shows how people do this counter curl:
Conclusion
While this article might come across as a Lineco advertisement, I assure you that I have no affiliation with them and have never communicated with them prior to this article. I just trust the Lineco brand after experimenting with cheaper alternatives. This isn’t to say there aren’t other good products at a cheaper price, but I haven’t found any that have met my needs yet.
An important thing to keep in mind that all of this preparation is expensive both in terms of time and materials, so be sure when you are giving your clients a quote that you don’t forget this expense and only think about shipping costs.
Other articles you may enjoy
If you enjoyed this article, you may also enjoy these:
- Printing Series – Tons of useful tips
- Printing 101 eBook
- Which Printer Should I Buy? Epson or Canon?
- Breathing Color Lyve Canvas – The best canvas I've ever used! (discount offer)
- Color Management 101 - How do I get prints to match what I see on my display?
- ColorByte ImagePrint (discount) – My favorite Epson RIP - Version 9 article due soon and it's even better - I highly recommend the upgrade!
- Counterpoint: Extreme Profiling or ImagePrint?
- Dano’s Dictionary of Fine Art and Photography Printing Terms (Concise Edition)
- Epson P600 Review
- Epson P800 Preview
- Getting Great 4x6 Prints Without Any Hassle–Part I of II
- GTI PDV-2020EX Desktop Viewer - 23.5 x 25.3" with Lower Luminaire and Side Walls
- ILFORD GALERIE Prestige Gold Cotton 330gsm & Fine Art 220gsm Papers Review
- ILFORD GALERIE Prestige Smooth Pearl Photo Paper
- Metallic Paper Comparison: Red River Polar Pearl vs LexJet Sunset Photo (Coupon Code Included)
- Printing Your Own Holiday/Greeting Cards (Tutorial Included)
- Oz to Kansas: Black & White Conversion Techniques
- Printing Series: Genuine Fractals (AKA Perfect Resize) - a great solution for resizing your images - The current version of Perfect Resize is brilliant and the best ever!
- QImage RIP & Layout Software Review – Great image layout solution for dirt cheap and it keeps getting better with every release!
- REDIpix.com - Home of Dazzle Backlit Printing
- Red River Paper vs Epson Papers - Fantastic papers for Canon and Epson printers
- The Digital Print
- The PERFECT Print DVD Series by Randy Hufford - A MUST own series!
- X-Rite ColorMunki
- X-Rite ColorChecker Passport
Disclosure
If you make a purchase using links found in this article, I may make a commission. It doesn’t cost you a penny more, but it does help to support future articles like this.


No comments:
Post a Comment