Showing posts with label iPF6300. Show all posts

Wednesday, November 30, 2016

MINI-REVIEW: Canon PRO-1000 & PRO-2000


Canon PRO-1000 17" Photo Printer

If you've followed my printing series, you know that I love printing quite a bit and that I've got a lot of time invested in both Canon and Epson printers. Both brands have their strengths and weaknesses, but I'm so excited about my two new printers that I had to write a quick blurb before the reviews are ready.

PRO-1000 Early Thoughts
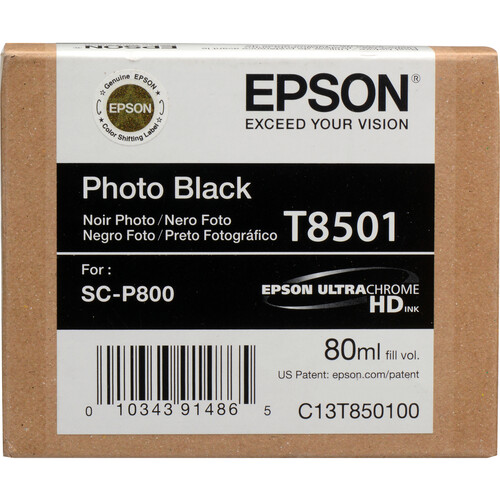

Epson 80ml ink


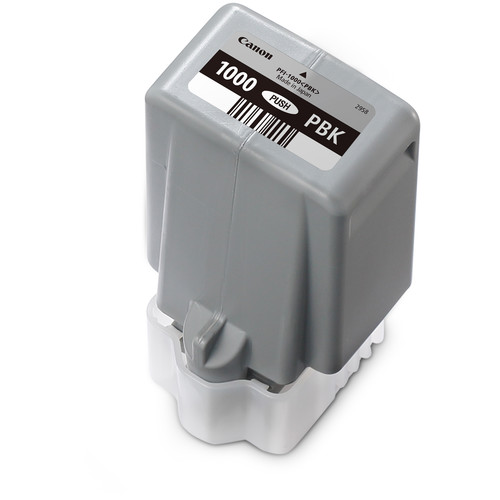
Canon LUCIA PRO 80ml ink

While I am disappointed that it lacks the roll support that my Epson SureColor P800 offers, and the larger ink set on the Canon (12 vs 8) means higher ink costs, so far that's where my concerns have ended. With excellent build quality, a much more durable finish that looks fantastic, and most importantly gorgeous prints sent seamlessly over wifi, I've been very happy in my early testing with this printer. 

All of the ICC profiles I've tested for this printer from Canon, Red River Paper, and Ilford have been excellent so far.

PRO-2000 Thoughts 
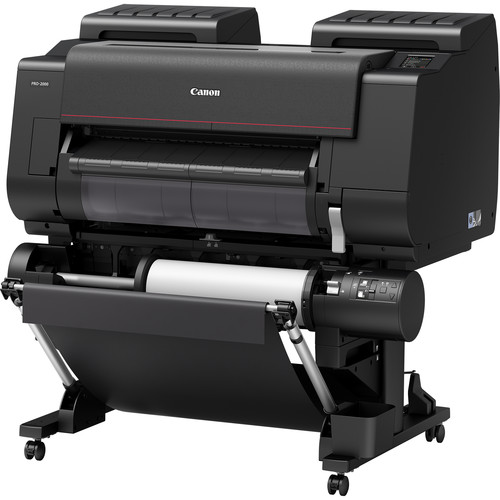

Canon PRO-2000 24" Photo Printer with Optional Multi-Function Roll

I loved the prints I got from my iPF6300 and I loved the hard drive feature of the iPF6450, but the quality of the ICC profiles created for the 6450 never matched the quality that I enjoyed with the 6300. This meant that if I wanted a good print, I had to go through the effort of generating the profile myself.

For the PRO-2000, the print quality has been excellent and all of the ICC profiles I've tried so far have been very good. I did have one for the Ilford Galerie Prestige Smooth Pearl 310gsm paper that was slightly darker than I think it should have been, but the PRO-1000  profile was great so I think this was an anomaly.  All of the Canon and Lexjet profiles have been great too.

The optional multi-function roll support has been fantastic and loading sheet paper has gone very well so far. However, the biggest news here is that the phenomenally improved unibody construction makes this printer significantly more stable (and heavy) resulting in less movement and noise than its predecessors. This is a good thing and the looks of this printer just puts a smile on my face every time I walk into my studio - it's stunning to look at!

Features Video

Here's a great video that Canon did that shows how sweet these printer are, and much more is to come from me when I do my official reviews:

Black & White

Black & White support is on par with Epson Advanced Black & White (ABW)

One thing that Canon has always done an excellent job with is black and white prints, and the chroma optimizer makes those blacks look even more incredible.

The new Print Shop Pro software is like a scaled down RIP that replaces my beloved Canon Export Module, but you get to this one off the Automate menu in Photoshop to create print jobs with more features than the export module supported. Sadly it lacks the roll preview feature, but I'm getting used to it despite some quirks.

Pattern Print (aka Print Variations) lives on in both color and B&W

Initially I thought my beloved variations / print pattern feature was gone, but it's alive and well in both color and black and white modes. As usual it does better with big prints vs smaller sheets, but I got up to 45 thumbnails on a letter size sheet (not that you can see squat but it's possible).

PRO-1000 almost equals the PRO-2000

Other than size, ink capacity and roll support, these printers seem to behave identically in every way. The software and print results have been identical which is a good thing for people who like to have a dedicated sheet printer to go with their big roll printers (which is great if you can afford it as you don't have to fight the curls on smaller prints).

Both supported easy to setup wireless and wired network printing. The PRO-1000 does have the added support for integrating with Google Cloud print and AirPrint, so that makes it handy for every day jobs as well. The PRO-1000 also features a night mode to make it a little quieter at night, but neither one made enough noise to wake my 13 month old daughter in an adjacent room with the doors open, so I wouldn't consider either model to be noisy.

I'm thrilled to have this combo in my studio!

Conclusion

I'm quite excited about both of these printers which is why I'm doing this early sneak preview. I've got a couple dozen prints under my belt with them but need more testing before I can draw any official conclusions. I can say that it's everything I liked about the PRO-1 print quality with the amazing LUCIA PRO ink set and the fantastic Chroma Optimizer has been very, very good so far. The Canon faithful should be extremely pleased based on what I've seen so far.

See my full PRO-1000 review here and my PRO-2000 review here.

Where to Buy?

Here's where you can learn or buy your own:

Other articles you may enjoy

If you enjoyed this article, you may also enjoy these:

Disclosure

If you make a purchase using links found in this article, I may make a commission. It doesn’t cost you a penny more, but it does help to support future articles like this.

Wednesday, February 27, 2013

Choosing the right Canon printer (UPDATED: Aug 7, 2015)

Canon Printers

There are a ton of Canon printers on Adorama, Amazon,and B&H to choose from but for this article I’m going to focus specifically on printers designed for those who wish to do professional quality photo printing typically referred to as Fine Art printing. This means I’ll skip a larger number of PIXMA printers with the “photo printing” moniker. Canon calls their pro photography printers the Professional Photo Inkjet Printers and Professional Large Format Graphics Art Inkjet Printers.

Narrowing the Selection

Canon offers a dozen printers in the aforementioned subset, but for this article I’m going to target the 4 that I believe are targeted to the high end consumer and professional photographers that read this blog. Therefore my recommended subset of Canon pro printers for photographers to consider are as follows:

Canon PRO-1 – The Best Black & White Printer Ever Made? Henry Wilhelm Thinks So!

PIXMA PRO-1
Canon PIXMA PRO-1 Photo Printer (Adorama, Amazon, Canon Store and B&H)

This desktop printer supports a maximum of 13x19” sheet paper is very comparable to the Epson SureColor P600 and Epson Stylus® Pro 3880 and is a great choice for those doing small scale fine art prints. It does 4x6” sheet prints very well, and Canon camera users will appreciate the fantastic results they get when they do NOTHING to their in-camera JPEG images and just send them to this printer.

One thing to keep in mind about this printer is that it is surprisingly large and heavy, so do your measurements first before ordering. Definitely plan to lift it with a friend too!

Read my review here and/or order yours today at Adorama, Amazon, and B&H.

Also see my PRO-10 review if you are wanting all the goodness of a PRO-1 with wireless and AirPrint support.

imagePROGRAF iPF5100 - The pro solution for the (large) desktop

Canon imagePROGRAF iPF5100 Large Format Printer

This is a printer designed for those who might be considering the Epson 3880 or 4900. Size-wise it is larger and heavier than Epson’s 4900, so space planning should be done prior to taking delivery. This is not going to fit on your average desktop like a Canon PRO-1 or Epson 3880.

Feature wise the iPF5100 is a 17” wide pro printer featuring roll paper support and technology from the last generation of Canon printers so it offers Lucia inks (instead of Lucia EX) and previous generation control panel and processor technologies. This is a fine solution for those who don’t wish to go up to a 24” wide printer and who find the print quality and archival needs of this printer sufficient for the work they are doing. It’s designed for heavy duty and larger volume printing than the Pro9500, so it’s an ideal choice for the wedding or studio photographer.

Learn more here or buy one today at Amazon, B&H or Adorama.

Ink Cost: $0.58/ml (as of 9/10/2010 @ JVHTech)

Canon imagePROGRAF 6400/6450 – The 24” WOW Printer

Canon iPF6450
Canon iPF6450 – Large Print Heaven!
iPF6400, iPF6450, iPF8400 and iPF9400 at B&H
iPF6400, iPF6450, iPF8400 and iPF9400 at Amazon

Let me cut to the chase and say I’m biased because I have a iPF6450 printer and love it (see my review). I also adored my iPF6300 that I had before it! This is an outstanding 24” wide format printer that is pure joy to use, but it is very big so space should definitely be a consideration before considering a printer this large. However, it is smaller and lighter than Epson’s 7900.  

This is is a true wide format printer designed for those who want to go large with fine art prints. It’s primarily designed to print from rolls. It can print cut sheets, but it’s just less enjoyable as you have to eject your roll paper and feed them one at a time. However, given the nature of fine art work, it’s common to do that even on printers that support multiple sheet feeders. It’s a fantastic choice for “wow” panoramas too (I did a 24”x51” borderless print of Seattle that still has me giggling like a school girl years later).

The 12-Color LUCIA EX ink based printers are the latest in print technology offered by Canon and feature an ink which Henry Wilhelm has declared as the greatest invention for printing since the invention of the ink jet printer (source: Randy Hufford & Canon USA).

You can read more here about some of the benefits of these new printers, but what I can tell you is that every pro who I’ve talked to who has used one of these new *300 and *400 series printers has said great things about them. Starting with the *300’s many have stated (including former Epson Stylus® Professionals – off the record) that Canon is “finally in the pro printer game” (meaning these are as good as anything else out there). Their words were less kind about the prior generations, so beware of great sales right now on outgoing models as there’s a reason for it! They may look the same, but print quality-wise they are in a league of their own in the Canon print lineup thanks to improved processors, ink, print head improvements and much more.

iPF6400 versus iPF6450

The ONLY difference between the iPF6400 and iPF6350 is that the later has a hard drive which is handy for a number of reasons – mostly doing re-prints. My recommendation is to spend the extra bucks and get the iPF6450 if you can. Everything is besides the hard drive is identical between these two printers, so if you want to save a few bucks then the iPF6400 is a great choice – just be prepared for iPF6450 envy when you see someone using one and their print job frees up their computer very quickly!

Learn more here or buy one today at B&H or Adorama.

Ink Cost: 61 cents per ml for the 130ml ink tanks versus 47 cents per ml in the new larger 300ml ink tanks (as of the time this article was written)

imagePROGRAF iPF8400

Image Courtesy of Canon USA

Like its competitor, the Epson 9900, this 44” wide printer is a beast designed for a high end print masters and print shops, but not your typical photographer. Sure, it’s just as easy to use as the other printers, but the size is closer to a smart fortwo! It’s effectively just a larger version of the fantastic iPF6450, so if you need the extra width then this is a great choice.

Learn more here or buy one today at B&H or Adorama.

Ink Cost: 61 cents per ml for the 130ml ink tanks versus 47 cents per ml in the new larger 300ml ink tanks (as of the time this article was written)

Get a FREE Print Sample

Click here to get a using LUCIA EX inks and Canon papers. In the past you’ve been able to submit your own image and choose to do prints from each of the printers provided, but I haven’t tested this offer so you’ll have to check it out for yourself.

Attention Northwest Shoppers – JVH Technical – A GREAT Place to buy local

image

Talk to anyone in the Northwest who is serious about printing, and odds are they’ve come across the path of John Harrington (no, not this one) and his company JVH Technical, LLC. When you do, the first words out of their mouth are always “John is a great guy”, and after meeting him myself I have to agree. John and his son Ryan are a big volume printer sales and supplies company with home grown service – literally – they run the business out of their really cool classic Northwest home!

Now, I know to some this business operated from John’s home might be a turn off, but the reality is that when John talks about printing people listen. Industry greats like Canon Explorer of Light Greg Gorman (featured on my Top Photographers list) , John Paul Caponigro, Randy Hufford, and Bambi Cantrell have been in attendance to his past open houses (sponsored by Epson and Canon). His printer sales blow away even local big shots like Glazers and Kenmore Camera, so it may seem small but it’s really quite big. Their annual digital print festival is a great treat to attend too!

This is no small mom and pop shop either, as John carries an inventory of over $400,000 in fine art papers and a huge selection of the latest printers from Epson and Canon that are available for immediate delivery. Not only that, they’ll deliver and install them for you at no charge! In fact, even if you didn’t buy your printer from John, if you have questions or are having problems odds are they’ll come out to your house and help make things right again – usually at no charge! In addition, John’s always happy to provide free samples of the papers you’ve wanted to try, but are wondering if they are worth the expense! This is the kind of customer service that simply doesn’t exist very much in the world today, but it is also why everyone loves JVH! I can’t recommend them enough as a great local resource for printers and supplies, and if you do go visit John or Ryan as a result of this article (or series) please be sure to tell them that I sent you. They may just have something special for you for doing so - wink wink

Here’s more in John’s own words as to why you should buy from JVH.

PLEASE READ

If you have any interest in printing, you must check out my Printing Series page. It has a wealth of information which you are sure to enjoy. You will probably also find my article entitled Which Printer Should I Buy? Epson or Canon? to be helpful as well.

Disclosure

Canon has provided me with a PRO-1, iPF6300, iPF6450 paper and extra ink so that I may bring you this series on printing. I do not get any monetary compensation from Canon, but I do get a commission if you use my links to Adorama, B&H, or Amazon so thanks for supporting the blog! I have no specific arrangements with JVH for a commission, but please mention this blog as a token of my appreciation to John & Ryan for their assistance in this series.

Wednesday, February 20, 2013

COMPARISON: Canon iPF6450 -vs- iPF6300 – Part I


My iPF6450 began its life at PhotoPlus Expo 2012

If you followed my printing series and/or read my Printing 101 eBook, then you probably know how found I am of my Canon iPF6300. It is a great printer and certainly part of a family of Lucia EX based printers that really got Canon into the same game as Epson. However, as great as it was, there was room for improvement as the gradients and tonal range were marginally better on the higher end Epson printers.

With the new iPF6400, iPF6450, iPF8400 and iPF9400 Canon worked hard to address the feedback from customers about how to make the the ultimate Canon printer for photographers. Some of the improvements include:

  • A new multi-sensor for better accuracy and faster performance
  • Gallery wrap feature built into the driver
  • Calibration Linking (link multiple printers together and calibrate together - see pdf for more info from one PC)
  • Improved driver with support for variations like the PRO-1 (woohoo, this is a great addition that won’t be back ported to the iPFx300 printers.
  • An optional integrated Spectrophotometer for the iPF6450 only – shown below

Canon imagePROGRAF 6450 with SU 21 spectrophotometer
My iPF6450 is shown here with the optional onboard SU-21 Spectrophotometer accessory ($1795)

Of course there’s the marketing improvements mentioned above, but there’s also living with the new printer. I’ll dive more into what it’s like to own the iPF6450 based on my experience owning the following professional quality printers:

Why are you comparing the 6300 to the 6450 and not the 6300?

Since I know this will be a FAQ, let me state up front a few important facts:

  1. The 6300 & 6350 are functionally identical, but the 6350 adds a hard drive.
  2. The 6400 & 6450 are functionally identical, but the 6450 adds a hard drive.
  3. The 6300, 6350 and 8300 are functionally identical and print exactly the same. The differences are only the paper size and the absence of the hard drive on the 6300.
  4. The 6400, 6450, 8300 and 9400 are functionally identical and print exactly the same. The differences are only the paper size and the absence of the hard drive on the 6400.

With these facts in mind I decided that since I covered the iPF6300 base model so well in my first review, that it made more sense to cover a model with a hard drive for the review of the new models. THE PRINT RESULTS ARE THE SAME, but the *50 models have the added convenience of a hard drive which allows you to reprint jobs very easily without using your computer.

The iPF6450 is unique in this line up in that it is also the only printer that supports an optional integrated spectrophotometer (SU-21 for $1795). I do not have a SU-21 and am not sure if I’ll get one to review, but that was also another consideration for me choosing this model.

Physical Differences

Canon iPF6300 - PCMag.com Readers Choice
39.1 x 46.4 x 34.3" (99.3 x 117.9 x 87.1cm) with stand
Approx. 146 lb (66.2 kg) with stand

Canon iPF6450
Canon iPF6450
39.4 x 48.3 x 34.3" (100.08 x 122.68 x 87.1 cm) with stand
154 lb (69.85 kg) including stand

Size-wise these two printers are roughly identical in size with the 6450 being a little heavier and slightly larger. If you look carefully though you’ll notice one big difference and that has to do with the size of the ink reservoirs shown below:

Canon iPF6300/6350's Ink Reservoir

Canon iPF6400/6450's Ink Reservoir

Here’s views of them open:

iPF6300/6350 Ink Reservoir supports only 130 ml Ink Tanks

iPF6450 Ink Reservoir supports both 130 & 300ml Ink Tanks
iPF6400/6450 Ink Reservoir supports both 130 & 300ml Ink Tanks

As you can see the older model only supports 130ml ink tanks, but the new model supports both 130ml (PFI-106) and 300ml (PFI-206) ink tanks which is great because you can upgrade without wasting ink and you can take advantage of the value savings of larger ink tanks. That comes out to about 61 cents per ml for the 130ml ink tanks versus 47 cents per ml in the new larger 300ml ink tanks (as of the time this article was written). That’s can be a pretty significant cost savings!

Cost Savings with the iPF6400/6450

Now you take that cost savings and you add the fact that the iPF6400/iPF6450 uses less ink (from what I’m observing – using identical settings) and the larger tanks and this can be significant over the year. Let’s just say you print five portraits similar to the one below at 13x19” each week (or any combo thereof) and you do that for a year.


This image printed at 13x19” was printed the exact same paper and settings on both printers
Accounting Manager reported 2.152ml with the 6300 vs 1.7155ml with the 6450

Accounting Manager reported 2.152ml of ink was consumed with the 6300 vs 1.7155ml with the 6450. That would mean that using the smaller 130ml tanks in the iPF6300 it would cost me ($0.61 * 2.152ml per print * 5 per week * 52 weeks) about $341.31. For the iPF6450 with the larger 300ml tanks it would cost me ($0.47 * 1.7155ml per print * 5 per week * 52 weeks) about $209.63. That’s a $131.67 savings for even the most casual user, whereas working professionals and printing business will see HUGE savings worthy of an upgrade.

Control Panels

For printing businesses looking to integrate some of the newer printers in with their older printers, you’ll be happy to notice that the new control panels are identical to their predecessors:

iPF6300 Control Panel

iPF6450 Control Panel

There’s nothing new to learn here and under the covers they seem functionally the same.

Setup and Overall Usage

I’ll cover this topic in more depth in future articles, but fundamentally both printers work the same way. Your workflow won’t be any different, but the new x4xx printers have some great new features that you are sure to enjoy.

The one I’m most excited about is the variations feature which users of the PRO-1 will enjoy. Be sure to see my PRO-1 review if you want to see right away what variations works like – it’s identical in these new printers. You can also click here to see a sample of what one of these sheets looks like (and you can print as large or as small as you want).

Image Quality

I’m finding that the Canon paper profiles that ship with it seem to be better than those in the iPF6300, but it could be the printer itself is just better. I haven’t done enough testing to determine which one it is. All I know is that I am getting better prints that are visible to the trained eye, but it’s not so drastic that I think clients would really notice. What’s more I don’t think it’s so drastically different that you couldn’t print jobs with old and new printers and not feel comfortable mixing the prints together in the same package. If you are a print master you’ll see the difference, but customers won’t. I consider this a very good thing!

A word for Epson users

As I mentioned earlier, I’ve got what I think is a good understanding of the Epson platform as well. While I don’t own a 7900, I have used it and I often use my 4900 which is very similar. While Epson does have the edge on the vast number of great paper profiles out there, I find that I’m very satisfied with the Canon prints. On identical paper with identical quality paper profiles, I find the Canon results to be just as good. However, I do appreciate on the Canon platform that I don’t waste tons of ink on clogged heads, the driver is so much easier to use, and I have the Accounting Manager to track my costs.

Conclusion

Click here to learn more in the second part of this review.

Where to order

If you are in the Seattle area then my friends at JVH Tech are a great local business to purchase from and get great personal support. However, most of my readers aren’t local so you’ll probably find the white glove service from B&H a great choice. Click one of the links below to research or order your new printer today:

iPF6400, iPF6450, iPF8400 and iPF9400 at B&H

iPF6400, iPF6450, iPF8400 and iPF9400 at Amazon

If you look carefully on both sites you’ll see that there are very rebates available from time to time that really make these printers ridiculously cheap compared to their Epson counterparts.

Other articles you may enjoy

If you enjoyed this article, you may also enjoy these:

Disclosure

If you make a purchase using links found in this article, I may make a commission. It doesn’t cost you a penny more, but it does help to support future articles like this.

Saturday, December 31, 2011

How to Print a 4x6 sheet of prints with the Canon Print Plug-In (UPDATED: 1/1/2012)


How to Print a 4x6 sheet of prints with the Canon Print Plug-In
Start by Exporting an Image Strip from Lightroom (or
QImage)

WARNING: In this example I’m using a 24” wide roll of paper, but if you are using a different size (i.e., 17” or 44”) then you should replace every occurrence of 24 with the width your paper roll.

  1. In Lightroom (I’m using 3.6), you need to create a new Single Image/Contact Sheet layout style with rotate to fit. For the layout section all the margins and cell spacing must be zero, the rows should be 1 (but it can be more if you want) and the columns should be 6. The cell size should be 6.00 in height by 4.00 in width. See the photo above for my settings.
  2. In Lightroom you won’t print to the printer but instead you’ll choose Print To: JPEG File and set the file resolution to 300, the JPEG quality to 100 and the custom file dimension to 24.00 in x 6.00 in. Since I’m printing to JPEG I just choose sRGB for the profile and Relative for the rendering intent. Some will argue with my settings, but honestly for 4x6 prints this is fine as I don’t consider 4x6 to be fine art. :)
  3. You can now open this JPEG up in Photoshop (required – both CS4 and CS5 work for me). DPP should work but doesn’t because it has a 6000x6000 pixel size minimum requirement for some stupid reason.
  4. In Photoshop you have to choose File | Export and in my case I’ll choose iPF6300 Print Plug-In…
  5. Go to the Page Setup tab and choose Borderless Printing (Input Image Size should say Width 24.00in x Height 6.00in – if it doesn’t, go create your JPEG again in Lightroom). Orientation must say Portrait and Paper Source must be Roll Paper. The Roll Paper Options must say Automatic Cutting Available and the checkbox for No Spaces at Top or Bottom (Conserve Paper) MUST BE CHECKED!

  6. For the Main tab choose your settings as usual. Again, for something like this I’d usually use the Canon Premium RC Photo Luster paper with the Print Mode set to Highest and Output Profile to Auto (Color) (because it’s a Canon Paper) and Matching Method set to Perceptual (People, Dark Areas) (only available with the Auto (Color) option). You can set this page to anything you like as only the Page Setup is important here.


Here’s how I configure my Main tab


Here’s how I configure my Page Setup tab

Conclusion

I hope this helps people. Use the comments below if you have any questions. I’ve only tried it out on a iPF6300, but it should work on anything that uses this plug-in. The key thing to remember is that I’m using a 24” wide roll of paper. If you are using a different size (i.e., 17” or 44”) then you should replace every occurrence of 24 with the width your paper roll.

If you enjoyed this article please consider making a donation. You may also enjoy my Printing 101 eBook and my printing series articles.

Disclosure

If you make a purchase using the links in this article I may get a commission.

Monday, July 4, 2011

Canon Premium RC Luster Photographic Glossy Paper Review & Tutorial

Canon Premium RC Photo Luster Paper

I love, love, love my Canon iPF6300 printer. It’s been a joy to use that has been much less hassle than my Epson 3880 and 4900 (which are excellent in their own way), but I’ve missed my beloved Epson Exhibition Fiber paper (EFP).  I know from feedback from my readers and sales reports that many of you are switching from Epson to Canon so you’ve probably been wondering the same thing I have – is there an equivalent to EFP from Canon?

From my research I’ve found Canon Polished Rag to be the closest thing to EFP and honestly I think it is just as good, but I haven’t been able to get it in 24” rolls. As a result I’ve been using Canon Premium RC Luster which is excellent too and doesn’t have the same issues with curling that EFP and Polish Rag do. I’ve found the built-in profile to be great for every day prints – especially in-camera JPEG’s with no post-processing (it’s amazing with those), but for those with a fine art color managed workflow you’ll want to generate your own with something like ColorMunki or i1XTreme for the most accurate results as the built-in profile does take some liberties with saturation and some minor color hue shifts.

A Word About Rendering Intents

On Epson I generally find that Relative Colormetric is my preferred rendering intent, but on the iPF6300 I have a strong preference for Perceptual. In fact, some papers such as this one offer a Perceptual (People, Dark Areas) rendering intent (only in the print plug-in) which I find to be fantastic most of the time. I choose that option whenever it is available. This extra rendering intent does take the liberty of making some adjustments to your image so some may not like it, but I find that it makes for great skin tones and offers a much greater tonal range of blacks than the other rendering intents (at least for the built-in profiles).

Products Tested

I have tested this paper with Photoshop CS4 for Windows, Photoshop CS5 for the Mac as well as Lightroom 2 & 3 for the Mac and PC and finally QImage. For everything but Photoshop  you are stuck with using the OS driver rather than my preferred Export Module / Plug-in which is available for Microsoft Word, Canon DPP, and Photoshop. The Export Module / Plug-in produces the most accurate print jobs because the software doesn’t interfere with the data sent to the printer so your soft proofing from it can be accurate if your display has been calibrated. When using the driver the third party software products can sometimes introduce color shifts which can be pleasing (as is the case with QImage) or horrific (as is the case with Photoshop CS5).

Great for Printing with No Post-Processing

In my article entitled Printing Family Photos for Normal People I used this paper with QImage to print a bunch of in-camera JPEG’s with no additional post-processing and the results were excellent. They weren’t theoretically accurate from a color managed workflow perspective, but what I’ve discovered is that Canon has tested its printers against its in-camera images and knows that workflow well. If you simply shoot an image and send that in-camera JPEG to your Canon printer (in my case a iPF6300) without doing anything else you’ll get an excellent print when using Canon papers. For photographers doing high volume work like school sports or school portrait/prom work you may find the results to be satisfactory enough that you can eliminate post-processing from your workflow (assuming there are no distractions that require the content-aware healing brush or clone stamp tools). This also assumes you got your in-camera settings right – including the crop.


This silly shot was an in-camera JPEG
with only text added in Photoshop
It printed perfectly on this paper at 24x36 with life-like results

Now I’m super picky about my workflow so I wouldn’t do this for my fine art or commercial work, but those are images that sell for hundreds to thousands of dollars so those customers deserve a much more exhaustive end-to-end solution. However, if you are selling $14.95 Santa photos or something then you’ll get a fabulous end-to-end result that allows you to save a bunch of time and avoid the headaches of post-processing so that’s a huge benefit. Canon proved this point to me when I was at the Winter Olympics in Vancouver, BC, but I’m a true believer now that I’ve done it myself with over 300 of my own personal photos.

Specifications

Here are the key facts that I have gathered about this paper:

Basis Weight 255 g/m²

Thickness

10 mil
Surface Finish Luster Gloss

Canon’s full PDF on this paper can be found here.

Paper Profiles

image
This paper has an excellent color gamut  with the Canon paper profile
Graph via ColorThink Pro

For this printer I only used the profiles that Canon provides with my Canon iPF6300 printer and I was pleased enough with the results that I didn’t feel compelled to generate my own paper profile. I also did not try to use this with a RIP

As  you’ll see later in the walkthrough I also found that when using the Canon plug-in that if you have the media type listed that choosing Auto for the Output Profile is acceptable because the software is intelligent enough to choose the proper ICC profile based on the settings you choose in the dialog (i.e., highest max passes versus highest require different ICC profiles). Based on advice from Eddie Tapp I tested this feature and found it to work enough that I trust it now.

Tips

I preferred Canon’s Export Module’s “Perceptual (People & Dark Areas)” rendering intent the most for my people shots. When doing my black and white prints I found Auto Mono Neutral to be my preferred choice (much more so than printing in color – but for color printing of black and white images Relative Colormetric was better).

When soft proofing in Photoshop I found that the Relative Colormetric rendering intent most closely resembles the result I see when printing using the Perceptual (People, Dark Areas) rendering intent. However, I didn’t like like the Relative Color metric rendering intent for actual printing.

Video Tutorials on the Mac

To help demonstrate how to use this paper I have create these videos which take you from start to finish on how to print using this paper on the Mac in Adobe Lightroom and Photoshop. In the Lilghtroom video I show how to locate the printer profile and print using the printer driver:


Play in HD

In Photoshop I also demonstrate soft proofing and how to use the Export Plug-in:


Play in HD

Windows Screenshots

Usage on the PC is identical to the Mac but the OS driver dialog looks a bit different. You should still watch the videos above, but here’s some screen shots to help make sure you set everything properly.

Lightroom PC
Lightroom settings on PC & Mac is nearly identical


The OS Driver on Windows feels like the Export Plug-In but it is different


A cool feature on PC only is the “Rotate 90 degrees” to save paper
I stumbled in the video looking for this but it doesn’t exist on the Mac

Photoshop (All Versions)

The Mac and PC are identical when it comes to printing from Photoshop so the video is very helpful. Remember for Photoshop you must choose File | Export (DO NOT USE FILE | PRINT). Once you do then you see the same dialog no matter which version of Photoshop you are using. Here’s what to do in the print plug-in:


Highest (Max No. Passes) isn’t required – just Highest is good too

Click here for a full gallery of screen shots visit

Conclusion

I had this paper for several months before I really began to appreciate how good it is. It’s thick, but not so thick that it curls like crazy. It feels very professional and prints from it look great. It’s much cheaper than Canon Polished Rag (back when you could buy it) so it’s a great value too. I feel that it is much more substantial than Epson’s Ultra Premium Photo Paper Luster which feels much more flimsy and cheap, yet produces excellent color prints as well.

I highly recommend Canon Premium RC Luster (available at B&H). It works extremely well with my Canon iPF6300 so I’ll be using it primarily for family photos and prints I give away as gifts to friends. I feel its quality is high and its price is affordable enough to make it a great choice as a high quality high volume paper.

Disclosure

Canon has provided me with a printer and paper for the purposes of reviewing these products for my blog.I may get a commission if you purchase using the links in this article, so thanks for your support!

Wednesday, December 29, 2010

Canon Fine Art Bright White 330gsm Paper Review and How To Walkthrough

When I started my printing series I didn’t really care for matte paper, but I’ll admit that at that time I honestly didn’t know the difference between what I traditionally knew as matte paper and a true fine art matte paper. I know now, and I am quite pleased to say that I love it. I especially enjoy using the  Canon Fine Art Bright White 330gsm on my Canon iPF6300  printer because the end result is a hearty thick, yet smooth paper that looks fantastic and feels like it belongs in a museum with a high price tag.

Favorite Prints with this Paper

Oddly enough I found myself preferring to print people on this paper, which I never thought I’d doe with matte papers. Here’s a few of my favorite images printed on this paper:


The colors just pop on this paper for this one

The details in the blacks were faithfully reproduced

The detail in the white was brilliant every
detail was just as I remembered in real life.
This is by far my favorite print on this paper.


Web browsers ruin this photo, but when it is printed on this paper you see it as
I see it on my wide gamut display and it is good!

This is very durable paper

Now one concern I always had with matte papers was that they didn’t feel as durable as luster or glossy papers because the ink just feels exposed. Well the truth is that this is very durable paper and beginning with my test on October 9th, until late December 2010 I’ve let (mis)prints using this paper sit out in the weather elements and in my garage and the paper has held up very well. Now inks play the biggest role in durability and I’m using Canon Lucia EX pigment inks which are known for their durability, so your mileage may vary if you are using a different ink set. I also am only looking for flaking, chipping, and discoloration in my testing, and thus far I’ve seen none of those. However the paper will naturally distort in the rain, but it can be flattened again.

Specifications

Here are the key facts that I have gathered about this paper:

Basis Weight 330 g/m²

Thickness

20 mil
ISO Brightness 115
Base Material 100% Acid-Free Cotton
Surface Finish Matte

Canon’s full PDF on this paper can be found here.

Paper Profiles

Color Gamut Graph of Canon Fine Art Bright White 330 gsm
This paper has an excellent color gamut  with the Canon paper profile
Graph via ColorThink Pro 

For this printer I only used the profiles that Canon provides with my Canon iPF6300 printer and I was pleased enough with the results that I didn’t feel compelled to generate my own paper profile. I also did not try to use this with a RIP

As  you’ll see later in the walkthrough I also found that when using the Canon plug-in that if you have the media type listed (in this case Fine Art Bright White 330g) that choosing Auto for the Output Profile is acceptable because the software is intelligent enough to choose the proper ICC profile based on the settings you choose in the dialog (i.e., highest max passes versus highest require different ICC profiles). Based on advice from Eddie Tapp I tested this feature and found it to work enough that I trust it now.

The names of the profiles I used outside of the plug-in are as follows:

  • CNN63936E.icc – Highest Print Mode (Max Pass is 16-bit only)
  • CNN63963F.icc – High Print Mode
  • CNN63963G.icc – Standard Print Mode (8-bit only)

Custom rendering intents are unavailable outside of the plug-in so sometimes the best results are only possible with the print module which can be used from Photoshop or for free with Canon’s Digital Photo Professional (DPP) product.

Tips

I preferred Canon’s Export Module’s “Perceptual (People & Dark Areas)” rendering intent the most for my people shots. When doing my black and white prints I found Auto Mono Neutral to be my preferred choice (much more so than printing in color – but for color printing of black and white images Relative Colormetric was better).

When soft proofing in Photoshop I found that the Relative Colormetric rendering intent most closely resembles the result I see when printing using the Perceptual (People, Dark Areas) rendering intent. However, I didn’t like like the Relative Color metric rendering intent for actual printing.

Walkthrough on Canon

Since Canon provides an excellent Print Plug-in for Photoshop (which I refer to as the export module) the printing is very straightforward in 32-bit Photoshop (and identical on Mac and OS platforms). Here are some screen shots of my some of my print settings for images featured in this article:


I always do Max Passes and 16-bit even though I haven’t been able to prove
that it is better than 8-bit and Highest print mode


The preview window is your friend here as what you see is what you get


For completeness I’ve included a Mac Page setup dialog to show that they are
identical to the PC – the same is true of the Main tab as well.


I choose Auto (Monochrome Photo) for my output profile


I prefer the Pure Neutral Black setting for my B&W prints on this paper
NOTE: These settings are only available on the Color Settings Tab
when you choose Auto Monochrome


Lightroom 

Lightroom is a little more tricky as the export module is not available, but it is an experience that is closer to what you would find if you skipped the Canon plug-in and went straight to Photoshop (not recommended). I was unable to produce results as good in Lightroom or Photoshop directly as I am able to produce using DPP or Photoshop with Canon’s Export Module so this method of printing isn’t recommended at this time.

It is my understanding that Canon will be releasing an update for Lightroom soon so I will postpone doing a Lightroom walkthrough until that happens. In the meantime I recommend using Photoshop or Canon’s DPP software and print using the settings shown above in the plug-in.

Prices & Sizes

As of December 29th, 2010 you can purchase Canon Fine Art Bright White 330gsm at B&H or local print shops like JVH (tell them I sent you) from as little as $14.73 for a 50 sheet pack of letter size paper up to $204.95 for a 60” roll with 50’ of paper. It’s offered in all of the paper roll sizes Canon printers support plus the standard letter, 13”x19” (Super-B) and 17x22” sizes.

Additional sizing information can be found here as well.

Conclusion

I like this paper quite a bit. I find it to be very comparable to Epson’s excellent Hot Press Bright paper but much thicker along with the added benefit that it seemed to work fine no matter which side I printed on (at least in my short term testing). This is a hearty and substantial paper that is worthy of your portfolio prints, and I didn’t find it to be to rough (i.e., it’s not a Cold Press paper). It is very bright white so if you don’t like OBA’s, then you’ll probably not care for this paper, but for me I thought it looked great. I did find that my blacks suffered a bit on this paper so adding a little black boost in your image before printing on this paper probably isn’t a bad idea.

Disclosure

I may get a commission if you purchase using links in this article. Thank you for supporting this blog and future articles like this by using the links when making your purchases or making a donation if that isn’t possible.

Saturday, November 13, 2010

JVH Technical Digital Print Festival 2010 was a HUGE hit!


Attendees packed the house to view prints for the contest

I had the pleasure of being a guest of John Harrington’s at JVH Technical’s Digital Print Festival this past Friday November 12th, 2010 where over 200 people were in attendance to learn about the latest print technology and products as well as participate in the annual digital print contest.


Attendees learn about this blog while enjoying an
Epson 3880 / ColorByte ImagePrint print in the GTI light box

It felt like everyone there stopped by my “booth” to enjoy the GTI PDV-2020ex light box on display and learn about the printing series I’m currently running on my blog. Attendees had questions ranging from Color Management to Epson’s Advanced Black & White mode advice.


Canon and Epson were around to discuss their latest products

Guests were eager to learn about the new iPF6300, iPF6350 and iPF8300 printers from Canon as well as the highly anticipated Stylus® Pro 4900 from Epson. They were able to enjoy one on one assistance from experts from both Canon and Epson on topics ranging from sales to technical inquires.


The GTI PDV-2020ex was a HUGE hit with attendees as were the
Canon iPF6300 prints on LexJet’s Sunset Photo Metallic paper

ColorByte was on hand to discuss ImagePrint as well as printing the first public print of their upcoming update for Canon printers (that’s right, it’s no longer vaporware now). The print I saw from the iPF6350 using this private build of ImagePrint was fantastic, so soon Canon users will be enjoying the same great RIP that Epson users have been enjoying for years.

I was also showing examples of LexJet Sunset Photo Metallic paper which I’m certain was the hit of the show as everyone was wanting to know more about this paper and take advantage of the 30% discount offered by this blog.


Randy Hufford used three of my raw images, edited them using his
workflow, and made massive prints from his
Canon iPF8300 and
iPF9100 printers

Color expert, Pat Herold from Chromix, was on hand to show users what my readers already know – that ColorThink Pro is an incredible product and a blast to use to learn more about the quality of your profiles and how to use the results to make better decisions before sending your job to the printer.


Guests enjoyed several great presentations from industry experts,
including master printer
Randy Hufford!

Randy Hufford had an all-day workshop the day before where he demonstrated his workflow much like you’d see in his fantastic DVD series The Perfect Print. During this presentation he elected to use some of my raw images and show users how to edit those images. In addition to this he filled the wall with three massive canvas prints of my images which was pretty neat as I’ve never seen my work printed so large! The best part was that Randy let me keep these prints, so now I get to enjoy them at my own home – thanks Randy!!!!


John Harrington was like Santa giving away laptops, iPads,
Nano’s, Wusthof knives, flat panel TV’s
and more to print contest winners!

John Harrington, founder of JVH, was great for putting on this wonderful event and even gave away some amazing prizes to the winners of the contest. He was also reminding everyone of our partnership where you can save 10% on ColorByte ImagePrint between now and the end of the year when you mention this blog when ordering (see the discount coupon code page for more details).   


Randy Hufford tries a new look while showing off one of the Honorable Mention Prints

I’d like to thank both John Harrington of JVH and Randy Hufford for all their support during this event in promoting this blog and my work as a Photographer. I also had a great time talking to so many wonderful people about printing on the fantastic printers by Epson and Canon.

If you ever get a chance to attend one of these events, I’d highly recommend it! It was super informative and FREE (including a fantastic five-star lunch that even included salad and dessert)! John easily had to spend several dollars per head for those in attendance, but this just another example of how he really loves his customers and works hard to give something back to them each year. Ask yourself before the next time you buy printers or supplies, what has your merchant has done for you? If it isn’t the first class treatment like this then I’d highly recommend you contact JVH and learn why they are the best place to buy printers from in the Northwest. They may not always be the cheapest, but they are without the best customers service business you’ll ever work with – period!

If you are reading this and were in attendance feel free to leave a comment to let John know how much you learned and appreciated this event as I’m sure he’d love the feedback.

If you’ve never heard of JVH before, I highly recommend them for all of your printer, paper, ink, imageprint and service needs. Be sure tell them you heard about them from this blog when ordering so John will know how much I appreciate him too by sending my readers to him!

Disclosure

I may get a commission if you mention this blog when ordering products from JVH as well as when you purchase using select links from other partners mentioned in this article. JVH is a preferred partner of this blog and provided me with free assistance with my Canon iPF6300 delivery as well as a free space at the digital print festival.