Showing posts with label 4k. Show all posts

Sunday, June 16, 2019

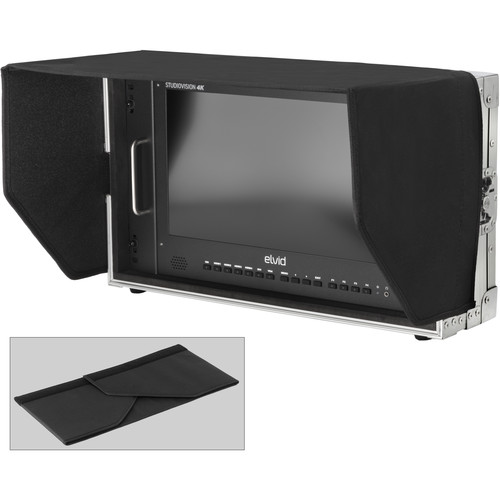
REVIEW: Elvid StudioVision 4K Portable Monitor


Elvid StudioVision 4k Displays - up to 28"

Laptops are great and practical for field shooting activities including tethering, but advanced shooting scenarios – especially in cinematography – result in multiple source devices in need of larger screen high resolution projection. What’s more, traveling with gear means that something like an extra display is going to take a beating so protecting an extra display can be a challenge.
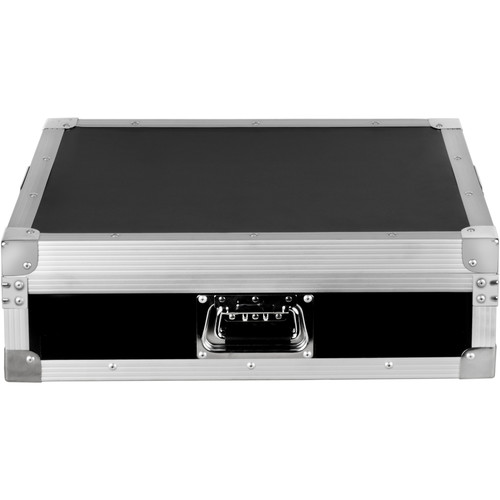
The Elvid StudioVision displays solve these problems by offering a 4K display in a near indestructible case that offers a wide variety of easily switchable inputs including HDMI 2.0, BNC (3G-SDI), and even VGA. What’s more, it has a speaker and headphones port so you can listen to the audio as well – all very a very affordable price.

Yeah, but is it any good?

Long-time followers of my blog know that I care a lot about image quality so I’ve written many articles on high-end displays, spectrophotometers, colorimeters, and color calibration in my role as a X-Rite Coloratti and NEC Display Color Visionary.  As a result, I was a bit skeptical when B&H (on behalf of Elvid) reached out to me to see if I’d be interested in reviewing this display.

My initial impressions was that the case was very well built and the soft touch discrete input buttons were a welcome feature. However, my first impression was disappointment when I discovered that the display had no modern inputs like DisplayPort and USB-C. This meant that I had to interface it with things like my AppleTV 4k and my Intel NUC to put it through its paces, instead of my MacBook Pro and Surface Pro

While frustrating, the support for HDMI 2.0 (on port 1 only) meant that I could easily use adapters to get full 4k UHD performance out of this display. As a result, I started with some 4k YouTube videos and compared the results to my NEC PA332UHD-2 such as the one shown here:


Costa Rica in 4K 60fps HDR (ULTRA HD)

Obviously the screenshot doesn’t tell you anything about the display performance beyond the fact that YouTube did report that I was getting UHD at 60fps, but my system reported that the display could only do SDR – not HDR video.

Color Accuracy

Out of the box I observed the colors to be a little oversaturated and on the warm side which is common for displays as that makes unedited photos and videos look more interesting. However, it’s a curse if your intention is to edit colors and get a accurate screen representation of what you are editing. As a result, I got out my X-Rite i1Studio Spectrophotometer and calibrated the display. With the colors displays more accurately, I found myself satisfied with the image quality but disappointed in the high gloss display finish which caused massive reflections even when using a hood as shown in the two photos below:

Notice how both have lots of reflections despite the included built-in hood and viewing angles. A matte finish for the display surface would have been a much better choice so this is something to consider if you will be using this display outdoors in strong daylight conditions.

As a result, I’d say this display is good for reviewing image and video content, but not suitable for photo or video color critical work in the field. Realistically, It is unlikely anyone would use it for that purpose anyway, but I wanted to make sure this was well understood who trust my opinions on color critical workflows.

For less than $900 USD (at the time of this writing) for Elvid StudioVision 4k Displays - up to 28" means they are a value that’s hard to beat for durability that is built to survive abuse in transport to your set.

Conclusion

I was extremely disappointed in the lack of support for DisplayPort and USB-C and the high gloss finish severely limits its usefulness in the field, but I think videographers looking for a larger display – especially when working with many multiple video sources in the field will really love this display. It’s super durable and can even run on battery power (not included), so it certainly beats the back of screen LCD or cheaper external displays most video productions use in the field.

Photographers looking for another display for field tethered shooting will find it invaluable as well – just don’t forget to bring the right display adapters and cables.

Lastly, at less than

Where to Buy?

CLICK HERE to review the technical specs or buy today at B&H.

Other articles you may enjoy

If you enjoyed this article, you may also enjoy these:

Enjoy these and more on the Reviews tab as well as Ron's Recommendations.

Disclosure

If you make a purchase using links found in this article, I may make a commission. It doesn’t cost you a penny more, but it does help to support future articles like this. I should also point out that I was allowed to keep this display after the review versus my typical requirement to return products.

Tuesday, June 4, 2019

REVIEW: Imagenomic Portraiture 3 (DISCOUNT OFFER) - Video Tutorial

Imagenomic Portraiture has always been my favorite skin softening product because it does a wonderful job of softening the skin without obliterating the texture like most other products (and techniques shown on YouTube). It's the secret sauce use by a lot of high end fashion and beauty photographers, so it's been a key part of my digital workflow for nearly a decade.

Buy and SAVE now using coupon code RONMART20

One of the big new features of version 3.0 is how the user-interface scales on a 4K UHD or larger display, like the NEC PA322UHD that I use.Here's the old UI which looks tiny both in thumbnail and when you click to view the 4K screenshot:

Imagenomic Portraiture 2 - Tiny on 4K

And here's the new UI which scales beautifully to any size:

Imagenomic Portraiture 3 - New Optimized for 4K UI

The heart of the new user-interface can be found in the left panel which is functionally similar, but now just bigger and easier to read:

Imagenomic Portraiture 3 - New UI Controls

The new user-interface is significantly more responsive thanks to hardware acceleration, so zooming is now instant with no painful minute waiting for the softening effect to be applied.

The user-interface does lose my beloved tabs feature which allows you to experiment and see the results of different settings spread over multiple tabs, but that was a geek feature most people didn't know exist so I don't think most users will miss it.

Skin Softening Results

Original Image - BEFORE Skin Softening (Zoomed to 111%) - Click for larger version

Portraiture 3 Normal Preset AFTER Skin Softening (Zoomed to 111%) - Click for larger version

Video Tutorial

My previous tutorial on Portraiture 2 had nearly 150,000 views and the advanced techniques tutorial was featured on the Imagenomic support website. In this all new for version 3 review, I focus on both a face and full body with basic and advanced techniques with improvements that hopefully address user suggestions for my past videos:

Conclusion

If you have a high resolution display, the upgrade is a no brainer because it's so much easier (and faster) to use. However, if your budget is tight I can honestly say that I don't see any improvements to the skin softening algorithms that make me prefer the new version over the old version.

This is still a great product that I highly recommend, especially for those who are disappointed by the wealth of terrible skin softening products and techniques currently available today. It's fast and easy to use and a must have for anyone who edits a lot of photos with people.

Where to Buy?

CLICK HERE to learn more or buy today, and be sure to use my coupon code RONMART20 to save 15% on one or more Imagenomic products as shown below:

Enter the code and click update to apply the discount

Other articles you may enjoy

If you enjoyed this article, you may also enjoy these:

Disclosure

If you make a purchase using links found in this article, I may make a commission. It doesn’t cost you a penny more, but it does help to support future articles like this.

Saturday, August 19, 2017

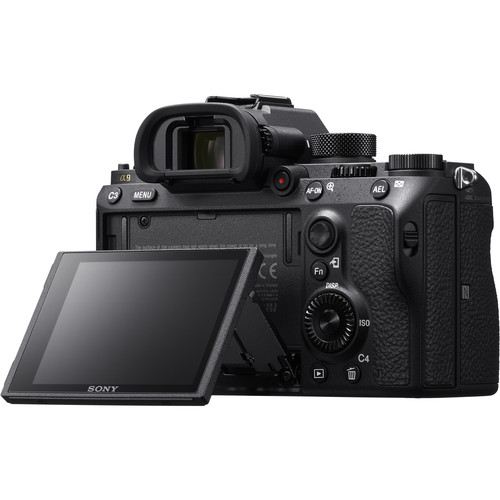
REVIEW: Sony a9 - The Best All Purpose Camera? (Part II of II)

In Part I of my review I asked Sony a9 - The Ultimate Action Camera By Which All Others Will Be Judged?, and I think the answer has to be yes. It's a very impressive AF system that almost guarantees you'll get the decisive moment for an action scene. However, this is a big investment and most of us aren't paid sports photographers, yet this camera has a lot of reasons why you might want to buy. As a result, I thought I'd spend the second half of this review discussing its value as an all-purpose camera to see how it does with typical shots that the average person might take.

Would this be a case of yet another expensive camera that's really just a one trick pony, or did Sony really make one camera to rule them all? Read on to find out and see my final conclusion.

Real World Shots

Real world shots is my way of saying examples of photos that an ordinary person might take as compared to ones that a paid professional being hired to photograph something would take. I like to include these types of shots in my reviews because it reflects exactly what you can expect to see if you buy this camera and examine the results on your computer.

All of the photos are 100% unedited (not even cropping unless noted) and you can click the photos to see the exact unedited JPEG that came out of the camera.

While I might use white balance (shade) and creative style (vivid) adjustments to enhance the in-camera image, the rest of what you see is what you'd see at home yourself if you took this same shot yourself.

All images are copyright, Ron Martinsen - ALL RIGHTS RESERVED, but you may examine the originals to your hearts content while viewing this article in your web browser. After closing the article, you agree to delete any local copies and you also agree not to print, re-post, re-distribute, link to or otherwise use these photos in any way without written consent.

With that said, please enjoy my thoughts on these and all of the photos found in part 1 of my review and in the galleries associated with this review.


f/2.8 @ 70mm for 1/160 sec at ISO 250

Using full resolution (6000x4000) you can't get a good shot of this subject from the fixed viewpoint


f/2.8 @ 70mm for 1/250 sec at ISO 400

However, if you switch to the APS-C mode, then you get some extra optical zoom without sacrificing quality - but you do get a smaller 3936x2624 file so you've essentially just done an in camera crop. That said, I still liked this mode and it will still print and look gorgeous on a 4k TV.


f/2.8 @ 70mm for 1/250 sec at ISO 500

Using the Clear Image Zoom feature at its maximum 4x means you can't pick the focus point but you get impressive reach and quality using this intelligent digital zoom technique.
Again, I have a file that needs no editing to show friends on a 4k TV - impressive


f/16 @ 24mm for 1.3 sec at ISO 100

In this intentional dynamic range torture test, I was reminded that this definitely no a7R II
The highlights were pretty blown despite the cloudy conditions


f/22 @ 24mm for 2 sec at ISO 100

However, if you shoot within the dynamic range of this camera,
the landscape results are very satisfying


f/4 @ 70mm for 1/800 sec at ISO 100

I snatched a frame of the distant boat,
but I was surprised to see how much detail still remained in the power lines


a9 Camping-34
f/4 @ 68mm for 1/3200 sec at ISO 100 
(cropped - click for unedited original)
As I was taking the shot above, I heard this plane overhead so I took a quick shot
Despite being underexposed, I was impressed with the detail in the shadows
and especially the wires going from the vertical stabilizer on the tail


f/5.6 @ 70mm for 1/100 sec at ISO 640

Zoom in to the original for a scary look at this spider shot done at full frame at roughly the minimum focus distance of the 24-70mm f/2.8 GM lens


f/4 @ 70mm for 1/200 sec at ISO 800

Decent bokeh and amazing detail make the kit a great deal for those getting started with Sony


f/3.2 @ 70mm for 1/1250 sec at ISO 100

Wild unpredictable boys are no problem with this camera


f/3.2 @ 70mm for 1/500 sec at ISO 100

Clear Image Zoom is excellent for hard to reach flower macro shots at the botanical garden


f/4 @ 70mm for 1/2000 sec at ISO 500

There is enough dynamic range to keep cheek highlights in check
when photographing family members in the harsh sun

Slow Motion Video Autofocus Test

I don't do much with video, but I think slow mo videos are cool so I couldn't help but play around with that feature on this camera. In this test, I was curious to see how the AF would hold up to the torture test of keeping up with my son's eyes. It failed, but honestly I thought it did better than expected given the fact that I was using eye focus mode on such a challenging scene.

Bookshelf Test


f/5.6 @ 50mm for 10 sec at ISO 100

ISO 100 quality was excellent even by today's standards
and the shadow detail above the books to the back wall was impressive

Where many special purpose cameras fail is how they perform when pushed to the extremes. In this case, I'm happy to report that the a9 did a respectable job in my bookshelf test that I use to just shadow detail, dynamic range and ISO performance. The full gallery of shots lets you examine full ISO stops from 100 (shown above) to 51,200 (shown below) where you can decide what your maximum tolerance is for sensor noise and noise reduction control. However, I found 51,200 to be usable in a pinch and 12,800 to be good enough to consider it a default top ISO for regular shooting.


f/5.6 @ 50mm for 1/50 sec at ISO 51200

As this shows, unless you are going to be viewing at large sizes, images of your vacation or kids shown a social media sizes is going to be totally fine at ISO 51,200

Conclusion

Yes, I have to say that this is the most impressive camera that I've tested this year and one of the best ones I've every shot with. While I won't be getting rid of my Canon 1D X Mark II because if its superior line up of sports lenses, better metering and excellent flash system, I did find myself looking at my camera and wondering why Canon can't do that!

I've also shot with the Nikon D5, and I'd prefer it over the Sony for the same reasons. Yes, I've seen adapters used with Canon and Nikon lenses and I'm extremely underwhelmed at AF performance when used with adapters, but manual focusing is fine. That kinda defeats the purpose of this camera and sports lenses, so I'd still say that if you are a sports shooter that this is a good second camera for close range action, but stick to Canon or Nikon for your >200mm needs.

With that said, if you are an event or wedding photographer then I think this is the camera you have to own. While you might want a a7R Mark II also around your neck or in the hands of your second shooter for its superior dynamic range, this will be the camera that helps you to get the shots that bring tears to your clients eyes. It's also got the high ISO performance to come home with concert and evening event shots that are totally usable.

Now this is an extremely expensive camera, so it's tough to suggest it for parents based on price. However, if you are a financially successful dual income household that can easily afford it then I can say without hesitation that this is the camera you want to photograph your precious little angel.

Overall, I'm extremely satisfied all around with the first Sony camera body that I didn't hate (thanks to its wealth of programmable buttons) and can easily give it MY HIGHEST RECOMMENDATION.

Where to Buy?

CLICK HERE to learn more or buy today.

Other articles you may enjoy

If you enjoyed this article, you may also enjoy these:

Disclosure

If you make a purchase using links found in this article, I may make a commission. It doesn’t cost you a penny more, but it does help to support future articles like this.

Unless noted, ALL shots in this article are unedited and come straight out of the camera as shown. In-camera JPEG's were used with in-camera Creative Style (vivid) and White Balance (shade) being leveraged to give shots an improved color over the camera default.

Tuesday, January 31, 2017

Aurora HDR 2017 Tutorial (3 Lessons) & Discount [Apple Mac Only]

Created in Aurora HDR 2017 - Copyright Ron Martinsen - ALL RIGHTS RESERVED
Click to learn more about Aurora HDR

Aurora HDR 2017 Tutorial - Advanced Features


Aurora HDR 2017's improved user interface
Click to learn more about Aurora HDR

While I may not be the most dynamic speaker in the world, I got a lot of emails from readers who loved what they learned in my original Aurora HDR video (found later in this article). As a result, I thought I'd cover some of my favorite new features of Aurora HDR 2017 in this new three lessons video created on October 15, 2016:

The files featured in the video were full size, and unless it was otherwise noted the processing occurs in real-time (first lesson only).

While most people bracket using a small range, for fun this tutorial includes an extreme range of three manual exposures that I blended together in Aurora HDR 2017 (see the video for more details):

Asia 2012-1853-3

I took these very long exposures in the evening in Winter 2012, but no product until now has done them justice in an HDR merge. The results you see in this article were done entirely in Aurora with no additional processing of any kind.

Original Aurora HDR Review & Tutorial

CLICK HERE to see my original review of Aurora HDR, and here's the very popular video on YouTube that even Trey Ratcliff liked:

What's New for 2017

Here's a summary of what's new:

  • Speed Improvements
  • Polarize Tool
  • Batch Processing
  • DNG  File support
  • HDR Noise Reduction
  • Top and Bottom Adjustments
  • Luminosity Masking - see how awesome this is in my new video
  • Radial Masking
  • Advanced Tone Mapping
  • and more

My new video focuses on the speed improvements and luminosity masking, as well as some of my favorite new presets. However, I'll be covering some of these other new features in a future video that is part of my full review.

I love this version way more than its predecessor, which I thought was the best HDR editing software on the market, so that's saying a lot!

Special Offer

Aurora HDR Coupon Code
Click to learn more about Aurora HDR

Click here to learn more, download a free trial or order today.

Stuck in customs also has a special offer here too.and don't forget to check my discount coupon code page for discounts on most products at StuckInCustoms.com.

Disclosure

If you make a purchase using links found in this article, I may make a commission. It doesn’t cost you a penny more, but it does help to support future articles like this.

Wednesday, December 28, 2016

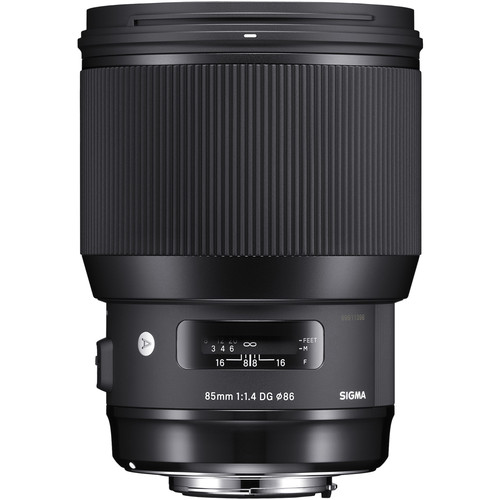
Sigma 85mm f/1.4 DG HSM Art - More Pics, Cool 4k Video & Dock Info

Sigma 85mm f/1.4 DG HSM Art Lens at B&H
Sigma 85mm f/1.4 DG HSM Art Lens

When I did my review of the SIGMA 85mm Art series lens I thought I was done, but I couldn't bring myself to return this lens to my friends at B&H because it was just so darn good. I ended up keeping it for a few days longer and took a few more photos that just further reinforce how impressed I am with this lens.

Simply put, this lens is too good for just one review!

Close up video of a frozen creek

Unedited Frame Grab from Canon EOS-1D X Mark II 4k 60fps Video - Copyright Ron Martinsen - ALL RIGHTS RESERVED
Unedited Frame Grab from 4k Video

I wasn't prepared for doing video when I was on this hike, but I had to see what the SIGMA 85mm Art series could do with these awesome frozen branches in the creek, so I switched my Canon 1DX Mark II into 4k mode and did a quick video using its auto focus feature.

All images and video in this article are Copyright Ron Martinsen - ALL RIGHTS RESERVED.

My apologizes for the shaky cam, but if you appreciate sharp lenses then you'll enjoy this:


View at full-screen to fully appreciate

Another Unedited Frame Grab from Canon EOS-1D X Mark II 4k 60fps Video - Copyright Ron Martinsen - ALL RIGHTS RESERVED
Another Unedited Frame Grab from Canon EOS-1D X Mark II 4k 60fps Video

More Real World Shots

Here's some more real world shots that were all taken hand-held except the long exposure shots and all are unedited in-camera JPEG's. See part I of my review for details about how these are taken with my Canon 1DX Mark II).

All images and video in this article are Copyright Ron Martinsen - ALL RIGHTS RESERVED


f/2.8 @ 85mm for 1/160 sec at ISO 640
As expected, this lens is the king of subject isolation


f/2 @ 85mm for 1/200 sec at ISO 200
The bokeh is simply awesome


f/16 @ 85mm for 1.3 sec at ISO 100
Yet even at f/16 it's incredible too!


f/9 @ 85mm for 0.5 sec at ISO 100
The detail on the rocks are amazing at full view


f/9 @ 85mm for 0.5 sec at ISO 100
Even more impressive than the 4k video screen grabs are the details in the photos


f/9 @ 85mm for 0.5 sec at ISO 100
For fun I tried different focus points and the detail in the hanging icicle here was more than I imagined - wow!


f/7.1 @ 85mm for 1/160 sec at ISO 6400
This lens takes any scene and makes it look cool


f/8 @ 85mm for 1/200 sec at ISO 5000
f/8 is great on most lenses, but this lens is great from f/1.8 to f/16!


f/2.5 @ 85mm for 1/200 sec at ISO 320
While I wouldn't consider this a good lens for shooting flowers due to its minimum focus distance, if you step back you'll likely be satisfied with the results


f/4 @ 85mm for 1/160 sec at ISO 800
Nailing the focus handheld at the the minimum focus distance with this lens did prove challenging, but worth it if you are patient (or you bring out the tripod)


f/1.8 @ 85mm for 1/200 sec at ISO 640
f/1.8 gives you the creative freedom to create multiple shots from one scene as shown below  where the only difference was the focus point


f/1.8 @ 85mm for 1/200 sec at ISO 800
Compare to above where only the focus point differs
(which did result in a different ISO for a correct exposure)

For a full gallery of images see http://photos.ronmartblog.com/lens/sigma/85mmArt . You may view the photos while your browser is open on this article, but you may not edit, save, share, link or otherwise use any images in this gallery or article without my ink on paper written consent. All images copyright Ron Martinsen - ALL RIGHTS RESERVED.

Using with SIGMA Optimization Pro & USB Dock

SIGMA USB Dock at B&H
SIGMA USB Dock

For those who are interested, I connected this lens up to my SIGMA USB Dock and took some screen shots of what settings are available from the latest version of SIGMA Optimization Pro:

Product information - click for a larger view
Product Information

Customization Menu - click for a larger view
Customization Menu

Focus Setting - click for a larger view
Focus Setting

Full-time MF Setting - click for a larger view
Full-time MF Setting

Conclusion

Please read my original SIGMA 85mm Art Series review for my final thoughts.

Where to Buy?

CLICK HERE to learn more or buy today.

Other articles you may enjoy

If you enjoyed this article, you may also enjoy these:

Disclosure

If you make a purchase using links found in this article, I may make a commission. It doesn’t cost you a penny more, but it does help to support future articles like this.