Showing posts with label Pro. Show all posts

Wednesday, January 17, 2018

REVIEW: Flixel Cinemagraph Pro Discount Offer–Motion Photos (Updated Jan 17, 2018)


Flixel Cinemagraph Pro makes making cinemagraphs easy!
Copyright Ron Martinsen © All Rights Reserved

If you are like me, you’ve probably been very intrigued by the cool cinemagraphs found on the web (especially on the bing.com home page), but many people like me also haven’t had the time to figure out how to do them! Most things in photography are time consuming enough, and video makes it even worse. As a result, I had little desire to find another way to consume my time.

Well I’m happy to report that after a little research I found out that it is not only easy it’s fun too! Here’s the main window of Flixel’s Cinemagraph Pro 1.5 back when I originally did this article in 2015 (page down for version 2.0):


Flixel Cinemagraph Pro Main Window

Basically you import a video, highlight what you want to move and pick start and end points. That’s in – in no time you can have one of these running and they’ll even host the cinemegraph on their web site – for free (size limitations and content restrictions apply).

It took me a bit to get the hang of it, but within a few minutes I had my first cinemgraph of my daughter below:


Yes, we think it is creepy too!

Not only did we think this was creepy, I quickly learned how you must keep things very still or else you get the shifty eyes problem featured here.

What was about this one is that I could export the still image portion and do a quick edit on it in Photoshop then send it back to Cinemagraph Pro. This allowed me to get rid of some unwanted skin blemishes caused by the fact that neither my daughter or I had planned to do this so no real life skin preparations were made!

Without any prep, I tried again:


Ok, cool but crooked as hell so let’s try again

As a second attempt the concept was good but the execution was bad, so I tried again:


Almost awesome

The ottoman was a little more stable this time as a tripod, but still not perfect. I also started noticing that my background was a bit dirty so I figured I needed another try where I actually prepared for a video (imagine that)!

My final attempt (the lead cinemagraph with cognac at the top of this article) included some preparations, but was done in one take. From start to finish I spent about 20 minutes, 16 minutes of which was preparation time getting “the set” ready.

Video Demos

Here's the best Flixels of 2017:

and here's a tutorial that shows how to use the latest 2.0 version for the Mac:

Conclusion

This is a fun and simple process that can be done on your Mac, iPhone, or iPad quickly and easily. While I’m disappointed that no Windows version exists, there is a product called Microsoft Blink (see below) that does cinemagraphs for free!

Capture Clients

To learn more, visit https://flixel.com/products/mac/cinemagraph-pro.

Where to order

Click here to order and use the code FLIXELTEN to save 10%!

Click here to save 10% off your order. If you do this properly, then you should see the discount automatically applied as shown below:

Prices are subject to change and this offer ends soon

This is a limited time offer and prices are subject to change. When this deal expires, please use THIS LINK instead so that I may get credit for the referral – thanks!

App Store

This product is also available on the AppStore:


iPhone


iPad


Cinemagraph Pro+ for OS X
WARNING: No discount, use this link to get a discount


Cinemagraph+ for OS X


Other articles you may enjoy

If you enjoyed this article, you may also enjoy these:

Disclosure

If you make a purchase using links found in this article, I may make a commission. It doesn’t cost you a penny more, but it does help to support future articles like this.

Friday, March 10, 2017

Plotagraph Pro Mini-Review & Discount - Animate your still photographs!

Unedited Fujifilm X-E2 Waterfall animated using Plotograph Pro
Unedited image from a Fujifilm X-E2 converted to a GIF after Plotograph Pro edits on waterfall

If you read my Flixel review, you learned how to take a video and convert it into a moving image called a cinemagraph. It's cool, but it assumes you shot video, so what if you had a still photo that was ripe for animation like the waterfall shot above? This is where Plotagraph Pro enters the picture.

How it works

Plotagraph Pro allows you to create a mask of what you would like to animate and set the speed and technique used to make it come to life. While masking is never fun, I found the tools to be easy enough to use and generally speaking you don't have to be incredibly precise when the viewing area is just on computer monitors (even for my 32" 4k display).

Click to see the UI with markup in the water

Using one of your still images, you can use the web or desktop app (which seems to leverage the web app) to mark which portions of your UI you wish to animate. Click on the image above to see what the markup looks like.

From there you can accept the defaults, choose a preset or dial in your own animation values before you click play (or export) to let the magic happen. Here's what that UI looks like:

Animation Properties

Videos

While you can save your animations in a variety of formats, the highest quality is in video so I've created some that you should VIEW AT FULL SCREEN to see how cool these things can be.

Japanese Stream

This animation only took about 5 minutes to create as the masking was pretty easy. The biggest mistake I made the first go around was getting too close to the rocks or the edge of the water. Cleaning up my mistakes after the first animation was easy and I was pleased with the results.

Waterfall

Feeling confident, I tried to do the waterfall using the automated masking tool and this one was completed in less than a minute. I loved the results, so I moved on to something a little harder.

Japanese Lake

This image took a little more time to mask, but only 5 minutes. However, I admit this one could still use some more work. With that said, after a little trial and error I had this one looking like you see here in about 15 minutes - not bad!

Conclusion

In minutes I was able to take two unedited photos (waterfall and lake) and bring them to life - that's pretty cool especially for sharing with your friends. What's more, if you keep the videos small enough then they'll auto play on Instagram or Facebook so you can have high quality video without requiring your viewers to hit play.

While I did this product a disservice by only showing you examples that animate water, I think you can see how easily it can bring your images to life. While I'm not a fan of its subscription model for pricing, I have arranged a discount. You can limit your cost by only signing up for a month, and you can even CLICK HERE for a FREE DEMO if you just want to check it out!

It should also be noted that you can download your videos, images, etc... so YOU CAN KEEP YOUR CONTENT if you cancel your subscription. Yes, you'll lose access to the software to edit your files, but there's no risk to trying it out. Go play with it for a few months on some of your favorite images and see what you think - I think you'll enjoy it! I thought it was a blast to use so I highly recommend it!

Where to Buy? [DISCOUNT OFFER]

Click here learn more using my 10% discount coupon code

CLICK HERE to learn more or buy today, and use coupon code RONMART to save 10%!

Other articles you may enjoy

If you enjoyed this article, you may also enjoy these:

Disclosure

If you make a purchase using links found in this article, I may make a commission. It doesn’t cost you a penny more, but it does help to support future articles like this.

Saturday, November 19, 2016

REVIEW: TTP Streetwalker Pro vs Glass Taxi (UPDATED: Nov 20, 2016)

Side By Side

In 2008, my favorite backpack company released a bag series called the Streetwalker, and as of 2016 the Pro version is still my favorite bag!. This series comes in three varieties:

  1. Streetwalker - 2 lbs and 9.5” W x 17” H x 6”D - Simple and compact
  2. Streetwalker Pro - 2.6 lbs and 10”W x 17.5” H x 7.5” D - Slightly larger in between a full size and small backpack - this is my favorite size!
  3. Streetwalker HD - 3.8 lbs and 11.5” W x 19” H x 8.5” D - Full size backpack with room for a 15" laptop

In this article I'm going to compare the Streetwalker Pro with the Glass Taxi that I loved in the days before the Streetwalker series existed.

As a point of reference my Glass Taxi is 2 lbs and 17” H x 8.5” W x 9.5” D. Officially ThinkTankPhoto states that the Streetwalker series is not a replacement for the Glass Taxi, but rather a different offering. In addition, size and weight wise the basic Streetwalker is most like the Glass Taxi, but since I use my Glass Taxi so much and long for a little extra space I decided to step up to the Streetwalker Pro.

The first thing I noticed when I got the Streetwalker Pro was that it was light and super deep (2" deeper than my Glass Taxi). I've tried to show the difference in the photo of both bags below with my Glass Taxi in the front, but it is hard to get the full impact from just a photo.

Side 1

However when loading the Streetwalker Pro I noticed that my 1DX Mark II  (and previously my 1D X and 1D Mark IV) fit very comfortably in the bag even with the L-bracket on (something that was a challenge in the Glass Taxi). From the moment I got it back in 2008, it immediately became my favorite backpack and it is to this day. My Glass Taxi  for a few years and then eventually was given to a friend as I never had a need for it after getting the Streetwalker series, but then again I didn't own any huge prime lenses which is what its really designed for.

TTP Streetwalker Pro-1-2-Edit copy

Inside I found the the dividers are much thinner than those used in pre-2008 ThinkTankPhoto bags I've owned. I've always considered the dividers and zippers to be the best features of these bags, so a change was a little concerning. However, I quickly discovered that the thin versions seem to work almost as well and have the added benefit of creating more space in the bag (always a plus). That said, I wish the old thicker dividers would come back.

One really great thing I noticed about the interior is that it finally has good pockets! As you can see on the right hand side in the picture above it now has two big nice zipper pouches versus the one useless velcro pouch in the Glass Taxi. The same holds true for the exterior - there's tons of wonderful pockets with places to hold pens, model releases, keys, and so much more. This is one place where the Streetwalker Pro is a clear winner!

Just like all other TTP bags, the added rain protection for a heavy storm comes in the form of a "shower cap" design but it has nothing built-in.

From the exterior the new huge size pockets (show below) and the big pockets on the front (shown at the beginning of this article) make the Streetwalker Pro a very desirable bag to own. I've always found you can't have enough pockets, and this is one bag where I've got more than I need (for now) and that's a good thing!

TTP Streetwalker Pro-4-Edit copy

Conclusion

I’ve been using my Streetwalker Pro since 2008 and I love it. Over the long-haul I stopped using the Glass Taxi for anything but large glass. In fact, even in November 2016, my Streetwalker Pro is often my “go to” bag when I need to carry a lot in a compact bag.

My bag has held up well and the only issue I had with it was the zipper sticking on the turn (due to the glide angle, not a zipper issue) which has been addressed in all models since shortly after I got mine in 2008.

Special Offer

Click here for the latest offer and FREE shipping.

Other articles you may enjoy

If you enjoyed this article, you may also enjoy these:

Disclosure

If you make a purchase using links found in this article, I may make a commission. It doesn’t cost you a penny more, but it does help to support future articles like this.

Monday, August 8, 2016

Macphun Unveils Sneak Peek of Aurora HDR 2017 New Features

Click to learn more about Aurora 2017

My favorite HDR Editing software is going to be getting better this September. Macphun has let me know that Aurora 2017 will come with over 20 key improvements and new features including these: 

  • New Batch Processing
  • New Tools, including polarize filter and radial masking tool
  • New presets by Trey Ratcliff and other recognized pros
  • Reworked tone-mapping and bracket merging technology for more realistic looking HDR images

More details will be released soon, so please sign up for the Aurora 2017 newsletter to learn more.

Availability:

Aurora 2017 will be available for pre-order September 15th and will officially launch September 29th.

Upgrades and Pricing

  • Current users of Aurora HDR Pro can upgrade to Aurora HDR 2017 at a special pre-order price of $49
  • Current users of the standard version of Aurora HDR can upgrade to Aurora HDR 2017 at a special pre-order upgrade price of $69
  • New customers can pre-order Aurora HDR 2017 for $89

Pre-order to receive special bonuses that will be announced soon.

Ron’s Aurora Review & Tutorial

I’m no Trey Ratcliff, but I give you my 2 cents in this 30 minute tutorial where I demonstrate how I use the first version of Aurora and my thoughts about it:

The cool thing about this video is that there’s no smoke and mirrors and it’s done on a 2010 MacBook Pro with 8GB of RAM and 512KB video, but it performs very well.

Where to learn more or order?

CLICK HERE to learn more about Aurora HDR 2017 and this special offer.

Want to know more about this product? Check out my full review and video tutorial.

Disclosure

If you make a purchase using links found in this article, I may make a commission. It doesn’t cost you a penny more, but it does help to support future articles like this.

Monday, June 29, 2015

ThinkTankPhoto & Mindshift Product Reviews and Special Offer Details

*** NOW WITH FREE FEDEX GROUND SHIPPING ***

From the start of this blog in 2008 I have been a big supporter of Think Tank Photo bags because I believe them to be the best bags on the market – PERIOD! However, there’s still plenty of people who believe that competitors bags are just as good, but I’ve tried a lot of bags and the first failure point for most competing bags is the zipper. Here’s a good video that talks about their zippers:

and here my story about why zippers really matter.

Yes, it's true that some other brands also use YKK zippers, but the other part of the equation is a combination of the size of the zipper (yes, bigger is better) and the material it's sewn on. It’s subtle, but I’ve seen bags with the tiny YKK zipper that was asked to do to much and it failed, but more often I’ve seen the zipper stay in tact but the material it was attached to ripped.

You’ve got to get all of these things right to make a great bag, and much more that only comes from knowing how real photographers are going to use your gear. This is a company of photographers making products for photographers, so they’ve got that part down pat.

Free Gift for readers of this blog!

When you place any order over $50 (see below), you’ll get your choice of a FREE gift bag. The choices change, but as of November 2016 here’s what’s being offered:

image

And all you have to do is  click my links or the photo above, and you’ll automatically be prompted to choose your free gift when you’ve add an item worth $50 or more to your cart.

Ron’s Think Tank Photo reviews

My favorite TTP/Mindshift bags ranked:

  1. StreetWalker Pro has been my go to bag since 2008 for all of my local shoots and short trips when I’m packing light (although I”ve stuffed 40 pounds of gear into mine more than once).
  2. Airport International v3.0 - The best roller bag on the market that is designed to fit in the overhead bin of planes worldwide (as of 2016).
  3. Think Tank Photo TurnStyle 20 – The Ultimate sling bag and super lightweight
  4. MindShift Gear Rotation 180° – THE Hiking Camera Backpack
  5. Think Tank Photo Modular Components V2.0 – Brilliant for sports or crowds. The ultimate photojournalist setup & great when you have to run!
  6. Think Tank Photo Logistics Manager – the ultimate I gotta move a lot of $hit bag, and my go to choice when the studio gear has to be transported.

Think Tank Photo reviews on this site:

MindShift reviews:

Disclaimer

I may make a commission if you make a purchase using links found in this article. Please support this blog by returning here and using the link on this page whenever you order Think Tank Photo products (even if you don’t want the free gift)!

Tuesday, February 4, 2014

REVIEW: Wacom Intuos Pro Professional Pen & Touch Tablet

Wacom Intuos Pro Professional Pen & Touch Tablet (Medium)

I’ve been using Wacom tablets since before the Intuos line came out, but it wasn’t until the Intuos 3 that I really started to love them. However, there’s one feature that has been included in my last couple of review units that never quite worked the way I hoped it would – WIRELESS!

If you own one of these tablets prior to the Intuos 5 with the wireless kit, you know EXACTLY what I’m talking about – especially on Windows. The tablet worked great when it was plugged in – but the wireless? Yeah, that was a feature that was cool when it worked, but that was a rare event based on my past experience. Since I review a lot of products and pollute my system with a lot of third party software, I figured it was just my machine being flaky. However, when I talk to Intuos owners about the new tablet the first thing we start talking about is the unreliability of the wireless in previous generations.

Now it’s my understanding that the Intuos 5, which I didn’t own, had the wireless kit that kicked off the improvements. However, as someone coming from a Intuos 4 Wireless the differences are huge!

The new version seems to have learned from the mistakes of the past and has moved away from the unreliable BlueTooth design to a new WiFi design that works like a typical wireless mouse or keyboard where you attach a dongle to your USB port. While it does stink to lose a USB port, the reward is that this is rock solid reliable wireless based on my testing. Even on my sometimes quirky machine, it’s been rock solid for more than a month without a single failure – even on Windows!

So my first comment about this tablet has to be “it’s the one where wireless REALLY works”!!! Beyond that reality, you get a tablet that performs in a manner that is similar to its predecessor. The drawing area is roughly the same size, and the number of buttons and wheel are the same. The medium tablet I use is roughly 5% larger than its predecessor and it’s a little heavier, but the buttons are nicely spaced out and it gains a big new feature – touch.

In this new era of touch everywhere devices, one place where things were a bit clunky with pen tablets was that there was no mechanism for doing natural touch gestures like swipe. This new version changes that by allowing you to use a toggle button to change the behavior of the tablet from a pen writing surface to a touch pad – much like you get with the built-in touch pad on a Macbook Pro. While I’d still rather a touch screen for those activities, the best displays on the market for photographers (at the time of this writing) do not support touch. As a result you are forced to choose between touch or a high quality display, so this new tablet bridges that gap.

Perhaps my only gripe about this new tablet over its predecessor is that it loses the LED labels that were used on the previous version to tell you what functionality you had assigned to your buttons. I REALLY liked that feature, so I’m pretty bummed that it has been removed. Aside from that, everything seems to be as good as or better than its predecessor. I do like the space between buttons again (they were butted together on the previous version), and the surface has  a more tactile feel to better support touch. These features with rock solid wireless have made this my favorite Wacom tablet yet!

Video

Here’s a short video overview of this tablet:

If you are new to Wacom tablets, check out this video and others on YouTube.

Conclusion

If you are happy with your existing Intuos 4 tablet or greater and don’t require wireless or touch support, then there’s probably no reason to upgrade. If you have the 5 and the wireless kit, it’s my understanding that you only get an improved button layout so there’s probably no reason to upgrade either.

Now, if you are coming from any older version or a Bamboo, then this is a nice upgrade that is worthy of consideration – especially if you like using touch and/or wireless.

I’ve tried the various sizes and Medium has always worked best for me. Your mileage may vary, but I always encourage people to start with a Medium and if you are dissatisfied after using it for a week then work with your reseller to get an alternate size (B&H is good at taking returns and doing exchanges).

I’ve been a long time user of Wacom tablets and HIGHLY recommend them for doing photo editing work like using the healing brush, creating complex masks, HDR, dodge & burn, painting, etc… Even if you have a good touch screen, nothing replaces the Wacom for photo editing in Photoshop (and it’s pretty darn handy in Lightroom if you use the adjustment brush). It’s just so much more easy and natural than using a mouse, and you get used to them REALLY quick to the point that you can’t live without them. This reliable wireless design also makes it easy to take it on the road with your laptop when you travel too!

TIP: Try as I may, I personally still prefer using a mouse for my mouse work and the pen for my pen work. Some people can do both, but I mention this for those who get a new tablet and find themselves frustrated when trying to use it as a mouse. It’s not a binary decision – you can use both together quite well – or just one – it’s your choice. I’ve used my tablet with touch screens, Windows and MacBook Pro based systems and all have complemented the pen tablet very well without conflicting with each other.

Where to order

Click here to learn more or order on the B&H web site. My friends at Amazon have it available here.

Other articles you may enjoy

If you enjoyed this article, you may also enjoy these:

Disclosure

If you make a purchase using links found in this article, I may make a commission. It doesn’t cost you a penny more, but it does help to support future articles like this. At my request, Wacom has provided me with a tablet to review for this article.

Tuesday, December 24, 2013

REVIEW: Picture Collage Maker Pro


Picture Collage Maker Pro (Win & Mac)

Pearl Mountain Software contacted me several times this year asking me if I would take a look at this app, but due to my busy schedule I refused. As the holidays got near I found myself needing to do a collage so I decided to take them up on their offer to check out Picture Collage Maker Pro (available for both Windows and Mac).

It turns out that this is one of the most useful collage programs I’ve used thus far, and it’s very fast and responsive. There’s lots of free templates available too so that you can hit the ground running very quickly.

Introduction Video

Here’s a little introduction video that shows how this product works:

Video Walkthrough

Here’s a simple video walkthrough I did to just show how I use this product:

Conclusion

If you are doing holiday greet pages, scrapbooking, disc labels, sports portraits or more you’ll love this app. It’s dirt cheap and you can download a free trial to see if you like it. I’m actually quite happy to have discovered it and highly recommend it!

Where to order

Click here to learn more and/or order.

Other articles you may enjoy

If you enjoyed this article, you may also enjoy these:

Disclosure

If you make a purchase using links found in this article, I may make a commission. It doesn’t cost you a penny more, but it does help to support future articles like this.

Monday, April 2, 2012

Free Think Tank Photo Speedbelt with Streetwalker Pro or Harddrive Purchase

Free Padded Belt

Just in time for Spring, Think Tank Photo announces a special offer on their popular StreetWalker™ backpacks.  When you buy one of Think Tank’s spacious and comfortable StreetWalker® Pro or StreetWalker® HardDrive backpacks by April 30, 2012, you will receive a padded Pro Speed Belt™ for free!

The Pro Speed Belt makes the StreetWalker backpacks even more comfortable and provides greater support for the weight on your back.   This padded belt also allows you to attach Think Tank’s modular bags to the belt line.  In doing so, you will have quick access to your lenses or accessories instead of having to take the backpack off to retrieve your camera gear. 

With Think Tank’s StreetWalker backpacks’ slim vertical profile, you can navigate crowded places while still being able to access professional photographic equipment.  The backpacks include a monopod/tripod mounting system, a contoured harness and air channel, and lots of pockets and organizers.  Women in particular will appreciate the StreetWalker’s very narrow and vertical profile, especially when combined with the shoulder harness design.

Streetwalker Pro (review) – Holds most 400 f2.8 lenses with a pro size DSLR camera body attached or a pro size DSLR and 70-200 2.8 attached.  Lens hood can also remain attached in shooting position.  Bottom front pocket can be used to carry a tripod or monopod.  A pop out tripod cup is built in for carrying a larger tripod.   Removable seam-sealed rain cover included.    

StreetWalker Harddrive

Holds most 15” laptops.   Carry a pro size DSLR and 70-200 2.8 attached with hood in position or a Nikon 400 f2.8 attached to a pro size DSLR body.  Bottom front pocket can be used to carry a tripod or monopod.  A pop out tripod cup is built in for carrying a larger tripod.  Removable seam-sealed rain cover included.  

Special Offer on ALL Think Tank Photo Gear

In addition to the offer listed here, I have a special offer on my Think Tank Photo page where you can get a free bag!

Disclosure

I may make a commission if you make a purchase using links found in this article.  

Monday, December 12, 2011

REVIEW: Think Tank Photo Modular Component Set v2.0 and Keep It Up Shoulder Strap

Think Tank Photo Modular Component Set v2.0 Think Tank Photo Modular Component Set v2.0
In the new v2.0 set, Think Tank Photo has reduced the number of included bags down from 6 to 4. Fortunately, the four included are the ones I use 99% of the time so for most this will be a good thing.

The Pro Speed Belt v2.0 belt sold separately so you can pick the size that is right for your waist size.

Here’s what’s included:

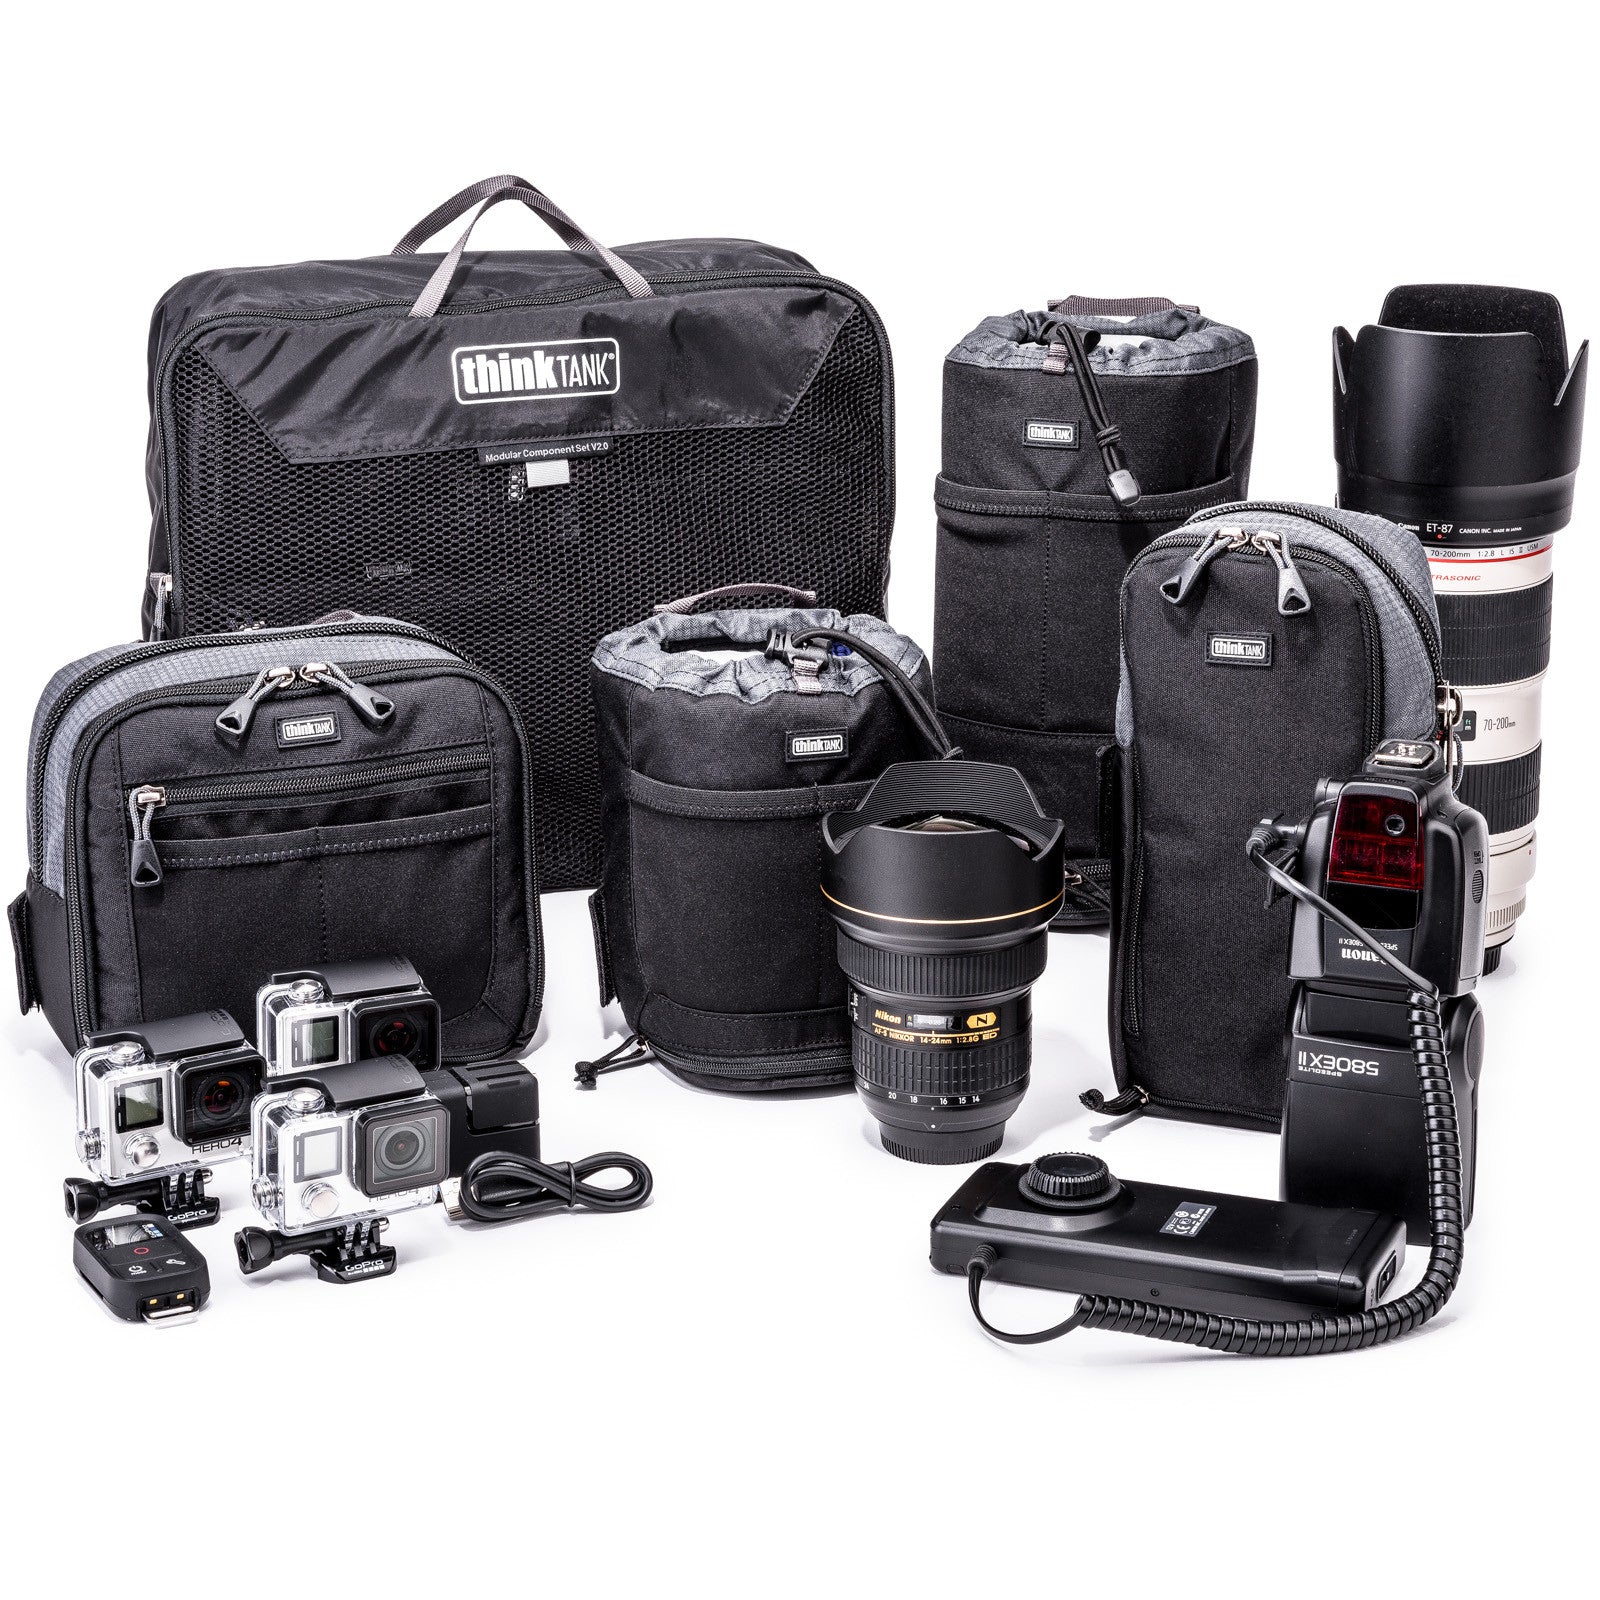
  • 4 piece set mesh carrying case
  • Lens Changer 50 V2.0 - Sized for both wide angle and standard professional zoom lenses
  • Lens Changer 75 Pop Down V2.0 - Carries a 70 - 200 f/2.8 or 100 - 400 f/4 with the lens hood reversed or in position
  • Strobe Stuff - Large enough to accommodate a 580EXII or SB900 with an external battery pack and diffuser attached
  • Speed Changer V2.0 - Multiple use pouch that can fit a pro-sized camera body (lens not attached) with room for accessories. Can also be configured with the included dividers to carry small telephoto lenses, teleconverters, RF Transceivers, or pro-size batteries.

Additional lens pouches, and skins are available to complete to your collection.

Keep It Up Shoulder Strap

Keep It Up Shoulder Strap Keep It Up Shoulder Strap

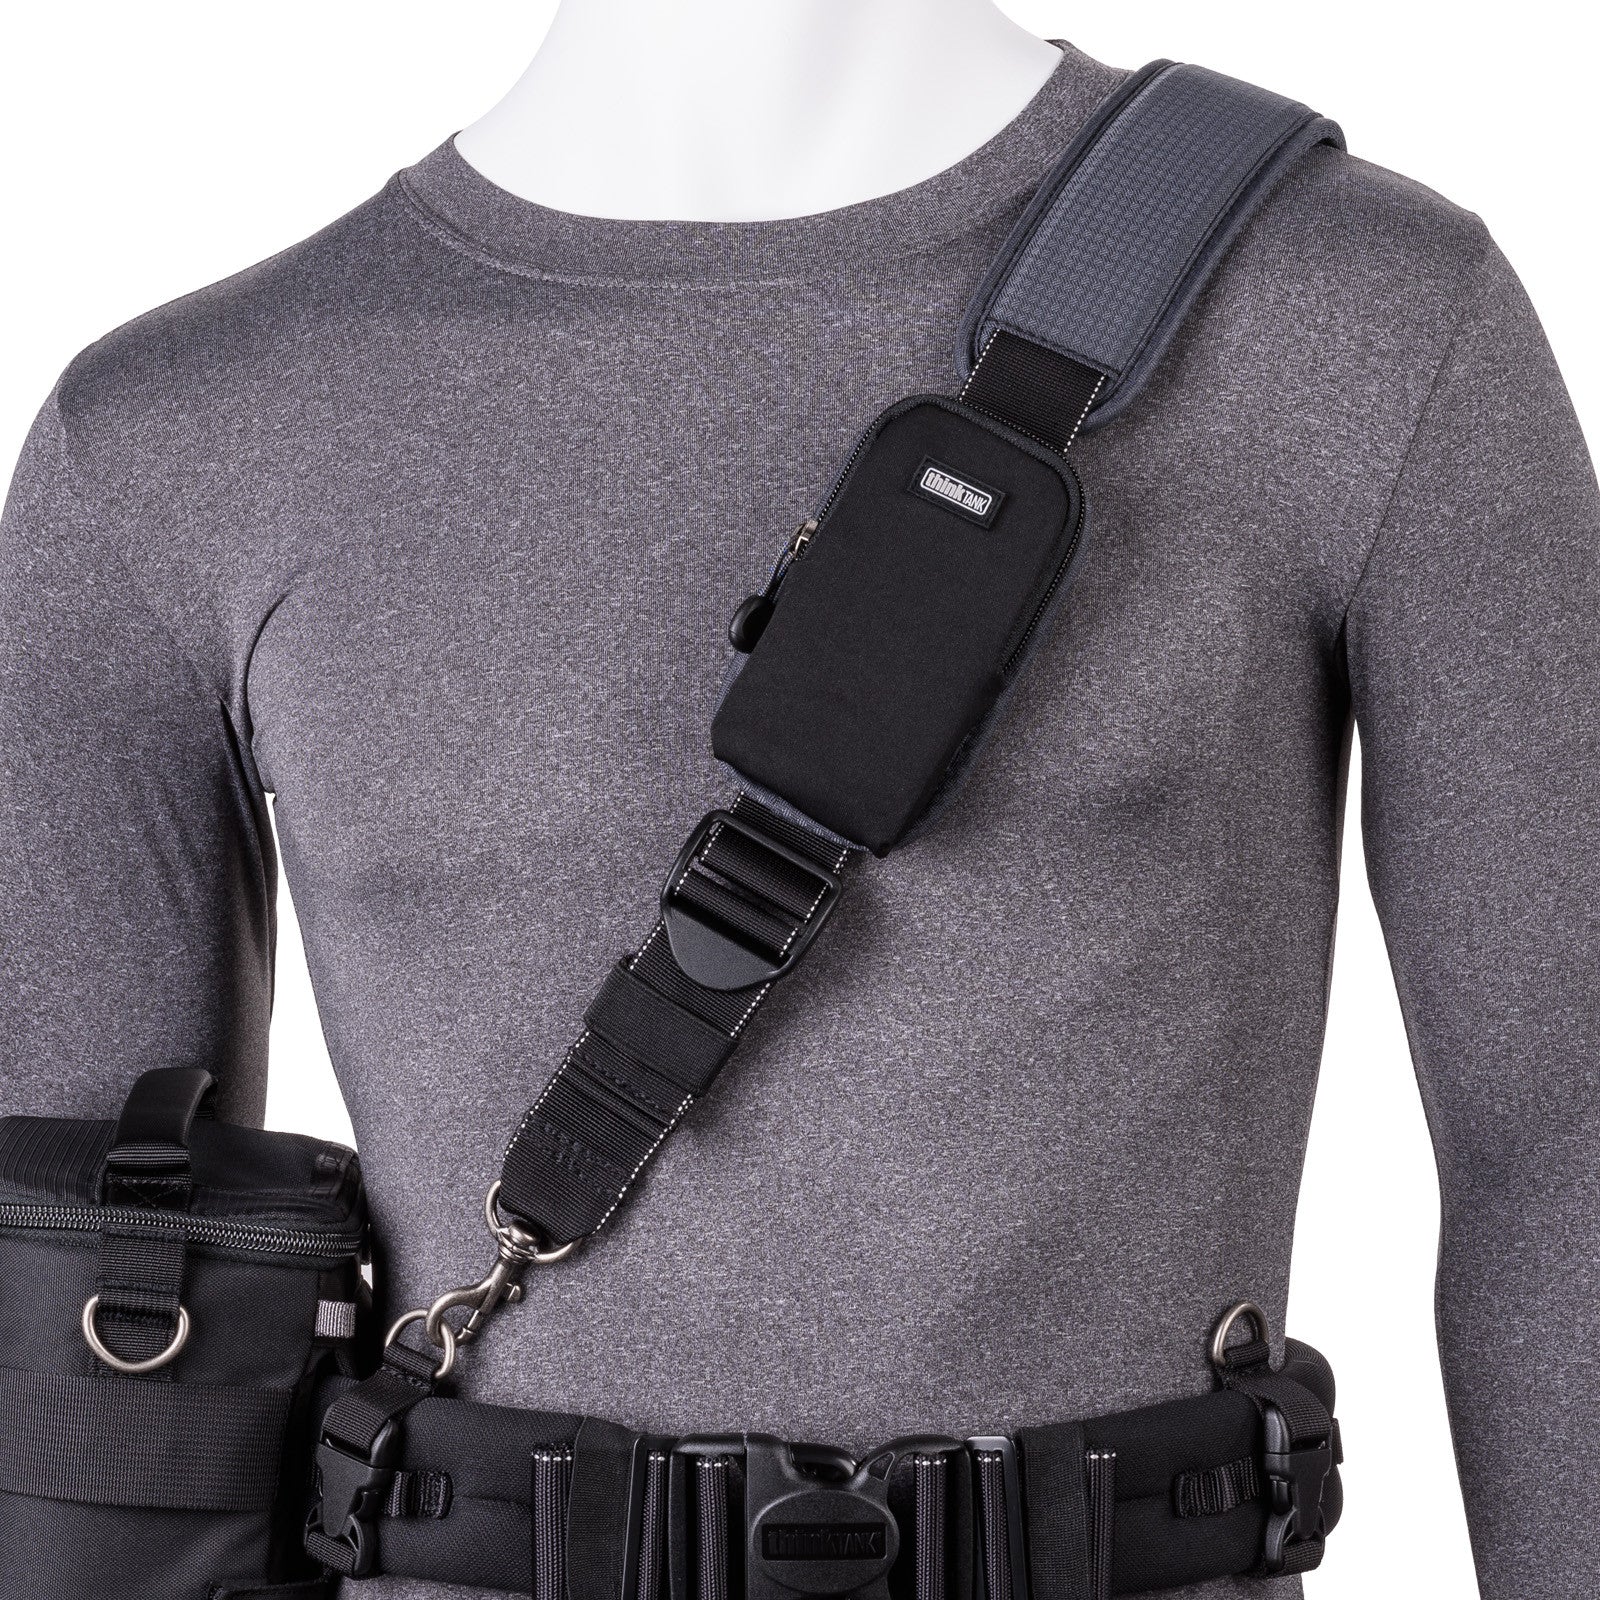
One of the challenges with the modular belt is that the weight of your gear and the lack of wide hips can result in a little downwards creep of your belt. I’ve never had a belt fall off, but I’ve needed to stop and re-tighten my belt on occasion to make sure I was comfortable with it staying put. Think Tank Photo has addressed this issue with the new Keep It Up Shoulder Strap which gives you additional support for your belt as well as a place to store your phone.

This strap is a wider version of what you’d find on the wonderful Artificial Intelligence laptop bag. Unfortunately it lacks any substantial padding, so I’m not crazy about that part. However, it doesn’t get much weight pressure when used with the belt so some might find the thin strap useful for storage when not in use. The inclusion of a cell phone pocket that can hold an iPhone is so cool that I’ll probably use it as a replacement strap for my Artificial Intelligence 17 V2.0

Should v1.0 Users Upgrade?

Watch this video to learn more

While I really like the improvements of the new bags, I’d say that v1.0 users are safe keeping their current bags. As you add bags I’d go for the new v2.0 bags, but I don’t think the convenience of the rain bag storage and new elastic pockets warrant replacing your existing bags.

Conclusion

I love my v1 modular components that I reviewed a year ago. Over this past year I have used them anytime that I only need one body AND when I know my camera will be in my hands more than in the bag. It has been great for event, sports and photojournalism shoots.

I use my Streetwalker Pro or Urban Disguise 40 v2.0 most often when I need larger capacity, and when I’m loaded down I use my Airport Security v2,0. Despite owning all of these bags and more, the modular set has remained an important part of my collection. Because I own both, I’ll be ditching my v1.0 duplicates, but for everyone else I’d say that either v1.0 or v2.0 will serve you equally well.

SPECIAL OFFER - Ordering Information

To order the bags featured in this article, please use these links (includes the FREE BAG offer):

Click here for the latest FREE BAG special offer and other Think Tank Photo bag reviews.

Disclosure

I was provided with a v2.0 modular set, pro speed belt v2.0 and keep it up shoulder strap for this review. I may also get a commission if you make a purchase using the links in this article.

Friday, November 11, 2011

REVIEW: NEC SpectraSensor Pro (powered by X-Rite)

NEC SpectraSensor Pro

The NEC SpectraSensor Pro is a specialized version of the i1Display Pro that was built in conjunction with NEC to calibrate their wide gamut displays (like the PA Series 24, 27 and 30” models). You can actually use this, a ColorMunki Photo, ColorMunki Display, i1Display Pro or other wide gamut calibration devices to calibrate your NEC monitors, but this is the new NEC version that was tested to work specifically with NEC monitors.

It is important to note that some monitors like the NEC PA Series have what is called a LUT (look up table) where the calibration information is stored. As a result you MUST use the NEC SpectraView II software to calibrate this display, as that is the only calibration software that can program the LUT in this display. Click here to learn more.

This is a replacement for the older calibration devices by NEC which also supported wide gamut color and could program the LUT, but was less accurate than this newer device. If you old the device or other supported devices, then you only need to make sure that you have the latest version of SpectraView II (recently updated to support Lion).

Use with SpectraView II


When using this sensor with the latest SpectraView II,
Choose XRite iOne Display Pro (I1D3) as your sensor type

If you are using SpectraView II then you should go to the NEC web site an install the latest version. Once you do, you’ll need to choose the new sensor type called “XRite iOne Display Pro (i1D3)”.

Recommendation for new NEC display buyers

If you are buying a new NEC display and don’t have a calibration device, then I recommend you get this or a ColorMunki Photo (a spectrophotometer for print soft proofing). I DO NOT recommend that you get the discontinued bundle that features the older NEC calibration device.

UPDATE: NEC tells me that going forward, all SpectraView bundles will contain the new sensor (even if web sites show the old sensor on their photos). If you should end up with an old sensor at this point, I wouldn’t worry too much. The old ones will work fine and feel more substantial than the new ones, so all you really lose is compactness from what I can tell.

More NEC Related Content

Disclosure

I was given an evaluation copy of this device to test with my NEC PA241W. My display was purchased from B&H at full market prices (i.e., no discount) BEFORE I had established any marketing contact with NEC.