Showing posts with label wedding. Show all posts

Saturday, August 19, 2017

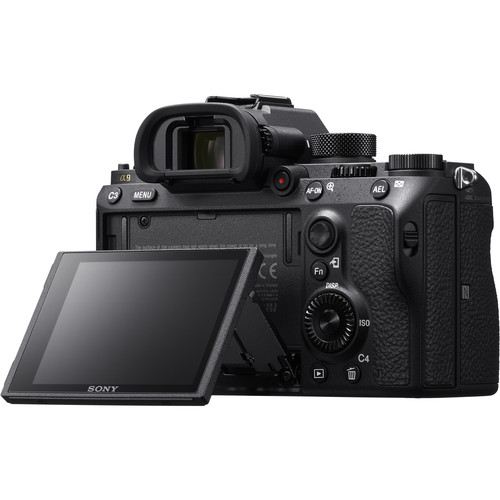
REVIEW: Sony a9 - The Best All Purpose Camera? (Part II of II)

In Part I of my review I asked Sony a9 - The Ultimate Action Camera By Which All Others Will Be Judged?, and I think the answer has to be yes. It's a very impressive AF system that almost guarantees you'll get the decisive moment for an action scene. However, this is a big investment and most of us aren't paid sports photographers, yet this camera has a lot of reasons why you might want to buy. As a result, I thought I'd spend the second half of this review discussing its value as an all-purpose camera to see how it does with typical shots that the average person might take.

Would this be a case of yet another expensive camera that's really just a one trick pony, or did Sony really make one camera to rule them all? Read on to find out and see my final conclusion.

Real World Shots

Real world shots is my way of saying examples of photos that an ordinary person might take as compared to ones that a paid professional being hired to photograph something would take. I like to include these types of shots in my reviews because it reflects exactly what you can expect to see if you buy this camera and examine the results on your computer.

All of the photos are 100% unedited (not even cropping unless noted) and you can click the photos to see the exact unedited JPEG that came out of the camera.

While I might use white balance (shade) and creative style (vivid) adjustments to enhance the in-camera image, the rest of what you see is what you'd see at home yourself if you took this same shot yourself.

All images are copyright, Ron Martinsen - ALL RIGHTS RESERVED, but you may examine the originals to your hearts content while viewing this article in your web browser. After closing the article, you agree to delete any local copies and you also agree not to print, re-post, re-distribute, link to or otherwise use these photos in any way without written consent.

With that said, please enjoy my thoughts on these and all of the photos found in part 1 of my review and in the galleries associated with this review.


f/2.8 @ 70mm for 1/160 sec at ISO 250

Using full resolution (6000x4000) you can't get a good shot of this subject from the fixed viewpoint


f/2.8 @ 70mm for 1/250 sec at ISO 400

However, if you switch to the APS-C mode, then you get some extra optical zoom without sacrificing quality - but you do get a smaller 3936x2624 file so you've essentially just done an in camera crop. That said, I still liked this mode and it will still print and look gorgeous on a 4k TV.


f/2.8 @ 70mm for 1/250 sec at ISO 500

Using the Clear Image Zoom feature at its maximum 4x means you can't pick the focus point but you get impressive reach and quality using this intelligent digital zoom technique.
Again, I have a file that needs no editing to show friends on a 4k TV - impressive


f/16 @ 24mm for 1.3 sec at ISO 100

In this intentional dynamic range torture test, I was reminded that this definitely no a7R II
The highlights were pretty blown despite the cloudy conditions


f/22 @ 24mm for 2 sec at ISO 100

However, if you shoot within the dynamic range of this camera,
the landscape results are very satisfying


f/4 @ 70mm for 1/800 sec at ISO 100

I snatched a frame of the distant boat,
but I was surprised to see how much detail still remained in the power lines


a9 Camping-34
f/4 @ 68mm for 1/3200 sec at ISO 100 
(cropped - click for unedited original)
As I was taking the shot above, I heard this plane overhead so I took a quick shot
Despite being underexposed, I was impressed with the detail in the shadows
and especially the wires going from the vertical stabilizer on the tail


f/5.6 @ 70mm for 1/100 sec at ISO 640

Zoom in to the original for a scary look at this spider shot done at full frame at roughly the minimum focus distance of the 24-70mm f/2.8 GM lens


f/4 @ 70mm for 1/200 sec at ISO 800

Decent bokeh and amazing detail make the kit a great deal for those getting started with Sony


f/3.2 @ 70mm for 1/1250 sec at ISO 100

Wild unpredictable boys are no problem with this camera


f/3.2 @ 70mm for 1/500 sec at ISO 100

Clear Image Zoom is excellent for hard to reach flower macro shots at the botanical garden


f/4 @ 70mm for 1/2000 sec at ISO 500

There is enough dynamic range to keep cheek highlights in check
when photographing family members in the harsh sun

Slow Motion Video Autofocus Test

I don't do much with video, but I think slow mo videos are cool so I couldn't help but play around with that feature on this camera. In this test, I was curious to see how the AF would hold up to the torture test of keeping up with my son's eyes. It failed, but honestly I thought it did better than expected given the fact that I was using eye focus mode on such a challenging scene.

Bookshelf Test


f/5.6 @ 50mm for 10 sec at ISO 100

ISO 100 quality was excellent even by today's standards
and the shadow detail above the books to the back wall was impressive

Where many special purpose cameras fail is how they perform when pushed to the extremes. In this case, I'm happy to report that the a9 did a respectable job in my bookshelf test that I use to just shadow detail, dynamic range and ISO performance. The full gallery of shots lets you examine full ISO stops from 100 (shown above) to 51,200 (shown below) where you can decide what your maximum tolerance is for sensor noise and noise reduction control. However, I found 51,200 to be usable in a pinch and 12,800 to be good enough to consider it a default top ISO for regular shooting.


f/5.6 @ 50mm for 1/50 sec at ISO 51200

As this shows, unless you are going to be viewing at large sizes, images of your vacation or kids shown a social media sizes is going to be totally fine at ISO 51,200

Conclusion

Yes, I have to say that this is the most impressive camera that I've tested this year and one of the best ones I've every shot with. While I won't be getting rid of my Canon 1D X Mark II because if its superior line up of sports lenses, better metering and excellent flash system, I did find myself looking at my camera and wondering why Canon can't do that!

I've also shot with the Nikon D5, and I'd prefer it over the Sony for the same reasons. Yes, I've seen adapters used with Canon and Nikon lenses and I'm extremely underwhelmed at AF performance when used with adapters, but manual focusing is fine. That kinda defeats the purpose of this camera and sports lenses, so I'd still say that if you are a sports shooter that this is a good second camera for close range action, but stick to Canon or Nikon for your >200mm needs.

With that said, if you are an event or wedding photographer then I think this is the camera you have to own. While you might want a a7R Mark II also around your neck or in the hands of your second shooter for its superior dynamic range, this will be the camera that helps you to get the shots that bring tears to your clients eyes. It's also got the high ISO performance to come home with concert and evening event shots that are totally usable.

Now this is an extremely expensive camera, so it's tough to suggest it for parents based on price. However, if you are a financially successful dual income household that can easily afford it then I can say without hesitation that this is the camera you want to photograph your precious little angel.

Overall, I'm extremely satisfied all around with the first Sony camera body that I didn't hate (thanks to its wealth of programmable buttons) and can easily give it MY HIGHEST RECOMMENDATION.

Where to Buy?

CLICK HERE to learn more or buy today.

Other articles you may enjoy

If you enjoyed this article, you may also enjoy these:

Disclosure

If you make a purchase using links found in this article, I may make a commission. It doesn’t cost you a penny more, but it does help to support future articles like this.

Unless noted, ALL shots in this article are unedited and come straight out of the camera as shown. In-camera JPEG's were used with in-camera Creative Style (vivid) and White Balance (shade) being leveraged to give shots an improved color over the camera default.

Tuesday, February 12, 2013

REVIEW: FotoMagico 4.2 Demo & Discount – A Wedding Photographers Must Own App!

About four months ago I got contacted to see if I wanted to review a product called FotoMagico. I get lots of these offers, but my to-do list is so long that I turn most of them down. I quickly checked out the web site to see what this product was about and was immediately intrigued. Fast forward to today when I finally got time to review this product and I’m now kicking myself for not doing it out sooner!

In short, FotoMagico is a very inexpensive, yet easy and fun to use app for generating videos of your photos and videos with great transitions, music and more. Sure, you’ve seen lots of apps like this, but if you are like me most have failed to meet your expectations. Of course web sites like Animoto showed great promise and were super popular, but it was absurdly priced so why bother right?

WARNING: This is a Mac OS X product only. It will not run on Windows! (Don’t feel bad Windows users, QImage doesn’t run on OS X – much to the frustration of Mac users <g>).

User Interface Tour

The user interface is clean and simple with nice integration with both the files on your drive as well as your libraries in iPhoto, Lightroom and Aperture. You just select your images and drag and drop them onto the storyboard.

Once you have your files dropped you can create an instant slideshow and be done – zero work on your part – or you can use the storyboard or timeline to customize your presentation.

The Timeline is powerful so you can perform advanced customizations with text that appears on demand.

You can even add videos as well as photos, and you can choose for auto advancement of your slides or click to navigate (on supported platforms).

You can even have teleprompter notes to display on a second display or beamer to provide your own words during a live presentation.

New for 4.2 - Masks and Opacity Control!

FotoMagico Demo

Here’s a demo that the folks at Boinx wanted me to show you so you can see what’s possible after you master this product:

and here’s my first video (rated PG) that I created using low res images off my people portfolio (NSFW) with very little effort:

I did this without reading any manuals or any help, and now that I've done it once I could easily recreate a video like this with new content in less than 10 minutes. There is an error at the end with the audio that could have been prevented with a feature that exists in FotoMagico to adjust the slide timing based on the length of the audio, but I forgot to use that before publishing my video.

What’s New in 4.2

If you’ve already been using this cool product, then you might be curious to know what’s new in version 4. Here’s a little video that tells you all about it (which new users might find useful as well):

Here’s also what’s new in 4.2:

Click here to see more videos on some of the new enhancements like the splitscreen effect, picture in picture, the spotlight effect and more.

Conclusion

I hate video because it’s too time consuming and a pain in ass to edit, but this changes my view a little bit. FotoMagico was super easy and fun to use so I quickly became addicted to video experimentations! I was very satisfied with the results that didn’t take me long to build (excluding time wasted experimenting just for fun). It was also super easy to build output videos for YouTube, Vimeo, DVD, and iOS devices with a click of a button. In short, all software should be this be fun and simple.

Oh, and in case you are wondering – in the two hours I played around with FotoMagico on my 3 year old MacBook Pro, it didn’t crash or hang once. 8GB was plenty and the performance on newer systems should be even better!

Now you are no longer limited to the crappy slideshows that Lightroom creates nor do you have a reason (if you have a Mac) to not make videos of your work. This is a really cool app that I’m very excited about and highly recommend it! If you are a wedding or event photographer, then you'll really love it as its so much easier and faster than anything I’ve used!

To learn more or get A 5 day free trial visit boinx.com here. Don’t forget to come back here to get a discount on your order using the link below!

Special Offer – Save 10%

Click here to get your 10% discount (it should appear something like what you see below):

FotoMagico 4x Discount Coupon Code

Other articles you may enjoy

If you enjoyed this article, you may also enjoy these:

Disclosure

If you make a purchase using links found in this article, I may make a commission. It doesn’t cost you a penny more, but it does help to support future articles like this. I also was provided a copy of this product to review for the purpose of bringing this article to you.

Wednesday, May 2, 2012

Guest Blog: Using Content Aware Fill to Make Your Assistants Disappear

QaioQiao - Copyright Kaethe Richter - All Rights Reserved

My name is QiaoQiao (chow-chow), and I am a fashion, teen and wedding photographer. I was featured in Ron's article entitled Travel Photography: Photographing People At Night In New York City. Ron is busy testing the Nikon D800, so he asked me if I could guest blog to you today to talk about my favorite Photoshop feature – Content Aware Fill!

Adding excitement to your photos with motion

I love photos with motions like moving hair and dresses like these photos that I did: 

Copyright QaioQiao Jade - All Rights Reserved

Copyright QaioQiao Jade - All Rights Reserved

So when I shoot weddings, I like to try to capture motion like this. What I usually do is have someone flap or throw the hair or dress real quick and have them run as fast as they can. That someone is usually my business partner Kaethe Richter, a recent guest blogger here. We second shoot for each other (very important for weddings), but we also assist each other to help each other get motion shots like those shown above.

Copyright Kaethe Richter - All Rights Reserved
Kaethe & QiaoQiao

Dealing with the classic problem of motion shots

Copyright Kaethe Richter - All Rights Reserved
Silly assistants don’t always escape fast enough

Motion shots are great, but you typically need an assistant to pull the shot off. The problem with this is that most of the time that assistant cannot run get out of the way quick enough, so you end up with body parts from your assistant in the shot. For example, in the shot above I was the slow assistant caught in Kaethe’s photo – oops, ha, ha!

Photoshop's Content Aware really saved my life!

Before I got Photoshop CS5,  I used to have clone stamp everything out and it took forever!. Now it only takes a couple seconds! Of course sometimes it doesn’t work, but the new content aware patch tool in Photoshop CS6 (preview videos) goes a long way in solving nearly every problem you can think of.

Here’s a quick example of a photo that really demonstrates just how easy and fast this feature can be. First, you open a photo in Photoshop and select the person or subject that you wish to get rid of as shown here:

Next, you just go to the Edit menu and choose Fill:

From the contents section, change the “Use” item to “Content Aware” then click OK as shown here:

Wait a minute and then magic happens – voila, the distracting assistant is gone:

Of course it is not always perfect like this, but the content aware patch tool in CS6 helps to solve some of the problems you’d have in CS5 by allowing you to choose where to sample the content aware fill from. If you don’t have CS6, then you can just use clone stamp to fix it. Of course, this always works best when you have a simple background with a predictable pattern, but you’d be amazed at how often it just gets things right! 

Here’s the resulting image where you can’t even tell there was ever an assistant – it even handled the area by the foot and the dress so that it looks natural! 

Copyright Kaethe Richter - All Rights Reserved

You can learn more about me on my website at www.qqjade-photography.com and your can follow me on my blog at www.qqjade-blog.com. You can also see more pics from this couple's wedding at http://www.qqjade-blog.com/2012/05/marlena-wedding-loveforever.html.

Disclosure

QiaoQiao wrote this article upon request of Ron Martinsen as a public service. There are links in this article which could result in a commission if you make a purchase.

Tuesday, May 1, 2012

GUEST REVIEW: Weddings: From Snapshots to Great Shots by Suzy Clement (Reviewed by Kaethe Richter)

About Kaethe Richter

Kaethe Richter of K. Mari Photography
Kaethe Richter

I’d like to introduce my readers to Kaethe Richter (K. Mari Photography) a wedding photographer based out of Albuquerque, New Mexico. Kaethe was both an assistant and model in my popular Photographing People at Night in New York City article. She’s a bright woman and an awesome wedding photographer, so I sent her my copy of this book and asked if she could review it on my behalf (since I don’t shoot weddings). She did a fantastic job, so I hope you enjoy her review.  - Ron

Introduction

Weddings are tough gig and as Suzy Clement points out, “not for the faint of heart”. Most growth and learning as a photographer takes place through experience. Experience, in this case, is shooting lots (and I mean LOTS) of weddings. As tradition has it, the course of most wedding days seem similar—but as LIFE tends to have it, lighting conditions, people, and the environments of these weddings are not. One weekend you are shooting in a beautiful open field and perfectly overcast sky, while the next you are faced with a dark window-less and aisle-less church. Weddings: From Snapshots to Great Shots is a great book that teaches start-up wedding photographers how to deal with and prepare for the many challenges of photographing a bride’s special day.

Chapter By Chapter

Here’s my thoughts on each chapter of this book:

1. Equipment

Although every chapter is geared toward both professionals and amateurs, this one specifically separates the different needs that come with increased experience. She overviews the pros and cons of full-frame vs. cropped sensors, and also which lenses are absolutely necessarily vs. beneficial to have as a wedding photographer. She does a exceptional job pointing out things an amateur might overlook on their first wedding day (i.e. backup batteries for flash, benefits of renting equipment, and proper carrying cases for equipment).

2. Shooting Basics

Most photographers who have worked in the industry can probably skip or skim this chapter. She overviews real basics like composition, shutter speed, aperture, ISO, and the different modes on cameras (aperture priority, manual, auto, etc.). The most useful part of this chapter for a professional are the pictures she’s provided in correlation to the lens and exposure choices. She exemplified how different settings and lenses can help a photographer create a story and describe the feeling of the day, rather than just using a hard flash on subjects to get the picture.

3. Prepping for the Shoot

If you are a seasoned professional, and you only read one chapter in this book, read this one. It’s one of the most overlooked parts of the wedding photography process that can help prevent a whole lot of frustration on the wedding day! Suzy encourages photographers to scout the location ahead of time. This is key. As I said earlier, your conditions are constantly changing with every wedding. Going ahead of time will allow you to not only find great locations to do different portraits (alleviating stress when stuff gets hectic!), but it also gives you time to rent/borrow equipment you may need to make the location work.

Another great point she makes is how important it is to understand your couple’s wants and needs. Similar to how locations can vary, so can your clients! Some of my brides in the past told me they could care less if they had formal portraits, while many of my brides said it was the ONLY thing that mattered to them.

Chapters 4 - 8

4. Getting Ready

5. The Ceremony

6. Post-Ceremony Portraits

7. Cocktails, Dinner, and Décor

8. Reception and Dancing

In chapters 4-8, Suzy walks you through the different parts of a wedding day, and certain aspects of each you should prepare for. This is a great opportunity for amateurs to prepare for the different elements that come into play at different parts of the day.

Being on your “a-game” for 6-12 hours is tiring. It’s easy to overlook certain important jobs as the wedding photographer (i.e. details in the reception hall, table shots of the guests, etc), especially when stuff gets hectic and when the people you are working with get tired. These 5 chapters are a good reminder of the things you really shouldn’t forget to capture, even in the midst of exhaustion and chaos.

9. Organizing and Presenting your Work

The biggest misconception of wedding photography is that once the big day is over your job is done. Clement perfectly both describes and PREPARES amateurs for the hard work ahead after the wedding. She offers advice on efficient ways to backup, cull and edit your bundle of . Unlike most wedding photography books I’ve read, she offers up-to-date online options for sharing, printing, and creating final albums for clientele.

Conclusion

For a start-up wedding photographer this book is an absolute must read. What I’m saying is: two years ago, it would’ve saved me a lot of unfortunate moments at weddings had I read this ahead of time. It does a great job preparing you for the unpredictable nature of weddings. Seasoned professional probably don’t need to read this, but it’s always nice hearing a fresh perspective (and see pretty pictures).

Disclosure

The publisher has provided ronmartblog.com with a complementary review copy of this book. Ron sent it to Kaethe for review due to her interest in the subject of wedding photography. Kaethe was not compensated in any way beyond getting a book to read for sharing her thoughts.

ronmartblog.com may get a commission if you make purchases using links found in this article.

Friday, July 22, 2011

Guest Blog: Shooting Weddings Part V: Contracts & Business Practices

Timothy Lusk is back to share some more of his pearls of wisdom on the subject of Wedding Photography. This is the last of five articles he’ll be sharing on this topic, so I hope you enjoyed his series!

B&H Wedding Photographers Buyers Guide

This is for everyone who has invested in a DSLR over the past few years and has either thought of shooting weddings or has been asked by a friend or family member due to their thought of either saving money or because the bride or groom isn’t aware of what goes into shooting a wedding.

There are plenty of questions that should be running through your head and asking not only the bride or groom, but yourself.

  1. Where is the wedding? Is it in a church? Is it an outdoor wedding? If it’s outside, is the wedded couple under a trellis or something that will produce shade?
  2. What are the expectations of the photographs? Doe the bride and groom “just” want the typical list? Is there a photographer that they love his or her style, but don’t have the budget for them?
  3. What can be expected of the event? Is it a quick ceremony on a beach? Is it a full day from sunrise to sunset and into the night?
  4. What equipment do you have in your bag? Do you need to rent any additional gear?
  5. Are you getting paid for doing this? If so, how much is your time worth to you? Are you thinking of this being a start to your wedding photography business, or is it going to be a one-time only offer?

Asking yourself these questions, can help you decide one of two things. Either you’ll move forward and step up to the plate, or you’ll play it cool and kindly decline.

For other articles in this series, please follow these links:

CONTRACTS

I want to take this last part of my Wedding Photography overview to discuss contracts. I am not going to just copy and paste a contract to review it and hand over the content needed… that’s too easy. A lot of what I have learned and refined over the years is thanks to a workshop I took under Mike Colon back at the WPPI conference in 2010.

To start, there are a few things that you should always note when starting to put together a good contract for weddings.

PRICE STRUCTURE

I’m listing this category first for a couple reasons. The first being, I want to stress that you charge for your services. I have never done a wedding for free–never. Yes, I’ve done one on a budget for $300, but that was not only my first wedding, but by charging for the wedding, I felt confident that it was something I could continue doing at a reasonable cost and not feel like I’m not charging what I feel I should be.

To start, I always ask for 50 percent deposit, remainder due on or directly before the wedding. Why? This might seem odd to not have even done the service yet, and still get paid the full amount. I grew up being a Boy Scout and have found that with the timeline of post production, etc. you have this notice to yourself (voice in your head) to finish the work on the photos and get them into a gallery for your client to view and buy.

Next, don’t sell yourself short. Before presenting your first contract, make a list of everything that you might need to be covering for that day. Gas for traveling, any rented gear (I’ve used LensProToGo.com [see the discount coupon code page]), any services you might use (ie web hosting), or memberships you might belong to (ie WPPI). By doing this, at the end of the wedding and handing off the photos, etc. you’ll see that you’ve succeeding in making a profit. The first handful of weddings I shot, I was putting half of the cost of my services into renting equipment and lenses for the wedding. And while it was well worth the cost of doing so for the quality of the images, if I was to go back to those, I would probably have a separate fee just to cover the cost of the rented gear and/or charge more per wedding to start.

TIMELINE (Day of)

No matter your cost, make sure you structure it in such a way to allow your client to understand a per hour cost if that helps them understand how the cost of a photographer is justifiable for a full day. You don’t have to directly note $200 per hour in the contract, but if you’re wanting to charge $200 per hour, make sure to that you base a 4-hour or an 8-hour day off of it.

Also, make sure that you monitor your time. If you’re shooting an 8 hour wedding and it goes into the 10+ hour evening, you want to have a clause that states something similar to “…15 minutes after the agreed end time, we will start to bill hourly in 15 minute increments at a rate of $200 per hour…”. Now you can be kind and if you see you’ve only had to spend an extra 30 minutes at the wedding, it’s probably silly to charge them, but if you’ve continued to capture images (per the clients request) beyond the end time, you’ll definitely want to get your money’s worth.

POST PRODUCTION (Day after)

I typically tell my client that I need 2-3 weeks (closer to 3) for editing. By doing this you help your client know that to expect the photos the next day isn’t going to happen, but at the same time (if you can manage your time well), you might be able to deliver earlier than expected.

First thing. Take a break. Ok, maybe go ahead and back up your cards, etc. to your hard drives or DVDs. But honestly, don’t dive into post production for a day or two. Let yourself rest from the event. Even though you know you’ve captured some great moments and want to view them immediately, I’ve found that I am more in tune with post production when I’ve mentally rested from the task of shooting for 8+ hours in a day.

The next task item is what I refer to as “please the bride”. I quickly go through the images and find 30-50 shots I think are worthy of my portfolio. I edit those, export them at a limited resolution with a watermark and upload them to Facebook, Flickr, the blog, and any other social web site I choose to help with marketing later on.

On to doing the work… I shoot upwards of 2500 images (if not more) during a wedding. Fortunately, my wife is a second shooter when we’re doing these gigs. The first step I take is importing (referencing) the images in Aperture (or Lightroom). I add meta data such as the names of the clients, venue, subjects, city, state, etc. that will help add to the library. I then go through all the images and break them into “albums” to relate them to the post wedding, getting ready, portraits, ceremony, reception, details and anything else I find is a chunk of the day. This helps the editing process seem less daunting. From there, my wife will help me throughout the first week to narrow down the images per category and we finally end up with 500 images or so.

After doing the detailed adjustments of color, etc. I upload them to Pictage [Ron’s favorite site is Zenfolio]  and it will usually cover a two-week editing process which results in a happy bride because I’ve delivered earlier than expected. Yes, this is an “ideal” structure. If you’re doing a 40 hour job on top of this, I would easily predict 3 weeks will be needed as I have been there myself.

DELIVERY

I have a few options the client can use. Pictage is a great online gallery with ordering services. There are multiple plans to choose from and based on the sales per wedding or portrait session, they will cut you a check for a percentage as well as cover the cost of the monthly dues if you’ve made enough in sales that month.

I will upload the selected photos via categories to allow the client to better sort through them this way. When you send you client the invite to Pictage (which I tend to do months before the wedding), they can invite friends and family to sign up for a notification and a small discount off their order.

Another service is album design. I have a great company out of New Zealand that I use. Queensberry has a very high quality structure as well as being archival with cotton pages and a great leather backing along with multiple sizes to your liking. While they are not cheap, the cost of them is very apparent. With a one-time investment, the company sends you sample albums to show off what the client will be gaining by investing in an album through you.

And finally, assuming you’ve built this into the cost of your contract as well, always be willing to provide your client with a CD of the images. This is the most common request, and don’t be offended by it as they have paid for them. The only thing you might suggest or recommend is either having them go through a professional printer and frame some of the select shots to hang in their home. On that note, at the very least, if they choose to only display them on Facebook to request they link them to you via a copyright notice or displaying your web site below the images.

FINAL NOTES…

Remember, these a more or less guidelines and things to remember when piecing together a contract. Even if you’re shooting your family members wedding or a long time friend, always have a contract to protect yourself from unwanted requests and needs. I have shot all of my weddings knowing that I have a contract in place to allow me to feel I have done a service and can continue with my life after the job is complete to not have random requests coming from a bride I shot 5 years ago for an 8×10 image.

Conclusion

I’d like to thank Timothy Lusk for taking the time to be a guest on my blog. I hope you enjoyed his series! You can find more of Tim’s work on his web site at http://www.luskshot.com/. He also has his own blog so if you enjoyed his articles here you can follow more like it on his blog.

Disclaimer

All articles in this series contain links to external sites which may result in a commission for purchases made. Thanks for supporting this blog by using the links!

Timothy Lusk also works at Microsoft Corporation where we both have day jobs in different groups unrelated to photography.

Monday, July 18, 2011

Guest Blog: Shooting Weddings Part IV: Gear

Timothy Lusk is back to share some more of his pearls of wisdom on the subject of Wedding Photography. This is the fourth of five articles he’ll be sharing on this topic, so I hope you enjoy it.

This is the next segment after Tim’s Shooting Weddings Part III: Inspiration, but his article was heavily Nikon-centric so I’ve made adjustments to relate to Canon users as well. New readers to my blog will find my Which DSLR Should I Buy? and Which Lens Should I Buy? articles to be useful as any of the recommendations here mirror my non-wedding recommendations also.

B&H Wedding Photographers Buyers Guide

This is for everyone who has invested in a DSLR over the past few years and has either thought of shooting weddings or has been asked by a friend or family member due to their thought of either saving money or because the bride or groom isn’t aware of what goes into shooting a wedding.

There are plenty of questions that should be running through your head and asking not only the bride or groom, but yourself.

  1. Where is the wedding? Is it in a church? Is it an outdoor wedding? If it’s outside, is the wedded couple under a trellis or something that will produce shade?
  2. What are the expectations of the photographs? Doe the bride and groom “just” want the typical list? Is there a photographer that they love his or her style, but don’t have the budget for them?
  3. What can be expected of the event? Is it a quick ceremony on a beach? Is it a full day from sunrise to sunset and into the night?
  4. What equipment do you have in your bag? Do you need to rent any additional gear?
  5. Are you getting paid for doing this? If so, how much is your time worth to you? Are you thinking of this being a start to your wedding photography business, or is it going to be a one-time only offer?

Asking yourself these questions, can help you decide one of two things. Either you’ll move forward and step up to the plate, or you’ll play it cool and kindly decline.

For other articles in this series, please follow these links:

IN THE BAG

So you’ve bought your first DSLR camera and you’re thinking of shooting a wedding or two, or making it something you will turn into as a business or side job because you’ve uncovered your passion for photography and see that it’s a great way to earn some extra cash.

In this post, I will inform you of why wedding photographers have the gear they do. It’s not as much as you think.

NOTE: I am a Nikon shooter, but most everything is also available via Canon or another camera manufacturer. [I’ve got you covered Canon shooters, read on – Ron]

BODIES

Today, there are plenty of models to choose from within each make of camera. However, this doesn’t mean that the body will be suited well for shooting a wedding. Similar to sporting events, a wedding is comprised of a variety of moments. Ones that are fast (dancing and the bouquet toss), ones that are time consuming (portraits and the ceremony), and moments that only happen once in the whole day (the first kiss and placing the rings on the finger). Each of these are something that you need to take into consideration not only as a talented photographer, but with the idea of “will my gear handle capturing that moment?”

ENTRY LEVEL (Nikon D5100)*

While these cameras are amazing with their technology (16.2 Megapixel and 1080p movie functions), they often are not ideal for shooting weddings because they don’t have a fast enough frame rate to cycle through a specific moment in a wedding.

I do think that if you’re looking to have a second body on hand, this is a great option though. Because of its movie function, you can easily promote this as part of your contract.

Ron’s 2 Cents: Consider the step up to the D7000 from Nikon if you can afford it or the Canon T3i.

PROSUMER (Nikon D300s)

Here is where you can start seeing some serious results in photographing a wedding. The D300s allows you to gain 6-9 frames per second (FPS) depending if you have the MB-D10 battery pack on it. Not only does this type of camera offer a fast frame-rate and some other features that the lower-end models don’t, but it is also commonly built with more durable materials, including a magnesium body to improve weather sealing.

These bodies are also considered “cropped”. By this, it allows the sensor to increase the distance the lens covers when mounted on the body. Most often, a cropped body will have a magnification of 1.6 times what a full-frame or 35mm camera will display in the viewfinder. So, a 50mm lens on a 35mm camera will actually read at 80mm on a cropped body.

Ron’s 2 Cents: A side-by-side comparison of the D7000 and D300s make it a tough choice, but for wedding photographers I’d probably agree with Tim’s suggestion here from Nikon. For Canon your best bet is the 7D as the 60D isn’t significantly different than the T3i (not true of xxD series in the past). The performance and AF system of the 7D are also going to be a wedding photographer’s best friend during a hectic day of shooting.

PRO (Nikon D3s)*

While they aren’t required to shoot weddings (in my opinion), a D3s (or full-frame camera) is a great asset to your bag. Shooting the weddings I have over the years, I have moved from just using a D300 to a D3, and now a D3s. The advancements over the years with this body has made my enjoyment of shooting a wedding that much more fun. The reason I say this is due to the high ISO/low noise combination and the fast frame rate (up to 11FPS). And while I don’t use the video function on the camera, the fact that it can do video has improved the recycle of image capture greatly over the D3.

Know your camera well. Quickly adjusting ISO, bracketing, etc. You want to be able to move fluidly throughout the day without looking back and thinking “I missed the first kiss!” Another critical note is the always have two bodies with you when shooting a wedding. Not only does it allow you to have multiple lenses at a quick access, but if one fails (knock on wood) you have another as backup.

*While the D3s is the top full-frame body, if you prefer a more compact version feel free to check out the D700.

NOTE: It is said that the D4 and D400 will be announced in August 2011, so if you’re able to wait until then, I highly recommend doing so.

Ron’s 2 Cents: Even as a Canon shooter, I’d say that the D3s is probably the best choice for wedding photographers at this time in the pro body format. It’s sensor has outstanding noise control at higher ISO’s which will give you a couple stops advantage over the Canon (despite what marketing data says). The Canon 1D Mark IV has a better AF system (when you know how to use it – see my 1D Mark IV guide) and the Canon 1Ds Mark III has a great sensor, but this is one area that I think is purely an advantage for Nikon – at this time (things change fast).

LENSES

While you can spend thousands on a set of lenses based on what you see the professionals carry around, I have found that this is what you’ll really need (Ron’s Canon recommendations after the forward slash):

Nikkor 24-70mm f/2.8 (35-70mm f/2.8 D) / Canon 24-70mm f/2.8L USM 

Nikkor 70-200 f/2.8 (80-200mm f/2.8 D) / Canon 70-200mm f/2.8L IS II USM 

Nikkor 105mm f/2.8 Macro (60mm f/2.8 D Macro) / Canon 100mm f/2.8L H-IS Macro

Nikkor 85mm f/1.4 (85mm f/1.4 D) / Canon 85mm f/1.2L 

Nikkor 50mm f/1.4 (50mm f/1.4 D) / Canon 50mm f/1.4 

There will be other alternatives to this list, and I have added the D-Model in parenthesis to show less expensive options that are just as great. (Ron – I haven’t included the Canon EF-S lenses as this subject is covered in my Which Lens Should I Buy? article)

Even though having a photographic eye is a main key to shooting a wedding, the glass is VERY important as well. I am an Aperture Priority shooter and all my glass is f/2.8 or faster (and it’s needed).

KIT LENSES (18-55mm, 55-200mm)

While I am not going to promote these lenses as a good option to shoot a wedding, I will mention where they can be used if you choose to do so. If you’re shooting all day, the 55-200 will be great for you to keep your distance and take some candid photos during the ceremony and other times when you don’t want to be “in their face” with the lens to capture an intimate moment. The 18-55 might be something you can use for the portraits, but throughout the wedding, I don’t advise using it (beyond the portraits).

The reason kit lenses aren’t really something you want to be using is due to a couple things. They aren’t as sharp as the other lenses mentioned above, the quality of build isn’t rugged enough, and they aren’t considered “fast glass”. The aperture ratings on these are listed with an f/3.5-5.6 structure usually that means at the closest (18mm) you can only open up to 3.5 and at 200mm you can only read out at f/5.6. These are reasonable, but not an ideal choice for shooting weddings that tend to be set in low light environments.

Fast glass refers to lenses that not only can focus quickly, but more importantly have a single aperture rating (ie 1.4 or 2.8) across the length of a telephoto lens (ie 70-200mm).

Ron’s 2 Cents: People should be paying you to photograph a wedding, so if they are then you owe it to them to use better quality glass. Don’t capture someone’s once in a lifetime moments on cheap kit lenses.

PRO (24-70mm, 70-200mm)

These lenses are what make or break a wedding photographer. Without the focal length or the aperture, you’ll be doing a lot more post-production than you’ll want to spend after shooting for 12 hours.

Ron’s 2 Cents: Agreed – applies to Canon as well and the new II version of the 70-200 is worth the upgrade

PRIME (50mm, 85mm)

I personally love prime lenses. Not only do they offer a wider aperture, in some cases they are sharper than telephoto models. Both of the primes I have listed above are great. My one note though is pertaining to cropped sensors. If you’re shooting with a D300s (or similar body), the 50mm is going to be 80mm compared to the 85mm on a full-frame camera. I only own the 50mm at this time for this reason and use it mostly for close portraits of the bride and any detail shots where I want a great bokeh on the image.

Ron’s 2 Cents: Agreed – Canon users should consider the 1.2L version of the 50mm if you can afford it as it’s a much better choice for wedding photographers due to its improved indoor autofocus performance. Image quality-wise the 1.4 is close enough, so the upgrade is purely for that extra stop and AF performance. Canon’s 85mm f/1.2L has no equal in my book, so its’ a must own for the wedding photographer.

MACRO (105mm)

This is a must-have lens for weddings. The rings, dress details, food, and other parts of the wedding that make it unique to the bride. This is where this lens comes in handy.

Ron’s 2 Cents: Canon offers two 100mm macro lenses and both are fantastic. You can see my comparison of them in this review, and my long-term assessment is that the non-L is just as good as the L for most uses. If you can afford to get the L get it – especially if you own a 7D or 1D Mark IV that can take full advantage of the Hybrid IS – but you aren’t missing much by getting the cheaper non L version whose image quality appears to be just as good.

OTHER GEAR

FLASH

If you can, avoid using the on-camera flash (get a TTL cord) and add an off-camera flash (SB-900 / 580EX II for Canon) to it. I have a Stroboframe that allows me to swing the flash in multiple directions for bouncing the light off walls, etc. so the light isn’t harsh and directly on the subject. And while do have this ability, since 2008 I really haven’t used the flash or mount system during a wedding. I prefer a very relaxed and candid style with my photography and a flash is just calling for “look at me”.

Ron’s 2 Cents: I highly recommend the Quantum QFlash and Custom Bracket I reviewed, but it is bulkier so you’ll have to decide on performance versus size on this one.

LIGHTING

During the portraits and other formal gatherings of the family and wedding party, it is nice to have a portable lighting system, but isn’t necessary for a wedding. If you simply remember to find a well lit space (outdoors or not) that will give you good lighting on the party, you’ll be able to get some great shots. I personally use Profoto for my lighting equipment, but don’t use it during a wedding.

Ron’s 2 Cents: If you can take a compact system like the Elinchrom Quadras that I have in my lighting setup then you’ll have a great product for a group shot. You’ll have to get extension cables and still need big light modifiers, but if you’ve got a good assistant then it’s a worthwhile addition. It’s also a big hassle so I’d only do this as an option for an extra fee to my wedding party client.

MEMORY CARDS

My general rule of thumb on memory cards is anything larger than 8GB is unnecessary. The reason for this is two-fold. One, I can shoot 600+ images (RAW) on one card. I typically cover 2500-3000 images per wedding. And the other is due to DVD backup and fear of a failed card. One DVD can house 360 (RAW) images. So it’s pretty easy for me to quickly split an 8GB card in two and burn two discs. I currently use the SanDisk Compact Flash cards. The day before every shoot, I reformat the cards in camera. This helps restore the cards to their default structure and clean out any “hidden” files. Don’t be afraid to buy these whenever you find spare money to spend. You can NEVER have enough.

You might wonder, how do you keep track of what you’ve shot so far? I use a Pelican CF card holder (2 of them actually). One contains my 4GB cards, and the other 8GB. I start out with all of my cards face-up. Then, when I’ve filled up a card and eject it from the camera, I place it face-down in the Pelican case. The first wedding I shot, I just kept them in separate cases and had to juggle through the LCD viewer to see if I’ve used the card yet. The Pelican is well worth the $20 to save the time frantically going through cards during the wedding.

Ron’s 2 Cents: Personally I prefer Think Tank Photo’s Pixel Pocket Rocket for holding my cards as it is smaller and holds more. What’s more its an option you can get free when you purchase Think Tank Photo bags from this blog. I do agree that SanDisk makes great cards, but I’ve been happy with Lexar too (see what I use). I personally don’t like to use cards larger than 8GB unless doing video as I like to distribute my risk on multiple cards in case of a failure. In addition, when using pro bodies like the Canon 1D Mark IV you can write your images to the CF card as well as the SD card at the same time for redundancy to avoid losing an image due to a card failure. I do agree with Tim though that you can’t have enough, and you don’t have to own the fast cards made.

ALERT: Through July 30th, memory cards are on sale at B&H – stock up now!

Conclusion

If you are wondering about the gear mentioned above, you can see the full list online at B&H [and via the various categories in Ron’s Holiday Gift Guide 2010 – Ron]. Also, if you’re not sure about investing in the lenses and equipment right from the start, please rent it. Read more about rental services here as I rented my gear for years until I was able to amass a collection that covers what I need to shoot a wedding.

Disclosure

This article contains sponsored links to B&H. Ronmartblog.com may get a commission if you make purchases using the links in this article. Thanks for supporting this blog by using the links when you make your purchases!

Monday, July 11, 2011

Guest Blog - Shooting Weddings Part III: Inspiration

Timothy Lusk is back to share some more of his pearls of wisdom on the subject of Wedding Photography. This is the third of five articles he’ll be sharing on this topic, so I hope you enjoy it – Ron

B&H Wedding Photographers Buyers Guide

This is for everyone who has invested in a DSLR over the past few years and has either thought of shooting weddings or has been asked by a friend or family member due to their thought of either saving money or because the bride or groom isn’t aware of what goes into shooting a wedding.

There are plenty of questions that should be running through your head and asking not only the bride or groom, but yourself.

  1. Where is the wedding? Is it in a church? Is it an outdoor wedding? If it’s outside, is the wedded couple under a trellis or something that will produce shade?
  2. What are the expectations of the photographs? Doe the bride and groom “just” want the typical list? Is there a photographer that they love his or her style, but don’t have the budget for them?
  3. What can be expected of the event? Is it a quick ceremony on a beach? Is it a full day from sunrise to sunset and into the night?
  4. What equipment do you have in your bag? Do you need to rent any additional gear?
  5. Are you getting paid for doing this? If so, how much is your time worth to you? Are you thinking of this being a start to your wedding photography business, or is it going to be a one-time only offer?

Asking yourself these questions, can help you decide one of two things. Either you’ll move forward and step up to the plate, or you’ll play it cool and kindly decline.

For other articles in this series, please follow these links:

INSPIRATION

Today, almost every photographer in the wedding business is required to have a website, blog, Twitter account, and Facebook page just to get their names out there and compete against the others.

Mike Colon, Chase Jarvis, Paul Dudley, Laurel McConnell. These are just a few photographers I got to know early on that inspired me to further challenge myself and develop a style that is unique unto myself and what I can offer my clients.

Chase Jarvis | chasejarvis.com

He is Seattle-based and has been involved with extreme sports and outdoor companies for years. I first stumbled upon him in 2007 with a random interest in finding some creative iTunes podcasts to further my understanding of photography. Since then I have kept him in my sights for inspiration. While he has no wedding references (to my knowledge), I still like referencing his stuff to seek out new ways to compose my clients and the photos themselves. Even when something has no relation to a particular subject, you can still draw inspiration and adapt it accordingly.

Mike Colon | mikecolon.com

I refer to as my “Arnold Schwarzenegger” of the wedding photography world (in a positive way). The reason for this? He was the first wedding photographer I really knew of that made me think “this would be fun to do”. Along with his fresh look at shooting weddings and having the high-end clientele, it was easily a way for me to learn from a “great” in the business.

Not only does he shoot Nikon, like me, which helped me understand what kind of gear to invest in for the purpose of shooting a wedding, but his approach to shooting the wedding was exactly how I wanted to do so. That being said, I have had the pleasure of taking a workshop from him and learned a lot–not only about shooting, but how to manage the business at hand and getting the right clients.


2010 WPPI Las Vegas Mike Colon Workshop

Laurel McConnell | mcconnellphoto.com

I know Laurel through a school friend of mine who had her photograph her wedding back in 2009. She’s got a great personality and definitely makes the bride and groom feel comfortable for the occasion. While her style of shooting is a great reference to get some ideas on how I should approach a similar shoot, I think knowing her personally has been a better benefit to my business and how I go about a day of shooting.

Paul Dudley | pauldudleyphotography.com

I consider Paul a great inspiration, friend, and my photography mentor. And for anyone who is looking to get into the business, I recommend finding a mentor to help guide you through the proper steps to start marketing yourself to the right clients. He has actually taught me more about photography in general over the last four years than I could have even thought of grasping if I took a class or attempted to earn another degree.


Slattery Wedding - Second shooting for Paul Dudley, July 2010

So, to take this chapter to the next step I wanted to give you some tips on what I have learned from these photographers.

Chase Jarvis / While it is said that “a picture is worth 1000 words”, make sure they are the right words. What I mean by this is that with Chase’s work I have found that while you might be able to get the story right with a simple portrait, think about all the options of how you can approach the shot before you release the shutter. You’ll be amazed at what can come from an additional minute or two analyzing your surroundings.

Mike Colon / High quality, high end approach. Photography is an art. It is subjective. Everyone has their own opinion about what is good. You have to be ready for criticism. While Mike might shoot weddings for nothing less than $25,000, I still approach the job with the same mindset even though I am making only a fraction of what he charges. If you’re looking to grab a high-end bride as a client, make sure your photography reflects this. How so? While a wedding can appear to cost into the six figures, a lot of times weddings might come in around $10,000-$15,000, and that’s if the bride and groom aren’t paying for it themselves. A bride who comes from a wealthy family is usually well educated in fashion and trends to know whether the photos from the previous weddings you’ve shot are on a budget or have spared nothing for every detail. In short, when you look through the viewfinder, ask yourself “is this the million dollar shot?”

Laurel McConnell / Network. Network. Network. Knowing Laurel over these past few years, I have seen her go from a social butterfly with a shutterbug attitude, to someone who is now networking with the likes of Nikon and Junebug Weddings. Even though someone might see this as a “sellout” when it comes to being a wedding photographer, it is actually a HUGE plus for a photographer to start making connections like this for the latest in gear as well as gaining a name in the industry as one to know.

Paul Dudley / Cater to everyone and feel comfortable with introducing yourself. Another part of being a good wedding photographer is to adapt to the needs of your client. Make sure you’re very comfortable with your gear as well as your approach to the way you want to shoot the event. Adapt and make the most of what you have. Sometimes you’ll expect that the environment will be ideal due to rumors and what you’ve heard about the venue. Other times you’ll be in cramp quarters just to make sure you can get the shot of the bride putting on her dress.

OTHER NOTES OF INSPIRATION…

Even though you can search through books, blogs, and numerous other reference guides that are specifically about wedding photography, remember to look to other subjects and themes to draw inspiration. Yes, it’s great to have a site like Flickr where you can uncover the EXIF data of a photo taken by someone else, but in the end it’s all about what your eye sees, not what the camera is setup to do.

If you’re one who would like some tips on magazines and blogs to start referring to, the one I want to stress most is part of the Wedding & Portrait Photographers International (WPPI). Visit www.rangefindermag.com and www.aftercapture.com to sign up for their FREE publications. Beyond that, check out magazines that are local to your community, such as Seattle Metropolitan Bride & Groom or Seattle Bride. From those magazines you can tend to find local photographers whom you can follow from their blog to gain further inspiration and see if there are any tips and tricks that might become useful the next time you book a wedding.

To end, if wedding photography is something you’re serious about and want to make a career out of, make sure to start networking with everyone. Make sure you find a niche that can sell yourself as the photographer every bride desires. Make sure your work speaks for itself and can stand alone. And, above all else, be yourself. While you can look at these photographers’ work above and get some ideas, you should never copy someone’s work with the intent of selling it off as your own.

Conclusion

Stay tuned for more articles from Timothy Lusk. Visit the links at the top of this article to see other articles in this series.

Monday, June 27, 2011

Guest Blog - Shooting Weddings Part II: Expectations & The Day Of…

Timothy Lusk is back to share some more of his pearls of wisdom on the subject of Wedding Photography. This is the second of five articles he’ll be sharing on this topic, so I hope you enjoy it – Ron

B&H Wedding Photographers Buyers Guide

This is for everyone who has invested in a DSLR over the past few years and has either thought of shooting weddings or has been asked by a friend or family member due to their thought of either saving money or because the bride or groom isn't aware of what goes into shooting a wedding.

For other articles in this series, please follow these links:

EXPECTATIONS

Ok, so you’ve booked a meeting with a potential client. What next?

Make sure when you meet with her (and her mom, most likely), you find out what details they might have in mind regarding the day’s event. One thing to note is that the client (unless they are a photographer), might not have the first clue on what it takes to compose a shot, capture that moment, or what kind of time post production can consume when the day is over with. I will go into further details in a post specifically about the contract you should have with your clients.

Commitment of Hours / Depending on the time of the ceremony and reception, you can expect to spend upwards of 12 hours shooting a wedding. If the client is on a budget, make sure to work with them and that they understand what you’re offering. It can end up being that the bride says the event is starting at 2pm and should be done by 10pm. While the latter end might be more true to the timing, expect that you’ll be arriving 2+ hours before hand to take pictures of the place settings and other displays that relate to the event.


Some shots are on "the list", others just happen

Photographs & Desired Captures / Everyone, not just the bride, will have input on what they are wanting to get out of the wedding from a photography perspective. Friends, relatives, certain poses they think are memorable. The one thing you have to be careful of is not making the client feel like you’re a know-it-all. Typically, a wedding has a certain structure. Therefore, it also has a certain “to do” list of what to capture throughout the day. As a photographer you have one of two ways of going about this. Either memorize the “checklist” and have a paper or notes in your phone to help you remember the other custom shots the client has requested, or just add everything to the list. I personally do the latter, not because I can’t retain all of those things to check off, but because it helps me refer back to my list now and then due to the times throughout the day that it might be slow and you can capture some details or casual and candid shots that you might have not remembered to do. Even though it is a list, it won’t be in order.

A list for me will be broken out as follows:

DETAILS

  • Cake
  • Tables / Settings
  • Gift table
  • Rings
  • Brides shoes
  • Brides gown
  • Flowers/bouquets
  • Programs
  • Trellis/Ceremony location

PRE-WEDDING

  • Bride getting ready*
  • Bride/mom/maid-of-honor interaction
  • Bridal party getting ready
  • Groom getting ready
  • Groom/dad/best man interaction
  • Groomsmen getting ready
  • Guests arriving/sitting down
  • Family Portraits
  • Wedding Party Portraits
  • Bride/Groom portraits
  • “First look” shots/interaction

CEREMONY

  • Bridal party entering
  • Family entering
  • Bride entering (follow down aisle)
  • Pastor
  • Bride/groom holding hands (close up)
  • Emotional shots (bride, groom, parents, guests)
  • Flower girl
  • Ring barer
  • Singers
  • Speakers
  • Groomsmen line
  • Brides maids line

RECEPTION

  • Drinks
  • DJ/Music
  • Dancing
  • Food/buffet line
  • Candid guest interaction
  • Father/daughter dance
  • Son/Mother dance
  • First Dance
  • Bouquet toss
  • Garter toss
  • Toasts
  • Cake cutting
  • Entertainment (jugglers, magicians)
  • Send off

*NOTE: Being a male photographer, brides tend to shy away from the request to get pre-wedding photos taken due to the dressing of the gown. I am fortunate to have my wife with me to help take these photos, and the bride feels more comfortable by doing so. So, if you ever have the opportunity to bring on a second shooter and you’re a male photographer, look to find a female to help with the day. You’ll get some fun and memorable photos by doing so.

THE DAY OF...

Ever heard “the early bird gets the worm”? This is very true when it comes to weddings. I have found that when I get to a wedding earlier than expected, I feel more accomplished with what I am assigned to do for the day. I can get shots out of the way early, and in some cases can get extra shots of the bride getting ready or any family involvement with getting the event set up.

Be prepared / The day, from the very minute you get to the site of the wedding, is going to be insane. The bride, while on a schedule, will most likely be confused and scattered, with a drink in hand or trying to figure out where her bridal party is at this very moment. Just go with the flow and know that you’re there to tell a story at the end of the day and from my experience, some of the shots I have taken outside of “the list” are some of my favorites.


Even when you think you've go "the shot", keep looking. It pays off.

There are going to be a lot of guests who will come up to you and ask to go take a photo of someone or something that they think is impressive. My advice: do it. It will appease them and if you prefer not to show the bride and groom later, they probably won’t recall it. It is very important to remain polite throughout the day. You never know who else might be attending the wedding that will be getting married in the next year or a set of parents who like you’re work and know their daughter would love to have you shoot their wedding.

And even though I will cover this in the gear list, make sure you have multiple cards and batteries for your camera. While I have never had to change a battery during the day, I have started out shooting too many photos during the pre-wedding and ceremony where I had to switch to only shooting JPG to allow enough room for portraits, toasts, the reception, and dancing into the night. But this also brings up another approach of “be prepared”. Know your camera and know it well. You don’t want to be shooting a wedding and have the camera start to act up on you to where you don’t think about the ISO or the aperture you’re set at could help the camera perform better.

Uncle Bob Encounter / Today, everyone has a P&S, and it’s gradually getting to the point where a lot of people are choosing to upgrade to a DSLR. This results in, you guessed it… wedding guests bringing their DSLR cameras to the celebration. While they might have a kit lens on the body, some of them will have lenses similar to what you have in your camera bag.

So what do I do in this case? Two things. If they are not a threat, you’ll know right away and don’t need to worry about them interfering with the job you’ve been paid to do. If they start to crowd your space, I was taught a great trick from a fellow photographer, Christopher Becker. He says that while the D3s with a 70-200 f/2.8 might outdo your setup at the moment, to offer some ways to improve their shots. Different angles, settings on their camera they might not know about, or anything that will make them feel more confident about what their trying to shoot. The idea behind this is to allow them to feel comfortable with you and that way you can kindly ask them to move aside while you capture the shots you need.

Wrapping up / Once the ceremony is done, this is where I feel most relaxed. I have covered most of “the list” and the photos from there on are typically candid and you won’t have to worry about key pieces like the first kiss or something that will only occur once during the night. During the reception, you’ll have to focus on toasts, dancing, cake cutting, garter and bouquet toss, and the first dances. These all will be something where you can choose the approach you want to take with it. It is also a great reason to have a second shooter. You can get different angles and make sure that that moment is really secure in the card. I always tend to have a 70-200 f/2.8 on my body, and then my wife has another body with the 24-70mm f/2.8 or an 85mm f/1.4. This way we can get some different angles as well as a different view of the moment--close-ups and as a whole.

Be approachable during the end of the wedding. If you feel you’ve missed something or need to capture some final shots of guests, do it. Talk to the newlyweds and make sure they understand you’re taking some last minute pictures before you call it a night. Committing to this will make the bride feel that you’re really focused on her and making sure that every detail is covered. Only when the bride says thank you or you know that they are finally sent off for the night, you can properly collect your gear and head home for the night. Job done.

Conclusion

Stay tuned for more articles from Timothy Lusk. Visit the links at the top of this article to see other articles in this series.