Thursday, August 24, 2017

Hahnemühle Matt Fine Art Photo Rag, German Etching and William Turner Review & Usage Tutorial for Mac & Windows

Hahnemühle FineArt Inkjet Paper - Matte FineArt

German paper maker Hahnemühle is well-known for making some of the best papers in the business since 1584 with the highest paper quality parameters for its Digital FineArt papers.

In this article, I share my thoughts on the three excellent Hahnemühle Matt Fine Art papers of which two are textured:

and one is smooth:

I also give some basic pointers on how to use these papers on Mac and Windows computers using my Epson SureColor P800 and Canon PRO-2000 printers.


ICC Profile / Color Gamut Analysis

In the following animation, what you see is that all three of these Matt Fine Art papers have roughly the same size color gamut using the ICC profiles from the Hahnemühle Download Center. The animation starts off with William Turner then Photo Rag and finally German Etching:

Hahnemühle William Turner, Photo Rag and German Etching ICC Gamut Size

While there are some subtle differences, in practice all three papers performed equally well. I did find that it is possible to get a lot more out of these papers with a finely tuned custom ICC profile so some users may look to building their own or leveraging ColorByte ImagePrint for the best results.

Despite the fact that matte papers traditionally have a smaller color gamut and a lower d-max (maximum density of blacks in a printed image) than glossy fine art papers, I found all three of these papers to be extremely good and delightful in use. In fact, for the prints I put on display I frequently found that viewers didn't realize it was a matte paper until I told them or they touched these papers.

In the hand

While some people swear off matte papers like the plague, I personally love them for one significant reason and that's how they feel in your hand. I'm a very tactile person so I love wood, leather, linen, cotton, etc... because of their textures and how it feels in my hands.

If you are this type of person then you are in for a sensory delight with these papers. Here's my thoughts on each:

  • Photo Rag - this is the paper you want if you want a hearty substantial feel, yet a smooth surface that draws the light in a positive way for a brighter natural white tone. I found it to have a light surface texture that when viewed at a harsh angle is visually delightful as it has the appearance of a centuries old handmade paper. This is the go to paper for portraits of models with smooth skin that you want to touch.
  • German Etching - this paper takes the texture that is visible in Photo Rag and brings it to the surface for a noticeable texture that feels like a very high quality hand made paper that is a joy to hold in the hand. It's almost orange peel like, but in a good and more aesthetically pleasing way. This is the perfect paper for images with leather, clothes, fruit, flowers, etc...
  • William Turner - this paper has a significant "tooth" to it and I love it! It's almost like 600+ grit sandpaper which might sound weird, but when you hold it you think "wow, this is good stuff". Surprisingly it prints beautifully too so the texture vanishes unless held at an angle in indirect soft light. I love this paper for landscapes and images that look so real that you want to touch them (I.e., rock, wood, bark, etc...).

Scans of Prints

WARNING: Scanning a print to a JPEG means you end up with details from one color space being lost in another color space and a much lower fidelity image than what you hold in your hand. As a result DO NOT JUDGE the print color based on these images.

Instead, the value of this section is so you can do relative comparisons against the other scans of the same image for different paper types (in this article only - not other articles on this blog). This can be useful to see how these papers compare against each other with identical images.

It should also be noted that if you look carefully at the intentional white border of these scans of each of these papers that you can get a hint of the texture pattern for that given paper.

Click any print to see a full-size JPEG scan, but remember it's color fidelity is MUCH lower in the photo than in real life. All images are copyright Ron Martinsen and may not be used for any other purpose but viewing while this article is open in your web browser.

The Outback Printer image is courtesy of the late but great Uwe Steinmueller and used by permission of Bettina Steinmueller. It should be noted that in real life all three papers show visible squares up to 6 in the blacks and 252 in the whites, even though that detail is lost in the scans. The color is virtually identical even under a light box for all three which means you can mix papers and get color matching for gallery exhibitions.

Photo Rag

Outback Print Printer Evaluation Image - Photo Rag

Treehouse - Photo Rag - Copyright Ron Martinsen - ALL RIGHTS RESERVED
Treehouse - Photo Rag

Gary - Photo Rag - Copyright Ron Martinsen - ALL RIGHTS RESERVED
Gary - Photo Rag

Gary Parker is a Pulitzer prize winning photographer who has done magazine covers for the who's who of high tech including Bill Gates and Steve Jobs as well as amazing commercial pet images. He's also my friend and mentor, so I have this photo I took of him in hanging by desk that is printed on ILFORD GALERIE Prestige Smooth Pearl Photo Paper.

In my experience a glossy will always beat a matte paper when compared side by side, but what struck me about this print (in real life - vs the washed out looking scan) was how close it was in quality to the glossy - on a matte paper!

As a result, this was my paper of choice for this image because it felt smooth with a very subtle texture - much like Gary's vest. It was a perfect match for this photo, so I sent a copy of this print to Hahnemühle for review.

German Etching

German Etching is a long-time favorite of mine as Canon had sent it to me at the start of my printing series when I reviewed the iPF6300. I never got around to reviewing this paper and I loved it so much that I ended up hoarding the rolls to save this paper for only very special images. Years later, I had the freedom to try it out again and I loved pretty much everything I printed on it.


Outback Print Printer Evaluation Image - German Etching

Treehouse - German Etching - Copyright Ron Martinsen - ALL RIGHTS RESERVED
Treehouse - German Etching

Gary - German Etching - Copyright Ron Martinsen - ALL RIGHTS RESERVED
Gary - German Etching

Korean Piano - German Etching - Copyright Ron Martinsen - ALL RIGHTS RESERVED

While the colors from the scan are very washed out from a source image that is intentionally aged (using Texture Effects), the combination of this paper and its texture reminded me of what my hand felt when I touched this chair. I immediately knew it was the perfect paper for this print and immediately printed a copy to send to Hahnemühle for review.

Ancient Staircase of Mystery - German Etching - Copyright Ron Martinsen - ALL RIGHTS RESERVED

Now this is a favorite image of mine done with Simplify that people either love or hate with every fiber of their being. I'm okay with that though because any image that evokes strong emotions is a successful image in my opinion.

With that said, I never imagined ever printing this image as it's obviously meant for the digital realm. However, the feel of German Etching reminded me of the feel and texture of these stones so I had to print it out. The net result is something that turned out better than expected and one that I actually enjoyed holding in my hand for the first time.

William Turner

Outback Print Printer Evaluation Image - William Turner

Treehouse - William Turner - Copyright Ron Martinsen - ALL RIGHTS RESERVED
Treehouse - William Turner

This was my paper of choice for the Treehouse print I sent to Hahnemühle for review. The texture of the paper just reminds me of the feel of the wood of the cabin, so it just felt so right to print this image on this paper.  It's ironic too because this photo was a huge commercial success for me, but I had never printed it. As soon as I touched this paper, that immediately changed and it immediately became a favorite test print for this series as the detail of the reds on the wall behind the light really showed the characteristics of the reds for a given ICC profile.

Gary - William Turner - Copyright Ron Martinsen - ALL RIGHTS RESERVED
Gary - William Turner

Usage Instructions / Tutorial

In this section, which is a bit redundant if you review the whole section, I try to get you pointed in the right direction about how to set your application (e.g., Photoshop) to use the correct ICC profile and media type so you can get the best results with these papers.

Canon PRO-2000 from Photoshop (Mac)

Printing using these papers from Photoshop is easy as long as you remember to set Color Handling to "Photoshop Manages Colors" and then set your Printer Profile to the appropriate paper as shown here (Photo Rag profile shown):

Screen Shot 2017-08-23 at 11.49.18 PM

The ICC profile you use will come from the Hahnemühle Download Center for your specific printer, but in this case for the Canon PRO-2000 I had the following choices:

  • German Etching paper uses HFA_CanPro2000_MK_GermEtching.icc
  • Photo Rag Matt Fine Art Smooth uses HFA_CanPro2000_MK_PhotoRag.icc
  • William Turner paper uses HFA_CanPro2000_MK_WTurner.icc

and I made sure to use my desired rendering intent and checked black point compensation.

If you click "Print Settings..." you'll see the printer settings dialog where you can specify the media type "under Quality & Media" which can be Heavyweight Fine Art Paper for all of these papers as shown here:Screen Shot 2017-08-23 at 11.47.42 PM

Epson SureColor P800 from Photoshop (Windows)

Printing using these papers from Photoshop is easy as long as you remember to set Color Handling to "Photoshop Manages Colors" and then set your Printer Profile to the appropriate paper as shown here (Photo Rag profile shown):

2017-08-24_0-00-56

The ICC profile you use will come from the Hahnemühle Download Center for your specific printer, but in this case for the Epson P800 I had the following choices:

  • German Etching paper uses HFA_EpsSC-P8000_MK_GermEtching.icc
  • Photo Rag Matt Fine Art Smooth uses HFA_EpsSC-P800_MK_PhotoRag.icc
  • William Turner paper uses HFA_EpsSC-P800_MK_WTurner.icc

and I made sure to use my desired rendering intent and checked black point compensation.

If you click "Print Settings..." you'll see the printer settings dialog where you can specify the media type which can be Velvet Fine Art Paper for all of these papers as shown here:

2017-08-24_0-00-08

Be sure that Print Quality is set to "Max Quality" and that Mode: is set to "Off (No Color Adjustment)" to ensure that you don't get an ugly double color managed print. Epson will also force you to use the Front - Fine Art paper settings source so if that's a problem then you should use the Epson Print Layout software as shown in the Mac section (works for Windows too).

Canon PRO-2000 from Photoshop (Windows)

Printing using these papers from Photoshop is easy as long as you remember to set Color Handling to "Photoshop Manages Colors" and then set your Printer Profile to the appropriate paper as shown here (William Turner profile shown):

2017-08-07_23-49-30

The ICC profile you use will come from the Hahnemühle Download Center for your specific printer, but in this case for the Canon PRO-2000 I had the following choices:

  • German Etching paper uses HFA_CanPro2000_MK_GermEtching.icc
  • Photo Rag Matt Fine Art Smooth uses HFA_CanPro2000_MK_PhotoRag.icc
  • William Turner paper uses HFA_CanPro2000_MK_WTurner.icc

and I made sure to use my desired rendering intent and checked black point compensation.

If you click "Print Settings..." you'll see the printer settings dialog where you can specify the media type which can be Heavyweight Fine Art Paper for all of these papers as shown here:

2017-08-07_22-36-33

Don't forget to set Print Quality to Highest and choose "Color Settings..." where you can go tot he Matching tab as shown below and set "Color Correction" to "Off" as shown here:

2017-08-03_23-15-40

This step makes sure you don't accidentally do double color matching which might sound good to the uninformed but looks horrible when you print.

Epson Print Layout Software (Mac & Windows)

Epson Print Layout Software is handy software that works on both Mac and Windows that helps you to get great prints without having to use Photoshop. While I won't give a tutorial on how to use this product, I will point out that you simply need to set the Media Type to "Velvet Fine Art Paper" and specify the correct ICC profile in the Color Settings section as shown below (for German Etching):

Screen Shot 2017-08-23 at 11.42.44 PM

The ICC profile you use will come from the Hahnemühle Download Center for your specific printer, but in this case for the Epson P800 I had the following choices:

  • German Etching paper uses HFA_EpsSC-P8000_MK_GermEtching.icc
  • Photo Rag Matt Fine Art Smooth uses HFA_EpsSC-P800_MK_PhotoRag.icc
  • William Turner paper uses HFA_EpsSC-P800_MK_WTurner.icc

and I made sure to use my desired rendering intent and checked black point compensation.

That's it - super simple and it works great, so this is an easy way to get great print results from your Epson SureColor printer.

Conclusion

Overall, I was extremely satisfied with these papers. You can see, and more importantly feel, the hundreds of years of experience Hahnemühle has in making truly special fine art paper.

These are papers for the print master who wishes to add the third dimension of a sensory experience to their prints and/or leverage papers that complement the texture of their image.

I highly recommend these Hahnemühle papers as the top premium papers on the market.

Where to Buy?

At B&H you can get these papers using these links:

At Amazon you use these:

Other articles you may enjoy

If you enjoyed this article, you may also enjoy these:

Disclosure

If you make a purchase using links found in this article, I may make a commission. It doesn’t cost you a penny more, but it does help to support future articles like this.

Saturday, August 19, 2017

REVIEW: Sony a9 - The Best All Purpose Camera? (Part II of II)

In Part I of my review I asked Sony a9 - The Ultimate Action Camera By Which All Others Will Be Judged?, and I think the answer has to be yes. It's a very impressive AF system that almost guarantees you'll get the decisive moment for an action scene. However, this is a big investment and most of us aren't paid sports photographers, yet this camera has a lot of reasons why you might want to buy. As a result, I thought I'd spend the second half of this review discussing its value as an all-purpose camera to see how it does with typical shots that the average person might take.

Would this be a case of yet another expensive camera that's really just a one trick pony, or did Sony really make one camera to rule them all? Read on to find out and see my final conclusion.

Real World Shots

Real world shots is my way of saying examples of photos that an ordinary person might take as compared to ones that a paid professional being hired to photograph something would take. I like to include these types of shots in my reviews because it reflects exactly what you can expect to see if you buy this camera and examine the results on your computer.

All of the photos are 100% unedited (not even cropping unless noted) and you can click the photos to see the exact unedited JPEG that came out of the camera.

While I might use white balance (shade) and creative style (vivid) adjustments to enhance the in-camera image, the rest of what you see is what you'd see at home yourself if you took this same shot yourself.

All images are copyright, Ron Martinsen - ALL RIGHTS RESERVED, but you may examine the originals to your hearts content while viewing this article in your web browser. After closing the article, you agree to delete any local copies and you also agree not to print, re-post, re-distribute, link to or otherwise use these photos in any way without written consent.

With that said, please enjoy my thoughts on these and all of the photos found in part 1 of my review and in the galleries associated with this review.


f/2.8 @ 70mm for 1/160 sec at ISO 250

Using full resolution (6000x4000) you can't get a good shot of this subject from the fixed viewpoint


f/2.8 @ 70mm for 1/250 sec at ISO 400

However, if you switch to the APS-C mode, then you get some extra optical zoom without sacrificing quality - but you do get a smaller 3936x2624 file so you've essentially just done an in camera crop. That said, I still liked this mode and it will still print and look gorgeous on a 4k TV.


f/2.8 @ 70mm for 1/250 sec at ISO 500

Using the Clear Image Zoom feature at its maximum 4x means you can't pick the focus point but you get impressive reach and quality using this intelligent digital zoom technique.
Again, I have a file that needs no editing to show friends on a 4k TV - impressive


f/16 @ 24mm for 1.3 sec at ISO 100

In this intentional dynamic range torture test, I was reminded that this definitely no a7R II
The highlights were pretty blown despite the cloudy conditions


f/22 @ 24mm for 2 sec at ISO 100

However, if you shoot within the dynamic range of this camera,
the landscape results are very satisfying


f/4 @ 70mm for 1/800 sec at ISO 100

I snatched a frame of the distant boat,
but I was surprised to see how much detail still remained in the power lines


a9 Camping-34
f/4 @ 68mm for 1/3200 sec at ISO 100 
(cropped - click for unedited original)
As I was taking the shot above, I heard this plane overhead so I took a quick shot
Despite being underexposed, I was impressed with the detail in the shadows
and especially the wires going from the vertical stabilizer on the tail


f/5.6 @ 70mm for 1/100 sec at ISO 640

Zoom in to the original for a scary look at this spider shot done at full frame at roughly the minimum focus distance of the 24-70mm f/2.8 GM lens


f/4 @ 70mm for 1/200 sec at ISO 800

Decent bokeh and amazing detail make the kit a great deal for those getting started with Sony


f/3.2 @ 70mm for 1/1250 sec at ISO 100

Wild unpredictable boys are no problem with this camera


f/3.2 @ 70mm for 1/500 sec at ISO 100

Clear Image Zoom is excellent for hard to reach flower macro shots at the botanical garden


f/4 @ 70mm for 1/2000 sec at ISO 500

There is enough dynamic range to keep cheek highlights in check
when photographing family members in the harsh sun

Slow Motion Video Autofocus Test

I don't do much with video, but I think slow mo videos are cool so I couldn't help but play around with that feature on this camera. In this test, I was curious to see how the AF would hold up to the torture test of keeping up with my son's eyes. It failed, but honestly I thought it did better than expected given the fact that I was using eye focus mode on such a challenging scene.

Bookshelf Test


f/5.6 @ 50mm for 10 sec at ISO 100

ISO 100 quality was excellent even by today's standards
and the shadow detail above the books to the back wall was impressive

Where many special purpose cameras fail is how they perform when pushed to the extremes. In this case, I'm happy to report that the a9 did a respectable job in my bookshelf test that I use to just shadow detail, dynamic range and ISO performance. The full gallery of shots lets you examine full ISO stops from 100 (shown above) to 51,200 (shown below) where you can decide what your maximum tolerance is for sensor noise and noise reduction control. However, I found 51,200 to be usable in a pinch and 12,800 to be good enough to consider it a default top ISO for regular shooting.


f/5.6 @ 50mm for 1/50 sec at ISO 51200

As this shows, unless you are going to be viewing at large sizes, images of your vacation or kids shown a social media sizes is going to be totally fine at ISO 51,200

Conclusion

Yes, I have to say that this is the most impressive camera that I've tested this year and one of the best ones I've every shot with. While I won't be getting rid of my Canon 1D X Mark II because if its superior line up of sports lenses, better metering and excellent flash system, I did find myself looking at my camera and wondering why Canon can't do that!

I've also shot with the Nikon D5, and I'd prefer it over the Sony for the same reasons. Yes, I've seen adapters used with Canon and Nikon lenses and I'm extremely underwhelmed at AF performance when used with adapters, but manual focusing is fine. That kinda defeats the purpose of this camera and sports lenses, so I'd still say that if you are a sports shooter that this is a good second camera for close range action, but stick to Canon or Nikon for your >200mm needs.

With that said, if you are an event or wedding photographer then I think this is the camera you have to own. While you might want a a7R Mark II also around your neck or in the hands of your second shooter for its superior dynamic range, this will be the camera that helps you to get the shots that bring tears to your clients eyes. It's also got the high ISO performance to come home with concert and evening event shots that are totally usable.

Now this is an extremely expensive camera, so it's tough to suggest it for parents based on price. However, if you are a financially successful dual income household that can easily afford it then I can say without hesitation that this is the camera you want to photograph your precious little angel.

Overall, I'm extremely satisfied all around with the first Sony camera body that I didn't hate (thanks to its wealth of programmable buttons) and can easily give it MY HIGHEST RECOMMENDATION.

Where to Buy?

CLICK HERE to learn more or buy today.

Other articles you may enjoy

If you enjoyed this article, you may also enjoy these:

Disclosure

If you make a purchase using links found in this article, I may make a commission. It doesn’t cost you a penny more, but it does help to support future articles like this.

Unless noted, ALL shots in this article are unedited and come straight out of the camera as shown. In-camera JPEG's were used with in-camera Creative Style (vivid) and White Balance (shade) being leveraged to give shots an improved color over the camera default.

Monday, August 14, 2017

REVIEW: Sony a9 - The Ultimate Action Camera By Which All Others Will Be Judged? (Part I of II)


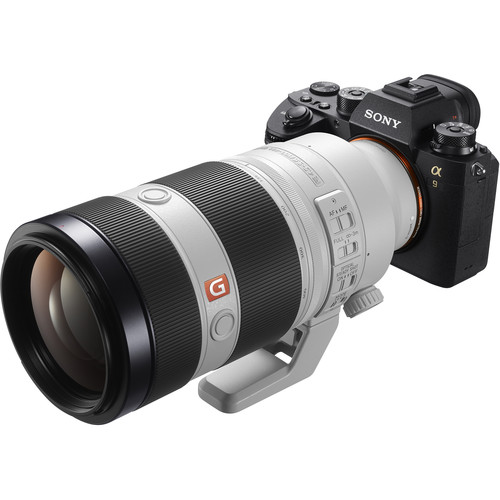
Sony a9 shown with the 70-200mm
I've used the kit 24-70 f/2.8 GM for my review

Henri Cartier-Bresson was famous for capturing The Decisive Moment in many of his images. When I got this camera and heard of its claim of 20fps shooting with a buffer that could hold hundreds of images, the first thing I thought was this might be a camera that helps mere mortals to increase their odds of capturing their own decisive moments in everyday life - in a high resolution image (vs video frame capture). If so, this would be a game changer.

Read on to see if this camera lives up to the hype and accomplishes that goal, or if it's yet another case of fan boy hype all over again.

Body Impressions - Finally More Buttons


Canon 6D Mark II vs Sony a9
Size compared to a DSLR (rear view)

I read a lot of stupid things on the internet, but one that really cracks me up is when people make the argument that this camera (and its siblings like the a7 and a7R II) are smaller or more compact.

Since I'm currently only shooting with a Canon 1D X Mark II, I had to use the only normal body DSLR I have on hand - a Canon 6D Mark II review unit for a comparison. I wanted to show how physically a a9 is roughly the same size as a common DSLR. This isn't a comparison of the features of these two cameras as they are totally different, but I did want to illustrate how this camera and especially the lens is very similar to what you'll get with your average DSLR.


Canon 6D Mark II vs Sony a9
Size comparison to a DSLR (top view)

One gripe I have had against the Sony a series is that their attempt to make a more compact profile just limits the better grip experience you get with a Canon or Nikon DSLR, so I do wish Sony would actually bulk them up a bit to make them more comfortable to hold with heavier lenses.

Another thing you'll notice about this Sony is that it finally gets a joystick (which sadly isn't present on the 6D Mark II for reasons that perplex me). This plus an exposure dial on top and just more buttons and knobs in general make this my favorite Sony camera body ever!

Overall, I loved this body which features:

  • A very good electronic viewfinder that shows exactly what you'll get when you shoot
  • The best coverage of AF points (especially at the edges) of any camera I've ever used
  • Excellent programming options for 8 buttons and even the joystick press event and the dial. As a result, getting this camera dialed in the way you want it without hunting through Sony's annoying menus is easily accomplished
  • An exposure compensation dial that makes it Fujifilm easy and fun to use (although it does get bumped out of its setting easier than I'd like)
  • A dial for drive modes and focus modes that Nikon lovers will feel right at home with
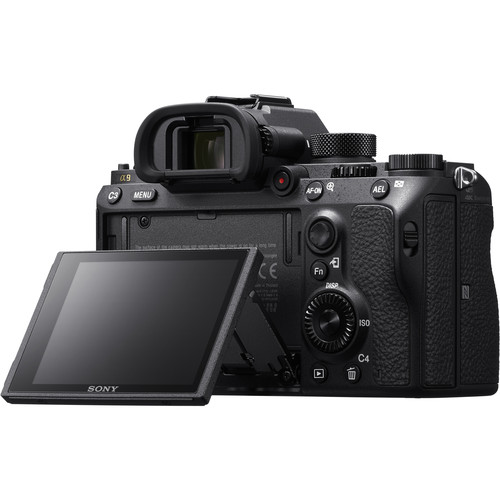
  • An articulating LCD screen that helps when shooting from odd angels, but sadly doesn't rotate where you can see it if you are in front of the camera doing group shots
  • Dual card slot, although one only takes SDXC II if that is your preferred format
  • and much more

Simply put, haters of Sony's annoying menus can set this camera up where they don't need to use those menus to successfully shoot out in the field. This is CRITICAL for sports photography, and something Sony has definitely done right.

Finally, Sony has made a great camera body!

Burst Mode


f/5 @ 70mm for 1/1000 sec at ISO 2000 (unedited)
Unedited single from from a series of a burst of 200+ shots

The first thing I wanted to know when I unboxed this camera was "is this burst mode for real"? I've seen other cameras that made this claim and only delivered on low resolution images. I've also seen other smoke and mirrors tricks that resulted in something that was a marketing claim, but not something that could really be used.

I built this blog because I hated all of the fan boy hype and lies in the mainstream media for  photography that made big claims that failed to materialize when I invested my money on those products.

In this video, I prove beyond a shadow of a doubt  that the Sony a9 is the real deal and it deserves credit for doing something no other camera I've ever tested has accomplished:

As a follow up to the video, you can find all 222 frames taken in the video in this gallery here. You are free to download and examine them to your hearts content, even though they are intentionally boring. :)

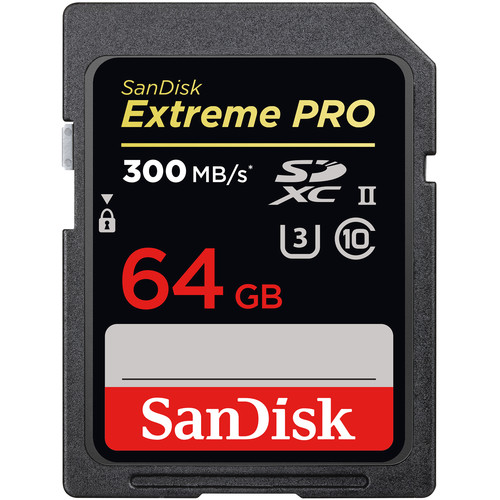
As I mentioned in the video, I did do RAW+JPEG on a common SDHC I 95mb/s card so your performance will only get better if you use the recommended SDXC II cards as shown above. I also didn't upload the RAW's simply due to bandwidth cost and download policies (login required) of the service where I host my images.

Burst Gallery


f/2.8 @ 70mm for 1/2000 sec at ISO 1250
(unedited)
You always get the decisive moment of any series with in 20fps burst mode

I took over 6000 shots with this camera which is extremely easy to do when you have a burst mode that is this rapid. Here's a link to a gallery that contains a random selection of some of the throw away burst sets I took while following my son around for various activities.

While I know there's some concern about the 12-bit images you get when using the electronic shutter in full burst versus the mechanical shutter in a slower burst mode (which offers 14-bit images), I can say in real world applications it doesn't make any difference. The value of getting the shot also more than makes up for the 2-bit difference that no viewer of our image will see (or should see if your capture doesn't suck).

I had a lot more bursts than these, but I only wanted to include throw away sets so readers are free to download and examine them to their hearts content.

Metering Issues - Room for Improvement


f/5 @ 70mm for 1/1000 sec at ISO 320
(unedited)
Despite doing okay for most frames, the metering was totally off for this frame
Sadly this happened more than it should for a camera of this price point

Despite advances made by Nikon and Sony in performance, one thing that keeps me on the Canon platform is the metering performance of my 1D X Mark II. If you take enough frames in a burst then odds of having a shot worth publishing is high, but having images that are way off on the exposure can lead to a lot more hassles editing or in some cases an unsalvageable shot.

In the shot above and many in this article you'll notice how the exposure is way off. Yes, I could have used exposure compensation to fix the problem, but the fact is that this is a weakness of the Sony and Nikon platforms that Canon definitely does a better job with. Like Nikon, using spot metering can help - but this camera only does spot metering from the center and not from the AF point so that's a huge fail for sports photographers who need precise metering on their target no matter what happens in the background.

If I could make only one wish to Sony for what they can fix in the next version of this camera, metering would definitely be that wish. See Canon's Evaluate Metering with an emphasis on the AF point for a case study on how metering should be done.

Swing Test

If you are a parent, you know how hard it is to get decent shots of your kids on the swing. Cameras are improving every year, but this is still a real world torture test for any camera. However, the a9 performed extremely well with hundreds of in focus images to chose from. Here's a few examples:


f/2.8 @ 70mm for 1/2000 sec at ISO 1600

A facial expression with excitement, no background obstructions and perfect focus


f/2.8 @ 70mm for 1/2000 sec at ISO 3200

Big air, great focus, and great exposure


f/2.8 @ 70mm for 1/2000 sec at ISO 1600

The perfect expression and composition for one of my favorite swing captures

If you have kids and and can afford this camera, it really is the perfect tool to get the perfect shot for just about any action your kids will do.

Handling Obstructions

The downside of photographing in public places is that someone always walks in your darn shots - especially when you are in burst mode. While it can be frustrating since you'll have editing to do, it's even more frustrating when the camera changes focus and you miss a series of shots that are impossible to capture again.

Fortunately the default settings of this camera are very good at keeping the focus point where it belongs - especially if you stick with the Flexible Spot S on your subject. Here's a few unedited examples of shots that could have been ruined, but weren't as the default AF-C settings give your original subject the priority.


f/2.8 @ 70mm for 1/2000 sec at ISO 1250

The above frame and the one before it weren't ruined by a passer by that got in the shot.
The default AF settings are designed to stay on your target and not switch when obstructed


f/2.8 @ 70mm for 1/2000 sec at ISO 1250

Lots of frames for this series, but this girl running across the frame didn't ruin any


f/2.8 @ 70mm for 1/2000 sec at ISO 1600

Even at the edges with a lot of action, the eye focus was maintained

This is great for a default setting, but if you are shooting sports like Basketball where you want the AF to change quickly to different subjects you can easily dial that in too. Sony on it's first attempt has effectively matched the Nikon D5, and one upped the D5 and 1D X Mark II by offering more focus points all the way to the edges to help increase your odds of getting the shot.

The Decisive Moment - Guaranteed

PLEASE NOTE that ALL images in this article are copyright Ron Martinsen - All Rights Reserved. You may view the associated original images while this article is open in your browser, but you must delete them when you are done. You may not print, edit, re-post, or otherwise any images in this article without written permission.

a9 LB-675-Edit
f/4 @ 70mm for 1/2000 sec at ISO 1250 (EDITED - click for the unedited original)
If you can think it, you can capture it with this camera

What I love about this camera is that when you see an opportunity where you know there's going to be a great decisive moment of the series that you want to capture, your odds of getting it are almost 100%. Even in my case where I was using the wrong lens and due to water I had to stand far back, I knew I was going to get the frame I wanted with this camera so I just planned to crop and took the shot anyway. I chose this frame, but I had tons to choose from so I could have had Kai in the water or just out of it - I had the shot no matter which artistic decision I decided to go with. That's incredibly powerful!

The rest of the shots in this section are all 100% unedited and appear exactly as they came out of the camera. Click on any to view the in-camera JPEG original file, or visit this gallery for more.


f/2.8 @ 28mm for 1/500 sec at ISO 100

I wanted a shot with a little edge flair, bouncing backlit hair and a nice shadow to the edge
Accomplished on the first attempt


f/2.8 @ 70mm for 1/1000 sec at ISO 3200

While talking to Kai I wanted to capture his overboard laugh
Accomplished on the first attempt


f/2.8 @ 59mm for 1/2000 sec at ISO 1600

I wanted to capture a great facial expression and the peace sign with his eyes in perfect focus
Accomplished on the third attempt


f/4 @ 70mm for 1/2000 sec at ISO 2000

Kai was having a happy day and I caught an expression that
However, the meter failed me but I can fix that in post-processing


f/2.8 @ 44mm for 1/2000 sec at ISO 3200

I wanted to capture an expression of unbridled enthusiasm of a boy jumping off a rock
Accomplished on the first attempt


f/2.8 @ 70mm for 1/2000 sec at ISO 2500

A big swing, parallel to the ground with a spot on smile - done
Now if that darn lady wasn't in the background - thank goodness for content aware fill :)


f/2.8 @ 70mm for 1/500 sec at ISO 1600

I wanted to capture Kai running away from his little sister - done
Accomplished on the first attempt better than I imagined with Ara appearing under his arm
in a hug/headlock type subliminal gesture


f/2.8 @ 70mm for 1/500 sec at ISO 1600

And sometimes you just get a funny shot that may not be what you are going for, but any shot that evokes an emotion response is worth keeping (My Facebook friends loved this one)

The Downside

It might surprise you that I only spent a few hours shooting with this camera over 6 separate days of reviewing.  I've been crazy busy, so I just don't get to review and blog like I used to, yet I still managed to take 6000 frames of photos worth about 60GB of disk space (excluding a lot of deleted RAW's).

Fortunately if you are using the electronic shutter, there's no fears about shortening the life of your camera like a mechanical shutter, but it can do some damage to your hard disk and backup storage in a hurry! It can also be problematic while you are on vacation, unless you buy A LOT of large capacity memory cards.

I also found it painful going through so many images in a burst that looked alike (see examples here), so often times I found myself going down to the lowest burst mode or switching to mechanical shutter just to slow things down. This is even true on my much slower Canon 1D X Mark II, as often times you simply don't need so many shots in a burst.


f/3.2 @ 70mm for 1/100 sec at ISO 640

Nice shots can still be made with AF-S single shot

That said, in practical use you'll find that the high speed electronic burst mode is fantastic when you need it - but you'd be wise to save it for only when you really need it.

Conclusion

See Part II for more of my review and my final verdict

Where to Buy?

CLICK HERE to learn more or buy today.

Other articles you may enjoy

If you enjoyed this article, you may also enjoy these:

Disclosure

If you make a purchase using links found in this article, I may make a commission. It doesn’t cost you a penny more, but it does help to support future articles like this.

Unless noted, ALL shots in this article are unedited and come straight out of the camera as shown. In-camera JPEG's were used with in-camera Creative Style (vivid) and White Balance (shade) being leveraged to give shots an improved color over the camera default.