
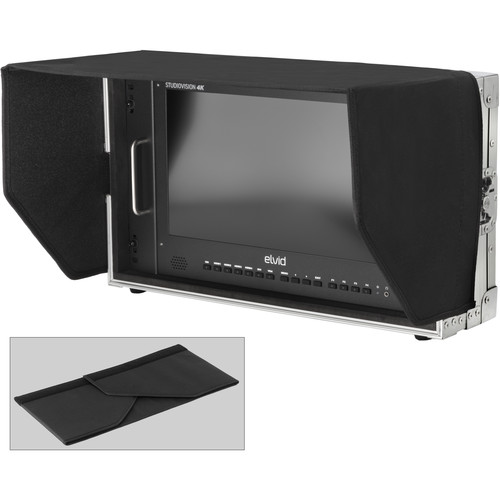
Elvid StudioVision 4k Displays - up to 28"
Laptops are great and practical for field shooting activities including tethering, but advanced shooting scenarios – especially in cinematography – result in multiple source devices in need of larger screen high resolution projection. What’s more, traveling with gear means that something like an extra display is going to take a beating so protecting an extra display can be a challenge.
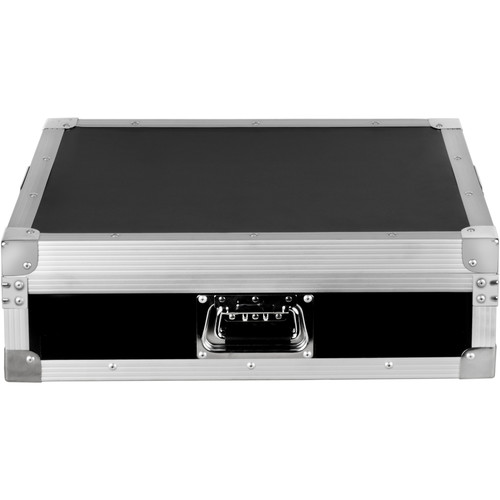
The Elvid StudioVision displays solve these problems by offering a 4K display in a near indestructible case that offers a wide variety of easily switchable inputs including HDMI 2.0, BNC (3G-SDI), and even VGA. What’s more, it has a speaker and headphones port so you can listen to the audio as well – all very a very affordable price.
Yeah, but is it any good?
Long-time followers of my blog know that I care a lot about image quality so I’ve written many articles on high-end displays, spectrophotometers, colorimeters, and color calibration in my role as a X-Rite Coloratti and NEC Display Color Visionary. As a result, I was a bit skeptical when B&H (on behalf of Elvid) reached out to me to see if I’d be interested in reviewing this display.
My initial impressions was that the case was very well built and the soft touch discrete input buttons were a welcome feature. However, my first impression was disappointment when I discovered that the display had no modern inputs like DisplayPort and USB-C. This meant that I had to interface it with things like my AppleTV 4k and my Intel NUC to put it through its paces, instead of my MacBook Pro and Surface Pro.

While frustrating, the support for HDMI 2.0 (on port 1 only) meant that I could easily use adapters to get full 4k UHD performance out of this display. As a result, I started with some 4k YouTube videos and compared the results to my NEC PA332UHD-2 such as the one shown here:

Costa Rica in 4K 60fps HDR (ULTRA HD)
Obviously the screenshot doesn’t tell you anything about the display performance beyond the fact that YouTube did report that I was getting UHD at 60fps, but my system reported that the display could only do SDR – not HDR video.
Color Accuracy
Out of the box I observed the colors to be a little oversaturated and on the warm side which is common for displays as that makes unedited photos and videos look more interesting. However, it’s a curse if your intention is to edit colors and get a accurate screen representation of what you are editing. As a result, I got out my X-Rite i1Studio Spectrophotometer and calibrated the display. With the colors displays more accurately, I found myself satisfied with the image quality but disappointed in the high gloss display finish which caused massive reflections even when using a hood as shown in the two photos below:


Notice how both have lots of reflections despite the included built-in hood and viewing angles. A matte finish for the display surface would have been a much better choice so this is something to consider if you will be using this display outdoors in strong daylight conditions.
As a result, I’d say this display is good for reviewing image and video content, but not suitable for photo or video color critical work in the field. Realistically, It is unlikely anyone would use it for that purpose anyway, but I wanted to make sure this was well understood who trust my opinions on color critical workflows.
For less than $900 USD (at the time of this writing) for Elvid StudioVision 4k Displays - up to 28" means they are a value that’s hard to beat for durability that is built to survive abuse in transport to your set.
Conclusion
I was extremely disappointed in the lack of support for DisplayPort and USB-C and the high gloss finish severely limits its usefulness in the field, but I think videographers looking for a larger display – especially when working with many multiple video sources in the field will really love this display. It’s super durable and can even run on battery power (not included), so it certainly beats the back of screen LCD or cheaper external displays most video productions use in the field.
Photographers looking for another display for field tethered shooting will find it invaluable as well – just don’t forget to bring the right display adapters and cables.
Lastly, at less than
Where to Buy?
CLICK HERE to review the technical specs or buy today at B&H.
Other articles you may enjoy
If you enjoyed this article, you may also enjoy these:
- NEC MultiProfiler - A Must for NEC Displays!
- NEC PA242W Monitor Review (PA241W & PA271W Review)
- NEC PA271Q-BK 2018 Review
- NEC PA302W Monitor Review (PA301W Review)
- NEC PA322UHD 4k for Pro Photo & Video Editing
- NEC EA244UHD 4k Display
- NEC SoundBar Pro Display Speakers
- NEC SpectraSensor Pro (powered by X-Rite)
- Canon SX-80 Pro Photography Projector
- Getting Great Color on Projectors
- Eizo ColorEdge CG243W 24” IPS 1.07 billion color LCD Display
- Eizo FlexScan SX2762W–27” Wide Gamut IPS Photography Display
- Understanding 10-bit Color by NEC’s Art Marshall
- X-Rite ColorMunki Photo Color Management Solution
- X-Rite ColorChecker Passport
- X-Rite i1Display Pro and ColorMunki Display Colorimeters
Enjoy these and more on the Reviews tab as well as Ron's Recommendations.
Disclosure
If you make a purchase using links found in this article, I may make a commission. It doesn’t cost you a penny more, but it does help to support future articles like this. I should also point out that I was allowed to keep this display after the review versus my typical requirement to return products.


 - Click for larger version")
 - Click for larger version")
