Thursday, May 31, 2012

REVIEW: The iPad for Photographers–Read This Book!

When I first got a copy of The iPad for Photographers: Master the Newest Tool in Your Camera Bag from the publisher I scoffed and thought “what kind of moron needs a book for the iPad?” — It’s probably one of the easiest devices in the world to use! My next thought was – why would I use an iPad for anything but showing my finished photos?

I was convinced this book was for suckers and I expected it to become a leveling tool for a bookcase or something. However, an interesting thing happened when this book landed on my bathroom countertop. I was waiting for my wife to finish up getting ready one day when I decided to look through the pages – I found myself getting hooked really quickly!

In no time I was downloading cool apps from the App Store like ShutterSnitch for iPad (iPhone) which could read my RAW files, and more that I’ll feature on this blog in the near future. I found myself getting excited when I learned that there were tools like Photosmith by C² Enterprises, Inc that could allow me triage my photos for Lightroom directly on my iPad and many others like these (not all inclusive):

Chapter by Chapter Review

Here’s my thoughts on the chapters in this book:

  1. The iPad on Location – This is the chapter that hooked me and it’s the one you should read at the bookstore if you are on the fence about this book. Very quickly you’ll see how to get your JPEG and RAW photos onto your iPad from your camera wirelessly using the Eye-Fi or via USB cable to begin doing some really cool stuff.
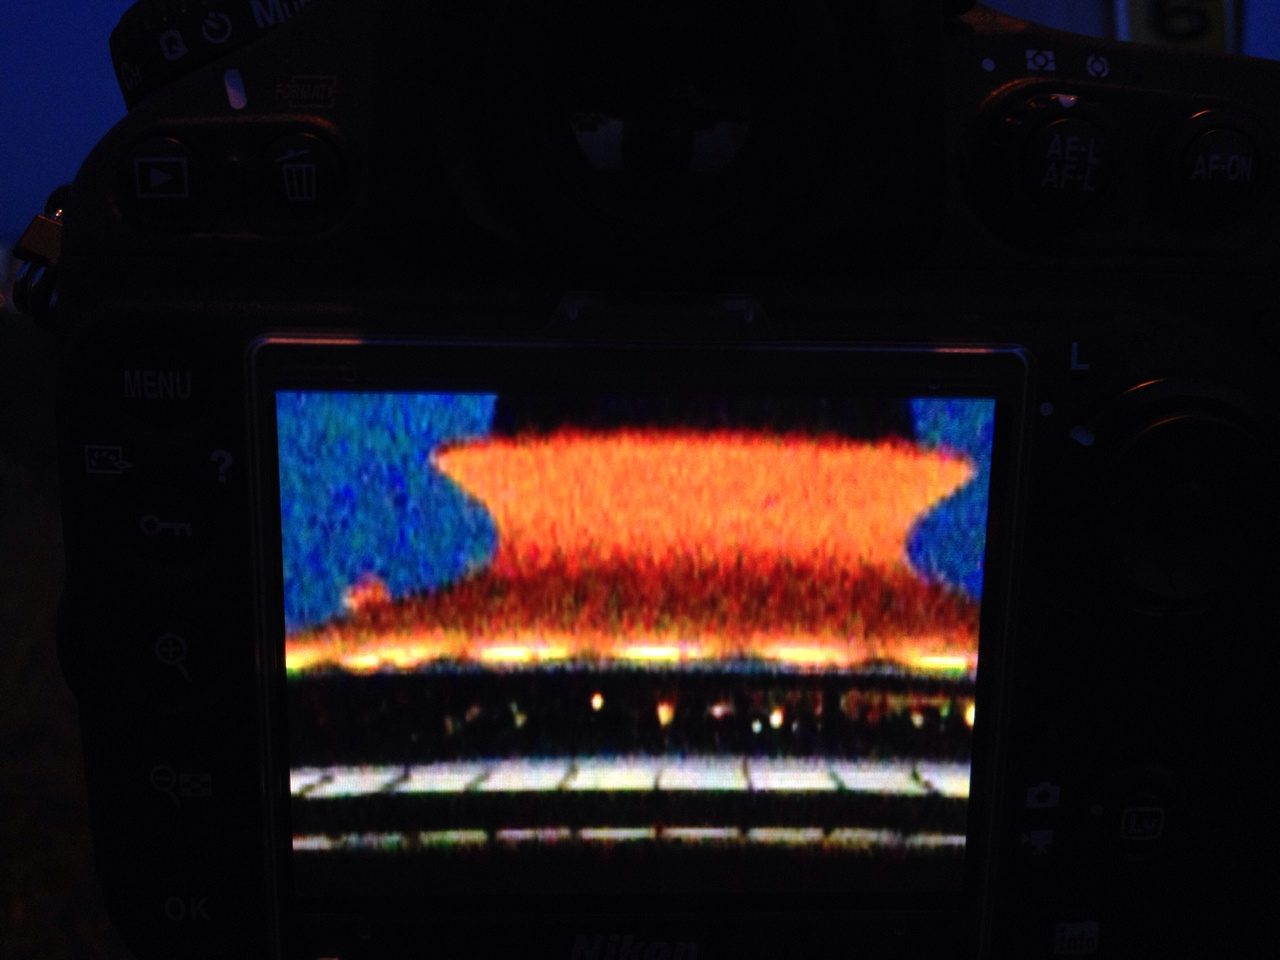
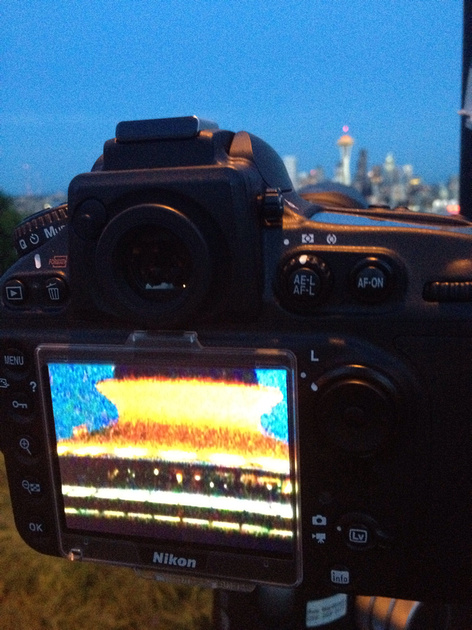
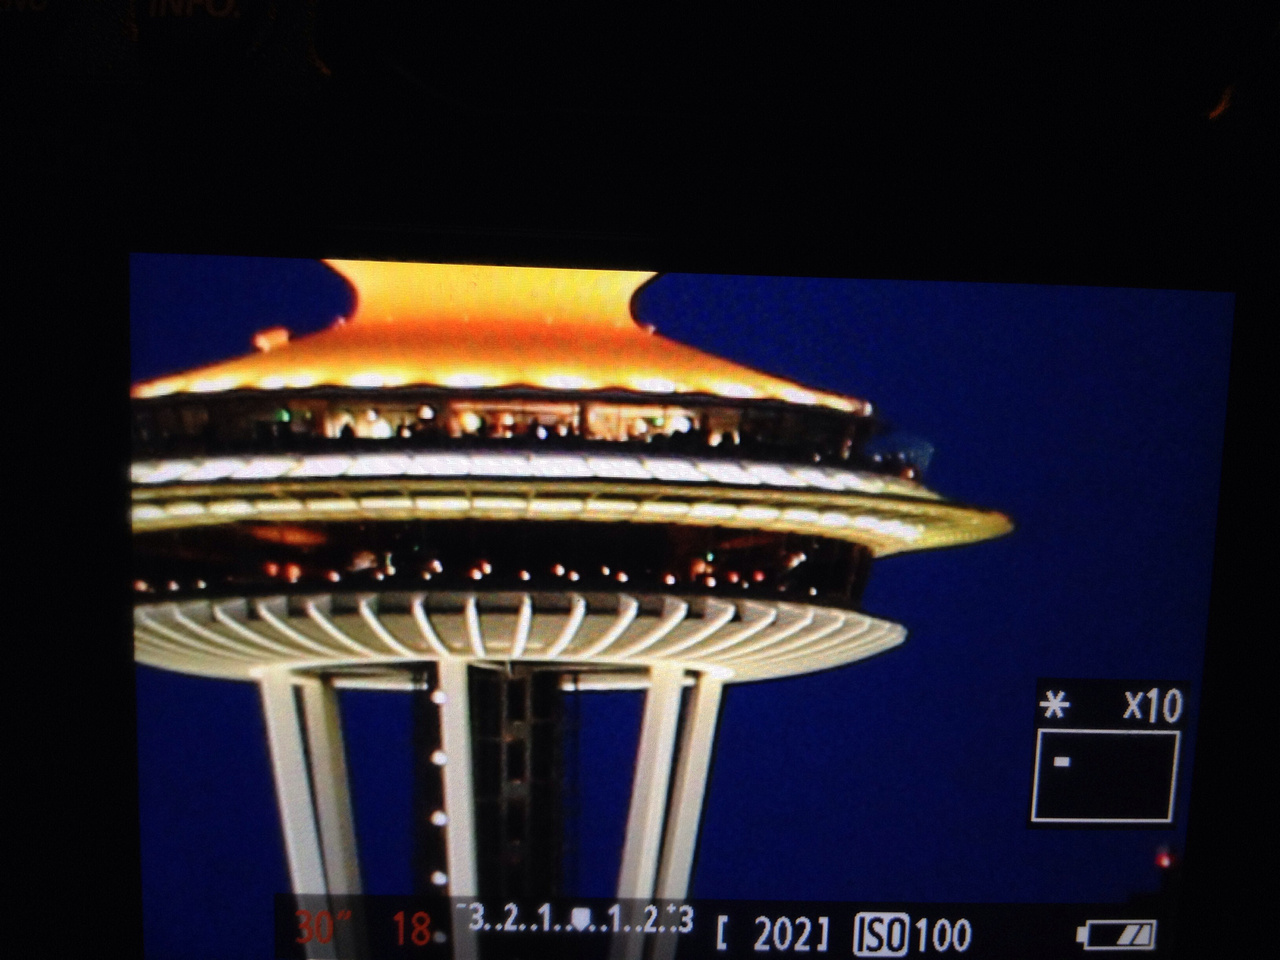
  2. The iPad in the Studio – This has some cool stuff about how to use your iPad as a remote camera controlling device as well as handy stands like the Pivot and Stump. There's even cool things like Air Display which MacBook Pro users are going to love. Collectively these and the recommended apps come together to really help you out with seeing what your shots look like on that sexy new iPad display before you call it a day during your studio shoot. This is super useful for those cases where the eye looks in focus at a glance on your LCD, but your iPad shows you it’s not.
  3. Rate and Tag Photos – This is what it’s all about because honestly I’m going to do my real work on my computer. However, if I can dump my photos on my iPad before a flight then being able to triage them on the plane is a huge win for me. Photosmith will rock your world for that if you use Lightroom. Great stuff here – highly recommended!
  4. Edit Photos on the iPad – While I use Snapseed on my phone and love it, I’m not going to use it for my DSLR photos. I found this chapter to be good info for people doing simple family or hobby work, but working pros can just glance through here.
  5. Edit Video on the iPad – Same as above, but surprisingly you can do more than I expected with video. Good FYI info.
  6. Build an iPad Portfolio- This was a chapter that I rolled my eyes at and thought would be lame, but in reality it was helpful. I knew most of the info in it, but as a photography instructor I know a lot of people will really appreciate this chapter. Definitely read it!
  7. Share Photos – This is useful for those who want to quickly get their photos on their web sites. While that’s not typically how I work, if you are an event photographer or photojournalist where speed is of the essence then you’ll find this very useful.
  8. Helpful Apps for Photographers – I’m a geek so this is just cool as there were some apps I hadn’t discovered yet. It’s clear that Jeff spends too much time screwing around on his iPad like me as he’s found some cool stuff here.
Prerequisites

In case you were wondering, this book applies to all versions of the iPad but the truth is that it was written for iPad 2 with updates for iPad 3. You’ll also want a Apple iPad Camera Connection Kit (or equivalent) and an Eye-Fi for the best experience.

Conclusion

If you haven’t got an iPad yet, or if you have an older one, I can’t recommend the new iPad enough. The display has more pixels per inch than my NEC PA Series photo editing display, so I long for a 24” version of the retina display for my desktop! Using EasyRelease is so much easier for my models than the iPhone version that I reviewed, and my printing 101 eBook never looked better. To me, it’s the must have tool for the modern photographer, and this book helps you make the most of it!

This is the most exciting new book I’ve read this year. I’ve been a huge fan of my new iPad and Flipboard (aka iOS Crack), but this book really transformed it from a time wasting toy to a business assistance tool.

I give this book my highest recommendation and that comes from someone who thought this book would be a waste of money!

Click here to buy your hard copy today or you can get the Kindle Edition for your iPad or Kindle Fire. If you don’t have it already, you can download the Kindle App for the iPad here.

Disclosure

I was provided a copy of this book by PeachPit Press for review. I contacted the author to thank him for a great book and to make arrangements to meet him since he lives in Seattle, but I have not met him or had any meaningful conversations with him up to this point. Now that this article has been released, I aim to change that.

If you make a purchase using links found in this article, I may make a commission.

NOTE: This site requires cookies and uses affiliate linking to sites that use cookies.

If you enjoyed this article, please support future articles like this by making a donation or saving money by using my discount coupon codes. Either way, your support is greatly appreciated!

This blog is intended for freelance writing and sharing of opinions and is not a representative of any of the companies whose links are provided on this site.

The opinions provided are of Ron Martinsen alone and do not reflect the view of any other entity

Wednesday, May 30, 2012

Eye-Fi with Nikon D800 and Canon 5D Mark III

For those of you who don’t know what an Eye-Fi card is, it’s a brilliant invention that allows whatever you can write to an SD card to be sent wirelessly to the destination of your choice using a wireless network. You can automatically send your photos your computer, iPad, Facebook, Flickr, and more. This means your point and shoot, DSLR (ones with SD card slots), and more can all transfer their photos to a larger display with no wires. It’s brilliant and works very well in the studio environment for giving you real-time feedback of your images on a much larger display.

About a month ago I started testing a Eye-Fi Mobile X2 SD card and love it! I have my images sent to my iPad 3, MacbookPro, or my NEC PA Series display on my desktop computer so I can quickly see if I’ve got the shot or if I need to keep shooting. Sure, I can do the same on my camera’s LCD, but seeing it on the big screen helps you to detect out of focus areas so much easier.

If I were recommending one to a friend I’d go for the Eye-Fi Pro X2 8GB because the extra cost gives you some important extra features at a drastically cheaper rate than if you add them after the fact with the Mobile X2.

Testing with the Canon 5D Mark III and Nikon D800

If you are like me, when you see the specs for these cards you think – man, those are kinda slow cards – and they are. I wondered if they could keep up with the huge files of the D800 and 5D Mark III so I did a little testing.

For starters, the important thing to keep in mind about both camera bodies is that they both have first class Eye-Fi support so you’ll actually see a Eye-Fi icon that flashes when the images are being transferred. The second thing is that files are copied to the card itself and then separately they are transferred, so you can fire away without your camera or card bogging down while the files transfer.

Since I consider this a studio photography aid, I didn’t do any burst mode testing. I mainly focused on how it could keep up if I were just doing a normal shoot – and it worked great – no issues or slowdowns to my workflow with either camera.

Eye-Fi Mobile X2 SD card I used only supports JPEG files so I wasn’t able to test RAW transfer. You need the Eye-Fi Pro X2 8GB to do that. However, the JPEG files of these cameras are huge so it still was a good stress test. Here’s what I found:

  • D800 – It took 8 to 20 seconds before the thumbnail preview showed up to begin the download, and 12 to 20 seconds for it to actually download. Total: 20 to 40 seconds from the time the photo was taken. First shots were always the slowest, but subsequent ones taken without the network connection getting dropped were much faster. File size: 15.9 MB
  • 5D Mark III – It took 2 to 10 seconds before the first thumbnail preview showed up to begin the download, and 10 – 12 seconds to download. File size: 7.5MB

Naturally your router, computer network card, hard drive performance, etc… will impact your actual results. However, my take from this is that the Eye-Fi is a great solution that seems to have a little overhead getting started, but once it gets going it doesn’t matter much if your file is 7.5MB or 16MB, it’s going to get it transferred pretty quickly (just over 10 seconds on my machine).

Auto Import into Lightroom

You can auto import to Lightroom which using my SSD drive seemed to have zero impact on performance. Once EyeFi said it was done Lightroom showed the file, so importing took milliseconds.

Lightroom 4’s Auto Import Settings Dialog

My strategy here was to put the files in a EyeFi folder on the fast SSD drive and then have Lightroom monitor that folder so it could quickly Auto Import files after the Eye-Fi transferred them. This allowed me to see my files in Lightroom as opposed to the less desirable Eye-Fi app.

Conclusion

This gadget rocks and really improves my workflow. It had no problems keeping up with the big files because the delay occurred while I was typically working, so by the time I looked at the images on the iPad or computer – they were coming in at a good speed.

If you shoot one shot and stare at the screen then this will drive you crazy. Transferring RAW files to a iPad is also going to fill up the memory quickly, so I’d avoid that for all but simple short shoots.

Where to Buy

As of this article, the best overall deal (when you consider taxes and shipping) for the Eye-Fi was at Adorama. Amazon had the lowest price, but taxes their hurt. B&H had a higher price, but they change their prices often so I’d expect to see it match Adorama soon.

Please use these links when shopping for your Eye-Fi card:

During the course of this article I found ShutterSnitch for iPad (iPhone) to be useful to monitor the incoming files on my iPad. I also loved the book iPad for Photographers which I’ll be reviewing soon as it helped me to find the tools I needed to make the most out of my Eye-Fi.

Disclosure

If you make a purchase using links found in this article, I may make a commission. Thank you for supporting my blog by using my links!

NOTE: This site requires cookies and uses affiliate linking to sites that use cookies.

If you enjoyed this article, please support future articles like this by making a donation or saving money by using my discount coupon codes. Either way, your support is greatly appreciated!

This blog is intended for freelance writing and sharing of opinions and is not a representative of any of the companies whose links are provided on this site.

The opinions provided are of Ron Martinsen alone and do not reflect the view of any other entity

Tuesday, May 29, 2012

Imagenomic 20% Discount Is Back for Portraiture, Noiseware and Real Grain

Imagenomic 20% Discount on ronmartblog.com

Portraiture is my go to product for skin softening and Noiseware won my noise reduction series, so I use both products every day. I was bummed here a while back when my discount that I had for my readers had expired for no apparent reason.

Good news – the discount is back so just enter the coupon code RONMART2012 and save 20% on any product offered on their website.

Click the links for Portraiture and Noiseware to read my reviews as well as my What Plug-ins Should I Buy? article.

Disclosure

If you make a purchase using links found in this article, I may get a commission.

NOTE: This site requires cookies and uses affiliate linking to sites that use cookies.

If you enjoyed this article, please support future articles like this by making a donation or saving money by using my discount coupon codes. Either way, your support is greatly appreciated!

This blog is intended for freelance writing and sharing of opinions and is not a representative of any of the companies whose links are provided on this site.

The opinions provided are of Ron Martinsen alone and do not reflect the view of any other entity

Monday, May 28, 2012

REVIEW: Wildlife Photography: From Snapshots to Great Shots

Wildlife Photography: From Snapshots to Great Shots is part of the series of “From Snapshots to Great Shots” books published by Peachpit Press. The series is geared toward the beginning photographer. Each book focuses on a specific topic or genre but includes foundational instruction on gear, exposure, and composition as it pertains to the given topic, which in this case is Wildlife Photography.

Like the other books in the series, this book progresses logically and it reads almost like a photography class or workshop. Exercises at the end of each chapter are intended to give the reader some practice with the material they just covered. The class-like nature of the book is further enhanced by giving readers a Flickr group to join where they can post samples of their work inspired by the book.

About the Author

Laurie Excell is a nature and wildlife photographer from Portland, OR. She’s co-author of another book in this series, “Composition: From Snapshots to Great Shots” and her galleries include some very impressive work, some of which I recognized within the book along with tips on how she got the shot. She leads various photo workshops throughout the year, so readers who really love the book have an option for hands-on instruction as well.

Chapter by Chapter Walkthrough

1. Equipment Essentials – Gear, gear, and more gear! This chapter discusses pretty much all the equipment an aspiring wildlife photographer might ever need. It provides a high-level overview of the features to evaluate when considering equipment purchases, and lists pros and cons of common options as they relate to wildlife photography. Experienced photographers won’t learn anything new here, but it will be a good “know your gear” starting point (although perhaps a little overwhelming) for someone just getting started with photography. One equipment-related point that I’d have liked to see mentioned - but wasn’t - is that gear rental is an option for those who occasionally want that 600 mm lens but can’t afford the high cost.

2. Camera Settings and Shooting Techniques – In this aptly-named chapter, the author briefly describes her typical camera mode settings for a wildlife shoot. This is a prescriptive list. The text doesn’t go into much detail as to why she chooses these settings; that information is covered a bit further in chapter 3. It also provides some tips on the most stable ways of operating the camera, whether handheld or tripod mounted.

3. Exposure Simplified – Readers of Bryan Peterson’s book Understanding Exposure will find this chapter to be a good refresher on the material covered in that book. For new photographers who just want to learn the rules (i.e.,” wide aperture = shallow depth of field”) this is a nice condensed version of the same exposure and lighting material. It offers some stunning sample photos to illustrate the author’s points. For those who really want to dive deep into the topic of exposure, I’d recommend that they pick up the Peterson book as well.

4. Get To Know Your Subject – This chapter’s title only partially describes its contents. It’s not just about getting to know your subject as a photographer, but also about compositional choices that allow your viewer to get to know your subject as well. The author lists some general websites and organizations that are useful for pre-outing research to help the reader improve his/her chances of being in the right place at the right time. It introduces some tips for creating more engaging compositions and showcasing the behaviors of your subject, which will be explored further in chapter 7.

5. Location, Location, Location – For most of us, true trips into the wilderness are infrequent and are of limited duration. This chapter gives readers ideas to help them make the most of their wildlife photo opportunities, both by identifying potential local areas for practice, and by providing seasonal suggestions for wildlife photography trips.

6. Close Encounters – This chapter addresses one of the most difficult aspects of wildlife photography – how to get the shot you want without spooking the subject. This is all pretty generic advice, as different species will have different tolerance for human presence which may vary by season and area. But it gives the reader several approaches to experiment with, from gear options to extend your camera’s reach, to using blinds, to less-threatening methods of physical approach. Toward the end of the chapter the author calls out the need to watch for signs of physical distress in the subject as a sign that you’re getting too close. To me, this is critical advice as spooking the subject can have poor consequences – either for it or for you! I wish this were called out in big bold print, but I’m glad to see it at least mentioned.

7. Creative Composition – In Chapter 4 the author illustrated some ways that composition could affect the overall impact of an image, and here she expands much further, with beautiful examples of using lines, shapes, patterns, shadow, and perspective to convey certain moods or to draw the viewer’s eyes into the photo. The title of this book mentions going “from snapshots to great shots” and the concepts presented in this chapter are probably the most relevant in the book for those who want to achieve those great shots with extra “wow” factor. These same compositional concepts apply towards any type of photography and should be familiar to experienced photographers, but they’ll be extremely helpful to beginners.

8. Beyond the Basics – This chapter explores some additional creative choices such as high-or low-key exposures and provides manual exposure advice for challenging high-contrast exposure situations. It revisits the “blur panning” technique that is mentioned a few times earlier in the book. (Personally, I’ve never been a fan of this…blurry images look like mistakes to me even if the effect was intentional. To each his/her own!)

9. Bear Tales,

AND

10. Birds of a Feather - The final two chapters are a departure from the rest of the book. Instead of advice and instruction, these chapters read more like an in-the-field diary. They’re intended to walk readers through the logistics and experience of a wildlife photography outing end-to-end. In Chapter 9 the reader follows along with the author on a trip to Alaska to photograph the coastal brown bears, and in Chapter 10 it’s an avian photography trip to South Texas. As a reader, the changed tone jarred me a bit initially (hey, what about helping me get better pictures!) – but once I got over the shift I think this is pretty usable information in that it gives you real-world example templates for planning and executing a wildlife photography trip.

Images Inspired By This Book

While I haven’t yet travelled to any exotic wildlife locations since reading this book, one thing the book did inspire me to do is to research wildlife I might see regardless of my destination, and to practice wherever/whenever I had a chance. So on a recent drive to California to see the solar eclipse, I found online mentions of a scenic stop off of highway 101 where elk could be observed in the evening hours. Without that little bit of beforehand research inspired by the book I’d have driven right by the turnoff not knowing these guys were grazing just a few hundred yards up the road:

clip_image002

The book also discusses approaching wildlife by boat as a way to get closer and better angled shots than you could on foot. I’d never tried shooting from a boat before, but I do have a waterproof camera bag and some friends with kayaks, so I brought the camera along on a kayaking trip on the Sammamish River. Sure enough, an eye-level perspective from the river worked nicely to capture this gray heron mid-takeoff:

clip_image004

Conclusion

Photographers are visually inspired, and perhaps the best aspect of this book is the wealth of amazing wildlife shots, along with the tips on how the author captured the shot. This is a great general purpose book for a beginner to intermediate photographer who could use some tips on gear, exposure, composition, or in-the-field operation. A more experienced photographer probably won’t learn anything new, but will at least be highly motivated to find more local opportunities to photograph wildlife and to start planning the next big wildlife photo expedition.

Order Today in Print or for Kindle

Click here to purchase this book (and support this blog). There’s also a Kindle version which is great for the Kindle Fire (my favorite eReader).

Disclosure

If you make a purchase using links in this article, I may make a commission.

NOTE: This site requires cookies and uses affiliate linking to sites that use cookies.

If you enjoyed this article, please support future articles like this by making a donation or saving money by using my discount coupon codes. Either way, your support is greatly appreciated!

This blog is intended for freelance writing and sharing of opinions and is not a representative of any of the companies whose links are provided on this site.

The opinions provided are of Ron Martinsen alone and do not reflect the view of any other entity

Seattle Workshop Was A Blast


Professor Parker was a big hit

My workshop with Gary Parker was held this past Saturday and by all accounts it was a great success!

Great Co-Instructor

Gary wow’d students with lots of practical tips and advice you are only going to get from a seasoned pro. Here he is demonstrating one of his tips using a Leica Tabletop Tripod with Ballhead in a way that blew everyone’s mind – including mine:


Add a tabletop tripod to my wish list now

Great Model

The lovely Raia was on-hand as our model and she was fantastic as usual. From swimwear:

to wild wear:

to Memorial Day BBQ clothes:

She was super patient and so versatile that everyone – including myself and Gary – that we ended up running late. I’d like to shout out a big thanks to Raia for being such a trooper on this holiday weekend!

Great Assistant


Luc - The Best and Most Friendly Assistant / Instructor

One of our students was so happy that she asked if we could do another workshop in the Bay Area and in Turkey. That’s cool, but the more impressive fact is that she specifically asked for Luc to join us as she felt he was a critical part of the team. I couldn’t agree more, and if we take this show on the road I’ll definitely be giving Luc a call!

Great Locations


Two students wanted to learn how to catch the fish with their camera

The park was fantastic and surprisingly not as busy as we expected it would be. However, the crowds were in full force in Seattle but that just gave us more opportunities to do things like take photos of flying fish much faster! Of course a trip to the market wouldn’t be complete with some instructions on shooting flowers as well:


The market never disappoints when it comes to flowers

Because I teach I don’t actually spend much time grabbing shots for myself, so the above flower shot may not be textbook but it turned out okay given that its only one of 2 frames I had time to take (while I was teaching a point).

We also had great fun doing street photography with random people like these:


If you know this couple, tell them I have a shot for them

Great Students


Standing in for Raia for a camera check is always dangerous with me. ;-)

While this student may not look super happy here, it’s only because he didn’t expect my quick snap to test my camera as Raia was changing would end up on the web. ;-) All the students were ready and willing to try new things as the day progressed.


I’m pretty sure this is your next photojournalist of the year at some point in the future!

Everyone had a nice collection of keepers that I hope to show you in the upcoming post-mortem article. In the meantime I’ve included my shots to show you how much fun we had and to force the rest of the students (and Gary) to get some shots to show to you as well!

Future Workshops

If this seems exciting to you, then let me know as I prepare future workshops. As of right now my next workshop will be in Kyoto Japan in early December, but there may be more so if you are interested then let me know.

Disclosure

If you make a purchase using links found in this article, I may get a commission.

NOTE: This site requires cookies and uses affiliate linking to sites that use cookies.

If you enjoyed this article, please support future articles like this by making a donation or saving money by using my discount coupon codes. Either way, your support is greatly appreciated!

This blog is intended for freelance writing and sharing of opinions and is not a representative of any of the companies whose links are provided on this site.

The opinions provided are of Ron Martinsen alone and do not reflect the view of any other entity

Thursday, May 24, 2012

Ask Ron: What do you think about Pixelmator 2.04?


Pixelmator - Pixelmator Team

Aleem Hossain asked me on Google+ what I thought about Pixelmator, so I thought I’d give it a try. This is Mac app that is only available via the App Store with no Windows counterpart. It’s designed to be a Photoshop alternative, but realistically it’s more like a Photoshop Elements alternative.

Since it runs on the Mac OS, it can open any RAW files supported by the system so I had no trouble opening my 5D Mark III and D800 raw files. Now there’s no raw processor so I couldn’t control how that RAW file was opened, but it did seem to be have the same way was you’d see in iPhoto. I did notice that some filters worked fine but others really struggled with these big files, so it supported but didn’t really like RAW files. In my opinion its best to use this product AFTER you’ve done your RAW conversion in Capture NX2 or DPP.

I was also able to open some of my Photoshop file with layers, but others failed. I’m not entirely sure what it didn’t like about some, but the behavior seemed to be on par with what I saw using Perfect Layers in my Perfect Photo Suite review. Perfect Layers is now free, so if you just need layers then this isn’t necessarily a must purchase product.

After using it for about an hour I reached the following conclusions:

  • It’s performance is great with JPEG’s, but sluggish with RAW files 
  • Fantastic selection of built-in filters
  • Layers and content aware healing make it a great tool for those who can’t afford the Adobe alternatives
  • I’ll still keep using Photoshop, but this isn’t bad at all

Here’s a little video that I made where I explore some of what’s available in a simple overview.


Play in HD

Some filters like Film Stock seem exciting, but really don’t do much. Others like Bulge & Dent mimic the Liquify filter, but its as nasty to use as spot healing in Lightroom. However, there’s lots of really cool and unusual filters that are decent which you’d usually have to pay extra for in Photoshop.

I didn’t see any way to use my existing Photoshop or Lightroom filter with this product, so you are out of luck there. There’s also key things like the fade feature and channels palette that Photoshop users will likely miss.

Conclusion

If you can afford Photoshop then I still say get it (especially CS6) as it’s still the king with no serious competitor. However, if you are just getting started and don’t have any budget for software then Pixelmator is a great solution for Mac users to get started.

You’ll be able to do basic editing of your image and even some advanced stuff thanks to the content aware healing brush, stamp tool, layers and an excellent array of built in features. It’ll be happiest with your JPEG’s, but it will work on your RAW files with a bit more sluggish behavior.

Snapseed by Nik Software and Perfect Photo Suite are other good Photoshop alternatives, but neither product is as powerful with portrait retouching as Pixelmator. However, those products also have a lot of features that Pixelmator doesn’t have so I’d really call them more complementary than competing products.

At $29.99 at the time of this writing, you can’t go wrong. I’ll still use Photoshop, but I picked this up just for the filters. You are getting a $30 product so set your expectations accordingly, but I still think it’s a no brainer purchase for Mac users just for the filters alone.

Click here to buy Pixelmator on the AppStore. You can also try it for free for 30 days, so you can’t really go wrong.

Disclosure

If you make a purchase using links found in this article, I may get a commission. Please support this blog by using my links when you are ready to buy your copy of Pixelmator.

NOTE: This site requires cookies and uses affiliate linking to sites that use cookies.

If you enjoyed this article, please support future articles like this by making a donation or saving money by using my discount coupon codes. Either way, your support is greatly appreciated!

This blog is intended for freelance writing and sharing of opinions and is not a representative of any of the companies whose links are provided on this site.

The opinions provided are of Ron Martinsen alone and do not reflect the view of any other entity

Monday, May 21, 2012

Learn To Create Exciting Lifestyle Photos


Raia by Ron Martinsen – All Rights Reserved

The world is full of opportunities for taking great photos of people, but for some reason many people struggle to see how to get the great shot. Some say it’s the location that makes all the difference, and it certainly helps, but guess what? All but the last photo in this article were shot at public parks! The Northwest is filled with so many great places for photography that location should never be the issue, so what’s left? — learning how to get the interesting shot!

 : 01 LIFE : Gary Parker Photography, San Jose, Silcon Valley and San Francisco, CA, Advertising and Corporate Photography, Corporate Exec Portraits, Editorial Photojournalist, Magazine, People, Cat, Dog and Pet Photography in the Bay Area
Copyright Gary Parker – All Rights Reserved

In my last workshop I helped my students get some awesome shots (here’s a small sample), but this time is going to be even better. This time I’ll have Raia again (featured at the top of this article and in the previous workshop photos) PLUS I’ll have Pulitzer Prize winning photographer Gary Parker on hand to teach you real-world techniques you just can’t pick up from books or videos.

 : 01 LIFE : Gary Parker Photography, San Jose, Silcon Valley and San Francisco, CA, Advertising and Corporate Photography, Corporate Exec Portraits, Editorial Photojournalist, Magazine, People, Cat, Dog and Pet Photography in the Bay Area
Copyright Gary Parker – All Rights Reserved

Gary’s years as a photojournalist have taught him how to make magic out of any situation, and he’ll be showing the students of this workshop how he does it. You’ll get to learn how he see’s a situation and manages to pull of some of the amazing shots you see in this article and in his personal and pet portfolios.

 : 01 LIFE : Gary Parker Photography, San Jose, Silcon Valley and San Francisco, CA, Advertising and Corporate Photography, Corporate Exec Portraits, Editorial Photojournalist, Magazine, People, Cat, Dog and Pet Photography in the Bay Area
Copyright Gary Parker – All Rights Reserved

If Gary can pull off a killer shot of Bill Gates in 73 seconds, make one of the super picky Steve Job’s favorite photos, or get an awesome shot of a dog sitting in a car, imagine what you can learn from him.

Gary and I have a few spots left for our workshop this Saturday May 26th and we’d love you to join us. We will be custom tailoring the class to the students goals, so now’s the chance to go out and get the shots that have been escaping you.

I’ll be teaching the technical side of things and Gary will be the composition expert. We’ll have Raia (featured at the top) as our model and one or more assistants on hand to help control the light in our favor — all shot at the place where I got this famous shot:

Haruka - Copyright Ron Martinsen - ALL RIGHTS RESERVED
Haruka
Copyright Ron Martinsen
ALL RIGHTS RESERVED

This is your chance to see how to get the great shots of people with your own interpretations thrown in with YOU as the photographer. In this workshop you will learn:

  • How to work with assistants as well as do things on your own
  • Get great shots of people at a crowded park where you might now feels like no shot is possible
  • New and exciting camera angles and techniques
  • Add and suppress light to your advantage
  • Get great shots from backlit scenarios
  • Include the scene in your shot yet still not have your subject look too small
  • Adapt to whatever challenges are thrown at you to still get the shot
  • and so much more!

Click here to learn more and sign up today before the last remaining spots are taken!

All you need is a DSLR camera and an open mind. Beginners are allowed, but you will be expected to be familiar with your camera (more so for Nikon users than Canon users) or at least have your camera manual on hand.

NOTE: This site requires cookies and uses affiliate linking to sites that use cookies.

If you enjoyed this article, please support future articles like this by making a donation or saving money by using my discount coupon codes. Either way, your support is greatly appreciated!

This blog is intended for freelance writing and sharing of opinions and is not a representative of any of the companies whose links are provided on this site.

The opinions provided are of Ron Martinsen alone and do not reflect the view of any other entity

World Famous Beezerker Motorcycle Goes On Sale

Beezerker - Copyright Ron Martinsen
Beezerker
Copyright Ron Martinsen – All Rights Reserved

By far, the coolest product I’ve ever shot was the Beezerker – a custom award-winning hand-built motorcycle with over 1000 hours of labor poured into it. This awesome motorcycle has been the buzz of the design world from Russia, to France, to Los Angeles and more. It’s even been used as eye candy for the grand opening of the Cosmopolitan Casio in Las Vegas.

Once rumored to be worth as much as $100,000 USD, it’s now on eBay starting at $57,450. As a work of art, it’s likely to attract the rich and wealth to add this to their collection. It’ll be interesting to watch it and see just how much it will get in this depressed economy.

If that price tag is too high for you then you might be interested in purchasing Beezerker Photos from me as others have. Its limited edition prints have been highly sought after because I’ve limited distribution to maintain the value of the prints for existing print buyers. You can click here to see a limited set of photos, and more are available upon request for serious collectors only.

NOTE: This site requires cookies and uses affiliate linking to sites that use cookies.

If you enjoyed this article, please support future articles like this by making a donation or saving money by using my discount coupon codes. Either way, your support is greatly appreciated!

This blog is intended for freelance writing and sharing of opinions and is not a representative of any of the companies whose links are provided on this site.

The opinions provided are of Ron Martinsen alone and do not reflect the view of any other entity

Thursday, May 17, 2012

Photoshop CS6 Plug-in Compatibility & Printing Update

In the better late than never category, I’ve reached out to my partners to find out how their products will work with Adobe Photoshop CS6 and the general consensus has been that the products are mostly working well. This is a huge improvement over CS5 which seemed to wreak havoc for months.

It is recommended that you completely uninstall the beta before installing the retail bits of Photoshop CS6. This may require you to re-install your plug-ins in some cases.

Nik Software

No issues with the current versions. Here’s a full statement from Nik.

The current versions are:

  • Dfine 2: Mac – 2.110; Windows – 2.110
  • Viveza 2: Mac – 2.007; Windows – 2.007
  • HDR Efex Pro: Mac – 1.204; Windows – 1.203
  • Color Efex Pro 4: Mac – 4.002; Windows – 4.002
  • Silver Efex Pro 2: Mac – 2.004; Windows – 2.004
  • Sharpener Pro 3: Mac – 3.008; Windows – 3.008

onOne Software

No major issues, but updates are available. Visit http://www.ononesoftware.com/support/2689/ for more info.

The updates are posted near the top of each page on the following links.

Topaz Labs

There should not be any issues with compatibility with CS6.

For setup, try this....

For Windows:
Please go to your preferences menu in Photoshop and select Plug-ins. Check / enable the Additional Plug-ins Folder option then click Choose. After that, please navigate to: C: \ Program Files and select the Topaz Labs folder. Then click Choose  (or it may say Save / OK) to save this back to Photoshop. Back in Photoshop click OK to save your changes, then restart Photoshop. Once Photoshop opens, go to your Filter menu and you should be able to access Topaz.

For Mac:
Please go to your preferences menu in Photoshop and select Plug-ins. Check / enable the Additional Plug-ins Folder option then click Choose. After that, please navigate to: Macintosh HD -> Library -> Application Support and select the Topaz Labs folder. Then click save / OK to save this back to Photoshop. Back in Photoshop click OK to save your changes, then restart Photoshop. Once Photoshop opens, go to your Filter menu and you should be able to access Topaz.

Alienskin Software

Here’s their reply:

All of our products work great with CS6. The one caveat is that the Bokeh installer doesn't recognize CS6, so you have to show it which folder to install into. We will update that before the end of May.

HDRSoft (Photomatix)

Learn more here:

Photoshop CS6 Printing

Windows had some issues that frustrated me in CS5, but there’s a workaround to help get the best results that Adobe offers for that product. While I still prefer the results I get from CS4 the best, things won’t be changing in Photoshop so it’s probably time to just accept the difference and adjust my workflow for the new print engine.

According to my Adobe contact for CS5, the "right way" to do things for printing in Photoshop is:

  1. Set the correct printer.
  2. Set the color management settings in the PS print dialog
  3. Select "Print Settings" to get the to the driver's print dialog
  4. Verify that the driver color management settings are correct, and correct them if needed
  5. OK.
  6. Double-check the settings in the Photoshop print dialog. The Color Management settings MAY have changed, depending on what changes you made in the driver settings.
  7. If the driver settings were correct in step 6, print and you should be good. If something had changed in 6, it's probably safest to select "Done" in the Photoshop print dialog, and then File > Print a second time. No changes should be needed at this point, but we'll re-send the color settings to the driver and things will definitely work correctly if you "Done" and come into the dialog a second time.

In CS6, steps 6 and 7 should be un-needed, and overall the printing experience should be better.

Imagenomic

No statement or comments made at this time.

Related Articles

Disclosure

If you make a purchase using select links in this article, I may make a commission.

NOTE: This site requires cookies and uses affiliate linking to sites that use cookies.

If you enjoyed this article, please support future articles like this by making a donation or saving money by using my discount coupon codes. Either way, your support is greatly appreciated!

This blog is intended for freelance writing and sharing of opinions and is not a representative of any of the companies whose links are provided on this site.

The opinions provided are of Ron Martinsen alone and do not reflect the view of any other entity

Wednesday, May 16, 2012

Canon 5D Mark III HDR is good, but Photomatix Pro 4.2 is still the king of HDR

HDR Faster and Easier with Photomatix Pro 4.2

I’ll admit that I don’t do a ton of HDR work so tonight when I was checking out the Photomatix web site I was surprised to see a new version of Photomatix Pro available. It’s a free upgrade for existing 4.x users and to my surprise it’s a very worthwhile upgrade!

The image above was processed from start to finish in about 10 minutes from three files taken from the in-camera JPEG of a Canon 5D Mark III. I was using its HDR mode but since it was a little windy, the HDR it generated was a total fail:


Canon 5D Mark III In-Camera HDR with Auto Align Enabled and Natural Effect

The shutter speeds for this bracketed shot were 1/8000, 1/2000 and 1/250 so I was thinking I had the shutter speeds needed to get the shot, but I was wrong. For fun I decided to give the new 4.2 update a shot with the following settings:

Photomatix 4.2 Preprocessing Options

Here’s the images that were sent to Photomatix:

37.8 seconds later it had digested the three files totaling 15.9 megabytes into a single file that already looked better than what I got from Canon. Much of time was spent in the Chromatic aberration correction, so had when turned it off it was only 23 seconds.

Photomatix Pro 4.2 Deep Preset

When I hit process in just a couple seconds I had the processed file:

Photomatix 4.2 Tone Mapping is Fast
Photomatix 4.2 Tone Mapping is fast!

When the tonemapping is done you now have a finishing touch dialog to do your final adjustments which I found to be less confusing than the old way that Photomatix worked. I was quickly able to make adjustments to suit my tastes for the final product at the top of this article.

Compared to Photoshop CS6

Photoshop CS6 Beta More Saturated Preset

Photoshop CS6 has come a long way, and in skillful hands it might get the job done. However, spending the same 10 minutes I spent in Photoshop and using the More Saturated preset with the ghost checkbox on, the shot above was the best I could do.

Photoshop impressed me by having the tone mapping ready to go in only 8 seconds (plus another 2 for checking the ghosting checkbox), and being ready for editing in Photoshop in only 18.3 seconds. However, it had some nasty banding and required a lot of manual work to get the image to not have the Harry Potter effect. I was much happier with Photomatix for the speed at which I could get my results, and had ghosting not been an issue its processing time would have been 7.3 seconds in Photomatix, so the net result is that Photomatix still is a bit faster – with much better default results.

Photoshop CS6 Compatibility

Here’s the compatibility statement for Photomatix with respect to CS6:

Conclusion

This is by far the fastest and easiest version of Photomatix yet, so I highly recommend the free upgrade for existing users (learn more). For people who haven’t purchased it yet, then I’d certainly advise you to take advantage of the in-camera HDR features of the Canon 5D Mark III with the Auto Align feature ALWAYS enabled (even if you are on a tripod) and enable Save Source Imgs so you have the option of using Photomatix later. Canon’s made great headway in what is offered in camera, and Adobe has their best effort yet with CS6, but for now if you are serious about HDR then Photomatix is still the way to go!

NOTE: For D800 users I experimented with the HDR features and found them to be similar, but less to my taste than what I got from the Canon 5D Mark III. As a result, I think your experience will mimic (at best) the Canon vs Photomatix experience. See my D800 review for more info.

Special Offer Promo Code

HDRSoft, the makers of Photomatix HDR tone mapping software have extended an offer to readers of this blog for a 15% discount when you use the coupon code RonMartBlog when you checkout on their web site (see picture above). Don’t forget to click the recalculate button after you enter the code to get the discount.

Technical Note

HDRSoft has brought a matter to my attention that deserves an apology on my behalf. While I can’t recall the source of what made me think this, apparently somewhere I led some readers to believe that Photomatix converts RAWs to JPEGs for internal processing. That is incorrect. Here’s the facts from their web site:

Photomatix does not convert RAWs files to JPEG for internal processing, and never did it. It would not make sense to do this anyway, given that converting to JPEG would result in quality loss and moreover would add processing time.

When you load RAW files in Photomatix, the files are converted in linear space into an uncompressed image with 16 bits per color channel, i.e. 48 bits per pixel.

The only moment Photomatix converts to JPEG is when you want to save the image created by Photomatix and choose to save it as JPEG. This applies to a tonemapped or fused image created by Photomatix, and not to the original image you loaded.

My apologies for the confusion. Others have made the same mistake as me, so I encourage you to consult HDRSoft when in doubt.

I should also note that I was not asked or forced to make this statement. I voluntarily did it upon being presented with the facts. I’m human and while I do my best to share accurate information with you, sometimes I get information from others that is correct (as was the case here) which I pass on to you.

Related Articles

Disclosure

If you make a purchase using select links or discount codes found in this article, I may make a commission. I was also provided with a review copy of this product with no commitments or expectations on behalf of HDRSoft.

NOTE: This site requires cookies and uses affiliate linking to sites that use cookies.

If you enjoyed this article, please support future articles like this by making a donation or saving money by using my discount coupon codes. Either way, your support is greatly appreciated!

This blog is intended for freelance writing and sharing of opinions and is not a representative of any of the companies whose links are provided on this site.

The opinions provided are of Ron Martinsen alone and do not reflect the view of any other entity

Friday, May 11, 2012

Canon 5D Mark III & 1D-X AF Setting Guidebook–READ THIS! (Link Fixed)

AF Setting Guidebook

If you are a Canon 5D Mark III or 1D-X owner, you owe it to yourself to carefully read this guide on the AF system. It is called the AF Setting Guidebook and it will help you to understand the system so you know how to get a very high percentage of in-focus shots.

Even if you never read manuals – READ THIS DOCUMENT!!!!

I know it is written for the 1D-X, but most of the content applies to the 5D Mark III as well, so I can’t stress enough how important it is that you read this document cover to cover. You’ll be rewarded by making most of this super advanced AF system.

UPDATE: Link fixed – sorry – Canon doesn’t allow direct links to the PDF.

Additional Information

Here’s more great content on the Canon DLC:

http://www.learn.usa.canon.com/dlc/tags/eos_1dx_tag/tagItemsListing.spr?sortBy=date_desc&recordLimit=20&currentPage=1

Disclosure

If you make a purchase using links in this article, I may make a commission.

NOTE: This site requires cookies and uses affiliate linking to sites that use cookies.

If you enjoyed this article, please support future articles like this by making a donation or saving money by using my discount coupon codes. Either way, your support is greatly appreciated!

This blog is intended for freelance writing and sharing of opinions and is not a representative of any of the companies whose links are provided on this site.

The opinions provided are of Ron Martinsen alone and do not reflect the view of any other entity

Photographing Kids Workshop


Copyright Gary Parker – All Rights Reserved

Let’s face it, photographing kids can be tough. The little buggers don’t stay still for two seconds, so you have to have all the skills and equipment of a sports photographer to stand a right chance! Or do you?


Copyright Gary Parker – All Rights Reserved

My good friend Gary Parker is a fantastic people photographer because he breaks all the “rules” and just gets great shots – again and again. When I do it, I occasionally get lucky but it sure is hard! Having good equipment helps, but it seems like the stars really need to align to get a great shot.


Copyright Ron Martinsen – All Rights Reserved

Are you tired of the same old boring shots? Would you like to start getting better shots of your kids?


Copyright Ron Martinsen – All Rights Reserved

If so, join me and Gary Parker at our workshop on May 26th where we’ll show you some techniques on how to get great photos of people – including kids. We’ll have both an adult and child model on hand to show you the challenges you face in the real world, but we’ll show you how to persevere to get the great shot!

Click here to learn more about our workshop and sign up for the last couple remaining spots!

NOTE: This site requires cookies and uses affiliate linking to sites that use cookies.

If you enjoyed this article, please support future articles like this by making a donation or saving money by using my discount coupon codes. Either way, your support is greatly appreciated!

This blog is intended for freelance writing and sharing of opinions and is not a representative of any of the companies whose links are provided on this site.

The opinions provided are of Ron Martinsen alone and do not reflect the view of any other entity

Thursday, May 10, 2012

FAIL: Nikon D800 Live View vs Canon 5D Mark III


Canon 5D Mark III, f/13 @ 100mm, 30 sec, ISO 100, Tripod, Mirror Lockup, 30 sec timer
Image shown is cropped and edited, but click to view unedited in-camera JPEG

Cityscape shots are a little tricky because it’s tough to get a good overall image focus. In the shot above, I used my Canon 5D Mark III to dial in focus to get the best focus possible before taking the shot. After focusing, the only variable I couldn’t control was the wind, but for a 30 second exposure the result was okay – not great, but okay. (NOTE: The shot you see above is cropped and edited – click the image to see the out of camera original)

Once I have my settings dialed in, I switch to manual focus and use Live View at its maximum zoom to adjust my focus on items in the foreground and background to get the best balance of focus across the entire image. This is the greatest reason to use Live View in my opinion, so it’s automatic anytime I’m doing any shot that will allow me to use it (typically landscape or other static subject work).

For this to work my camera must be on a tripod and my subject must be static. The scene above of Seattle is a great test, so I took a few shots. While I’m not super happy with any of the shots I took due to wind, one of the huge problems I had during this test when comparing the Canon 5D Mark III against the Nikon D800 was the performance of the Live View on the D800.

Simply put, I found the Live View feature on the D800 to be unusable at maximum zoom under low light conditions like these. When I would zoom in with the Canon I’d get great detail and could easily dial in my focus on a detail like the people in top of the Space Needle. However, when I zoomed in with the Nikon all I could see was noise like you’d see on a old analog color TV. It was horrible and unusable!

Evidence of the D800 Live View Zoom Bug

Now, I know my comment in the last paragraph will infuriate D800 owners and Nikon fanboys, so I created a little video to show what I mean. Let’s start by saying that both cameras were on their default Live View settings and focusing on this piece of tile:

It was low light at night, but there’s some ambient light from three overhead lights. I set both cameras to use a tungsten white balance and zoomed in digitally to the maximum value each camera would allow (which is what I always do when using Live View for focusing).

In the video below the D800 is on the left and the 5D Mark III is on the right:


Play in HD

I find the results of the D800 to be so horrible that I really am starting to wonder if it is a bug worthy of a recall. I can use a Rebel T2i and get better results than the D800, so with Nikon’s claims of video parity and in some cases superiority to Canon’s video support, how can they expect people to use this?

The consequence of this bug meant that despite my best attempts, the best shots I was able to take that evening were these two shots both of which aren’t focused very well. Sadly autofocus didn’t even create an image worth saving:


So much potential lost due to the inability to focus accurately with Live View
Unedited in-camera JPEG D800 f/11 @ 200mm, 30s, ISO 100
Click for original


D800, f/14 @ 112mm, 4s, ISO 100, Unprocessed, AWB
Click for unedited JPEG original

The D800 would clearly be the better camera for this shot with the right lens (and I don’t think the Nikkor 70-200mm f/2.8G ED VR II is the right lens for this one). However, you need to have precision focusing for a shot like this and that was impossible with the D800.

My best shots were done when I focused through the viewfinder with the diopter adjusted to the best view I could get out of the D800. Focusing to infinity and taking a shot in the dark didn’t result in a better shot either as one might expect.

Update

Here’s a few shots I took with my iPhone of the problem while I was at the Space Needle:


D800 Live View

As you can see, it’s hard to do precision focusing with this.


Canon 5D Mark III Live View


The 5D Mark III was much easier to use for seeing detail on the Space Needle and getting a sharp accurate focus.

I should also note that some have tried to raise concerns about my pics due to the wind. To that I say, ignore the output photos and focus on the facts clearly illustrated by these photos here. The LCD has massive noise on the D800 and the 5D Mark III does not. Of the two LCD screens above, which did you think is easier to use to achieve an accurate focus?

Conclusion

If I were a D800 owner, I’d be very mad about this and would use this video (or your own) as evidence to Nikon that they could do better. Hopefully they will in a future update as the D800 has so much potential for landscapes and cityscapes that it would be a shame if they could only be done during good light for the best focusing experience.

Despite what people might think, I actually like Nikon cameras. I like Canon and Fujifilm too! I wrote this article to raise awareness of what I believe to be a bug that limits the usability of the D800, not to bash it. My hope is that Nikon can and will fix this issue to create a Live View feature that is on par with Canon. This is what Nikon owners who have bought this camera deserve, so I hope this article helps make that possible.

There’s a lot to like about the D800, so learn more about how it stacks up in my article entitled COMPARISION: Nikon D800 vs Canon 5D Mark III.

Disclaimer

If you make a purchase using links found in this article, I may make a commission.

NOTE: This site requires cookies and uses affiliate linking to sites that use cookies.

If you enjoyed this article, please support future articles like this by making a donation or saving money by using my discount coupon codes. Either way, your support is greatly appreciated!

This blog is intended for freelance writing and sharing of opinions and is not a representative of any of the companies whose links are provided on this site.

The opinions provided are of Ron Martinsen alone and do not reflect the view of any other entity