Thursday, January 31, 2013

Photo Thoughts: Childhood Happiness

Childhood Happiness by Ron Martinsen (ronmart)) on 500px.com
Childhood Happiness by Ron Martinsen

In 2012 my blog became very focused on product reviews and less about photo editing, so I’d like to change that in 2013. I put photos on my photography notebook and 500px, but I didn’t really focus on the photo editing aspect of this blog that made it popular to begin with. With that in mind, I thought I’d try to start sharing some photos again.

About this photo

This is a photo I took while on a subway train in Seoul, South Korea. It was part of a deliberate series of photos I took with my Canon 1D X using the 24-70mm f/2.8L II lens. I wanted to capture my youngest son’s enthusiasm for life as I hadn’t seen him in over two months (due to his extended visit with his grandparents in Korea).

Here’s the original image created from the RAW with an 8x10 crop and no other processing:

Click for original - Copyright Ron Martinsen - ALL RIGHTS RESERVED
f/2.8 @ 24 mm,1/250, ISO 1000, AWB, No Flash
Original In-Camera Photo with no editing (but cropped)
Click for original – for personal use only – DO NOT REDISTRIBUTE or UPLOAD

I was a great shot of my son’s laughter (and I had plenty of shots to choose from), but my desire to avoid the flash and my shutter speed needed to freeze his animated body meant a high ISO.

How I edited this photo

I started by editing the RAW image in Lightroom 4.3 with the following adjustments:

image

As you can see I started by cropping (which I don’t usually do and typically don’t recommend), then I brightened up the dark exposure. I experimented with some of the camera profiles to get the Canon look that I like, but for this one the nasty lights made the white balance a little gnarly. After some experimentation I decided I’d handle that problem in Photoshop (more on that later). I finished up with the Punch preset which I like a lot but I thought it used too much clarity for this shot so I toned it down a bit.

After Lightroom I send the file to Photoshop for the heavy lifting:

Photoshop CS6 Layers

I started off using Vincent Versace’s white balance action from his book Welcome to Oz 2. With the white balance finally fixed I fixed up some skin blemishes and then took care of the noise problem with Noiseware.

My son is young, but I still wanted a little skin softening so I threw that on there with Portraiture’s default setting. I also wanted to brighten his teeth a bit so I used the Hue/Saturation adjustment layer.

To warm the shot up I used the Skylight Filter from Color Efex Pro then I applied my Tonal Contrast filter with the mid-tones set to 0 and the method set to Fine. Next I added my secret sauce Silver Efex preset and reduced the opacity down to 60% to give it that desaturated look, but I did a Tonal Contrast again with saturation boosted to 49% to give it some color back but to also emphasize the darker look I was going for with the processing.

The dark look begs the question – why dark for a shot of a happy kid? The answer is simple – it’s just a photo editing style that I like and thought felt right with this shot. I could do bright colors, B&W and a variety different styles of editing for this shot but I liked this color newspaper processing style. Some will like it, some will hate it, but that’s the way things go with photography. This shot is for me, not a client, so I get to enjoy doing it in a way that suits me. I encourage you to do the same!

I finished up with some high pass sharpening and masked out the face by ctrl+clicking on the portraiture layer and doing a black fill on my mask. I always do this to avoid sharpening skin that I’ve softened.

When the file got back to Lightroom I made a slight adjustments with the highlights slider to get rid of a hot spot and then I tossed the preset Vignette 2 on it to help hold the viewers attention into the frame and on my son.

Conclusion

This was a quick 20 minute edit of this shot. If I were to stare at it and analyze it I’m sure I’d probably get in there with Viveza and work on some spots and I’d probably experiment with some different color enhancements.

I hope you enjoyed seeing the before and after and hearing the how and why behind the final image. If you want to see more articles like this, then let me know in the comments below.

Other articles you may enjoy

If you enjoyed this article, you may also enjoy the reviews of some of the products featured in the article. Be sure to click the links to see my reviews and learn more. Don’t forget that I have a discount coupon code page where you can get discounts on all of the products used.

You may also enjoy these articles:

Disclosure

If you make a purchase using links found in this article, I may make a commission. It doesn’t cost you a penny more, but it does help to support future articles like this.

NOTE: This site requires cookies and uses affiliate linking to sites that use cookies.

If you enjoyed this article, please support future articles like this by making a donation or saving money by using my discount coupon codes. Either way, your support is greatly appreciated!

This blog is intended for freelance writing and sharing of opinions and is not a representative of any of the companies whose links are provided on this site.

The opinions provided are of Ron Martinsen alone and do not reflect the view of any other entity

Monday, January 28, 2013

Sony DSC-RX100 vs Fujifilm X10 vs Canon s110/G15(Review Part 2 of 2)

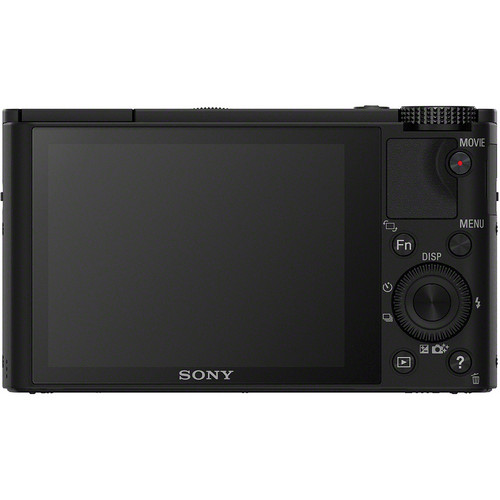
Sony Cyber-Shot DSC-RX100 Rear View

In part 1 of my review of the Sony DSC-RX100 (click to read), I showed lots of real world photos which show off the strengths of this camera. Its compact size and solid image quality make it compelling, but in this article I’ll wrap things up with a discussion about how it compares to some of the competition. In my mind, the cameras that most closely compete with this camera are the Fujifilm x10 (my former point and shoot of the year), the Canon s110 (which offers similar features in a compact package) and the highly touted Canon G15.

Bookshelf Test

Bookshelf images of different ISO’s and additional settings can be found at http://www.ronmartinsen.com/sony/rx100. Be sure to look at the filenames and metadata for details about what is what, and you may download them for your personal review but please delete them when you are done. All images were taken with RAW+JPEG Fine and camera defaults, but I can only upload JPEG so that’s what’s included online. I did disable stabilization for these tests since I was using a tripod and long exposures.

Here’s the base native ISO image (which is 125, not 100 or 200 as you’d find in other cameras):


Sony DSC-RX100 - f/8 @ 10.4 mm,10s, ISO 125, No Flash, AWB

From the in-camera JPEG with zero post-processing, what I see is an image that has excellent color, white balance and tasteful saturation. The image is sharp and overall fairly impressive for the size of its sensor.

For the opposite end of the spectrum, the ISO 6400 image always underexposed no matter what metering mode I was in and even with various ISO modes and both Aperture Priority and Manual (when set to +/-0 EV). Here’s the result:


RX100 f/8 @ 10.4 mm,1/8, ISO 6400, No Flash, AWB

The noise was squashed to oblivion which kills too much detail so overall I felt like this was an unusable ISO. For kicks and giggles I took the same exact image from the RAW file and just accepted the default RAW processing of Lightroom 4.3 (plus I clicked Auto Exposure) and this is what it looked like:


Same as above, but from Lightroom RAW Processing and Auto Exposure

The detail returns but so does the noise, so make no mistake that this is still a tiny sensor point and shoot. Noise is a reality but if you take a less ridiculous noise reduction setting (say Noiseware Default setting) then you have an image that cleans up nice enough to use for small prints and online images as shown here:


Same as above, but Noiseware Default noise reduction applied

DRO vs HDR

I also decided to test DRO vs HDR more carefully to see if my handheld results in the previous article would still hold up. As one might expect, they did but I did also confirm using longer exposures that HDR does in fact take multiple exposures as one would expect. In my previous article I stated I wasn’t sure that it did because the exposures were taken so quickly and so close together that I didn’t hear them. As a result I thought it might have been doing in-camera HDR from a single exposure, but that doesn’t appear to be the case (thankfully).

Here’s the Auto DRO setting which appeared to be the same as the DRO 5 setting done manually:


f/8 @ 10.4 mm,10s, ISO 125, No Flash, AWB, DRO Auto

There wasn’t any major difference in this mode versus the non DRO image, so I was a bit disappointed in the result. However, the HDR was quite nice and Auto seemed to take 3 or 4 exposures (I heard 4 clicks but wasn’t sure if all 4 were exposures) in the HDR Auto & HDR 6EV modes. Here’s the result:


f/8 @ 10.4 mm,10s, ISO 125, No Flash, AWB, HDR Auto

As I saw with the handheld, the alignment was great and the range was very good. It still was less than I am accustomed to getting from the EXR mode of the X10, but it was way better than the s110 HDR mode. If you have the this camera and the time to use, the HDR mode is definitely worthwhile for a great dynamic range with excellent color.

Subjective Comparison

Unfortunately I do not have any direct bookshelf images to compare against RX100 as my methodology for testing is much different now than it was at the time I reviewed the other cameras in this class. I didn’t take cameras in this class seriously in the past so my other bookshelf tests were more informal and not framed and tested to the same standard as I do for mirrorless and DSLR’s now.

With that said, I did test the RX100 using the more advanced methodology so that I can compare it against future cameras and you can compare it with other more expensive cameras that I have reviewed. This should come in handy when I review the X20 and the RX100 replacement in the future (no, I have no idea when or if that will ever happen).

To see the galleries of the other cameras discussed in this review then visit the following hyperlinks:

Based on my subjective opinion, here’s how I am seeing how these cameras compare:

  1. At lower ISO’s, the best overall image quality favors the RX100
  2. It’s my opinion, that the RX100 seems to have the sharpest lens of the bunch
  3. In-camera noise reduction on the RX100 is terrible and gets horrific after ISO 800
  4. The in-camera meter likes to underexpose compared to the others and switching metering modes didn’t help in the bookshelf test. Despite indicating a proper exposure, the ISO6400 shot was very underexposed. None of the other cameras exhibited this issue.
  5. The RX100 and s110 are nearly identical in design, but the s110 is more feature rich and easier to use.
  6. While none of these cameras have great flashes, I preferred the RX100’s flash performance the most.
  7. The RX100 LCD was the hardest to use outdoors, but its battery performance was the best so perhaps that was an intentional trade-off by Sony.
  8. Ease of use wise, I still prefer the Canon G-series (especially the G12) over the RX100
  9. Camera that frustrated me the most in the field – RX100
  10. Camera my wife most enjoyed – X10, but she loved the one hand ease-of-use of the RX100.
  11. Best mixed-light camera (i.e., drastic differences between foreground & background) – Fujifilm EXR mode found on the x10. DRO and even the HDR performance of the RX100 wasn’t even close
  12. Best macro camera – x10
  13. Best pano performance – RX100
  14. Best video – RX100
  15. Best stabilization – RX100
  16. Best in-camera high ISO performance – s110
  17. Best value – s110
  18. Worst value – RX100 (overpriced IMHO for what you get)
  19. If I could only have one – Fujifilm x10 (because of EXR mode)
  20. If advising a friend, I’d still suggest the x10 but if size is an issue I’d say the s110 or RX100

Here’s also some other cameras I’ve reviewed that some may wish to compare against as well (but I don’t consider any of these to be direct competitors):

Conclusion

I like the RX100 and feel like it makes great images. If you do a comparison of the RAW images you’ll quickly find that it has great RAW images that are hampered by fairly poor in-camera processing compared to the other cameras I’ve tested. At low ISO’s it’s not an issue and they are quite good, but as the ISO’s climb the poor in-camera noise reduction really hurts. As a result, my “always keep your raw images” applies more for this camera than any of the others I’ve tested.

I wanted the RX100 to be a small sensor RX1 with a zoom, but it’s not. I wanted it to have NEX-7 like performance and Canon s110 like ease of use – but it doesn’t have that either. Instead what you get is a nice s110 size camera with an excellent lens, great low ISO performance, above average battery life and great video. All of those things make it a compelling camera that I think will satisfy buyers who live in the automatic modes, but anyone who likes control over their camera will find that the RX100 comes up short – very short. Given the high price of this camera, that’s unacceptable, but hopefully enough people will ignore these realities and buy it anyway so that Sony will be encourage to release a new model that hopefully addresses some of my concerns.

If you are a RAW only shooter then you’ll be much more satisfied than if you are someone who likes to use the JPEG whenever possible and the RAW is only a backup (which is my preference for cameras in this class). As a result, all of these little issues and the price have caused me to pass on getting the RX100 (which I had intended to buy before I tested it) and stick with my X10. It looks like my hope for a replacement now will rest on the X20 which I hope to review soon.

Where to order

Click here to order the Sony Cyber-shot DSC-RX100 on the B&H web site. My friends at Adorama have it available here and Amazon has it available here.

Other articles you may enjoy

If you enjoyed this article, you may also enjoy these:

Disclosure

If you make a purchase using links found in this article, I may make a commission. It doesn’t cost you a penny more, but it does help to support future articles like this. B&H loaned me the camera I used for this review.

NOTE: This site requires cookies and uses affiliate linking to sites that use cookies.

If you enjoyed this article, please support future articles like this by making a donation or saving money by using my discount coupon codes. Either way, your support is greatly appreciated!

This blog is intended for freelance writing and sharing of opinions and is not a representative of any of the companies whose links are provided on this site.

The opinions provided are of Ron Martinsen alone and do not reflect the view of any other entity

Friday, January 25, 2013

REVIEW: Storytellers by Jerod Foster

Storytellers: A Photographer's Guide to Developing Themes and Creating Stories with Pictures

Storytellers: A Photographer's Guide to Developing Themes and Creating Stories with Pictures by Jerod Foster is a book that grabbed my attention from the second I saw the cover. I thought oh, this is going to be a great book! I couldn’t wait to read it, but my busy schedule didn’t allow it until I took a long flight to Asia for vacation this past November. I had a stack of books with my for my long flight, but I started with this one first.

About 10 pages in I started to realize this might not be the book I thought it was going to be. About 20 pages in I started to get sleepy. About 30 pages in I was drooling on the book and hitting my head on the seat in front of me as I struggled to stay awake. After a short nap, I resumed reading and remained disappointed (and napped a few more times) until I got to the end.

What I discovered was that this book wasn’t the book that would teach me more about how to tell better stories with my photographs, but rather a book by a Texan telling stories about his  photographs. His photos weren’t the story – his words about them (sometimes seemingly unrelated to the photo) were the real story.

Most of my family is from Texas so I felt like I was sitting down with a cousin while he was telling me about his photo rather than the photo speaking for itself. I think the intent of the author was to teach, but I didn’t feel that his attempt was effective.

Conclusion

This book was not what I was expecting. The cover photo is great, but much of what follows are dull and uninspiring photos from Texas that don’t really tell much of a story at all. There’s an ineffective attempt at real education on how to tell a story with a photo via the exercises and discussions of themes, colors, gesture, etc… that don’t really work (and yes, I tried the exercises after getting to my destination).

Believe the bad reviews on Amazon – this book fails to inspire or accomplish its objective. If you really think you need to read this book (like I once did), then go for it but don’t say I didn’t warn you.

As an author of three books myself, I know how hard it is to write a book. You put your heart and soul in it, so it’s painful for me to say that my advice is NOT RECOMMENDED. However, this blog is based on telling it like it is, so that’s the advice I’d give a friend so I have to do the same for my readers.

Where to order

Click here to order Storytellers: A Photographer's Guide to Developing Themes and Creating Stories with Pictures by Jerod Foster from Amazon in print or Kindle format.

Other articles you may enjoy

If you enjoyed this article, you may also enjoy these:

Disclosure

If you make a purchase using links found in this article, I may make a commission. It doesn’t cost you a penny more, but it does help to support future articles like this.

NOTE: This site requires cookies and uses affiliate linking to sites that use cookies.

If you enjoyed this article, please support future articles like this by making a donation or saving money by using my discount coupon codes. Either way, your support is greatly appreciated!

This blog is intended for freelance writing and sharing of opinions and is not a representative of any of the companies whose links are provided on this site.

The opinions provided are of Ron Martinsen alone and do not reflect the view of any other entity

Wednesday, January 23, 2013

REVIEW: Sony DSC-RX100 with Real World Sample Photos (Part 1 of 2)

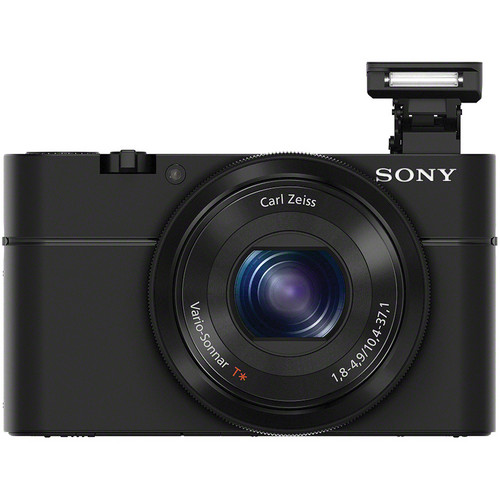
Sony Cyber-shot DSC-RX100

When I reviewed the Sony RX1 I was thrilled with the image quality, but very disappointed with the fixed lens. I loved the Sony NEX-7, but interchangeable lenses on a compact camera isn’t my thing. This made me extremely eager to test out the RX100 because I hoped its smaller sensor sibling would finally dethrone my Fujifilm X10 as my personal point and shoot camera.

Since my wife is the primary point and shoot user in our house, I decided to let her spend a couple weeks with this camera before I put my hands on it. She uses her iPhone for most candid snaps and the X10 for her important shots, so I wondered what she would do with the RX100 in her purse along side her favorites.

She was attracted to this camera due to its nice compact size and her favorite feature over the X10 was that she could operate it complete using one hand (including power on/off) – something all busy moms are sure to appreciate.

Ease of use was important, but would it be enough to win her over? Would this camera finally dethrone the X10? Read on to find out.

Real World Sample Images


f/5 @ 10.4 mm,1/13, ISO 3200, No Flash, Shade WB
Aperture Priority & Single AF Point Handheld

I’m going to cut to the chase and let the photos taken with this camera speak for itself. You be the judge as to the quality of these images taken the way REAL PEOPLE use this caliber camera. These aren’t studio shots, they aren’t pre-planned, and many aren’t even taken by me – they are taken by my wife who captures the adventures of our son and everyday life.

All of these photos are in-camera JPEG’s – yes, JPEG’s because I’m testing the camera – not the sensor. I can tell you that I do keep the RAW’s wherever possible (not all features allow for RAW) and that unlike most cameras these days I’m not crazy about the in-camera JPEG processing of the RX100. That’s a shame too because it’s the JPEG preview that you see on the camera, and despite what the pixel peepers say – it’s actually what many buyers of this class of camera actually use.

With zero instructions from me, my wife gravitated to the Intelligent Auto mode as I suspect she was searching for something similar to the EXR mode on the X10. She tried SCN (Scene) mode, but it wasn’t as intuitive to her as the X10, so she avoided it. She didn’t discover the Pano mode, but she liked it once she saw it (she uses pano on the X10 occasionally).

All images are exactly as they came out of the camera. They’ve been imported into Lightroom 4.3, keywords added, and then exported using the Original option. All originals may be download for PERSONAL USE ONLY. You must delete them after reviewing them. You may not edit or reuse any images for any purposes or reason – including non-profit – without a hand signed license agreement by me personally. Of course, these are real world shots so few are worth stealing – ha, ha. ;-)

The full gallery of images is at http://www.ronmartinsen.com/sony/rx100. It should be noted that there are many duplicates in the gallery because those are where I used the in-camera HDR or DRO features, so the first is with that feature off and the second is with the feature applied.


Pleasantly saturated yet very accurate color in-camera
f/1.8 @ 10.4 mm,1/250, ISO 500, No Flash


Very good dynamic range, but still small sensor quality
f/1.8 @ 10.4 mm,1/25, ISO 3200, No Flash


Intelligent Auto just worked for this whereas the EOS M failed miserably!
(see the only
usable EOS M shots here taken at the same exact time)
f/1.8 @ 10.4 mm,1/250, ISO 3200, No Flash (flash intentionally disabled)


Rapid moving Octopus shot through glass in crappy light – no problem for Intelligent Auto (IA)!
f/1.8 @ 10.4 mm,1/100, ISO 3200, No Flash


As might be expected, moving white birds gave IA fits,
but it did better than any camera I’ve ever owned in a scenario like this
f/5.6 @ 10.4 mm,1/160, ISO 125, No Flash


In the “hurry up and turn on the camera to get a shot of the rambunctious toddler” scenarios,
it got about 3 out every 10 bang on – that’s impressive for a point and shoot
This success rate made my wife grab for it more than the iPhone
f/1.8 @ 10.4 mm,1/200, ISO 800, No Flash


Being silly at the dinner table? Auto everything did okay
f/1.8 @ 10.4 mm,1/8, ISO 800, No Flash (flash disabled intentionally)


Flowers in Tungsten via SCN Landscape Mode – Sweet!
f/1.8 @ 10.4 mm,1/30, ISO 160, No Flash


With only a far away kitchen sink light on, I just snapped this to see what this camera could do
I was impressed that it came out so nice and stable as my hand was really in an awkward
position. Its stabilization is excellent and phenomenal with video!
f/1.8 @ 10.4 mm,1/13, ISO 800, No Flash

Mouse over to see before, mouse out to see after
In IE, Safari & Firefox the mouse in and out images are identical, but in Lightroom, Chrome you see a washed out gradient for the in-camera image (mouse out) and a bright red (should be orange) image for the RAW conversion in Lightroom (mouse over)
Lightroom and Chrome are accurate.
f/1.8 @ 10.4 mm,1/250, ISO 1000


f/3.5 @ 10.4 mm,1/100, ISO 125, No Flash
In the “honey take a picture of my meal” test the auto AF frustrated
but switching to single point could easily fix that. Otherwise it rocked.


If you don’t take it out of auto modes, this camera loves f/1.8 (too much)
That said, it’s not bad for a handheld shot
Chrome the color is very accurate with reality whereas all other browsers oversaturate
f/1.8 @ 10.4 mm,1/30, ISO 125, No Flash


I can’t wait to edit this one, but the in-camera was very accurate to what my eyes saw
f/3.2 @ 10.4 mm,1/100, ISO 125, No Flash


The Zeiss lens is excellent
f/5.6 @ 10.4 mm,1/500, ISO 125, No Flash


Great for a point and shoot, but the tiny sensor shows its weakness here
Those tiny things poking through the clouds are Seattle skyscrapers!
f/5.6 @ 37.1 mm,1/320, ISO 125, No Flash (A mode)


In-camera Pano Mode

HDR & DRO Mode

The Sony Dynamic Range Optimization (DRO) mode is much discussed on the web but it most closely resembles Fujifilm EXR in terms of performance. I still think EXR has the edge, but DRO was better than nothing. Even still, I found the in-camera HDR feature to outperform DRO to my eyes. The big difference though is that DRO will work when RAW format is active, but HDR only works with JPEG only mode.

DRO supports Auto and 5 manually chosen levels whereas HDR has Auto and 6EV levels. I laugh a bit at the EV levels for the HDR as it doesn’t feel like it’s doing real HDR since the camera seemingly takes one exposure and then manually creates the final image in-camera. For HDR a non-processed image is retained followed by a processed HDR. My samples gallery contains a bunch of examples and the HDR images are identified as being the brighter images.

Here’s a real world example in a touch scene:


No HDR


HDR 6EV does a decent job with what seems to be a single-exposure image

The windows is where you see the biggest difference and the improvement is worth using this feature, but if I did a 6EV by hand or with a DSLR, you’d not have overblown windows like you see here so this setting is a joke. Usable yes, but 6EV – not!

Video

I’m not a video shooter, and much of what we do with this class of camera is so bad I can’t bear to share it. However, I did toss one short video in its native MTS file format with all default settings for movie mode up on my samples site. It’s 59.5MB and it really shows how solid the stabilization is since I’m hand holding the shot and rotating on an uneven surface.

NOTE: The offline original is better than the online version I’ve shared. It’s much smoother with less compression.

The Wife Verdict

My wife loved using this camera and found herself taking a lot more images with it because of its one hand operation. She never really got used to the features and missed both the EXR mode and the exposure compensation dial (which we call the make it brighter/darker knob at home <g>) on her x10.

If this were a $300 camera we’d probably keep it, but at $648 (at the time this was written) it’s definitely going back to B&H in favor of the x10. It’s compact size doesn’t make up for the performance and features of her x10, and the benefits just don’t justify the price – for her.

Compared to Other Compact Cameras

Click here to see my comparison of the RX100 to the Fujifilm X10 and Canon s110/G15.

As common sense dictates, cameras like the RX1, XPro-1, etc… destroy it in image quality. However, if you are only printing 4x6 prints (but it can easily do 16x24”) and sharing your images on Facebook (etc…) with small images like I have here then this is all the camera you need for that output format.

Conclusion

See part 2 for my final thoughts.

Where to order

Click here to order the Sony Cyber-shot DSC-RX100 on the B&H web site.

Other articles you may enjoy

If you enjoyed this article, you may also enjoy these:

Disclosure

If you make a purchase using links found in this article, I may make a commission. It doesn’t cost you a penny more, but it does help to support future articles like this. B&H loaned me the camera I used for this review.

NOTE: This site requires cookies and uses affiliate linking to sites that use cookies.

If you enjoyed this article, please support future articles like this by making a donation or saving money by using my discount coupon codes. Either way, your support is greatly appreciated!

This blog is intended for freelance writing and sharing of opinions and is not a representative of any of the companies whose links are provided on this site.

The opinions provided are of Ron Martinsen alone and do not reflect the view of any other entity

Tuesday, January 22, 2013

REVIEW: From Oz to Kansas: Almost Every Black and White Conversion Technique Known to Man by Vincent Versace

From Oz to Kansas: Almost Every Black and White Conversion Technique Known to Man by Vincent Versace is a book that at first made me say WTF?!!! Why on Earth would I give a crap about all the B&W conversion techniques when I’ve got Silver Efex Pro? I LOVE Silver Efex and it gives me exactly what I want. Done. End of Story. Or is it?

Copyright © Vincent Versace – ALL Rights Reserved

I didn’t really “get” Welcome to Oz the first time I read it, but over time I found myself referring people to chapters of the book. When I read  Welcome to Oz 2 the light bulb went off and I came to appreciate the message behind Versace’s book. I had gotten a little lost in the details and the banter, but hidden in the book was a message that has changed how I work. Given my respect for that book and his work (see above and his website), I decided to snuggle up with From Oz to Kansas and see if I could be enlightened.  

Conclusion

Gary Parker by Ron Martinsen - ALL RIGHTS RESERVED
Apply what you learn in this book to your Duotone and even your color images

I’m a computer programmer by trade and reading this book reminded me of a lesson I learned in 1992 as a programmer:

Sometimes you have to read the “why” behind what you do even when it doesn’t make sense at first. It may seem pointless and a waste of time, but there will come a day when knowing why will help things click. When that happens you’ll be on a whole new level and amazing things will happen.

Reading this book helped me to make more sense of the controls I use in Silver Efex Pro and B&W Effects. It helped me to think differently about how I tackle my B&W images. It also gave me another series of tools I can use to solve my B&W conversion challenges. All this is goodness, and it’s why I think you should give a crap about this book.

If Black & White photography is important to you AND you are an experienced Photoshop user, then I recommend that you read this book.

Click here to order your print or Kindle copy today.

Special Offer

Silver Efex Pro 2

To get a discount just click here, add it to your cart, then enter the code (see my discount coupon code page for updates if this doesn’t work). If you did everything correctly you should see the correct price. My code also works for other versions – not just upgrades, so save on most Nik Software products when you use this code!

Prices subject to change without notice. I will get a commission and you’ll get a discount if you purchase using my code, so help us both by using the code!

NOTE: If any other codes are listed please choose REMOVE and enter mine as it’s the best deal you can get for this product!

Other articles you may enjoy

If you enjoyed this article, you may also enjoy these:

Disclosure

If you make a purchase using links found in this article, I may make a commission. It doesn’t cost you a penny more, but it does help to support future articles like this. I was also provided a review copy of this and other books by this publisher so I can bring you articles like this.

NOTE: This site requires cookies and uses affiliate linking to sites that use cookies.

If you enjoyed this article, please support future articles like this by making a donation or saving money by using my discount coupon codes. Either way, your support is greatly appreciated!

This blog is intended for freelance writing and sharing of opinions and is not a representative of any of the companies whose links are provided on this site.

The opinions provided are of Ron Martinsen alone and do not reflect the view of any other entity

Thursday, January 17, 2013

Nikon D5200 Now Shipping for only $896.95

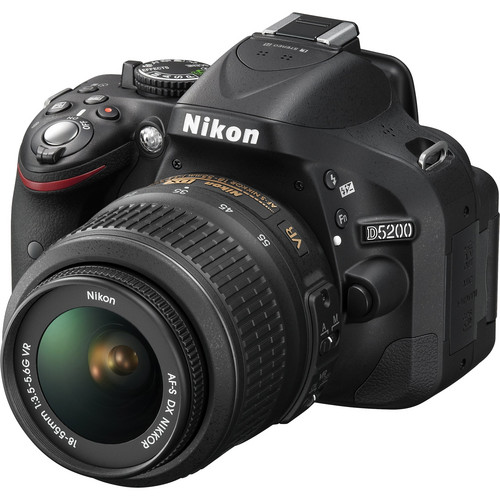
Nikon D5200 Digital SLR Camera with 18-55mm Lens (Black)

Nikon D5200 Digital SLR Camera with 18-55mm Lens is now available in Black at Adorama and B&H. With all of the good things I saw with the D600, I have high hopes for this as a nice entry level offering from Nikon.

Learn more about this cool new camera here:

Nikon D5200 Rear Pivoting LCD (Shown in Red)

Disclosure

If you make a purchase using links found in this article, I may make a commission.

NOTE: This site requires cookies and uses affiliate linking to sites that use cookies.

If you enjoyed this article, please support future articles like this by making a donation or saving money by using my discount coupon codes. Either way, your support is greatly appreciated!

This blog is intended for freelance writing and sharing of opinions and is not a representative of any of the companies whose links are provided on this site.

The opinions provided are of Ron Martinsen alone and do not reflect the view of any other entity

Monday, January 14, 2013

REVIEW: Canon EOS M–Taking the Fun Out of Photography


Canon EOS M with 70-200mm f/2.8L IS II USM
Yeah, you’ve got to do this at least once ;-)

Let me just say up front that if you are looking for an article that makes you feel good about wanting an EOS M then you’ve come to the wrong place. While I enjoy reviewing cameras, there’s no camera that I’ve wanted to return faster than this one because I disliked it so much (well, the Nikon 1 V1 was close and previously held that title).

Why I Hate This Camera (Skip this if you don’t care why)

The reason why I hated this camera is because I’m just don’t get who the target audience really is for this camera. In the world I live in I see the need for one to three cameras for most people with the following logic:

  • Cell Phone Camera – This is the camera that’s always with you and hopefully is one that doesn’t suck. For me it’s the iPhone 5 and it gets the shots that are just for me to share with my friends on Facebook and to capture a moment that would otherwise be lost without it (like where my car is parked at the airport – ha, ha). Cell phones like the Nokia 920 even rival the higher end compact cameras! For many people, this is the only camera they really need – but not you if you are reading this.
  • Compact Cameras – This is the camera that you whip out when your cell phone just won’t do, but you don’t want the hassle of the DSLR. You get this camera because you want more control than your cell phone gives you (you know, like being able to control the depth of field, shutter speed to avoid blur or ISO to kill the noise when you can keep your camera stable, etc…). These days these cameras are getting so good that many rival lower end DSLR’s, and some are so fun to use that even photography enthusiasts can enjoy a creative outlet in a compact package. With great cameras like the X20 and RX100 this may be all “real photographers” who shoot for a hobby really need.
  • Interchangeable Lens Cameras – This is for the serious enthusiast or part-time semi-pro photographer who is willing to make a serious investment in their photography to match the right lens to the scene. This is the buyer who wants the best and is willing to pay for it. Now for some the appeal of the micro-four thirds meets their needs and for others it’s a full-blown DSLR. However, for both camps I argue that this is the person who wants full creative control over their shots and wants quick access to the change the focus point, shutter speed, aperture, and ISO as needed.

Of course there’s other categories of cameras and pro shooters have a need for multiple interchangeable lens cameras, but the point is that for much of the photography enthusiast world this pretty much covers what most people will need or want.

Now at first glance one might think that the EOS M falls into the third category since it has a large APS-C sensor like you’d find on a 60D, interchangeable lenses and even a hot shoe. However, this camera fails miserably in the all-important “quick access” feature that I think is critical to serious photography.

The fatal flaw of the EOS M is that it is going for the minimalistic approach of the cell phone camera with serious features buried behind nested touch screen menus. It’s clear from the design this camera is designed for the picture taker (I can’t say photographer) who finds a cell phone about as difficult as they can handle, but they long to look like their friends with DSLR’s.

Now I’m not saying these are stupid people because you have to be well off to afford this nearly $800 camera plus the additional lenses and accessories (like a flash which isn’t included), but it seems that Canon is targeting this to someone who finds a Sony NEX-7 to be just too complex to use.

Despite the strengths of this camera, I just don’t see the point of a camera that has been dumbed down even more than a s110, yet it has no built-in flash and it requires you to read the manual (which many DSLR owners fail to do) just to get out of the cell phone-like automatic modes. Perhaps, if you are an amateur videographer you might find some value in this camera, but even then I’d argue that you’d want more control and features than this camera offers.

What I Do Like About this Camera


f/4 @ 28 mm (24-105mm), 1/320, ISO 100, AWB
Unprocessed In-Camera JPEG – Standard Picture Style

Okay, so now that I got that off my chest I can focus on what’s good about this camera. In practice I found this camera to be very much like a T4i in a nearly touch only body with what seemed to be better ISO performance and dynamic range. This is a good thing, especially with the must have EF/EF-S lens adapter as it means you can get some great shots if you work hard enough at it.

A Real World Lens Comparison

In my sample gallery I have bookshelf shots for those who want to pixel peep three of the lenses I tested with, but here’s a quick real world practical test that illustrates similar behavior I found with other frames. These shots were chosen not to send a religious message but simply because they were good examples under challenging conditions and are similar to high ISO shots of this same subject used in other reviews.


f/2.8 @ 22 mm (kit lens), 1/40, ISO 800
Lack of stabilization and sharpness
made me quickly avoid the 22mm lens

In my testing I found that the included 22m kit lens was disappointing (sample shown above), but the optically darker but stabilized 18-55mm zoom lens was much more practical in everyday use. Here’s an example of the same shot above with the :


The EF-M 18-55mm f/3.5-5.6 IS STM Lens performed well for a $299 lens
f/4 @ 26 mm (18-55mm), 1/50, ISO 1600, AWB, No Flash

If you have an investment in EF or EF-S lenses, then the EF/EF-S lens adapter is a must as you can use the best lenses Canon makes to get great results. The downside is that the improved AF performance (and IS when applicable) comes at a cost of draining the battery very quickly. Here’s a sample using my old EF 24-105mm f/4L IS with the adapter which offers edge to edge sharpness improvement at a cost of $799 more for the lens plus another $200 for the adapter:


My EF 24-105mm f/4L IS (with adapter) had better edge sharpness, but it cost $700 more!
f/4 @ 24 mm (
24-105mm), 1/40, ISO 1600, AWB

If you are going to get this camera your takeaway should be to get the adapter if you own existing  Canon lenses, but if you don’t you’ll find the 18-55mm to be a good starter lens in terms of both size and performance (and especially battery life).

Good Lenses + Patience = Sometimes Good Results


When mastered, the EOS M can produce excellent results even with EF-M lenses
f/5.6 @ 44 mm (18-55mm), 1/80, ISO 640, No Flash, AWB
Click for original in-camera JPEG

If you are prepared to read the manual for this camera and learn how to use it properly, it will reward you when you match it to the right lens. It’s also quiet handy to point on the touch screen LCD to quickly pick your AF point (like the T4i offers), but you must be careful as grabbing this small camera body can also result in accidentally relocating the AF point – A LOT.

Bookshelf Test


Bookshelf Testing did include the 70-200mm

If you are frequent reader and are looking for my bookshelf test shots, you can find an assortment with three lenses at http://www.ronmartinsen.com/canon/eosm/e52365dee. As usual for non DSLR’s these are all in-camera JPEG’s all shot the same way. Touch to focus made it hard to get the same level of accuracy as I get with my other cameras tested, and it seemed easy for the meter to want to over expose by 1 stop.

image
In the center the smaller lenses perform well, but it’s at the edges where the expensive lenses show their value. Even at up to 55mm the EF-M lenses were only super sharp in the center.


Using the 70-200mm, here’s the best I got out of this sensor (but it was 1 stop over exposed)
f/5.6 @ 100 mm, 10s, ISO 100, No Flash, Manual Mode, AWB


Using the 70-200mm, here’s the best of the worst ISO 12,800
You MUST view at full size to see compare details
f/5.6 @ 100 mm, 1/13, ISO 12800

Overall I felt that ISO performance up to ISO 1600 was excellent, but even 3200 was good. 6400 under the right conditions was tolerable and 12,800 was usable but not suitable for printing above 4x6 prints.

For those wondering about RAW’s, see my other articles as to why I don’t include them. Yes, I do have the RAW’s and will make them available on demand for personal use only if you give me a free location to drop them. However, the delta of difference is the same in the RAW’s vs JPEG’s.

Video

I’m no videographer, but overall I found that with a good lens and decent light the video quality was very good. This is no camcorder though so expect DSLR like performance. The STM lenses do allow for near silent zooming and auto focus and the built-in audio was on par with DSLR’s.

Real World Sample Shots

Click here to see my full gallery of real world sample shots. These are the in-camera JPEG’s with zero post processing. With exception of the bookcase shots, all were taken handheld and where possible in the automatic modes to test the camera – not the photographer.

Be sure to look at the filenames to see which lens was used. Blurry or focus miss shots were included to point out shortcomings of focusing by touch or using the auto modes.


Bokeh freaks – yes, it’s possible – even here where I was riding at 70mph on a rough road <g>
f/4 @ 58 mm (24-105mm), 1/500, ISO 100, AWB, No Flash


The large APS-C sensor means you can control the depth of field very well
f/5 @ 37 mm (18-55mm), 1/30, ISO 6400, AWB, No Flash


I was impressed with the dynamic range and detail in the images
f/4.5 @ 28mm (18-55mm), 1/50, ISO 250, No Flash, AWB


High ISO performance was good, and seemed superior to the T4i, 60D and 7D
f/4 @ 105mm (24-105mm), 1/50, ISO 6400, AWB, No Flash


This doesn’t appear to be a lame G1X with interchange lenses as color depth seems to be better
f/5 @ 42mm (18-55mm), 1/80, ISO 160, No Flash, AWB


At times like this, I wanted to like this camera
f/4 @ 18mm (18-55mm), 1/30, ISO 3200, No Flash, AWB


Despite its size, this is no point and shoot. Just like a DSLR can burn you, so will this camera.
Sadly, I found it’s slow AF – even with good lenses to be problematic.
Unless you went to Manual mode, I found moving people to be impossible in all AF modes

Mouse over to see before, mouse out to see after
External flash is required, yet painfully difficult to use in all but 0EV ETTL
f/4 @ 25mm (18-55mm), 1/60, ISO 1600,
600EX-RT Flash
Mouse over to see the ISO 4000 no flash version

Mouse over to see before, mouse out to see after
I preferred the Shade White Balance over Vivid Mode (mouse over)
f/4 @ 45 mm (24-105mm), 1/80, ISO 160, No Flash

Conclusion

Putting a 24-105mm lens and a 600EX-RT on this body just feels stupid, and its touch screen makes it so easy to accidentally reposition the focus point that it becomes a real challenge to use this camera. This coupled with the reality that you have to go on a mission to change many camera settings made this a very unenjoyable camera to use, despite it’s decent image quality. This means you are then forced to either live without a flash or use the lame and bulky 90EX Flash and a EOS-M lens which would probably be bashed if that caliber lens were sold for a real DSLR.

In the end, I’d rather have a Sony NEX-7 which offers a built-in flash and superior physical controls as well as almost all of the benefits of the EOS M. I applaud Canon for trying to compete in the new interchangeable lens compact camera segment, but honestly this is almost as bad as the abysmal Nikon 1 V1. Canon and Nikon are the kings of the DSLR’s, but it seems that the small camera makers (i.e., Fujifilm, Panasonic, Sony and Olympus) still own this space.

If you are a parent or pet owner, I DO NOT recommend that you get this camera. It will frustrate you to no end as its too cumbersome to set the camera to the settings you need to get the shot (and even if you do, many settings are lost when the power goes off automatically). The touch to focus is also impossible for a child and the shutter lag makes the face tracking nearly useless (see the blurry photos at Tokyo Steakhouse in my gallery).

Where To Buy

If you are a die hard Canon person who has just gotta have one of these, and you appreciated my honesty then please support this blog by using my links when ordering. Empty your cart and click the links below to give me credit for your referral:
Other articles you might enjoy…

Disclosure

B&H loaned this camera and two lenses to me for the purpose of this review. If you make a purchase using links found in this article, I may make a commission.

NOTE: This site requires cookies and uses affiliate linking to sites that use cookies.

If you enjoyed this article, please support future articles like this by making a donation or saving money by using my discount coupon codes. Either way, your support is greatly appreciated!

This blog is intended for freelance writing and sharing of opinions and is not a representative of any of the companies whose links are provided on this site.

The opinions provided are of Ron Martinsen alone and do not reflect the view of any other entity