Tuesday, June 30, 2015

REVIEW: Olympus OM-D E-M5 Mark II with 12-40mm f/2.8 PRO Lens– Can it compete with Sony and Fujifilm? (PART II of II)

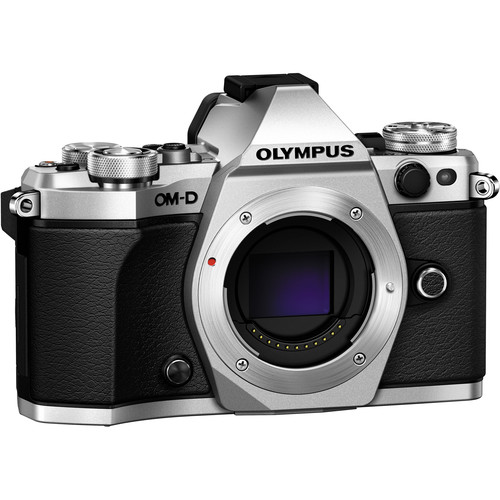
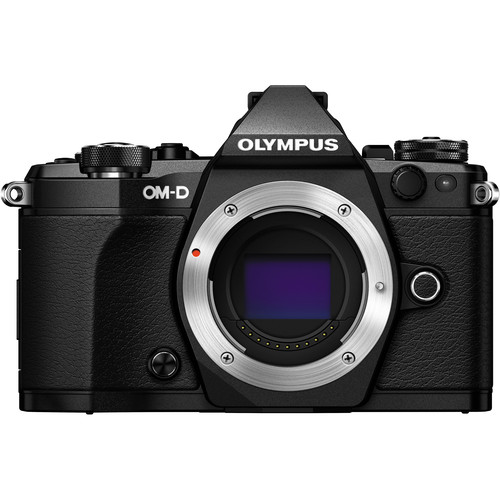
Olympus OM-D E-M5 Mark II

In the first part of my review entitled, Olympus OM-D E-M5 Mark II with 12-40mm f/2.8 PRO Lens–Crazy Sharp with Vibrant Colors, I couldn’t help but share my excitement for what this camera does well. Make no mistake that it takes great pictures in good light and the 12-40mm lens is sure to please even the most picky users.

In the hands this camera feels like it should be held by someone driving a Rolls Royce and wearing a made to measure Gucci suit – it screams quality. When you dig deep into the features you start noticing cool things like shutter speeds beyond the typical 30 seconds max found on other models (it goes to 60 seconds) and 1/8000 sec shutter speed. This combined with an overwhelming array of options make it a true photographers camera.

With that said, there’s still lots of modern features like a excellent face detection system, HDR, scene modes and more all controlled via a responsive touch screen. Indeed, on paper and at first glance it seems like a dream camera.

Bookshelf


f/4 @ 12mm for 2 sec at ISO 200

From my testing it was clear that f/4 at 12mm was the sweet spot of this lens. Given the right conditions the image sharpness, even RAW,  was often very good.


f/5.6 @ 24mm for 3.2 sec at ISO 200

High Resolution Mode

The high resolution mode seemed to offer marginally better results.

High ISO Performance


f/5.6 @ 24mm for 1.25 sec at ISO 1600

The bookshelf test really brings out the shortcomings of the higher ISO performance of this camera. If I take a 100% crop from the shot above you’ll see that the text “Your Seven”, the detail in the pages of the book and the leather texture all get obliterated. This is due to poor in-camera noise reduction which can be improved using Noiseware.

image
100% Crop of the shot above at f/5.6 @ 24mm for 1.25 sec at ISO 1600

Before the conspiracy theorist and fan boys crucify me, here’s the same spot taken from the RAW:

image
100% Crop of the original RAW of the shot taken at f/5.6 @ 24mm for 1.25 sec at ISO 1600

The detail comes back but noise is extreme at this low ISO in the world we live in now. As a result, I’ve got to say that in most scenarios ISO 800 to 1600 going to be the maximum I could tolerate with this camera. This is very disappointing for a camera that allows for up to 25,600.

Click here for a full gallery of bookshelf shots at various apertures and shutter speeds. Use the captions or the info panel for more details about each shot.

HDR

This camera features easy HDR access from a button on top of the camera body. Using it you can easily take a dark scene like this:


f/5.6 @ 19mm for 1/80 sec at ISO 200

and completely ruin it as shown below. While the image definitely a much wider dynamic range, the in-camera results often felt fake.


f/5.6 @ 19mm for 1/40 sec at ISO 200

Here’s a scene where the dynamic range of this sensor just couldn’t deal with the dark building:


f/11 @ 17mm for 1/200 sec at ISO 200

The in-camera HDR feature brings back the detail lost in the shadows at the expense of killing the life out of the plants.


f/10 @ 17mm for 1/250 sec at ISO 200

In this last shot you can see a lot of contrast in the image but details lost I shadows of the people under the umbrellas:


f/3.5 @ 31mm for 1/640 sec at ISO 200

Once again the HDR feature does a good job of balancing the scene but the colors feel too flat for my taste in the shot below:


f/3.5 @ 31mm for 1/640 sec at ISO 200

The cool thing about this camera is that if you shoot RAW+JPEG you’ll get processed HDR’s as shown above, but you’ll also get three RAW files that comprised that HDR exposure. This gives you a chance to try again in Photomatix to get better HDR results.

More Real World Samples

The following images come straight from in-camera JPEG’s using the camera default noise reduction settings. Most camera settings are the default with the exception of RAW+JPEG, a desired White Balance (only Shade or AWB), and a desired focus point.  The i-Enhance Picture Mode was used for most of these photos.

Click here for a full gallery of unedited images.

All images are copyright Ron Martinsen – ALL RIGHTS RESERVED. You may not save, print, edit, modify or otherwise use any images featured in this article or the gallery without expressed written permission.


f/4 @ 19mm for 1/160 sec at ISO 200

This was pretty much my reaction when I got my hands on the OMD-M5 Mark II, but…


f/4 @ 24mm for 1/200 sec at ISO 200

My wife was done with it on day one when every shot she took of my son catching his first fish came out blurry. Face detection failed big time in these conditions for reasons I don’t quite understand.


f/11 @ 29mm for 1/13 sec at ISO 1600

Image stabilization is quite good so it came in handy on this hike without any support


f/2.8 @ 24mm for 1/80 sec at ISO 200

Manual focusing using focus peeking can yield exception results on static subjects


f/2.8 @ 32mm for 1/60 sec at ISO 1250

If your subject is grainy with lots of texture then the high noise found in this camera won’t be as distracting as it is with people and objects.


f/3.5 @ 40mm for 1/2500 sec at ISO 200

Like many cameras, this one struggles a bit with reds


f/4 @ 38mm for 1/1250 sec at ISO 200

While most of the shots in the burst came out blurry, it usually would get at least one or two in focus when face detection was turned off.


f/5.6 @ 40mm for 1/100 sec at ISO 800

I was amazed that the colors in this shot on the screen were an identical match to what I saw in real life. If color accuracy is what you desire, then this might be the right camera for you.


f/5 @ 40mm for 1/1250 sec at ISO 200

This camera is most impressive when photographing scenes with lots of textures


f/4 @ 38mm for 1/1600 sec at ISO 200 –1/3 EV

I don’t like to take pictures of other peoples art, but I took this one when I was checking out something with this camera. I was so impressed with how it made this wall painting look so much better than it was in real life that I had to keep looking at the sign to remind me that this was a building!


f/4.5 @ 40mm for 1/2000 sec at ISO 200

I wasn’t able to have as much luck photographing bees with this camera as I did with its predecessor. Camera start time definitely contributed to me missing plenty of opportunities.


f/4 @ 17mm for 1/160 sec at ISO 200

If you just shoot flowers and landscapes, then this camera will reward you for your patience


f/2.8 @ 26mm for 1/125 sec at ISO 200

If your goal is to photograph kids then look elsewhere as the wide variety of shooting and stabilization settings still never resulted in the kind of performance you’d see on a Nikon D7200


f/2.8 @ 12mm for 1/1600 sec at ISO 200

Overall the metering felt improved from the previous version, but it still had plenty of scenarios like this where other brands do a much better job of detecting and compensating for backlit scenarios


f/16 @ 40mm for 1/100 sec at ISO 800

f/16 was about the max I felt was usable with this lens as things get pretty soft at f/22


f/2.8 @ 32mm for 1/800 sec at ISO 200

This camera does a good job of protecting the highlights from being overblown


f/5.6 @ 17mm for 1/100 sec at ISO 200

This pretty much sums up my feelings after this day with this camera. It became clear that to get the most of out this camera you’ve really got to sit down and read the manual. If that’s something you can’t do (cover to cover) then this definitely isn’t the right camera for you.

Click here for a full gallery of unedited images. You’ll see a few more blurry shots, but there’s a significant number that I didn’t upload. This isn’t to say that you can’t still get some sharp shots like the slide shot earlier in this article.

Conclusion

The Olympus OM-D E-M5 Mark II is a great camera in many ways, and definitely one built for the photographer who loves to have lots of options. In fact, I’d probably need another few months to review all of the options this camera offers as there are two many to fully master in the short three weeks that I’ve had this camera. With that said, as a camera body I loved everything except for the rear LCD behavior.

My four main gripes with the Mark I was the gurgling sound it made, poor default exposure metering, autofocus performance and high ISO noise performance. The Mark II definitely resolved my concerns about the first two, and the autofocus is significantly better but still not good for parents / event photographers. However, my biggest disappointment is that the noise level after ISO 800 is downright below average compared with other cameras over $500. Given this reality and my frustration with the poor behavior of the rear LCD black out behavior, I can’t recommend it over comparable models by Sony and Fujifilm.

Does this mean you shouldn’t buy this camera? No, I think if you are loyal Olympus shooter or outdoors photographer shooting in bright light then you’ll be delighted. If you aren’t and you use this without having in-depth experience with other models then you’ll still probably be extremely happy with it. However, those looking for the best balance of camera body performance and image quality are going to be happier with the latest models from Fujifilm and those with deep wallets will find nirvana in latest additions to Sony’s a7 series.

Where to order

Olympus OM-D E-M5 Mark II Limited Edition (Titanium)

For Sale in mid-July

Click here to learn more or order at B&H. The cool new Olympus OM-D E-M5 Mark II Limited Edition (Titanium) is also going to be available soon too. It looks pretty cool, but personally I’m still a big fan of the black model!

Other articles you may enjoy

If you enjoyed this article, you may also enjoy these:

Disclosure

If you make a purchase using links found in this article, I may make a commission. It doesn’t cost you a penny more, but it does help to support future articles like this.

NOTE: This site requires cookies and uses affiliate linking to sites that use cookies.

If you enjoyed this article, please support future articles like this by making a donation or saving money by using my discount coupon codes. Either way, your support is greatly appreciated!

This blog is intended for freelance writing and sharing of opinions and is not a representative of any of the companies whose links are provided on this site.

The opinions provided are of Ron Martinsen alone and do not reflect the view of any other entity

REVIEW: Olympus OM-D E-M5 Mark II with 12-40mm f/2.8 PRO Lens–Crazy Sharp with Vibrant Colors (PART I of II)

Olympus OM-D E-M5 Mark II Mirrorless Micro Four Thirds Digital Camera

I enjoyed the images I got with the original Olympus OM-D E-M5 Mark I, so I was looking forward to doing the testing for this review of the Olympus OM-D E-M5 Mark II. Like its predecessor, it is an extremely well built camera that now features a wealth of upgrades. Some of the big improvements include:

  • 1/8000 support (vs 1/4000 max previously)
  • Improved processor
  • Auto Image Stabilization (can be disabled)
  • 10 fps (vs 9) although the burst mode is now limited to 10 RAW (vs 17 previously)
  • More customizable buttons
  • Significantly improved LCD and Viewfinder
  • GPS with GeoTagging
  • More resistant to cold (-10 C or 14 F)

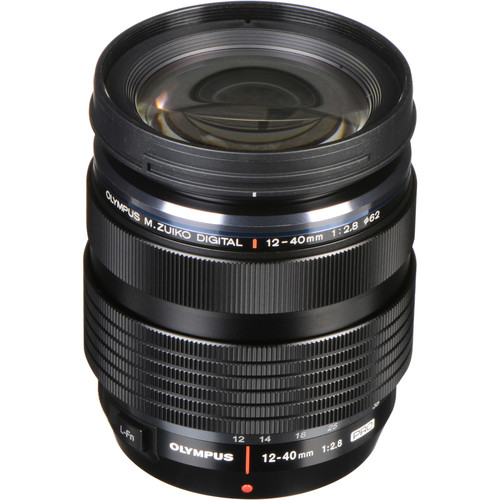
For this review I chose the incredible 12-40mm lens:

Olympus M. Zuiko Digital ED 12-40mm f/2.8 PRO Lens

This is a very, very good lens that ranges from insane sharp to totally usable up to f/16 at any zoom length– I loved it!

My initial take is that if you liked the original OM-D E-M5 then you’ll love this one even more. If you didn’t, like the predecessor then little has been done to address its usability. I loved the feel in hand, but the controls – especially the LCD auto off and playback behavior – drove me insane.

Real World Samples

The following images come straight from in-camera JPEG’s using the camera default noise reduction settings. Most camera settings are the default with the exception of RAW+JPEG, a desired White Balance (only Shade or AWB), and a desired focus point.  The i-Enhance Picture Mode was used for most of these photos.

Click here for a full gallery of unedited images.

All images are copyright Ron Martinsen – ALL RIGHTS RESERVED. You may not save, print, edit, modify or otherwise use any images featured in this article or the gallery without expressed written permission.


f/4 @ 38mm for 1/1600 sec at ISO 200

Olympus has always been a great platform for flower photography and this is no different – wow!


f/4 @ 17mm for 1/80 sec at ISO 200

An obviously wide dynamic range means reds and oranges look very true to life


f/2.8 @ 12mm for 1/160 sec at ISO 200

Over and over again I found myself thinking “wow” at the colors that came out of this camera


f/16 @ 40mm for 1/100 sec at ISO 800

Even f/16 is nothing to sneeze at with this crazy sharp lens and sensor combo!


f/4.5 @ 40mm for 1/1250 sec at ISO 200

Yet another obvious overexposure but if you zoom into that fly you see that it’s a reasonable tradeoff for that level of sharpness for a shot that I literally only had one split second to take!


f/5 @ 40mm for 1/1250 sec at ISO 200

In great light in the hands of a photographer who uses AF points instead of face detection, it does well enough to make people think that this might be a good camera for parents…BUT…


f/4 @ 24mm for 1/200 sec at ISO 200

In my wife’s hands, with or without face detection, we got a vast number of blurry shots. As a result, my wife hated it pretty quickly and refused to use it for anything after all of the shots of Kai catching his first fish ended up blurry.


f/5.6 @ 25mm for 1/100 sec at ISO 200

Eye detection autofocus is brilliant – when it works

Click here for a full gallery of unedited images.

Conclusion

More to come in part II, but I can state now that this is obviously an excellent sensor and lens combo that are sure to please photographers who can master the Olympus system and quirks. I personally hated the usability of the rear panel controls, but the additional buttons and touch screen improvements made this version even better than its predecessor.

Fujifilm and Sony definitely have something to fear by what I’m seeing thus far in my testing, so if you are consider those brands then be sure to consider this as well – but only if you are an experienced photographer who likes lots of controls. This is definitely NOT a camera for soccer mom’s and amateurs.

See my final conclusion at REVIEW: Olympus OM-D E-M5 Mark II with 12-40mm f/2.8 PRO Lens– (PART II of II).

Where to order

Olympus OM-D E-M5 Mark II Limited Edition (Titanium)

For Sale in mid-July

Click here to learn more or order at B&H. The cool new Olympus OM-D E-M5 Mark II Limited Edition (Titanium) is also going to be available soon too. It looks pretty cool, but personally I’m still a big fan of the black model!

Other articles you may enjoy

If you enjoyed this article, you may also enjoy these:

Disclosure

If you make a purchase using links found in this article, I may make a commission. It doesn’t cost you a penny more, but it does help to support future articles like this.

NOTE: This site requires cookies and uses affiliate linking to sites that use cookies.

If you enjoyed this article, please support future articles like this by making a donation or saving money by using my discount coupon codes. Either way, your support is greatly appreciated!

This blog is intended for freelance writing and sharing of opinions and is not a representative of any of the companies whose links are provided on this site.

The opinions provided are of Ron Martinsen alone and do not reflect the view of any other entity

Monday, June 29, 2015

ThinkTankPhoto & Mindshift Product Reviews and Special Offer Details

*** NOW WITH FREE FEDEX GROUND SHIPPING ***

From the start of this blog in 2008 I have been a big supporter of Think Tank Photo bags because I believe them to be the best bags on the market – PERIOD! However, there’s still plenty of people who believe that competitors bags are just as good, but I’ve tried a lot of bags and the first failure point for most competing bags is the zipper. Here’s a good video that talks about their zippers:

and here my story about why zippers really matter.

Yes, it's true that some other brands also use YKK zippers, but the other part of the equation is a combination of the size of the zipper (yes, bigger is better) and the material it's sewn on. It’s subtle, but I’ve seen bags with the tiny YKK zipper that was asked to do to much and it failed, but more often I’ve seen the zipper stay in tact but the material it was attached to ripped.

You’ve got to get all of these things right to make a great bag, and much more that only comes from knowing how real photographers are going to use your gear. This is a company of photographers making products for photographers, so they’ve got that part down pat.

Free Gift for readers of this blog!

When you place any order over $50 (see below), you’ll get your choice of a FREE gift bag. The choices change, but as of November 2016 here’s what’s being offered:

image

And all you have to do is  click my links or the photo above, and you’ll automatically be prompted to choose your free gift when you’ve add an item worth $50 or more to your cart.

Ron’s Think Tank Photo reviews

My favorite TTP/Mindshift bags ranked:

  1. StreetWalker Pro has been my go to bag since 2008 for all of my local shoots and short trips when I’m packing light (although I”ve stuffed 40 pounds of gear into mine more than once).
  2. Airport International v3.0 - The best roller bag on the market that is designed to fit in the overhead bin of planes worldwide (as of 2016).
  3. Think Tank Photo TurnStyle 20 – The Ultimate sling bag and super lightweight
  4. MindShift Gear Rotation 180° – THE Hiking Camera Backpack
  5. Think Tank Photo Modular Components V2.0 – Brilliant for sports or crowds. The ultimate photojournalist setup & great when you have to run!
  6. Think Tank Photo Logistics Manager – the ultimate I gotta move a lot of $hit bag, and my go to choice when the studio gear has to be transported.

Think Tank Photo reviews on this site:

MindShift reviews:

Disclaimer

I may make a commission if you make a purchase using links found in this article. Please support this blog by returning here and using the link on this page whenever you order Think Tank Photo products (even if you don’t want the free gift)!

NOTE: This site requires cookies and uses affiliate linking to sites that use cookies.

If you enjoyed this article, please support future articles like this by making a donation or saving money by using my discount coupon codes. Either way, your support is greatly appreciated!

This blog is intended for freelance writing and sharing of opinions and is not a representative of any of the companies whose links are provided on this site.

The opinions provided are of Ron Martinsen alone and do not reflect the view of any other entity

Wednesday, June 24, 2015

REVIEW: Darling by Jerry Ghionis


Darling by Jerry Ghionis

Generally speaking, I’m not a fan of photo books that celebrate the work of photographers. However, I saw this book at WPPI in Las Vegas this past March and it drew me in. At 16 x 10 x 2 in and weighing in at 5 lbs, this is a substantial book with high quality prints that are often both mesmerizing and inspiring.


Darling celebrates the work of master photographer Jerry Ghionis

Simply put, if you are going to do a portfolio book this is a good example of how it should be done. What’s more, this is a book that will hook you with the images and I think inspire you when your running short on ideas. This is why I’m giving it a rare “recommended” rating for a book of this class because honestly I think people will love it.

Here’s a short promo video for the book to give you a peek inside:

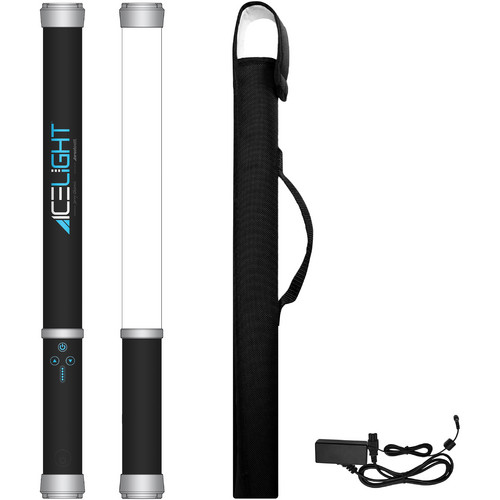
Westcott Ice Light

Westcott Ice Light 5500

You may have noticed in the video or elsewhere that Jerry’s a big fan of the Westcott Ice Light. These are pretty neat handheld LED lights that only weigh a little over a pound yet can run up to an hour on a battery. It’s pretty cool for location shoots. Click the image above to learn more.


Click photo to learn about Jerry’s
Westcott Ice Light 5500 on Amazon

Conclusion

This book isn’t cheap so it isn’t going to be for everyone, but for those who appreciate wedding and boudoir photography the images are sure to get your creative juices flowing again.

Where to order

Click here to learn more or order your copy today. 

While there is NO discount and I DO NOT make a commission on this book sale, I would appreciate it if you could acknowledge in the cart (as shown below) that you purchased this book after seeing it here on my site.

Please let them you know you saw it here on ronmartblog.com!

Other articles you may enjoy

If you enjoyed this article, you may also enjoy these:

Disclosure

If you make a purchase using links found in this article, I may make a commission. It doesn’t cost you a penny more, but it does help to support future articles like this.

NOTE: This site requires cookies and uses affiliate linking to sites that use cookies.

If you enjoyed this article, please support future articles like this by making a donation or saving money by using my discount coupon codes. Either way, your support is greatly appreciated!

This blog is intended for freelance writing and sharing of opinions and is not a representative of any of the companies whose links are provided on this site.

The opinions provided are of Ron Martinsen alone and do not reflect the view of any other entity

Thursday, June 18, 2015

REVIEW: Topaz Labs Glow (discount offer)

See my updated review for Glow 2.0 here.

For years Nik Software was an innovation leader in photo editing, but ever since they were bought out by Google not much has changed. In that time Topaz Labs has really stepped forward with a fantastic line of products featuring outstanding innovation their newest products like Impression and now Glow.

Like many Topaz products which offer unique effects not found by the other major products in the photo editing industry, Glow has some really cool things I haven’t seen before. In fact, I’d couldn’t replicate most of the filters manually in Photoshop as there seems to be some nice low-level image processing happening here.

Given the unique nature of this product, it’s helpful to see a video as screen shots can easily mislead one into thinking that it only offers neon-like effects that some photographers might find unappealing. Check out the video below and see if it doesn’t spark some ideas that make you want to download the free trial!


Great video that shows a lot of cool examples using Glow

Using Glow

Topaz Glow Stand Alone Version

Glow runs both as a stand-alone app (great for Lightroom integration) as well as a Photoshop plug-in. The user interface is identical to Impression where presets (which allow for customization) appear as live thumbnails to the right. At the bottom you can adjust the strength of the effect as well as the blend mode which is super useful when you aren’t using Photoshop layers as it allows third party hosts (like Lightroom) to only apply part of the effect rather than only the full effect.

When you click a filter the effect is applied and if you click the controls button then you are taken to the panel below where you have the ability to do a significant amount of customization. Customizations are immediately applied and can be saved as new presets.

image
Lots of customization is possible

A word about performance

On my Alienware Aurora R4 Windows 7 workstation with a Intel(R) Core(TM) i7-3820 CPU @ 3.6GHz and 16GB of RAM, I found the time required to render thumbnails to be slow enough to be annoying but it didn’t block my productivity. It did require more patience than I usually have so I would go off and read an email while it was rendering previews for each image. If you’ve used Impression 1.1 then this is the same UI, but the processing of previews was several times faster.

Sample Before & After Images

Here are some photos I took recently while in Asia using a Canon 1D X and 24-105mm lens which are straight out of the camera JPEG’s with no post-processing. I’ve simply applied the preset to the image and saved. A full gallery of examples can be found at here where you can read the image captions for info about what preset was used.

Please note that all images are copyright Ron Martinsen and ALL RIGHTS are reserved. Written consent is required for any saving or external linking.

Liquify II
Liquify II

Soft Bloom II
Soft Bloom II

Wonderland
Wonderland

Brilliant Fibers III


Natural Neon III

Fur and Feathers III

Conclusion

Like Impression, this is a unique product that doesn’t do what other products on the market do. Some of the presets are similar to what can be done in other Topaz products like Clean, Detail and Simplify, but the vast majority are totally unique to this product. As a result I had a lot of fun exploring and found myself “in the zone” experimenting when I was supposed to be writing a review!

I wish the performance wasn’t so bad on my PC, but I’m due for a PC upgrade next year anyway. I suspect that people on fast Haswell or greater Intel processors won’t have the same delays I am seeing, but to be sure you might want to download the free trial before committing to a purchase. Topaz updates their products regularly, so even if this version doesn’t meet your performance criteria, I’d urge you to check back from time to time for an update. 

I had a lot of fun with this innovative product and highly recommend it for those who aren’t photorealism purists.

UPDATE: See my Glow 2.0 review here

Where to order (SPECIAL OFFER)

Click here to learn more, download a free trial or order your copy today.

image
Enter the coupon code and hit apply

WARNING: To get the discount on this product or your entire order you MUST CLICK HERE and enter the coupon code RONMART. If the code isn’t working then visit my discount coupon code page for the latest code and offer details.

Other articles you may enjoy

Here’s some of my Topaz Labs software reviews:

If you enjoyed this article, you may also enjoy these articles:

Disclosure

If you make a purchase using links found in this article, I may make a commission. It doesn’t cost you a penny more, but it does help to support future articles like this.
NOTE: This site requires cookies and uses affiliate linking to sites that use cookies.

If you enjoyed this article, please support future articles like this by making a donation or saving money by using my discount coupon codes. Either way, your support is greatly appreciated!

This blog is intended for freelance writing and sharing of opinions and is not a representative of any of the companies whose links are provided on this site.

The opinions provided are of Ron Martinsen alone and do not reflect the view of any other entity