Tuesday, February 24, 2015

Welcome Scott Kelby Blog Readers!

Ron Martinsen Guest Blog on ScottKelby.com - February 25, 2015

I’d like to thank Scott Kelby for giving me another opportunity to do a guest article on his blog. If you are interested, you can see my first article I did for his blog here. I’d like to welcome those of you who are coming over to check out my blog for the first time – thanks for stopping by!

If you are new to my blog there’s a few important things you should know:

  1. Pay attention to the right column ------>>>>>>>>>>>>>>>>>>>>>>>>>
    As you page down, this is where you will find an index to my:
    • Popular Posts
    • Software Reviews
    • Gear Reviews
    • Book & Video Reviews
    • Service Reviews
  2. At the top, you’ll see an aqua blue bar that looks like this:
    Navigation Tool Bar
    This is where you will find tips, discount coupon codes and my popular printing series section. It is also where you can learn more about this blog and me!
  3. I post articles a few times each week from Sunday through Thursday. Keep visiting for new content, or stay in touch on Facebook, Twitter, and Google+.

Be sure to check out my Getting Great 4x6 Prints Without Any Hassle article and if you are on a PC and want something better than Lightroom, then check out my QImage 2013 Review & Discount (see also my original QImage review).

Here’s also some more information about and a discount on the ioSafe devices I discuss in my guest blog article:

You can also get a FREE Trial and special discount on KelbyOne when you check out my review.

Conclusion

It was an honor to be on Scott’s blog, and I hope you enjoyed what I wrote. Please feel free to share comments here or on Scott’s blog to let me know what you thought!

Other articles you may enjoy

If you enjoyed this article, you may also enjoy these:

Again, there’s plenty more great content on the right side of this blog. Please page down reviewing what’s available on the right column of the blog over here. >>>>>>>>>>>>>>>>>

If you found any of my articles to be helpful, please share them on your favorite web forums, Digg, StumbleUpon, Tumbler, and your favorite social networks. It helps me a lot so that I can bring you more great content in the future!

Training

I do photo tours in Asia (see http://asia.ronmartblog.com for ideas of what you might expect, but thousands of amazing images from Japan haven’t been uploaded yet).

I also do classes, private 1:1 training, and portfolio reviews. If you think you might be interested in any of these services, please contact me for more details.

Disclosure

If you make a purchase using links found in this article, I may make a commission. It doesn’t cost you a penny more, but it does help to support future articles like this. If you can’t use my links, then donations are greatly appreciated!

NOTE: This site requires cookies and uses affiliate linking to sites that use cookies.

If you enjoyed this article, please support future articles like this by making a donation or saving money by using my discount coupon codes. Either way, your support is greatly appreciated!

This blog is intended for freelance writing and sharing of opinions and is not a representative of any of the companies whose links are provided on this site.

The opinions provided are of Ron Martinsen alone and do not reflect the view of any other entity

Monday, February 23, 2015

REVIEW: ioSafe 1515+ NAS powered by Synology DSM–The Ultimate in Photo & Video Storage (Special Offer)

ioSafe NAS 1515+ powered by Synology
ioSafe NAS 1515+ powered by Synology DSM Protects against Fire & Flood

Recently I had every photographers worst nightmare come true – my storage solution (a DroboPro) – stopped being visible to my computer so I feared I had lost 12 TB of images!

I had used Drobo’s “dual disk redundancy” for protection, but I failed to think about what happens if the Drobo can’t communicate with my computer. After numerous attempts to contact both Drobo support, media relations and even the CEO went unanswered I decided to join Scott Kelby in saying I’m done with Drobo (see Scott’s story).

Fortunately I discovered a solution – on my own – to get my Drobo data back, but it was a very scary time for several days. As a result, I went on a mission to not only find a replacement device, but also something that I felt I could trust in the event of an even bigger disaster like a fire or flood. My data needed a new home, so I wasn’t going to make the same mistakes of the past!

I’ve written about the ioSafe Solo and SoloPRO and I still love and use both to this day. Out of laziness I moved away from using ioSafe’s for my primary drive each year in 2011 and just stuck my files on my DroboPro. However, this potential data loss scare reminded me of the peace of mind that I have with my ioSafe’s so I decided to revisit them again for a Drobo replacement solution – and so much more!

What is a ioSafe?

It’s a hardware design that protects your hard drives from damage from physical disasters like fire, flood, earthquakes, etc… The case is exactly that – a safe –  and enclosed within it is basically a Synology DiskStation DS1515+ 5-Bay NAS Server. Here’s a peek inside to where the drives are located after you’ve peeled through two layers of protection via the included tool to remove the screws:

Up to 5 Hard Drives are encased in a massive layer of protection

Click here to learn more in this CES video about the ioSafe 1515+ where it gets a video walkthrough and opened up. However, what’s more interesting is to see a device like this get subjected to a serious fire as is the case here:

While the video above is its smaller sibling, the case design is the same. It’s pretty impressive to see it get burned at 1000 degrees Fahrenheit(7:15) for several minutes and then opened up (at 10:50 mark). The unscathed drives get put into a new unit where the files are accessed without any problem – pretty impressive!

What the heck is  NAS RAID?

ioSafe NAS 1515+ powered by Synology - Front View
No confusing this for being a Macbook Air - it really is a safe!

Simply put, it is a dedicated computer that has only one job – to manage storage (hard drives). NAS stands for Network Attached Device and it is just that – a device attached to your router or wall plate via one or more Ethernet cables. However, this is a special class of NAS that is often referred to as a “Smart NAS” which does more than just hold files – it also can do cool things like be a media, file, web, or even WordPress server – and much more!

ioSafe NAS 1515+ powered by Synology - Rear View
See those 4 LAN ports? That's protection against a single point of failure for your connection!

To protect against cable and port failures, it supports up to 4 simultaneous Ethernet cables connected to your router. This is useful if you need the ultimately in reliability in case a cable gets unplugged (think tripped over), fails, etc… Now most photographers don’t have that many ports available on a home router anyway, so let’s assume you don’t care about that.

Redundancy has a great value over time where a port can fail due to age and your NAS can no longer connect to your router. This was exactly the failure point for both my Drobo and Buffalo systems devices, so if your computer can’t talk to the device you are out of luck! 

Since this is a dedicated computer that means it has its own operating system which also has the benefit of meaning that you can attach devices to its USB ports like additional external hard drives, network cameras, printers and more.

If you want the device to behave like a drive and not a NAS, that is still possible with its iSCSI support. I used iSCSI for my DroboPro, but I’ve decided to abandon that approach this time around so I can take advantage of all the features this product has to offer as a smart NAS.

Click here to learn about more ways this device offers benefits specifically for photographers.

Cool Web User Interface

image

Having to learn a new OS sounds scary, but the reality is that you don’t. If you can use a mouse and step through a wizard in a web browser you have the skills needed to use this device.

Rather than having to remote a Windows or OS X interface (think SplashTop), this device allows the operating system to run in your web browser and communicate over the web with the device. The performance is extremely fast and works extraordinarily well (like ChromeOS). The magic behind this technology is called Disk Station Manager 5.1 (or DSM for short), and it works exceptionally well.

Here’s a sample running on my Windows 7 desktop from Chrome:

image
Yeah, that is a Canon RAW file opened up directly in DSM
Click here to see image formats supported by Photo Station

See, that’s not scary at all! I was even shocked to see that I could open RAW files! Click here for a massive list of what DSM supports.

The main takeaway for photographers here is that there isn’t some cryptic, unusable and painfully slow user interface. What’s more, it isn’t just a black box either. You can connect to the device easily from your computer and operate it the same as if you had a monitor connected to it (which isn’t possible).

See my video below for a quick walkthrough of how you’ll use DSM. While I show Windows in my example, the experience is identical for DSM on OS X:


DSM is the Operating System for the 1515+ accessible via your web browser

Accessing or Uploading via iOS was Easy

Mobile Upload/Download just worked

Are you using Dropbox, OneDrive, iCloud, Google Drive, etc… right now and paying monthly fees? Well if you wanted to replace them, then you’ll be happy to know that this product can act as your own cloud server which Synology calls Cloud Station.

To be fair there is some integration of iCloud into OS X and other services into Windows/Chrome OS that makes it work more seamlessly with your apps, but if you’ve OneDrive or other less popular file services then this is basically the same as those – except you don’t have to pay a monthly fee because it’s on your NAS!

You can easily use this device to store files of any type that are accessible (as you allow) to anyone on the Internet. You can also disable this feature too (it’s off by default) to ensure that nobody can hack into your files as well (assuming they can’t get into your network).

I only had an iPhone to test with, but I found the support to be brilliant for uploading/downloading photos to/from my iPhone both over the local network and the Internet when not at home. Simply put, it just worked!

It’s just as easy to make this device become a home media server too so you can easily view your music, video, and photos on your SMART TV, game console, etc… It can be an iTunes server as well so you can easily serve content to your Apple TV device.

Accessing your files remotely vs backing up your files

Photo Station Uploader is interesting but file copy works just as well
Photo Station supports a client app that makes it easy to bulk upload photos, but I personally prefer a traditional file copy via Finder / Explorer to the photo share to work just as well

I want to be very clear on a subject that I found confusing when I first got this device – storage versus backup. This device has loads of use services with matching mobile apps for easy access:.

  • Cloud Station is an included storage service that allows you to have a 1515+ act like your own personal Dropbox where you can access it remotely and share links with people.
  • Photo Station is a photo server that you can access from a web browser or use on your mobile device or desktop to bulk upload photos.
  • Media Server - This is an awesome DLNA compliant media server that work great with your Smart TV, Game Console, and mobile devices to easily access your music, photo and videos with them pre-converted into a format that allows for fast remote usage (although you can disable that and just serve full-size files).
  • And More – There’s a bunch of server packages to do things like iTunes server, WordPress, Video, Audio, Logitech Squeezebox, and so much more. It can even be an email or web site server too!

All of this is great, but NONE are what people traditionally think of as backup solutions.

Backup software protects your files on your local computer from accidental deletion, virus attacks, drive failure, etc… While the 1515+ does include software that allows you to backup your 1515+, it does not include software to help you back up your PC’s. Instead, you can think of the 1515+ as a destination where your existing backup software can use to store a backup of your devices (i.e., laptop, computer, etc…).

Now I see a device like this as valuable for several purposes:

  1. Huge Hard Drive Scenario – This is what us photographers need to hold the never ending amount of storage needs for our photos. This product rocks for this and it can be treated as a network drive or what feels like a local drive via iSCSI (like Drobo where it also behaves like a local hard drive).
  2. File & Media Server - To have a place where you can upload/download files from any device and easily access them from your phone, TV, any computer, etc… This is what the Cloud Station (file server), Photo Station (photo server), Media Server (audio, video, photos), etc… packages do.
  3. Data Backup Storage - To have a backup solution that I don’t have to think about – it just works. This is what your backup software included in your operating system or sold separately does. This software will simply use your 1515+ as a place to store its backup data.

To backup your data against accidental deletion, you still need local backup software like Windows Backup, Time Machine or even Drobo PCBackup would probably work (but I didn’t try it). This software generally doesn’t care about what your device is, it just wants to know where it can put a huge file and get access to it all of the time. For this task, the 1515+ works great. However, if you don’t have software you already like for this purpose then this device will not help you with that problem.

As  I also mentioned, it is a great “huge hard drive” too. If your backup routine is more simplistic where you just copy files to a Drobo or some external device (via Lightroom’s “Make a second copy to” feature on import) then the 1515+ is great for that too!

Don’t forget to backup your NAS!!!!

Included Backup Packages
This is for backing up your NAS, not your computer, to a remote destination

Getting a NAS creates a bit of a chicken and egg problem, because it can serve as a storage location for your computer backups – but what happens if your NAS dies? This is an especially important issue if you use it as your Huge Hard Drive (i.e., the place where we keep our PSD and RAW files) which is what most of us usually do with a Drobo or external hard drive once the drives in our computer fill up.

The 1515+ includes built-in software for this and you could use something like CrashPlan, but it’s important to have something that is off site for this scenario (although you may want to have the device on-site for that first backup).

You can also have an off-site NAS backup your on-site NAS to protect you in case a total loss at your home/office (i.e., theft, mudslide, etc…) where your on-site is gone forever. For this later purpose, DSM offers a way for you to backup your 1515+ to another NAS or cloud service. This is both important and necessary, but don’t confuse this with the backup software required to keep the files on your PC backed up – that’s different and not covered by this service.

Click here to see a full list of software you can install. The packages are for your 1515+, but the stuff for Windows or Mac is much more limited and noted as such in the Download column.

Geek Setup Alert for Cloud Station

Cloud Station is your personal dropbox-like service
Cloud Station (Windows View) is like your own personal Dropbox service,
but it doesn’t protect against accidental file deletion

Getting things set up the first time for Cloud Station is rather tricky for non-geeks so I highly recommend that you watch this video:


You also may have to do one or more of the following steps which isn’t especially straightforward:

  1. Install the Cloud Service on both the ioSafe (from the Package Center) and on the PC (from the browser).
  2. Start the Cloud Service app on the server and follow any instructions and warnings. For example, I was prompted to go to Advanced User settings to enable the user home service.
  3. Set up a QuickConnectID which allows remote computers on the Internet to find your ioSafe1515+. It is VERY important that you are using very strong passwords before you take this step!
  4. For me, I also had to tell my router to use the same IP address for my ioSafe. This is not for the faint of heart, so if you haven’t done this before then you’ll probably want to call product support. You’ll know if you need to do this because the QuickConnectID setup will tell you, so if you don’t see that warning then ignore this step.
  5. In some cases you have to grant permission to your user account in the Shared Folder Control Panel via the Security tab so that you have read/write access to the place where you will be backing up.
  6. Set or verify that you have enabled privileges and sharing for your user account in the privileges and sharing tab of the cloud station control panel shown below:

Cloud Station

TIP: You can’t use the same name for your quick connect ID as you use for your local computer.

Fortunately all of this stuff is a one time thing so once you get it set up all is well. This is why non-geeks may want to ask a geek to help out so you don’t spend much time getting things set up.

Worried about security?

Security Advisor offers peace of mind

One obvious concern once you start opening up devices to the internet is how secure is this system? None of us want our photos stolen or systems hacked, so I felt good about having the built-in free Security Advisor check my system and tell me what I needed to do to lock my system down. Geeks aren’t required to use or act on the recommendations it suggested, so I loved having this feature available to me.

For the geeks reading this, common suggestions are reassigning port numbers, disabling the admin account (which can be locally restored without a bare metal restore), using strong passwords and other traditional safeguards. External and quick connect services are disabled by default, so you have to opt in before putting your device on the net.

Things to consider

There is much to love about this product, but there are a few things that you should know before you purchase this product:

  1. Noise – Under normal operating conditions this device sounds like a typical tower computer from 10 – 15 years ago. You hear it, but it is white noise that you get used to. However, people used to silent or fanless systems might be taken back by this noise. Sadly when the device gets hot, which is easy when you think about the fact that only 5 hard drives are buried in this massive beast – the fans go to maximum RPM(a good thing). When that happens, you hear an audible sound from the fans that I found to be annoying (a bad thing). As a result, if you are going to get one of these it is advisable to store it in a well ventilated place with Ethernet cable access where you won’t hear it but it can also pull in cool air to keep it from cooking itself.
  2. Size – What do you think of when you hear the term safe? Big and heavy, right? Yeah, well that’s exactly what this is too – it is very big and very heavy. Protection comes at price and in this case that translates to about 95 pounds and roughly 15 x 9 x 13  inches (h w d)!
  3. Expensive – At about 2x the cost of a Synology DiskStation DS1515+ 5-Bay NAS Server which is the core of this device but without the fire protection, the cost of physical protection is steep. The price doesn’t include hard drives either, so it is definitely a major investment. However, some will find that peace of mind worth it – especially if disaster ever strikes and you need it!

Storage Requirements

Disk calculator
Disk Calculator helps you to know how much storage you’ll really have for your data

If you’ve never had one of these type of devices before, you’ll be wise to use the Disk Calculator before ordering disks. While the graphic shows a bunch of drives, it is important note that this device only supports 5 drives – not the 12 drive bays shown.

I’d recommend you creating a disk group with Synology Hybrid Raid with 2 disk fault-tolerance (aka SHR2). This offers more flexible disk usage than traditional RAID and protects you against up to 2 disks failing simultaneously while still allowing you to access your data while your two new disks get rebuilt. This important because that means if you fill all five drive bays with 6TB of disks, 12TB will get used for protection so you’ll only have 18TB to hold your data. For most people this is more than they’ll need so smaller drives can be used or one slots can be left future expansion. Please note that SHR requires that replacement drives be the same size or larger, unlike Drobo which can take any size drive at any time.

Unlike Drobo which just flashes a light and you replace the drive without doing anything special, you are required to do a manual intervention to rebuild when a drive fails. A failure will be indicated by an audible alert (which you can clear remotely via DSM). It isn’t necessarily a difficult process, but it is more stressful than some Drobo users may be accustomed to.

Performance is Excellent

Any company in the storage business always quotes maximum possible performance numbers, but when you get the devices home and test yourself you never see those actual numbers. Here’s how they get the numbers, but I just never see those type of numbers in real world scenarios.

There are so many variables and tricks that can done to make the numbers look better than real world experiences that I never trust those numbers. A better test for me is to grab a folder full of JPEG & RAW images and copy them to a new folder on the same device as that limits the variables to the drives installed and the content of the data.

Using this test on a device freshly opened up out of the box with no modifications, I saw about 60mb/sec actual sustained performance with 1TB WD Red NAS class hard drives. My DroboPro saw about 42mb/sec under similar conditions.

When I copied a batch of files from my local SSD over to the 1515+ via iSCSI I was able to see sustained speeds as fast as 90mb/sec, so this is fast device when you eliminate disk IO bottlenecks.

Transferring data from your computer, camera, or other devices which most likely have slower transfer rates means you’ll probably never see those speeds in real world usage! However, this device is fast especially when you consider the same test on the fastest locally installed SSD’s I’ve tested were in this same range as well.

Oh and if you are wondering if it makes saving those huge 500MB+ Photoshop files any faster? Personally I noticed an improvement, but much of the slowness really seems to be Photoshop – not disk IO. Lightroom was much faster when I stored files on the 1515+ instead of my aging SSD’s or DroboPro, so I’d definitely move all my working files to this drive and continue to use the SSD just as a catalog cache.

A Cheaper Alternative
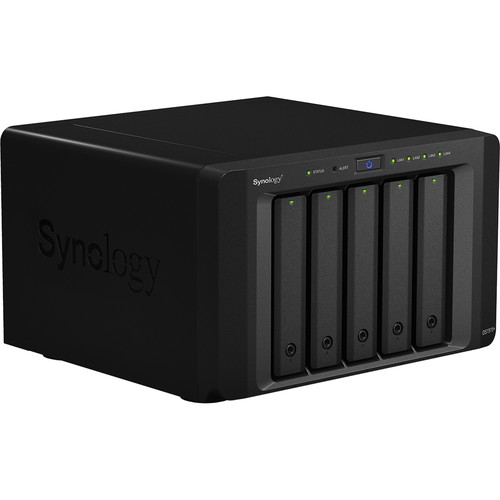
Synology DiskStation DS1515+ 5-Bay NAS Server

The ioSafe 1515+ is a big device that is rather pricy, so if it is too large or expensive for your needs then you can consider Synology DiskStation DS1515+ 5-Bay NAS Server. It is the same type of device WITHOUT the fire and flood protection. This means you’d be out of luck if any disaster situation should occur, but you could enjoy all the same hardware and software benefits of the device itself.

PLEASE NOTE: The purchase price does NOT include ANY hard drives! You MUST purchase drives separately

Drive Recommendations
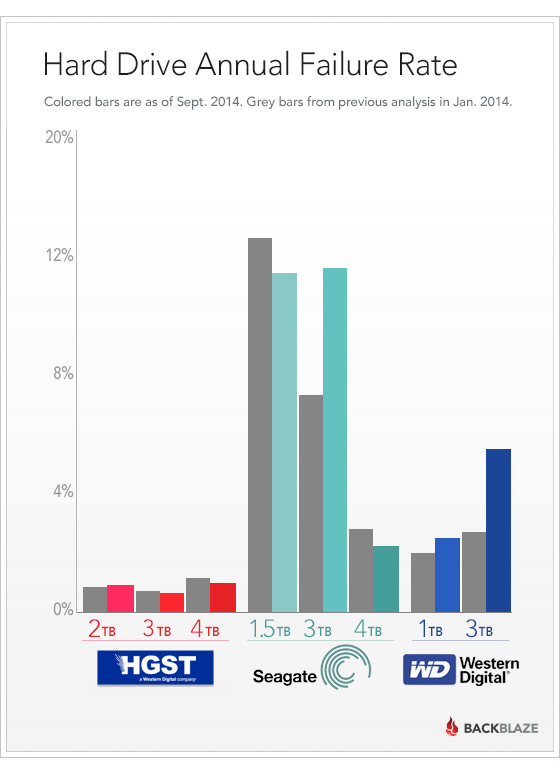

Backblaze Hard Drive Reliability Update – Sep 2014

With over 34,881 drives storing over 100 petabytes of data, BackBlaze.com is a pretty trusted source about drive reliability. As you can see from the chart above the HGST drives have served them well, so I recommend NAS or Enterprise class (only) HGST Drives on B&H and Amazon. Please beware that you should avoid “green” / energy efficient and desktop class drives as those aren’t built to withstand the heat of drives running 24/7.

WARNING: PLEASE consult THIS LIST and only use compatible drives. If you have a newer drive that you are considering that is not on this list then please contact support for approval before purchasing. Remember, unsupported drives really means unsupported so save yourself the frustration by only using supported drives.

Please note that the difference between Synology's supported drive list and ioSafe 1515+ Qualified Hard Drive List is that ioSafe has subjected all of their qualified drives to the burn test and confirmed that the drive was still working properly afterwards. While the larger list from Synology might work, you lose the peace of mind knowing they will survive a fire – which is the purpose for buying this device! As a result, using non-qualified drives from ioSafe’s list doesn’t make much sense. Contact product support for the status of drives not listed if you have any questions.

Warranty & Support Info

Click here to learn more about the no hassle warranty which also includes one year of data recovery service.  It should also be noted that there is both telephone and email support, and I did a blind test of this during my review and my interactions with Matt were excellent.

Click here to see the FAQ and

Conclusion

Like Scott Kelby, I’m done with Drobo. It’ll take me a while before I can get everything moved over and retire my drive, but that day is coming – this month! Based on all the research I’ve done, I’ve decided that Synology devices which ioSafe uses are the best bang for the buck over the more expensive competition like QNap.

If you’ve done any research on NAS devices then you’ve probably seen reviews for the Synology DiskStation DS1515+ 5-Bay NAS Server already. Synology DSM based devices are well known for being great media servers that work great with your DLNA compliant TV’s as well as backup solutions, and this is all that plus flood and fire protection. It’s also a brilliant solution for photographers who want a device that can host files for their clients without having to use external services and the monthly fees that go with them!

While average photographers will still probably need help from a geek to get things going, this device is brilliant and worked flawlessly for me during my testing. The web based DSM user interface was excellent too! Average computer savvy users what know how to configure their router and manage network shares shouldn’t have any trouble at all.

Flood and fire protection come at a steep premium for footprint, noise and weight, but that added peace of mind will be worth it for those who can both afford it and store it. My advice is to keep it in a well ventilated alternate location besides where you’ll be working for when the device is under load, but if you can’t don’t worry as the noise is generally inaudible for normal day to day use. In fact, when not under load it was certainly a lot less noisy than my DroboPro.

I highly recommend this product for those users who want the ultimate in on site data protection. It is true that it isn’t as simple as connecting a Drobo via USB, but it’s not too much harder and you get a lot more bang for your buck.

Where to order

Click here to order a 1515+ direct from ioSafe, or click here to learn about their full product lineup starting as low as $349 with a 2TB drive included (the Solo G3). Please note that not all devices are NAS devices and only the NAS devices powered by Synology come with DSM.

You can also get some ioSafe Devices at B&H and look for the 1515+ model on Amazon. If your budget is tight and you want to forgo disaster protection, then check out the cheaper 1515+ Synology Devices at B&H and Amazon.

You may also want to consider the following sources for hard drives (which often beat Fry’s, Newegg, etc…):

PLEASE consult THIS LIST and only use compatible drives when placing your order.

SPECIAL OFFER for ioSafe.com (Expires May 31, 2015)

Coupon Code Entry Example
Example of entering the coupon code in the ioSafe cart
(please note that codes change and are case sensitive)

  • Click here to order and use the coupon code ronmartNAS to save 10% OFF on any 214 or 1515+ when you buy direct from ioSafe.com.
  • Click here to order and use the coupon code ronmart to save 5% OFF on any Solo G3 or SoloPRO.

WARNING: The discount coupon codes are CASE SENSITIVE!

Other articles you may enjoy

If you enjoyed this article, you may also enjoy these:

Disclosure

If you make a purchase using links found in this article, I may make a commission. It doesn’t cost you a penny more, but it does help to support future articles like this. ioSafe provided me with a short-term loaner unit for this review.

NOTE: This site requires cookies and uses affiliate linking to sites that use cookies.

If you enjoyed this article, please support future articles like this by making a donation or saving money by using my discount coupon codes. Either way, your support is greatly appreciated!

This blog is intended for freelance writing and sharing of opinions and is not a representative of any of the companies whose links are provided on this site.

The opinions provided are of Ron Martinsen alone and do not reflect the view of any other entity

Monday, February 16, 2015

Presidents Day Deals from Zazzle, Smugmug, CanvasOnDemand, Nikon, Fujifilm & More

20% All Orders at Zazzle.com


Use code: YEAROFZSHEEP - Starts 2/17/2015


This offer expires on 2/21/2015

Save 20% off at SmugMug


Use code SASVday


This offer expires on 2/18/2015

Think Tank Photo February special offer


AppHouse 8 or AppHouse 10 tablet cases for free + $50 or more orders get a free additional bag

See my review of this product

This offer expires on 2/28/2015

Try KelbyOne for FREE + 10% Off Discounts on everything


7 Day Free Trial plus 10% off all memberships and products

See my review of this product

Canvas On Demand - Save 40% off for President's Day


Use Code: Presidents40aff

See my review of this product

This offer expires on 2/18/2015

Zenfolio Discount – 10% off


View link for details

See my review of this product

Save 10% on Bryan Peterson's School of Photography Courses


Use Coupon Code: RONMARTBLOG

See my review of this product

Trey Ratcliff / Stuck in Customs Tutorials, Presets, Textures eBooks & More


Save 15% Off by clicking link and using code RONMART15

See my review of this product

SAVE UP TO $400 ON AF-S NIKKOR LENSES + NEW BUNDLES & SAVINGS


Use link to learn more

Save Up to $200 On Select Fujifilm Lenses


Up to $200 Off

See my review of this product

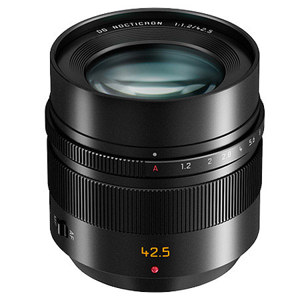
Save up to $200.00 on a variety of Panasonic Lenses


Save up to $200.00


This offer expires on 2/21/15

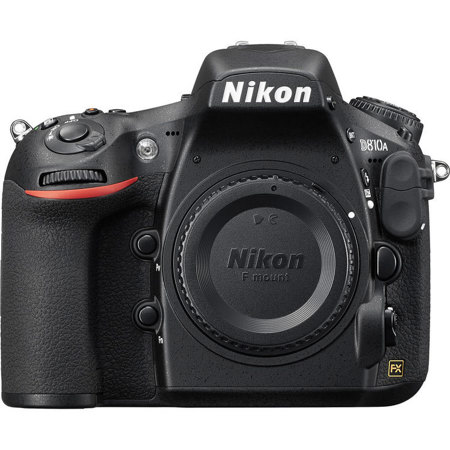
Nikon D810A for Astrophotography


New Product $3,796.95

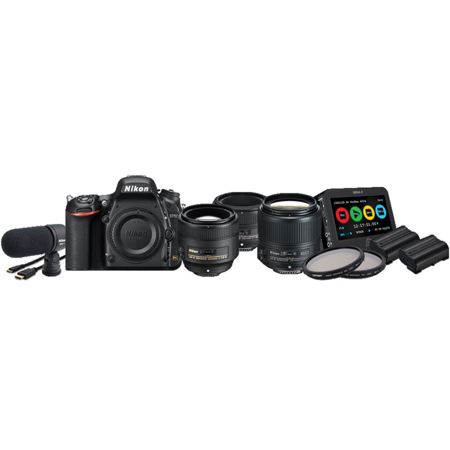
Nikon D750 DSLR Camera Filmmaker's Kit


5mm f/1.8G ED, 50mm f/1.8G, and 85mm f/1.8G Lenses, Includes Atomos Ninja-2 Recorder, ME-1 Stereo Microphone, Two Spare Batteries, and 58mm & 67mm ND Filters for $3996.95

See my review of this product

Conclusion

If you like to get deals like this, please subscribe to my deals newsletter.

Disclosure

If you make a purchase using links found in this article, I may make a commission. It doesn’t cost you a penny more, but it does help to support future articles like this.

NOTE: This site requires cookies and uses affiliate linking to sites that use cookies.

If you enjoyed this article, please support future articles like this by making a donation or saving money by using my discount coupon codes. Either way, your support is greatly appreciated!

This blog is intended for freelance writing and sharing of opinions and is not a representative of any of the companies whose links are provided on this site.

The opinions provided are of Ron Martinsen alone and do not reflect the view of any other entity

Tuesday, February 10, 2015

$20 Off Topaz Restyle until Feb 28, 2015–One Click Photo Editing Shouldn’t Be This Cheap!


Restyle Collection Thumbnails Viewer

Topaz Labs is one of the most creative software editing companies in the photography business and their hot product, Restyle is definitely one of my favorites. As I mention in my review, what’s really cool about this product is that it analyzes your photo and gives you hundreds of one click editing suggestions.

Here are a couple images that I prepared for this article that are straight out of camera one click photo edits using the Restyle preset listed under the photo:

Edited only with Restyle's Shadowy Orange Rose Preset

I loved how the rich colors of the woods came out and the flowers popped more after this simple edit. In the photo below the difference was even more dramatic as a dreary shot becomes post card worthy:

Edited only with Restyle's Rocky Pink Sundown Preset

Now if you hate these edits, that’s okay – there are hundreds of different suggestions based on the colors that occur in your photo so there’s sure to be something you do like. From warm to cool tones from simple to more abstract, there’s really something for everyone in this product.

Where to order

Click here to learn more or order and use coupon code febrestyle to save between now and the end of February 2015.

Don’t forget to use my Discount Coupon Code page once this offer expires, or to purchase other Topaz products.

Other articles you may enjoy

Here’s some of my Topaz Labs software reviews:

Here’s some other articles you might also enjoy:

Disclosure

If you make a purchase using links found in this article, I may make a commission. It doesn’t cost you a penny more, but it does help to support future articles like this.

NOTE: This site requires cookies and uses affiliate linking to sites that use cookies.

If you enjoyed this article, please support future articles like this by making a donation or saving money by using my discount coupon codes. Either way, your support is greatly appreciated!

This blog is intended for freelance writing and sharing of opinions and is not a representative of any of the companies whose links are provided on this site.

The opinions provided are of Ron Martinsen alone and do not reflect the view of any other entity

Thursday, February 5, 2015

Canon Announces New 50.6 MP 5DS, 5DS R, Rebel T6i, 11-24mm Lens and more

As was expected, Canon finally released its super megapixel cameras as well as some other surprises. Read on below to learn more about each and place your pre-order today!

Canon answer to medium format – The 5Ds & 5Ds R

Canon has finally decided to release some products to compete with Nikon’s D800 (the 5Ds) and the D800e/D810 (the 5Ds R), so if 36.4 megapixels wasn’t enough for you then here’s an extra 14.3 megapixels on top of that! While it is not a “true” medium format camera since it is still based off a 35mm full frame sensor, if you are talking number of megapixels it’s basically in the same league now.


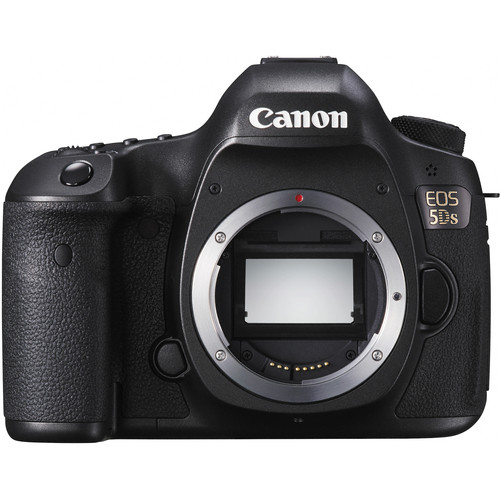
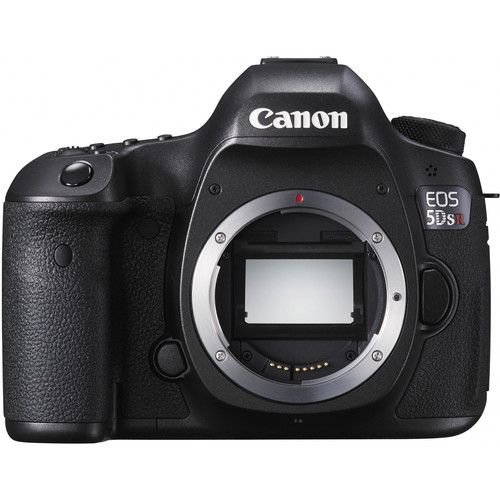
Canon 5Ds
on B&H

PRODUCT HIGHLIGHTS

  • 50.6MP Full-Frame CMOS Sensor
  • Dual DIGIC 6 Image Processors
  • 3.2" 1,040K-Dot ClearView II LCD Monitor
  • Full HD 1080p Video Recording at 30 fps
  • 61-Point High Density Reticular AF
  • 150,000-Pixel RGB+IR Metering Sensor
  • ISO 100-6400; 5.0 fps Burst Shooting
  • Anti-Flicker Compensation
  • User-Selectable Shutter Release Time Lag
  • Dual Compact Flash and SD Media Slots

Click here to see the full press release and photos and click here to see the Canon website product page. There is also a High-Resolution EOS mini site that is worth checking out too.


Canon 5Ds R
on B&H

PRODUCT HIGHLIGHTS

  • 50.6MP Full-Frame CMOS Sensor
  • Dual DIGIC 6 Image Processors
  • Low-Pass Filter Effect Cancellation (which means it’s basically like a D800e/D810). LEARN MORE here.
  • 3.2" 1,040K-Dot ClearView II LCD Monitor
  • Full HD 1080p Video Recording at 30 fps
  • 61-Point High Density Reticular AF
  • 150,000-pixel RGB+IR Metering Sensor
  • Native ISO 6400; 5.0 fps Burst Shooting
  • User-Selectable Shutter Release Time Lag
  • Dual Compact Flash and SD Media Slots


Learn more about LPF Cancellation (EOS 5DS R)

Click here to see the full press release and photos and click here to see the Canon website product page. There is also a High-Resolution EOS mini site that is worth checking out too.


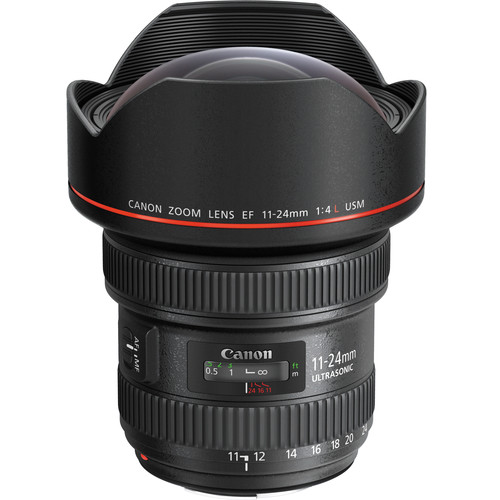
EF 11-24mm f/4L Ultra Wide-Angle Zoom Lens

While this isn’t the 180 degree field of view of the 8-15mm that I enjoyed owning, it still offers a respectable 126 degree FOV. This lens has a much greater ability to maintain straight lines. It also offers Subwavelength Coating (SWC) and Air Sphere Coating (ASC) help to significantly reduce flare and ghosting.


Canon EF 11-24mm f/4L USM Lens
on B&H

PRODUCT HIGHLIGHTS

  • EF Mount L-Series Lens/Full-Frame Format
  • Constant f/4 Maximum Aperture
  • Super UD, UD, and 4 Aspherical Elements
  • SWC, Air Sphere, and Fluorine Coatings
  • Ring-Type USM Autofocus Motor
  • Internal Focus; Full-Time Manual Focus
  • Weather-Resistant Design
  • Rounded 9-Blade Diaphragm

Click here for the full press release.

New Rebels T6i & T6s

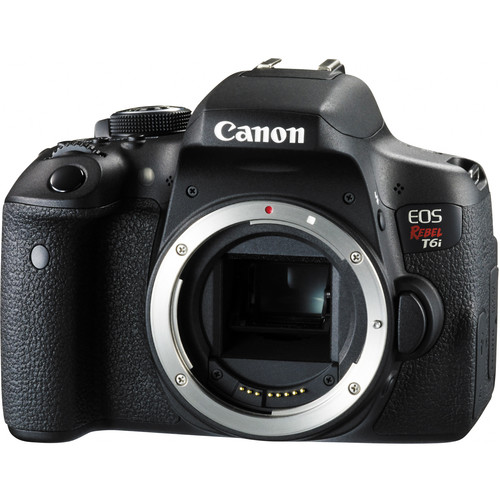
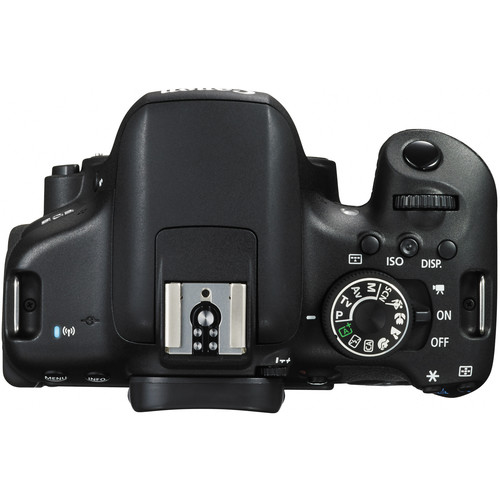
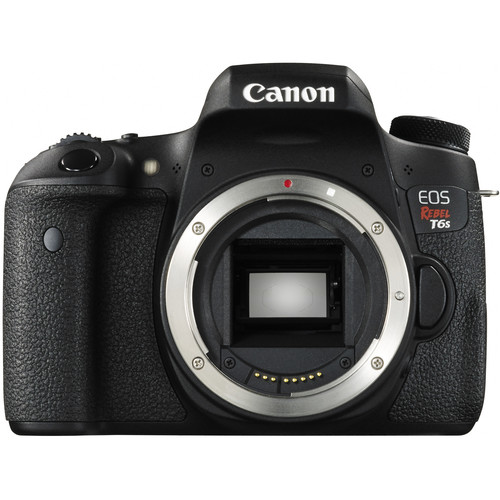
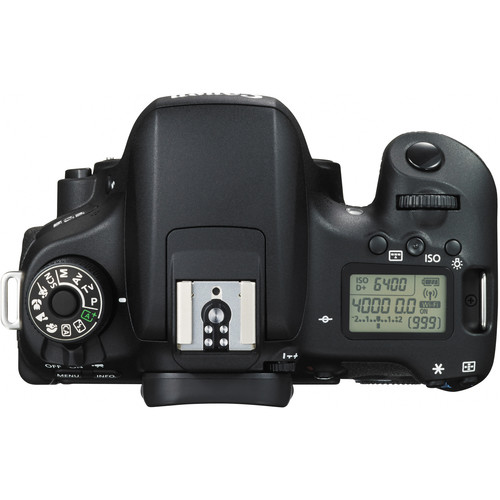
The really big news here is that the T6s is closer to a 70D than it is a typical Rebel thanks to the new top LCD and additional features. The T6i is basically the stripped down version for those looking for maximum core features at a minimal cost.


Canon EOS Rebel T6i DSLR Camera (Body Only)
– $749

Canon EOS Rebel T6i DSLR Camera - Top View (NO Top LCD)

PRODUCT HIGHLIGHTS

  • 24.2MP APS-C CMOS Sensor
  • DIGIC 6 Image Processor
  • 3.0" 1.04M-dot Vari-Angle Touchscreen
  • Full HD 1080p Video Recording
  • 19-Point All Cross-Type AF System
  • 5 fps Shooting & Extended ISO to 25600
  • Hybrid CMOS AF III & EOS Scene Analysis
  • Creative Filters
  • Built-In Wi-Fi Connectivity with NFC
  • CS100 Connect Station Support

Click here for the full press release and click here for the product page on Canon’s website. The EOS Rebel website also features some cool stuff here.


Canon EOS Rebel T6s DSLR Camera (Body Only) –
$849

Canon EOS Rebel T6s DSLR Camera - Top View (LCD is exclusive to the T6s)

PRODUCT HIGHLIGHTS

  • 24.2MP APS-C CMOS Sensor
  • DIGIC 6 Image Processor
  • 3.0" 1.04M-dot Vari-Angle Touchscreen
  • Full HD 1080p Video & HDR Movie Mode
  • 19-Point All Cross-Type AF System
  • 5 fps Shooting & Extended ISO to 25600
  • Hybrid CMOS AF III & EOS Scene Analysis
  • Top LCD Panel & Quick Control Dial (only on the T6)
  • Horizontal Level (only on the T6)
  • Built-in HDR movie mode will record alternating exposures at 60 fps and combine them to generate a 30 fps movie (only on the T6)
  • Built-In Wi-Fi Connectivity with NFC
  • CS100 Connect Station Support

Click here for the full press release and click here for the product page on Canon’s website. The EOS Rebel website also features some cool stuff here.

Conclusion

I wasn’t a big fan of the Nikon super megapixel D800/D800e because it was so easy to get blurry shots and honestly it’s more megapixels than people really need. I expect more of the same for these new Canon’s, but it will still be fun to see what they have to offer.

The new lens is a great addition to the lineup, but its nearly $3000 price tag is too much for my blood. I was pretty happy with the 8-15mm so I can’t see spending nearly twice as much for this one.

The Rebels area always where Canon innovates and offers amazing value – this is true here once again. These are awesome cameras at excellent prices. Pair one of these with the SIGMA 50mm f/1.4 Art Series and I’ll bet it will destroy most of the images people are getting with the new 7D Mark II. I can’t wait to review the T6s!

Other articles you may enjoy

If you enjoyed this article, you may also enjoy these:

Cameras

Lenses

Printers & More

Disclosure

If you make a purchase using links found in this article, I may make a commission. It doesn’t cost you a penny more, but it does help to support future articles like this.

NOTE: This site requires cookies and uses affiliate linking to sites that use cookies.

If you enjoyed this article, please support future articles like this by making a donation or saving money by using my discount coupon codes. Either way, your support is greatly appreciated!

This blog is intended for freelance writing and sharing of opinions and is not a representative of any of the companies whose links are provided on this site.

The opinions provided are of Ron Martinsen alone and do not reflect the view of any other entity

Tuesday, February 3, 2015

REVIEW: Canon EF 100-400mm f/4.5-5.6L IS II USM Lens (SIGMA 120-300 & Canon 200-400 Compared)

Canon EF 100-400mm f/4.5-5.6L IS II USM Lens

I have been waiting for this lens for several years as I loved the original 100-400mm, but felt it was too soft for current generation sensors. With that said, I adored the previous generations reach and compact size – especially for motorsports. When Canon announced a new model, I was super excited so the second I got it in my hands I quickly started to review it. Please be sure to check out my article entitled First Look: Canon EF 100-400mm f/4.5-5.6L IS II USM Lens–The Wait Is Over!!! which contains a lot of my initial thoughts about this lens.

Amazing Image Stabilization

400mm at 1/13 sec - HANDHELD!
100% Zoom of the shot below - 400mm at 1/13 sec - HANDHELD!

I’ve got shaky hands after years of typing, yet without any tricks (FYI: I did not use this trick) I was able to pull off an astonishing 1/13 sec at 400mm – handheld! See the above image and click on the image to see the original. Much of the softness seen in this image is due to the ISO 1250 and f/8 aperture, not the lens. Yes, I was VERY impressed as that is the best I’ve personally ever been able to pull off at 400mm!


Here’s the full image from above - my focal point was the leaf
Canon EOS-1D X, f/8 @ 400 mm, 1/13, ISO 1250, No Flash


Canon EOS-1D X, f/8 @ 100 mm, 1/30, ISO 4000, No Flash

I was pretty far away from this log for both shots. This is the same type of shot at 100mm

I’m pretty certain that nobody is going to fault the IS performance of this lens – it is simply  incredible!

Bookshelf Test

My bookshelf tests are simple tests done on a tripod with stabilization turned off and both a timer and mirror lockup turned on. The images uploaded to the gallery are all the in-camera JPEG’s with Auto White Balance, Standard Picture mode and noise reduction set to low.  


Canon EOS-1D X, f/5.6 @ 100 mm, 15s, ISO 100, No Flash

While this lens isn’t as sharp as its 200-400mm sibling, it’s pretty darn close! When you consider that you have to spend $9600 more to get better results!

Upon close inspection you can pixel peep where it could do a little better, but it’s still excellent overall:

Copyright Ron Martinsen - ALL RIGHTS RESERVED
100% Crop of f/5.6 @ 100mm shot

Only the most hardcore landscape shooters who will be getting the future super megapixel cameras which triple the megapixels of the 1DX will possibly have a reason for a sharper lens like the 200-400mm. Personally, I think sports and wildlife shooters will be plenty happy with the sharpness of this lens. Make no mistake, this is a very sharp lens!


Canon EOS-1D X, f/8 @ 400 mm, 25s, ISO 100, No Flash

At 400mm f/8 is the sweet spot which is nice for wildlife shooters. This is a great focal length to have such sharpness. In fact, when I look closely at the blue book I get really good texture and the faint pattern on the spine is even clearly visible:

Copyright Ron Martinsen - ALL RIGHTS RESERVED
100% Crop of f/8 @ 400mm shot

I’ve only seen this level of detail show up a few times in my testing, so that’s super impressive. Of course, the focal length forced me to get a little closer to the bookcase than I normally like to do. However, this is still good detail that rarely shows up in photos even when cameras are much closer.

Things do drop off after f/8 for 400mm and after f/5.6 for 100mm, but overall it’s a pretty good lens up until f/11. After f/11 things get softer and there’s definitely more softness at 400mm than there is at 100mm. However, I think that is more diffraction related because my sensor has a low pass filter. If the newer models ditch the low pass filter, then this lens should be pretty amazing.

My test lens did have some minor back focusing issues at 400mm (only not 100mm). Normally I’d get addressed by sending the lens in with my camera for a quick calibration with Canon, but I can’t do that for a review. I’ve only had to do that with one lens since I’ve moved to DSLR’s in 2007 (my 24-70mm f/2.8L II), so I suspect this is because I have a first run copy. I wouldn’t expect this to be the normal behavior of these lenses from the factory.

Click here to see a full gallery of images from f/4.5 to f/32.

A Day at the Zoo


Canon EOS-1D X, f/5 @ 248 mm, 1/160, ISO 6400, No Flash

I probably could have shot this at 1/30 sec and in retrospect I wish I would have!
This lens is capable of very slow shutter speeds at any focal length thanks to the outstanding image stabilization (IS) performance

My article entitled At the Zoo with the Canon EF 100-400mm f/4.5-5.6L IS II goes into detail about my thoughts of this camera when photographing wildlife at the zoo. I give some initial impressions which still apply, but I do have one caveat – the trap door on the hood that allows you to rotate filters had a habit of getting bounced open while I was walk the zoo with my BlackRapid strap. A piece of gaffers tape is worth keeping in the bag for a rainy day like this!


Canon EOS-1D X, f/5.6 @ 400 mm, 1/160, ISO 3200, No Flash

Despite a pretty good rain (for Seattle), the AF worked flawlessly 99% of the time

Compared to the Canon 70-200mm f/2.8L IS II USM 


Canon EF70-200mm f-2.8L IS II USM , f/4 @ 200 mm, 10s, ISO 100, No Flash

To my eyes, I find the new 100-400 to be sharper than this benchmark lens. This was shocking and is really starting to make me disappointed in my 70-200 2.8!!!! Just kidding, I still love that lens but it’s awesome to see the new lenses blowing it away!

To see my review of this lens when I first got my hands on it in 2010, see First Look: Canon 70-200mm f/2.8L IS USM II – Perhaps Canon’s greatest lens!

Compared to the SIGMA 120-300mm


Sigma 100-300mm @ f/4 ~200 mm, 6s, ISO 100, No Flash

The SIGMA 120-300mm is a super sharp lens, but the 100-400 feels slightly sharper to me. It was definitely closer than I thought which reminded me how sharp this lens was. However, the stabilization and autofocus of this SIGMA lens were nowhere even close to the being in the same league as the Canon 100-400.

To see my review of this lens, check out my article entitled REVIEW: SIGMA 120-300mm f/2.8 DG OS HSM | S with the Canon 1D X at the Zoo (vs 200-400mm).

Compared to the Canon 200-400mm 


Canon EF200-400mm f-4L IS USM, f/4 @ 200 mm, 8s, ISO 100, No Flash

Surprisingly this mega expensive 200-400mm lens is just slightly sharper, but only if you really pixel peep. This is definitely not a $9600 sharper lens, but if you need a constant f/4 and built-in extender then perhaps it’s worth it to you. The 200-400mm is a phenomenal lens, but I’d save the $9600 and get the 100-400 plus other toys if I had nearly $12k to spend!

To see my review of this lens, check out my article entitled REVIEW: Canon EF 200-400mm f/4L IS USM Lens with Internal 1.4x Extender.

Real World Images

The following images come straight from in-camera JPEG’s using the low noise reduction settings. Most camera settings are the default with the exception of RAW+JPEG, a desired White Balance (only Shade or AWB), and a desired focus point. , The default creative style was used for all of these photos.

Click here for a full gallery of unedited images.

All images are copyright Ron Martinsen – ALL RIGHTS RESERVED. You may not save, print, edit, modify or otherwise use any images featured in this article or the gallery without expressed written permission.


Canon EOS-1D X, f/5 @ 135 mm, 1/100, ISO 12800, No Flash
, Handheld
Outdoor shooters will appreciate that even at high ISO’s
there’s enough sharp detail that you can save a shot as shown here


Canon EOS-1D X, f/5 @ 158 mm, 1/100, ISO 10000, No Flash
, Handheld
You don’t get much bokeh at f/5, but what you get isn’t too bad


Canon EOS-1D X, f/22 @ 100 mm, 0.5s, ISO 400, No Flash
, Tripod
Focused on the foreground rock on the left side. Net result?
I probably wouldn’t consider this a strong landscape lens but I’m
jaded after my SIGMA 50mm and Otus 55mm tests!


Canon EOS-1D X, f/8 @ 100 mm, 10s, ISO 100, No Flash, B+W VND MAX Position

Same shot as above with a variable neutral density filter, and equally unimpressive
See COMPARISON: Variable Neutral Density Filters (Singh-Ray, B+W, Hoya, Tiffen & Bower)


Canon EOS-1D X, f/8 @ 100 mm, 1/6, ISO 100, No Flash
, Tripod
Focused on the tree in the back but a pretty inconclusive result
I’ll admit these shots kinda suck but I was so smitten with the a6000 I was testing at the same time that I didn’t get as many test shots as I should have. I actually enjoyed photographing moving objects with this lens much more, which is why I did the zoo test. Be sure to see the full zoo article for more shots.

Click here to see the complete gallery of test shots.

Conclusion

Ultimately I love this lens and strongly recommend it. While I do wish it was sharper at 400 and my unit definitely needs calibration, nothing I noticed during testing gave me cause for concern. The AF was brilliant for everything except one shot (see the wolf peeking shot in this review) and I loved the new hood design. I do think the new tripod foot sucks – badly, but I don’t expect Canon really gives a hoot what we think about that. While your existing brackets for tripod feet will work, I would advise one custom made for this new foot design for best results.

With sharp images, brilliant image stabilization and fast/quiet AF, there’s really nothing to say but order now and be prepared for a long wait – this lens is going to be in serious demand for quite some time.

After having spent time with this lens, I’m wishing I had the money to buy one for myself. If I had the available funds, I’d definitely buy this lens.

Where to order

Click here to learn more or order on the B&H web site.

Other articles you may enjoy

If you enjoyed this article, you may also enjoy these:

Here’s more Canon related articles too:

Disclosure

If you make a purchase using links found in this article, I may make a commission. It doesn’t cost you a penny more, but it does help to support future articles like this.

NOTE: This site requires cookies and uses affiliate linking to sites that use cookies.

If you enjoyed this article, please support future articles like this by making a donation or saving money by using my discount coupon codes. Either way, your support is greatly appreciated!

This blog is intended for freelance writing and sharing of opinions and is not a representative of any of the companies whose links are provided on this site.

The opinions provided are of Ron Martinsen alone and do not reflect the view of any other entity