Monday, April 30, 2012

How to shoot HDR Panoramas and Artwork Videos

Shooting and Processing HDR Panoramas is a new video by X-Rite Coloratti member Randy Hufford. Randy was part of my printing series and has a great set of DVD’s called The Perfect Print DVD Series. I loved his series, so when he told me he had a new 4 hour DVD on the subject of HDR Panoramas I thought you should know! Here’s a little video preview:


Play in HD

As I’ve mentioned before, don’t let Randy’s laid back Hawaiian nature and energy throw you – this man knows his stuff! He’s a fun and energetic speaker who is sure to please if this is the type of stuff you think you’d enjoy doing.

Trey Ratcliff fans and Photomatix users are sure to enjoy it!

You can learn more or buy it here and I don’t make a penny. I share this with you because Randy does great work that has helped me a lot, and I’m sure you’ll enjoy it too!

Solutions for Photographing Artwork

If you’ve been given the task of photographing artwork, you quickly find out that it is not easy. While books like Light, Science and Magic help, it’s just not as easy as it sounds so seeing a pro actually do it helps a ton. Randy loves to teach and share his vast knowledge, so this is a great video for those who have to do this sort of thing.

You can learn more or buy it here and once again I don’t make a penny if you buy it. I share this with you because Randy does great work that has helped me a lot, and I’m sure you’ll enjoy it too!

Disclosure

While I do not make a penny off of the sale of Randy’s two new videos featured in this article, there are links in this article which could result in me earning a commission. I do know Randy personally and am sharing this information about his videos as a public service. I have not had a chance to watch these videos, but I did watch his The Perfect Print series and liked it very much, so I am assuming that these are as equally helpful.

NOTE: This site requires cookies and uses affiliate linking to sites that use cookies.

If you enjoyed this article, please support future articles like this by making a donation or saving money by using my discount coupon codes. Either way, your support is greatly appreciated!

This blog is intended for freelance writing and sharing of opinions and is not a representative of any of the companies whose links are provided on this site.

The opinions provided are of Ron Martinsen alone and do not reflect the view of any other entity

onOne Software Perfect Photo Suite 6.1 Sale–Only $199.95 Until May 1st

Just click here and you’ll get the special price while this offer is in effect. It’ll show coupon code STE6 in your cart, so if you don’t see that then the sale is over.

After the sale is over you can save 10% on ALL onOne Software products when you use my onOne Software Coupon Code RMART20 (if not working, check my discount coupon code page for the current code).

Limited Time Until May 1st

Get the entire Perfect Photo Suite for only $199.95 until May 1st! This is an insane deal as several of the products included are totally worth the $199 alone, so to get all these products at this low price (normally about $499) is really great!

Even if you don’t get the suite, you can still get a free copy of  Perfect Effects 3 and Perfect Layers 2 to add layers to your Aperture or Lightroom workflow:

Click the links below to see my onOne Software product reviews:

Disclosure

I may make a commission if you make a purchase using links found in this article.

NOTE: This site requires cookies and uses affiliate linking to sites that use cookies.

If you enjoyed this article, please support future articles like this by making a donation or saving money by using my discount coupon codes. Either way, your support is greatly appreciated!

This blog is intended for freelance writing and sharing of opinions and is not a representative of any of the companies whose links are provided on this site.

The opinions provided are of Ron Martinsen alone and do not reflect the view of any other entity

Friday, April 27, 2012

WORKSHOP: Gary Parker & Ron Martinsen Photographing People Workshop in Seattle - May 26th, 2012

Copyright Gary Parker - ALL RIGHTS RESERVED
Come Join Gary & Ron to learn how to make great summer photos!

I’m pleased to announce that I’ll be holding another Photography Workshop on Saturday May 26th, 2012 in Seattle, but this time with photography legend Gary Parker. Limited spots are available, so interested parties should act quickly. See the end of this article for more details on enrollment. To quickly see how much fun students had at Ron’s last workshop, click here.

Check out some of Gary’s guest blogs here:

Learn composition from a whole new perspective

Copyright Gary Parker - ALL RIGHTS RESERVED

Gary Parker is not your average photographer.

He doesn’t see the world like you.

Gary has a gift of seeing the world differently and capturing the most amazing shots in situations where most people wouldn’t even have their camera with them. It’s both amazing and liberating to see how he does his magic because it’s not formulaic or tedious. Gary just knows how to get the shot and does a great job of sharing his enthusiasm with others to help take your photos to the next level!

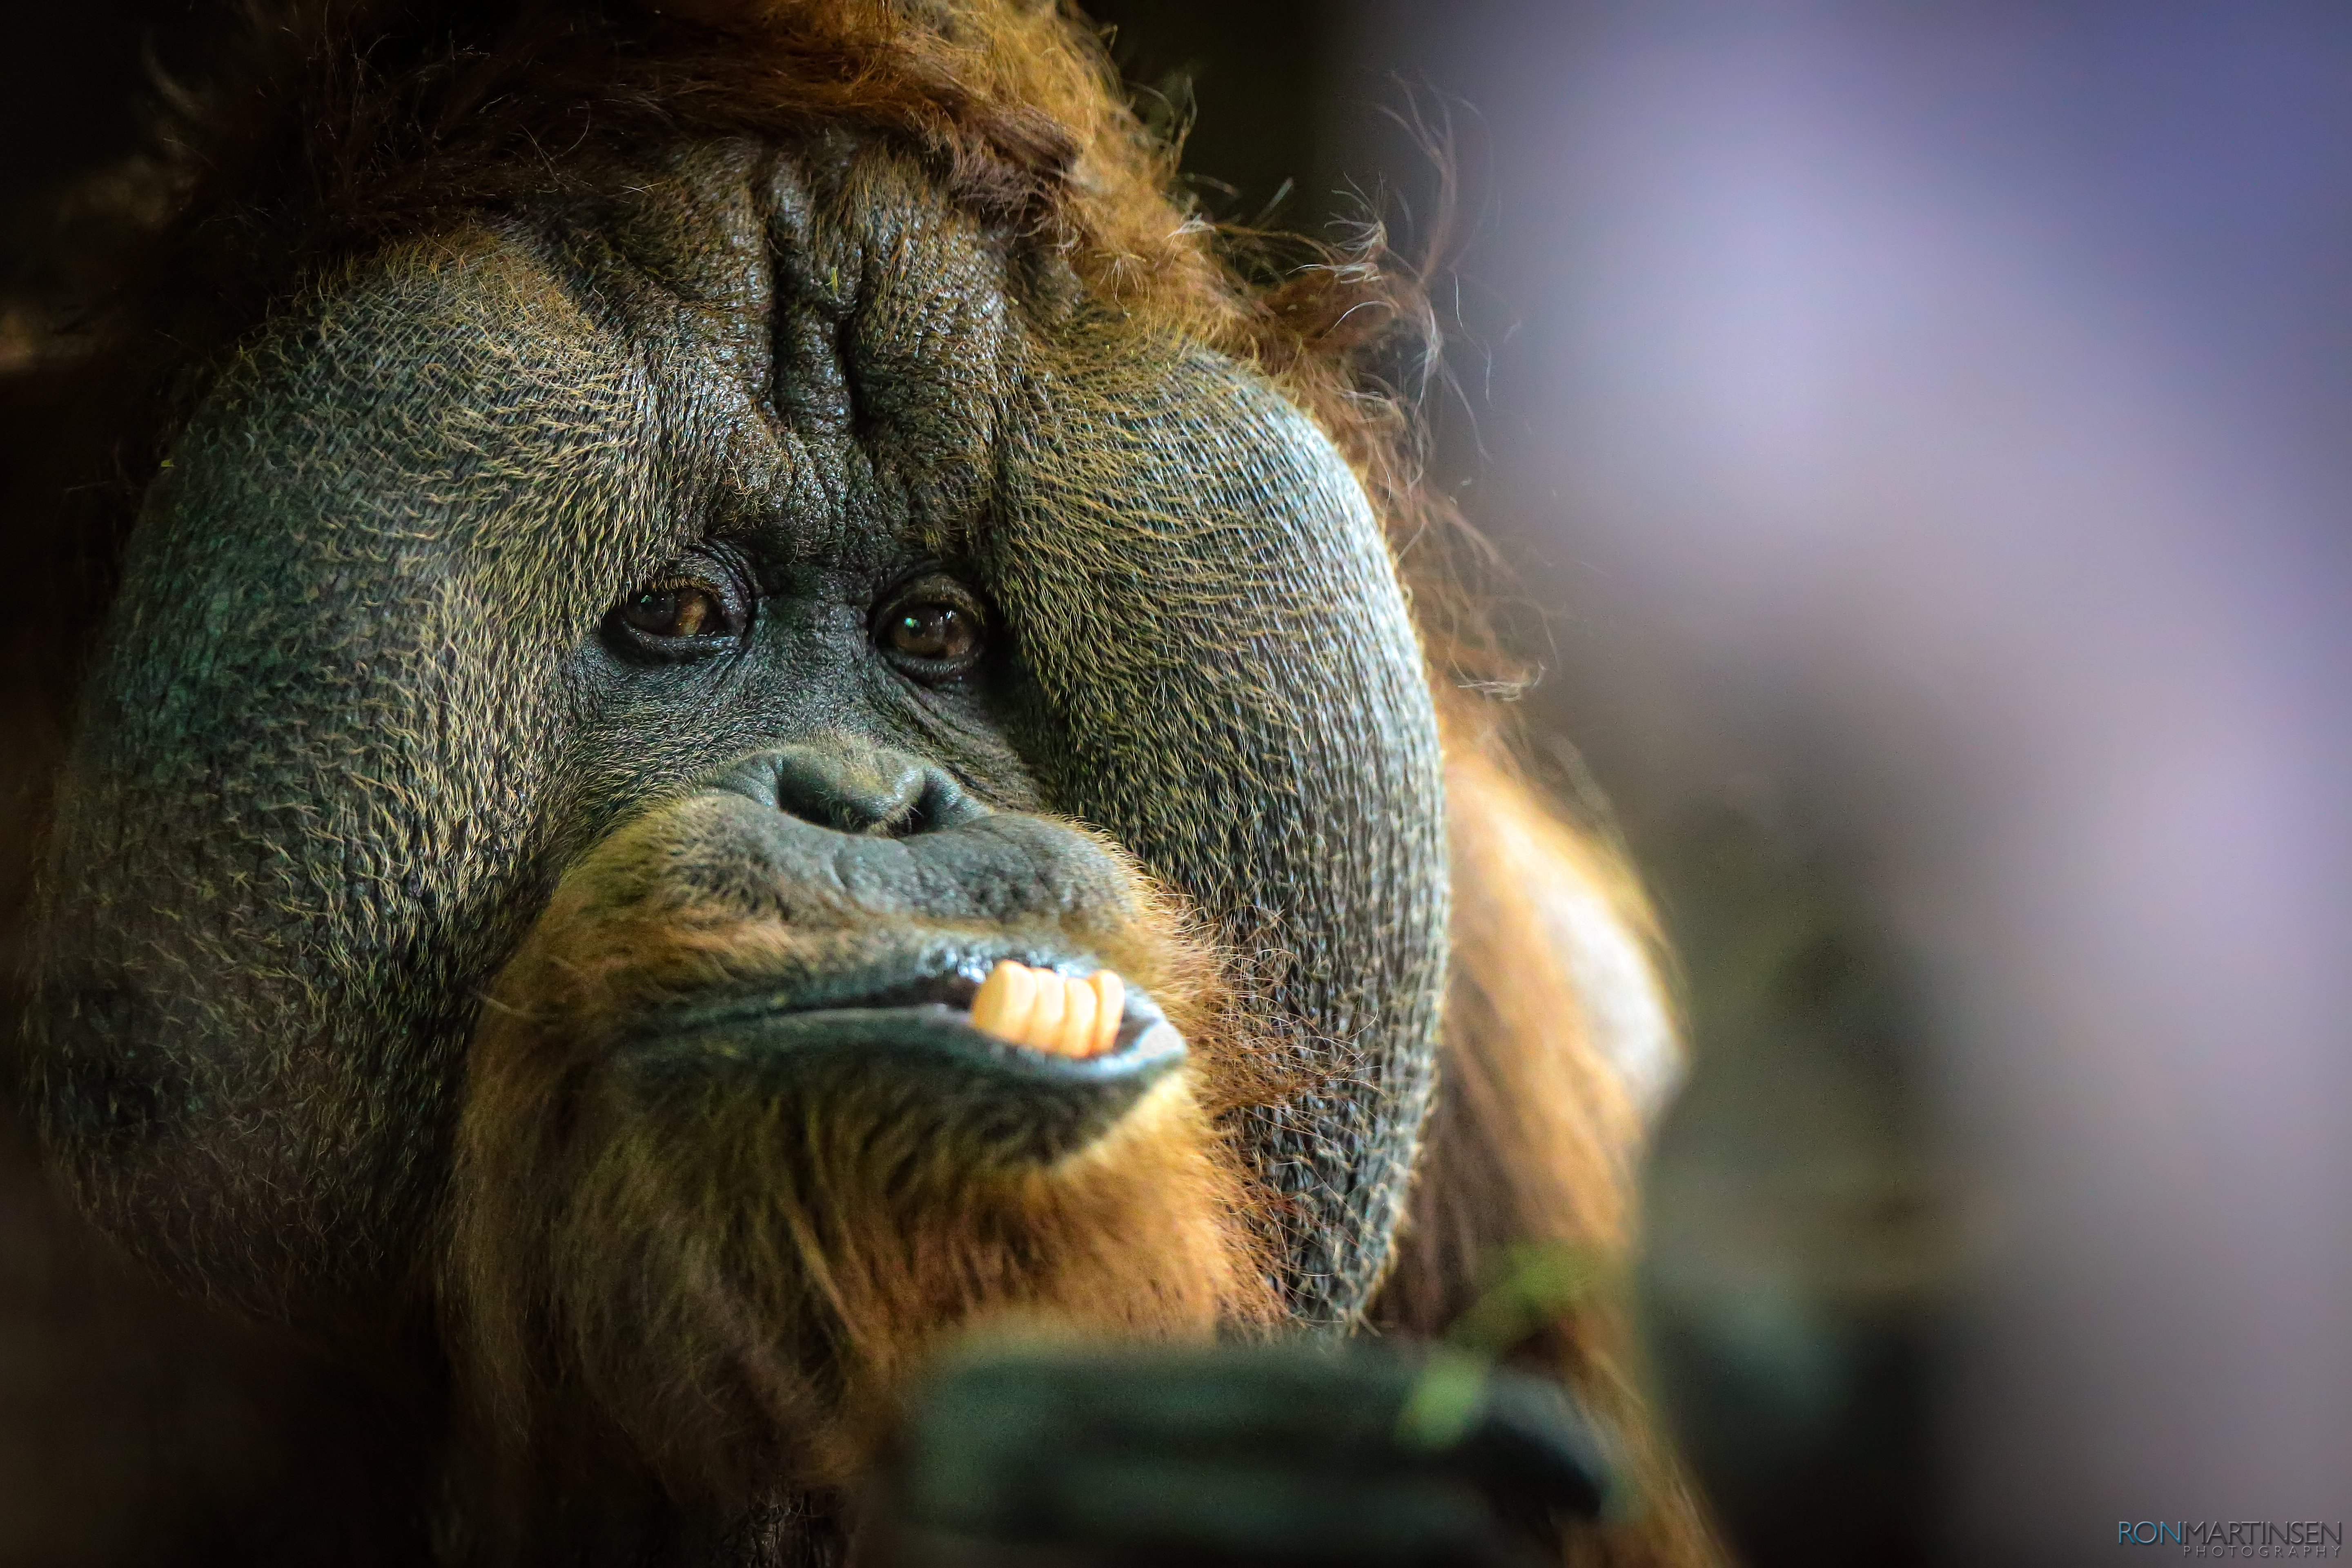
Tired of the boring same old mug shots? This workshop may be just the ticket!

Copyright Gary Parker - ALL RIGHTS RESERVED

Details

This workshop is designed for both beginners and seasoned photographers. The theme of this class will be taking photos of people with an emphasis on composition and lighting in an outdoor environment.

The class will begin at approximately 9:30 AM in Renton, WA and will end at approximately 4:00 PM in Seattle. The duration of the teaching portion of the workshop will be roughly 5 hours. A lunch break and travel time are built into the schedule.

This session will include at least one model for 3 hours (Raia pictured below, confirmed) and possibly a second.

Raia - Copyright Ron Martinsen - All Rights Reserved
Raia

After the morning outdoor shoot, we will spend the last part of the day outdoors in Seattle around Pikes Place Market.

  • You will be able to learn how to improve your photography and on-camera flash skills outdoor in real world situations. You will have access to Gary, Ron and an assistant to get your questions answered and to help you get your best shot.
  • You will get group as well as one-on-one instruction from both Gary and Ron at EACH location as well as the boot camp in the evening. It is for this reason this won’t be a workshop of 20 people so one-on-one interaction is the plan.
  • Food will not be included in the price but we will stop together as a group and have a quick bite (i.e., pizza, subs, etc…) near the first location. Those with special diet needs should plan to bring their own lunches. Everyone should also bring water and snacks from home.
  • You will be responsible for transportation and parking expenses between events, but I hope to carpool. I will bring my SUV and can take up to 4 people with me, so contact me ASAP after payment if you want one of those spots. Out of town guests and those who don’t own a car will get priority seating with me. I am not responsible for theft or damage of gear, laptops stored in my vehicle which will not be able to conceal your gear left in the car from view. It is therefore recommend you carry your gear with you in a comfortable backpack like those from Think Tank Photo.
  • There will be no handouts, so you are responsible for your own note taking materials or devices.Video recording of the class is prohibited.
  • The only gear required is your Digital SLR camera (no point and shoots, Rangefinders, etc…), but you may find having an external flash and/or remote radio triggered flashes handy. Extra memory cards and common photography accessories are encouraged as well. Both instructors are Canon shooters, so responses to technical questions for other platforms may be limited. Students should carry their product user manuals in their camera bags.

This class will take place rain or shine as the primary objective is to learn how to make great shots in any conditions. Dress and plan according to the weather!

About Ron Martinsen

Copyright Ron Martinsen - ALL RIGHTS RESERVED
Self-Portrait (Copyright Ron Martinsen – 2012)

Ron Martinsen has been teaching Photography, Lightroom and Photoshop since 2008.

His blog has been enjoying exponential growth and has been enjoyed by nearly a million visitors in over 180 countries around the world. More recently, Ron has been gaining recognition from major players in the industry including Scott Kelby, John Paul Caponigro, Trey Ratcliff, Joe McNally, Nik Software, NEC, B&H and so many more.

You can find Ron’s work in magazines around the world including GQ (France), Robb Report (Russia), Cycle World (Los Angeles) and many more.

To see a small sample of Ron’s work, visit his portfolio site and photography notebook. You can also learn more about his Printing 101 eBook on his popular printing series page.

Since his last workshop and the one he taught with Bryan Peterson, Ron has had numerous requests to do another workshop so now is your chance!

About Gary Parker


Gary Parker with his Little People Friends

Award-winning photographer Gary Parker is widely recognized for creating compelling images for Corporate clients, Advertising campaigns and Publications.  Inventive and versatile, Gary’s diverse range of dramatic environmental portraits, stunning product shots and other photographic specialties have earned him a multitude of accolades.  Gary is well regarded for his palpable energy and innate ability to elicit a positive response from his subjects, be they big shot moguls (http://www.garyparker.com - Corporate & Lifestyle), his fabulous furry four-legged friends (http://www.catdogphotography.com - Pet industry & Kid Lifestyle) or his Pro Bono work for Little People of America featuring the largest library of little people images in the world (http://www.garyparker.com - Dwarfism).

Copyright Gary Parker - ALL RIGHTS RESERVED
Ron Martinsen & his wife Moonhee by Gary Parker

Beginning his career as a photojournalist, then recruited as a staff photographer for Time/Warner – with over 200 magazine covers from Sunset Magazine to Information Week – Gary has earned a reputation for absolute dependability, enthusiasm and eagerness to embrace photographic challenges. As a seasoned specialist in lighting and large production shoots, Gary is especially adept at solving complex issues and working with individuals where timeframe or temperament may present a challenge.  Whether collaborating with Art Directors or serving as chief Creative Media Consultant to his clients, Gary is the “go-to” photographer folks hire when there is no second chance to get an image right.

Awards, Commendations & Endorsements

  • Pulitzer Prize-winning Team for the San Jose Mercury News coverage of Loma Prieta Earthquake
  • Southern Photographer of the Year
  • Newspaper Photographer of the Year (twice honored)
  • 1998 Communications Art Photography Annual
  • 1999 Luerzer’s Archive – Best of International Advertising Photography Annual
  • Lecturer for Flying Short Course
  • Workshops on lighting, creativity and digital darkroom
  • Endorsements for Canon Camera, Imacon Scanners and Calumet
  • TV Appearances and images featured on Discovery TLC, “Kenadie’s Story Part 2”,  “Romeo Dev “The Worlds Smallest Bodybuilder”
  • TV- Associate Producer for upcoming Series this Summer (to be announced)
Client Resume

CORPORATE & TECHNOLOGY:
Apple, Applied Materials, CentroSolar, Cisco, Cogenra Solar, Complete Genomics, Dow Jones, Inc., EFI, Facebook, Fiberzone, Fujitsu, HP, Hitachi Microsystems, IBM, Idexx, INS/Lucent Technologies, Intel, KNTV, Microsoft, NetApp, OnPharma, Plantronics, Pulmonx, San Jose Convention & Visitor’s Bureau, Sony, Tabula, Tibco, Togos, Topcon, VeloDyne, VeriFone, and many others...

ADVERTISING:
Purina Cat Chow, Purina, Iams/Eukanuba, Milk Bone, PediaSure, Pedigree, PetFree, PetSafe, Pfizer Pharmaceuticals, Nestles, Procter & Gamble, Alaska Digitel, Allied Signal/Fram, Atlantic Bank, Avoderm, Bayer/Merit, BBC, Bell Helmets, Buster Brown, Costco, Del Monte, Discovery, Fairmont Hotels, FidoPharm, Ford Motor Company, Societe Generale/Bank du France, Starter Athletic, Tony Lama, US Postal Service, and others…

MAGAZINES:
New York Times, Wall Street Journal, Time, Fortune, Money, Newsweek, MacWorld, Sunset Magazine, Southern Living Magazine, Oxmoor House Books, Sports Illustrated, Information Week, Harvard Magazine, Consumer Reports, EE Times, Costco Connection, State Farm Magazine, Harvard Alumni Magazine, Communication Arts, Luerzers Archive, Publish, VAR Business, , Mother Jones Magazine, Popular Photography, der Stern Magazine, Southern Accents Magazine, Mix Magazine, Interactivity Magazine, Electronic Musician, L.A. Times, West Magazine, Alaska Airlines Magazine, Pulse Magazine, Expressen Sweden, Pick Me Up, See & Hear Norway, Pan Media South Africa, Woman Day Australia, Closer and others...

TELEVISION:
Appearances; Discovery/TLC Documentaries – “Kenadie’s Story Part II”, Discovery/TLC Romeo Dev “Worlds Smallest Bodybuilder”,
Photographs on TV;  ABC News - Medical Mystery, The Dr. Oz Show, Discovery/TLC Documentaries – “Kenadie’s Story Part II”,  “Romeo Dev – The Worlds Smallest Bodybuilder”

PRO BONO:
Gary's enthusiastic approach brings into play years of experience as a Pro Bono photographer and ambassador for Little People of America and, specifically, his support of the Primordial Dwarfism community.

In 2009 Gary and his wife Kimberly were named Honorary Lifetime Members of Little People of America for their contributions towards increasing Dwarfism awareness globally through Gary's landmark Little People photography, the largest body of work of it's kind in the world. Gary's work was highly lauded for the dignified and respectful manner in which Gary photographs the subjects he has come to love.

Workshop Enrollment (Special Introductory Price)

The cost for this 5 hour workshop is only $399 + tax with a minimum of 6 students (max 8).  Future courses may be offered at a much higher rate. Meals, lodging and transportation are not included. The fee only covers your participation with Ron & Gary.  

Feel free to use the comments or email below to ask questions about the workshop.

If you are interested in attending then send mail to ronmartblog@martinsen.com with the subject “Ron Martinsen Workshop”. To reserve your spot please make your full payment using the button below:

Click to purchase your spot via PayPal

Withdrawal Policy: All pre-payments are subject to a 25% cancellation fee after May 3rd and the fee increases to 50% on May 11th. No refunds are available after May 20th if the class is held on May 26th as advertised. Special exceptions are at the sole discretion of Ron Martinsen.

If Ron or Gary can’t attend for any reason a full refund will be provided to all registered students.

Disclosure

This is a for profit workshop. If it is necessary to cancel for any circumstances, a refund will be issued.

If you make a purchase using select links in this article, I may make a commission.

NOTE: This site requires cookies and uses affiliate linking to sites that use cookies.

If you enjoyed this article, please support future articles like this by making a donation or saving money by using my discount coupon codes. Either way, your support is greatly appreciated!

This blog is intended for freelance writing and sharing of opinions and is not a representative of any of the companies whose links are provided on this site.

The opinions provided are of Ron Martinsen alone and do not reflect the view of any other entity

Thursday, April 26, 2012

Mini Review: onOne Software Focal Point 2

Mouse over to see the image without the focus bug, mouse out to see the focus bug
onOne Software FocalPoint 2

onOne Software’s FocalPoint is an application that you can run directly from Aperture or Lightroom without owning Photoshop to add lens blur and vignetting to your image. It’s very powerful because it can emulate a lot of great lens blur effects (from expensive lenses) and you can control the effect.

I last reviewed onOne Software’s FocalPoint 1.0 product in early 2009 when I compared it to AlienSkin Software’s Bokeh. Since that time Bokeh hasn’t evolved that much, but Focal Point has improved quite a bit. Both products are good, but I find the user interface of Focal Point to be far superior.

The main reason I prefer FocalPoint now is because I have a lot more control of what I do and the powerful focal bug makes it much easier to get the look I want quickly. However, as good as the bug is there’s still the problem with part of my image getting blur that I don’t want so that’s where the handy FocusBrush comes in where I can easily remove the parts where I don’t want blur and add it where I do. It’s simple masking which can easily be done in Photoshop, but for Lightroom users this support being built in the product means you are limited. For Photoshop users it’s also means that you don’t have to visit Photoshop to just do a blur effect.

Use Focal Point to control your viewers eye

In the sample photo below I’ve used FocalPoint to blur out the distracting mud on the ground and draw the viewers attention more to the yellow tulip in the center. I’ve also done a little Photoshop work to remove some other distractions and applied Nik Software’s Tonal Contrast filter (in Color Efex Pro 4).

Mouse over to see before, mouse out to see after
After post processing (hover (or tap on iOS) to see the before)

If you hover your mouse over the photo above (or look at the photo below) you can see the difference it makes in blurring the edges and adding a vignette. No longer are your eyes flying off the frame, but instead they keep getting bounced back into the center of the photo to the tulip where you want their attention to be.

Mouse over to see after, mouse out to see before
Before post processing (hover (or tap on iOS) to see the after)

For those viewing on mobile devices, I’ve included the before version, but if you are using a mouse you can hover over either photo to toggle between before and after. You can also tap on the photo to toggle on iOS (but you must tap a different photo to toggle back).

This is just one example, but you can imagine anywhere you have unwanted background you could use FocalPoint to make it become less visible in a natural kind of way. You can also use FocalPoint to create the toy city effect like this:

Overall it’s a fun product that is a nice stand alone product or addition to have when getting the other great Perfect Photo Suite 6.1.

Special Offer

Save 10% on ALL onOne Software products when you use my onOne Software Coupon Code RMART20 (if not working, check my discount coupon code page for the current code).

image

Limited Time Until May 1st

Special Perfect Photo Suite Deal - onOne Software Perfect Suite 6.1 Sale–Only $269.95 Until May 1st.

Conclusion

This product has been around awhile, but I’ll admit that I hadn’t been using it much. Now that I’ve taken the time to rediscover it, I look forward to adding it back to my digital workflow. Download the free trial here and try it out for yourself!

Click the links below to see my other onOne Software product reviews:

Disclosure

I may make a commission if you make a purchase using links found in this article.

NOTE: This site requires cookies and uses affiliate linking to sites that use cookies.

If you enjoyed this article, please support future articles like this by making a donation or saving money by using my discount coupon codes. Either way, your support is greatly appreciated!

This blog is intended for freelance writing and sharing of opinions and is not a representative of any of the companies whose links are provided on this site.

The opinions provided are of Ron Martinsen alone and do not reflect the view of any other entity

Wednesday, April 25, 2012

Getting The Shot: Steve Jobs and Laurene Powell Jobs In Love by Gary Parker

Steve Jobs and Laurene Powell Jobs by Gary Parker - ALL RIGHTS RESERVED
Copyright Gary Parker – ALL RIGHTS RESERVED

It was about 9 pm in the evening when my studio phone rang. I answered casually instead of with my official business voice and name. The voice on the other end asked, “Is this Gary Parker?” then “Hi Gary, this is Steve Jobs. Great picture you made of Laurene and me yesterday! Can I get a copy to give my wife for Christmas? Really nice job, man!”

I wasn’t really expecting a call from Steve Jobs… Sweet!

Steve was not famous for his complimentary style – yet this is exactly why he called! He could have let his people simply order a print. Cool!

In all truth, I thought Steve might be calling to chew me out for defying his instructions by making flash photographs the day before at a worldwide Apple product release. The problem was I made strobe pictures after Steve’s people directly relayed his last-minute instructions, “No flash…” (Steve hated strobes) I wondered if maybe Steve was calling to personally fire me out loud?!!! Was I about to be fired in a burst of fury by a world icon?!!!

This phone call from Steve Jobs came just one day after August 15, 1998, the day he announced the release of the original iMac, those groovy psychedelic, vividly colorful computers that dominated the end of the millennium. NOT your Grandmother’s ordinary beige computer…

At the time, Apple’s stock was around $25/share and as it turned out, incredibly, this was the very product release which began the amazing turn of Apple’s fortunes by becoming the best selling computer in the world! Steve’s excitement about the release was smack on the money! Steve Jobs really did know a big deal when he had one in his ragged, holey cutoffs… (Steve’s rumored dress code at the office…)

The fact this picture of Steve and Laurene exists at all is remarkable since it’s lit with a ceiling full of large strobes – even though Steve was literally famous amongst photographers for truly despising flash. Of course the truth is I was excited about lighting this large venue – just for fun – and because it was for Steve Jobs and no telling what new product, whatever, it was bound to be cool.

I also felt the place needed to be fully lit. What a great opportunity to make the kinds of crisp images you get with the increased apparent sharpness and contrast of multi-strobe lighting!

I was initially shocked when my Apple contacts called to say Steve AGREED to let me light the large venue, though only because this product release was SO BIG. Really big…

I was stunned, in disbelief by a “yes” answer to strobes. Steve had been known to stop live worldwide satellite feeds to chew out photographers when strobes were fired after his “1st minute only” flash curfew. Steve really really really hated flash of any kind! YET he was going to let me light this big worldwide product release??? Hmm… No way… I just couldn’t believe it… Each day as the event approached I called my Apple contacts to make sure lighting Flint Center was still ok by Steve.

My big-huge-gigantic FEAR was we’d show up, spend hours sweating over custom lighting this entire event center, climbing rafters, only to have Steve pull the plug at the last minute. Yet, by the day of the event, I’d been assured, reassured and double-dog-rest-assured lighting the place was fine by Steve – this was something REALLY BIG! I bought in…

On the day of the event just before daylight my talented assistant, Andrew Nielsen, and I showed up to light the place for a 10:30 worldwide keynote with satellites pointing in all directions as if Captain Kirk was materializing as a guest speaker. By 9:30 am, five 2000 watt-second power packs and 12 strobe heads were mounted, tweaked to my desired settings, tested and double tested - good to go with an hour to spare!!! The stage and crowd were lit to perfection! I was in the most perfect location. Good to shoot in all directions. Nice, yet still just a wee bit antsy…

Sure enough, 60 seconds before Steve took the stage, I notice his personal assistant up to whisper, ”Steve changed his mind.  NO STROBES.”  SAY WHAT????!!!!  (long string of expletives deleted!!!!) There I sat, stoked about making the best pics of Steve Jobs ever made on a stage and suddenly the plan changed entirely with only a literal single minute to switch gears and decide what to do?!!!!

The obvious only-recourse was to increase the ISO of the early-digital Kodak/Nikon digital camera to a noisy ISO 800 and push the Fujichrome 100 two stops to ISO 400.  Since the stage was not brightly lit, this meant I could only shoot Steve at peak moments – when he paused or reached the apex of a gesture – at around 1/30th of a second with the 300/2.8 wide open to f2.8. Fortunately, Steve made many emphatic points, which required a prolonged gesture. From a tripod that meant I got lots of peak moments, yet back to a more risky natural light look, rather than the easy, crispy edge strobe look I was expecting.

So, it seems a bit ironic this sweet picture of Steve & Laurene Jobs made after the event is the only image made with flash, even though the lighting was intended for the entire grand Apple event.

Still it was ALL well worth it if only for this one priceless moment as Steve plopped on the edge of the stage once the auditorium had cleared. Laurene approached to softly connect with Steve for a good long head to head moment. Sweet… This was just time enough for me to whip my trusty Pocket Wizard out of my pocket, toss up the 300 2.8, and fire three quick frames – with ALL THOSE STROBES - until Steve shot me a murderously piercing glare… YIKES! Fade to black…under the stage…

It occurred to me that this glare may well have come with a twinkle, since my suspicion was Steve intuitively knew exactly what I’d photographed, as he and his wife shared this rare public moment, head to head, soul to soul.

About Gary Parker (by Ron Martinsen)

Gary Parker is on of my favorite photographers and this photo is just one of many in his portfolio that make me go “WOW”!!! Not only is Gary talented at photographing people, but his pet photography at CatDogPhotography.com is going to look familiar to you if you’ve ever owned a pet.

Among Gary’s long list of accomplishments is being a member of the Pulitzer Prize-winning Team for the San Jose Mercury News coverage of Loma Prieta Earthquake; Southern Photographer of the Year; and Newspaper Photographer of the Year (twice!).

As you can see from this photo and hear from this story, Gary is a man that knows how to get the shot! You can learn more about another one of Gary’s photos in his LEARNING FROM THE PRO’S: Gary Parker on Having Fun on a Commercial Dog Shoot article.

Gary Parker Workshop

If you’d like a chance to learn how to make great shots from Gary, he and Ron will be doing a workshop in Seattle in May. Click here to learn more.

NOTE: This site requires cookies and uses affiliate linking to sites that use cookies.

If you enjoyed this article, please support future articles like this by making a donation or saving money by using my discount coupon codes. Either way, your support is greatly appreciated!

This blog is intended for freelance writing and sharing of opinions and is not a representative of any of the companies whose links are provided on this site.

The opinions provided are of Ron Martinsen alone and do not reflect the view of any other entity

Tuesday, April 24, 2012

5D Mark III and 300mm f/2.8L IS II USM at the Zoo


1/320 at f2/8, ISO 12,800, 300mm
Shot through nasty dirty zoo plexi-glass and edited in
Photoshop CS6

Recently I had the luxury of having a Canon 300mm f/2.8L IS II USM lens (Adorama, B&H, & Rent from LensRentals.com) on loan from Canon. This is an outstanding lens, but my lens had a little bit of a back focus issue that I didn’t have a chance to correct before I took my family to the zoo this past weekend. Despite that fact, the laser focus of the Canon 5D Mark III’s spot focus has been blowing me away shot after shot.

In the shot above I was pretty far back in the crowd of people with their faces against the Plexiglas to look at this cute fellow. I had to shoot through the crowd and try to get a bead on his eye (actually a little offset due to the back focus issue). What you see in the above shot is a scaled down (but click for a larger full size) version of the photo I edited in Photoshop CS6. It’s basically been treated to Noiseware, Color Efex Pro 4’s Tonal Contrast & Skylight filters, and a little content aware patch tool work on the teeth. You can find the un-retouched original in-camera JPEG here, or click the photo for the full size edited version.

I’m pretty impressed especially considering that I could barely see through the nasty scum on the Plexiglas with my naked eye and that distraction at the bottom of the frame is one of the many kids popping in and out of my frame while I tried to take this shot.

The light was brutal as we were there during the brightest part of the day to have fun, so taking photos was kind of a secondary thing despite my lugging this huge beast of a lens around. Here’s a shot of a giraffe that I took in brutal light and edited lightly in Lightroom 4.0:


1/800 sec at f/2.8, ISO 100 – Minor Lightroom Edits

The environment for this shot had nothing going for it, so it was a brutal shot to try to get in super harsh sun. However, I thought the 5D Mark III did a reasonable job. This is after all only 30% of the original image and the best I could do given the nasty cage he was in. You can click here to see another uncropped in-camera jpeg with no edits of his next door neighbor.


1/320 at f/2.8, ISO 100, 300mm
Lightroom 4.0 – Crop (keep 30%) from In-Camera JPEG with Punch & Sharpen Faces Preset


1/320 at f/2.8, ISO 400, 300mm

I’ll spare my wife and not show you the original, but this edit only features skin corrections in Photoshop (mostly Portraiture and Content Aware Patch Tool in CS6). The rest is the in-camera JPEG, but I’ve only made a small version available. Overall though I was very happy with this lens as a portrait lens even if the working distance is a bit far.

A Few Untouched In-Camera JPEG’s

All of the following have had ZERO post processing beyond what happens in-camera for the creation of the JPEG. Again, I’m pretty happy with the astonishing spot focus system in the 5D Mark III which has given me more perfect frames with this camera than anything I’ve ever used. All of these shots were taken with the Canon 300mm f/2.8L IS II USM lens (Adorama, B&H, & Rent from LensRentals.com) on loan from Canon:


1/250 at f/7.1, ISO 1250, 300mm
In-Camera JPEG with No Edits


1/1250 at f/2.8, ISO 100, 300mm
In-Camera JPEG with No Edits

Conclusion

While none of these are exactly portfolio shots, and most were simply quick snatches for the family photo album, I was super impressed with the performance of this combo.  The back focus issue was as pain to deal with, but I managed. However, the spot focus AF of the Canon 5D Mark III shouldn’t be overlooked as it really seems to be one of the greatest features of this new body. I just can’t believe how many perfectly in focus shots I keep getting with the focus point being EXACTLY on my intended target.

I highly recommend the Canon 300mm f/2.8L IS II USM lens. You can pick one up from Adorama or B&H, but if you can’t afford its steep price then it’s a little more affordable to rent it from BorrowLenses.com or LensRentals.com.

Other Articles You May Enjoy

Disclosure

I was provided this lens by Canon as part of my CPS membership and was not obligated in any way to feature my findings on my blog. I shared just because I enjoyed the results I got under tough conditions. If you make a purchase using links found in this article, I may make a commission.

NOTE: This site requires cookies and uses affiliate linking to sites that use cookies.

If you enjoyed this article, please support future articles like this by making a donation or saving money by using my discount coupon codes. Either way, your support is greatly appreciated!

This blog is intended for freelance writing and sharing of opinions and is not a representative of any of the companies whose links are provided on this site.

The opinions provided are of Ron Martinsen alone and do not reflect the view of any other entity

Adorama One Day Sale–EXPIRED


image

Sorry folks, it appears there was a miscommunication between myself and Adorama. When I read the mail on Monday that said tomorrow, I thought that it meant the sale was on Tuesday. Instead, the sale was from 9:00 AM Monday until 9:00 AM Tuesday so this offer has expired. Even this was confusing as last night when I was preparing this article I did not see the special prices, so this was a major miscommunication or something.

I sincerely apologize for the mistake.

Ron

NOTE: This site requires cookies and uses affiliate linking to sites that use cookies.

If you enjoyed this article, please support future articles like this by making a donation or saving money by using my discount coupon codes. Either way, your support is greatly appreciated!

This blog is intended for freelance writing and sharing of opinions and is not a representative of any of the companies whose links are provided on this site.

The opinions provided are of Ron Martinsen alone and do not reflect the view of any other entity

Monday, April 23, 2012

Adobe Releases Photoshop CS6 and The Creative Cloud

Today Adobe announced the release of Creative Suite 6 which includes Photoshop CS6. The beta has been out for a bit for people to test, but if you haven’t done that yet then a trial version is available soon at http://www.adobe.com/products/photoshop.html.

Creative Cloud is also another big change to connect all of your devices so you can do your work no matter where you want. Click here to watch a video and learn more and see how it works with Photoshop Touch for iOS and Android (which I can’t want to install).

Rather than bore you with text, I thought I’d share a bunch of videos that went live in the wee hours of the morning

Videos of What's New


Introduction to Photoshop CS6


Julieanne's Top 6 Photoshop CS6 Features


All-New Crop Tool in Photoshop CS6


Content-Aware Patch in Photoshop CS6


New and Reengineered Design Tools in Photoshop CS6


Look at the Big Picture with Adaptive Wide Angle in Photoshop CS6


Top 10 Time Saving Enhancements to the Layers Panel in Photoshop CS6


Mercury Graphics Engine in Photoshop CS6


Six Favorite Features from Photoshop CS6 Extended in Six Minutes

Blur


Selectively Blurring Images in Photoshop CS6


Tips and Techniques for Using Tilt Shift, Iris Blur, and Field Blur in Photoshop CS6


New Blur Gallery in Photoshop CS6

Camera Raw


Amazing Wonders of Adobe Camera Raw 7.0 in Photoshop CS6


Adobe Camera Raw 7.0 in Photoshop CS6

Video

Here are some hot new videos about the Photoshop CS6 video processing features:


Using the New Video Features in Photoshop CS6


Intuitive Video Creation in Photoshop CS6

Conclusion

I’m pretty jazzed about the new version of Photoshop. While I’ve only had experience with the beta, I’ve already found the content aware patch tool to be enough to warrant the upgrade to me. Of course, if you have a new camera and plan to shoot RAW then you’ll need Adobe Camera Raw 7, which makes an upgrade pretty much mandatory.

More to come in weeks ahead as I become more comfortable with the new version.

Learn more here on Adobe’s web site, Scott Kelby’s website.

Disclosure

I may make a small commission if you purchase using the links found in this article. Thanks for supporting this blog by using my links!

NOTE: This site requires cookies and uses affiliate linking to sites that use cookies.

If you enjoyed this article, please support future articles like this by making a donation or saving money by using my discount coupon codes. Either way, your support is greatly appreciated!

This blog is intended for freelance writing and sharing of opinions and is not a representative of any of the companies whose links are provided on this site.

The opinions provided are of Ron Martinsen alone and do not reflect the view of any other entity

Friday, April 20, 2012

35% Off All Topaz Software Products THIS WEEKEND ONLY

Topaz Labs is offering 35% off ALL their products this weekend only when you use my special coupon code ronmartTWP at http://www.topazlabs.com/store. Here’s what your cart should look like after you've applied the code:

image
Enter the code and click apply to see your discount

Personally I recommend the bundle because you only need to buy a few products before you’ve exceeded the cost of the bundle (especially with this great deal), but even if you only buy one product this is a great offer.

This offer ends just before midnight on Sunday April 22nd, so act fast!

Here’s some of the Topaz Software products I’ve reviewed on this blog:

Disclosure

I may make a commission if you make a purchase using this deal. This offer is not valid with any other offers or codes.

NOTE: This site requires cookies and uses affiliate linking to sites that use cookies.

If you enjoyed this article, please support future articles like this by making a donation or saving money by using my discount coupon codes. Either way, your support is greatly appreciated!

This blog is intended for freelance writing and sharing of opinions and is not a representative of any of the companies whose links are provided on this site.

The opinions provided are of Ron Martinsen alone and do not reflect the view of any other entity

Thursday, April 19, 2012

GUEST REVIEW: Film is Not Dead – A Digital Photographer’s Guide to Shooting Film by Jonathan Canlas & Kristen Kalp

Intro

Although I started shooting film in the early 1980’s, I’m happy the film days are gone. In my mind it is dead, but I realize that many still enjoy the charm of shooting film. In fact, I’ve still got a few rolls on the shelf and occasionally feel the desire to fire off a roll. However, I’ve moved on and embraced digital and love ever second of it.

When one of my partner publishers sent me a copy of Film Is Not Dead: A Digital Photographer's Guide to Shooting Film I thought about just tossing it aside and not doing a review, but then I remembered one of my former Lightroom students Mark Olwick. Mark has always been a film photographer who only dabbled in digital on the side. I figured he was a much more qualified person than me to review this book and offer a fair opinion of it for those who are still enchanted by the charm of film photography.

About Mark Olwick

Mark Olwick is a fine art photographer living in Seattle WA and has been shooting film for more than 40 years.  He specializes in capturing the emotion and dreams of exotic places around the world.  You can view his work at olwickphotography.com

Review

Being primarily a film photographer, Ron asked me to share my thoughts on Jonathan Canlas’ book “Film is Not Dead”. There’s been a real resurgence of interest in shooting film as many digital photographers attempt to differentiate their look from millions of others.

The book is written from the point of view of a wedding and portrait photographer, of which Jonathan Canlas is an outstanding example. If you’re a digital photographer in that area, this book will definitely speak to your style of photography. Note: Kristen Kalp is listed as a coauthor, but I don’t know what her role was. The book is written with Jonathan’s voice. I’m sure it was a critical role, it’s just not explained in the book.

Here’s an overview of the book, followed by my comments:

Chapter 1: The Reasons

This chapter focuses on the reason he shoots film – and they’re pretty compelling. Not only does it give you a unique look, but it dramatically reduces the time you spend in post-processing. And those are just two of the reasons!

Chapter 2: The Rules

Want to know how to expose and actually take a photo with a film camera? This is it, presented in short, to-the-point fashion. No in-depth theory here – he writes just as if you were standing next to him at one of his workshops telling you what to do and why. I love this writing style. Subjects are exposure (including specific settings for specific films), a gear overview, etc.

Chapter 3: The Cameras

Here Jonathan shares the cameras that he uses along with specific quirks about each model. If you’re looking for a comprehensive guide to all the film cameras out there, this isn’t it. It isn’t really even all the formats. It’s limited to the ones he knows about. It does, however, show you the types of things to look for when choosing a film camera, then leaves it to you to research more alternatives (and I think this is the proper approach)

Chapter 4: The Film

What are the types of film that Jonathan uses to shoot weddings and portraits? They’re covered here, along with why and when he chooses to use each. Tips for each type of film are included as well, including when to push film and latitude of each emulsion (don’t worry, he explains all these terms too). Note that it’s primarily color discussed here. There’s a bit of black & white thrown in, but not to the depth that color is.

Chapter 5: The Exposing

Exposing for film is just plain different than shooting digital, especially print film. Jonathan walks you through common shooting scenarios and gives step-by-step instructions for each. If you don’t have a hand-held meter, you’ll likely want to buy one once you finish this chapter.

Chapter 6: The Backend

You’ve shot your first roll…now what? Covered topics include both labs and developing at home. Each of these are only covered at a superficial level. There are obviously many more labs than the one he recommends and developing your own is a huge topic unto its own, covered by many in-depth books.

Chapter 7: The Personal Projects

Jonathan says that this is his favorite part of the book and you can see why. This is the most important part of any photography. It’s what drives us. He shares some examples of his own projects and you’ll come away inspired by both the stories and photography.

Chapter 8: The Tutorials

How to load film into the cameras that he mentions, plus metering with the hand-held meter. It’s a brief but valuable section, I just wish some of the photos were larger.

Chapter 9: Resources

A list of resources to find the products and services mentioned in the book.

Summary

I enjoyed the book. It’s an easy read, written in a very conversational style and a “Just the facts, ma’am” approach. If you’re photographing people, you’ll be up and going in no time. Here are a list of pros and cons:

Pros

  • Succinct and to the point
  • Filled with inspiring photography
  • Includes real-world tips and tricks
  • Conversational writing style
  • Any trepidation you had about trying film will be eliminated
  • Great overview of the subject

Cons

  • It’s limited to what Jonathan knows best – weddings, portraits and people photography. If you’re looking for landscape advice, you’re out of luck here. How to use films like Fujifilm Velvia 50 (color) or TMAX (black & white) for scenery and landscapes aren’t even mentioned, even though they’re staples in many landscape photographers bags. Many other types of photography are omitted as well.
  • It’s almost entirely about color. Black & white advice is really only limited to shooting ISO 3200 film at the wedding reception.
  • If I was a beginner, some of the subjects left me wanting more info. Of course, as Jonathan says, you can always do a web search for that.
  • Small photos in the tutorial section
  • Limited to the cameras and films that he knows, which isn’t a huge variety.
Bottom Line

If you’re a digital photographer and want to shoot like Jonathan Canlas does, this book will get you headed in that direction. Just remember, there are no magic bullets – Jonathan got to where he is through a lot of hard work and talent as well.

Ordering Info

Click here to order your hard copy of Film Is Not Dead: A Digital Photographer's Guide to Shooting Film. This book is also offered in a Kindle Edition for reading on your Kindle, Android, iPad, etc…

Disclosure

Mark was not paid for this review, but he was allowed to keep a copy of the book in exchange for his time. I may make a commission if you make a purchase using links found in this article.

NOTE: This site requires cookies and uses affiliate linking to sites that use cookies.

If you enjoyed this article, please support future articles like this by making a donation or saving money by using my discount coupon codes. Either way, your support is greatly appreciated!

This blog is intended for freelance writing and sharing of opinions and is not a representative of any of the companies whose links are provided on this site.

The opinions provided are of Ron Martinsen alone and do not reflect the view of any other entity

Wednesday, April 18, 2012

REVIEW: Creative Landscape Photography

Creative Landscape Photography book cover

The photography world is flooded with books. In fact, many are useless books that are little more than a tribute to the author and their pride in their work. While it may be interesting looking at someone else's work, I’m not the type to enjoy spending my hard earned dollars on picture books. If I buy a book I want to be taught and I want to have something that makes me a better photographer, rather than pour through pages of stories about how great someone thinks they are with little said to help me grow as a photographer.

With the advent of eBooks the problem has become worse because the barrier to entry with publishing books has dropped, so subsequently the volume of crappy books has increased.

When Gordon Laing of CameraLabs.com asked me to take a look at this book I was skeptical because I’ve got about 100 printed books in my “to blog about” list. Many of the books I have aren’t that great which is why I haven’t bothered to review them, so I really wasn’t looking for another to add to the lame collection.

I’m very pleased to report that when I opened this gorgeous book up on my iPad my jaw dropped. The images were fantastic, but the layout and content was even better. While this book does tend to have a Canon bias, the quality of the content is outstanding. It’s really like a great recipie book that many new photographers would do well to have on their iPhone or iPad when they are out shooting.

To see what I mean, take a look at this nice hyperlinked list of topics you can jump to in the book to see exactly how to get the shot:

Creative Landscape Photography book sample page 1

For each topic there’s the sample photo, followed by in-depth details on how the shot was made using in-camera settings:

Creative Landscape Photography book sample page 7Creative Landscape Photography book sample page 8

Discussions on details about composition and what to look for are great. In addition, these topics aren’t as short as they may appear here (these are just sample pages) so generally you leave each topic thinking “good idea”.

Here’s one for filters:

Creative Landscape Photography book sample page 2

And here’s another about using reflections:

Creative Landscape Photography book sample page 4

Conclusion

This is good stuff folks! I’ll be recommending it to my Photography 101 students this season, so if you like what you see in the sample pages I’d highly recommend you toss out a few bucks to get this very well done eBook.

My hats off to Mike Langford and Jackie Ranken for proving that an eBook can be a fantastic product with tons of useful info. In addition, since there’s no dead trees and greedy publishers, the price is dirt cheap.

This book is in PDF format which means it’ll look great on your iPad, iPhone, Kindle File, etc…  You’ll definitely want a color device, and the new iPad 3 just makes you drool with books like this.

Order Now

Click here to view more details on how to order this book. If you don’t already have one, save sales taxes (outside of New York) and pick up your iPad 3 here.

NOTE: This site requires cookies and uses affiliate linking to sites that use cookies.

If you enjoyed this article, please support future articles like this by making a donation or saving money by using my discount coupon codes. Either way, your support is greatly appreciated!

This blog is intended for freelance writing and sharing of opinions and is not a representative of any of the companies whose links are provided on this site.

The opinions provided are of Ron Martinsen alone and do not reflect the view of any other entity

Tuesday, April 17, 2012

REVIEW: Think Tank Photo Airport TakeOff Roller Bag

Think Tank Photo Airport TakeOff Roller Bag

The Airport TakeOff™ roller bag is one of four Airport Series Roller Bags from Think Tank Photo. I’ve already reviewed these bags (click links to see my review):

I’ve also reviewed the huge Think Tank Photo Logistics Manager, but this bag is a little different from what I’ve reviewed so far. For starters, the Airport TakeOff is the only bag with a front buckle pocket which has the advantage to securely storing a nice size laptop (My 17” MacBook Pro fit). It’s also got a nicely designed integrated backpack harness when you want to go from being on wheels to being more mobile (great for locations with rough ground, steps, etc…).

This bag has the typical great handles and build quality of its siblings. It’s also got loads of extras dividers, the tripod mount, and a combo tether. It easily held the following Canon gear during my demo video below:

It holds everything very well and has the dividers to do as many combinations as most would ever want.

Video Review


Play in HD

Conclusion

Since this bag can’t easily hold a 5D Mark III with a battery grip or a 1D Mark IV – both with lenses attached, I’d rather go with the Think Tank Photo Airport Security v2.0 for my needs. If you don’t have those requirements, then you’ll find this is a great bag that will serve you well.  You can also overcome the handle hump a bit by putting taller items along the outer edges (including your cameras), but I don’t care for that configuration.

More Think Tank Photo Reviews

Visit this page or scroll the Gear Reviews list on the right side of the blog to see more of my reviews of Think Tank Photo products.

Special Offer

Click here to get a special offer on Think Tank Photo bags.

Disclaimer

If you make a purchase using links found in this article, I may get a commission.

NOTE: This site requires cookies and uses affiliate linking to sites that use cookies.

If you enjoyed this article, please support future articles like this by making a donation or saving money by using my discount coupon codes. Either way, your support is greatly appreciated!

This blog is intended for freelance writing and sharing of opinions and is not a representative of any of the companies whose links are provided on this site.

The opinions provided are of Ron Martinsen alone and do not reflect the view of any other entity

Monday, April 16, 2012

Stopping To Smell The Flowers

I had a great shoot with the 5D Mark III today – out of 300 shots, every single shot was in focus on the intended target. The new spot focus is awesome, and the built-in HDR has exceeded my expectations.

I’m taking the night off – back tomorrow with more.

Ron

NOTE: This site requires cookies and uses affiliate linking to sites that use cookies.

If you enjoyed this article, please support future articles like this by making a donation or saving money by using my discount coupon codes. Either way, your support is greatly appreciated!

This blog is intended for freelance writing and sharing of opinions and is not a representative of any of the companies whose links are provided on this site.

The opinions provided are of Ron Martinsen alone and do not reflect the view of any other entity

Saturday, April 14, 2012

NEC Adds Ron Martinsen to the SpectraViewII™ PA Series Testimonials

I’m pleased to announce that NEC has added me to their elite list of featured photographers. Some of the noteworthy photographers invited to this honor include Jeff Schewe, Michael Grecco, Greg Gorman, Lou Manna, and John Paul Caponigro. It’s an honor to have my work displayed alongside theirs at trade shows on NEC PA Series displays!

Thanks for your support and recognition NEC!

Enjoy the following NEC related articles on my blog:

Disclosure

I was invited by NEC and participated at their request. I purchased the NEC display featured in the article (and photo above) at full price from B&H prior to having any business relationship with NEC. I wrote a testimonial for their products because I believe in them and because my PA series display has served me well. I was not compensated in any way for this testimonial. 

NOTE: This site requires cookies and uses affiliate linking to sites that use cookies.

If you enjoyed this article, please support future articles like this by making a donation or saving money by using my discount coupon codes. Either way, your support is greatly appreciated!

This blog is intended for freelance writing and sharing of opinions and is not a representative of any of the companies whose links are provided on this site.

The opinions provided are of Ron Martinsen alone and do not reflect the view of any other entity

Tony Corbell–Finally A Photographer Who Really Knows How To Teach

Tony Corbell
Tony Corbell

The photography industry these days is flooded with talented people in the industry who are willing to share their skills. Many are very talented photographers who have great stories to tell, but many also have one thing in common – they struggle at truly explaining HOW they get their great shots. The reason why is because many learn from trial and error and just do their magic instinctively.

If you have the pleasure of seeing many photography legends work in real life they seem to fire without thinking in what appears to be a “spray and pray” manner. However, if you check their LCD there’s magic in many of the frames. When you ask them on the spot how they did it, you get answers with no substance to help you do the same. You leave thinking that they possess a gift you’ll never have and that it’s their “instinct” that makes them so great.

Simple Lighting Techniques for Photographers

While a photographers “gift” or talent may be partially the reason why they can’t translate their success into words that you can apply yourself, the bigger truth is that few people possess the skill to explain exactly what’s going on in their head in a meaningful way to an average photographer. Despite his critics, I think Scott Kelby does a pretty good job of this in his books and today I just watched a video by Tony Corbell on Kelby Training who just nails the true meaning of teaching in his video entitled Simple Lighting Techniques for Photographers.

Now Tony doesn’t carry the legendary status of a Joe McNally or the name recognition of Vincent Versace or David Hobby, but he can damn sure out teach all of them – hands down in my book. That’s not meant to put down any of them as I think all of done a tremendous amount to help millions of photographers take their skills up a notch or two, but Tony’s video struck me a special for going the extra mile to explain exactly what was in his head and they why behind how he gets the shot.

If you are a frustrated photographer who has watched a lot of videos on lighting techniques but feel like nothing is sticking when you try to do it yourself, then I’d advise you to give Tony’s video a try. I think you might learn something that makes you have that “ah ha” moment for those things you’ve been missing all this time.

I will warn you that Tony isn’t going to dazzle you with swimsuit models or shots from exotic locations, but he is going to teach you some fundamentals. If you finish the video thinking “I knew that” then consider yourself well taught, but odds are you’ll pick up some useful nuggets (especially in the “Made in the Shade” subtractive lighting segment).

Check It Out Yourself (Free Preview & Discount Membership)

Click here to see Tony’s class agenda and watch a free intro. If you are a Kelby Training member then you can enjoy the whole class for free, but if you aren’t then enjoy a special exclusive discount on a membership only from this blog on my discount coupon code page or my Kelby Training Review.

Who The Hell Is Tony Corbell?

If you are asking yourself this question, then don’t let his dazzling good looks throw you off. He’s really quite an accomplished photographer. Click here to read his bio and visit here to see his upcoming teaching schedule on CorbellProductions.com.

Disclosure

I have a complementary Kelby Training membership so I enjoy it for my personal use in my free time on occasion. Tonight I happened to stumble across this video so I wrote an unplanned article to share my discovery. I do know Tony Corbell personally through our mutual affiliations with Nik Software and he has made a small donation in the past to this blog. Ironically though, tonight was the first time I’ve actually experienced Tony teaching so this was actually a side of him that I had heard about but never experienced before.

Like most of my articles, if you make a purchase using select links in this article, I may make a commission. However, if you are already a Kelby Training member then I probably won’t, yet I still strongly encourage you to check this video out.

NOTE: This site requires cookies and uses affiliate linking to sites that use cookies.

If you enjoyed this article, please support future articles like this by making a donation or saving money by using my discount coupon codes. Either way, your support is greatly appreciated!

This blog is intended for freelance writing and sharing of opinions and is not a representative of any of the companies whose links are provided on this site.

The opinions provided are of Ron Martinsen alone and do not reflect the view of any other entity

Friday, April 13, 2012

Clay Blackmore’s 30-city “How To Photograph Everyone” Tour


Credit: Lynn Reihman

Clay Blackmore’s 30-city “How To Photograph Everyone” Tour kicked off last Monday evening, in San Diego and runs through June 11, visiting cities throughout the US.

Don’t settle for snapshots and flash-on-camera images - you need to know the techniques to set yourself apart from the crowd. HTPE brings portrait photography back to where it started, with all the tools you need to make timeless photographs that sell.

Clay will teach the following principles during the seminar:

Posing, Lighting, Lifting, and Refining - A live demonstration will take place with all participants looking through Clay’s lens as he creates elegant portraits on the stage.

Clay’s Flow Posing - Clay will demonstrate live how to create 10 portraits of a couple in five minutes.

“How to Photograph Everyone” - A descriptive analysis of how to make portraits of children, mother and child, maternity, men, women, high school seniors, business portraits, and small-to-medium groups.

The Perfect Portfolio - How to create an awe-inspiring portfolio that is sure to entice potential customers.

Weddings: Catering to the Modern Bride - Learn how to take photos that sell, and get your client to fall in love with the pictures before they even leave the wedding.

Big Portraits with Small Lights - Take cover! We’ll focus on working with scrims, reflectors, and window light to produce photographs that rival studio portraiture.

Post Production – Clay will show you several of his secret weapons for portrait retouching and enhancement.

DSLR Filmmaking Opportunities - Learn how Clay is bundling his photography with this new technology to increase his bottom line.

Don’t Just Survive—Learn to Thrive - Learn how to control the sale and increase profits.

Register using our Discount and Save!
Registration is $69, but you can save $10 and pre-register for only $59 with promo code CLUB10. Click here to register for a program near you!.


Credit: Lynn Reihman

Clay Blackmore, one of the most passionate professional photographers working today, is a true innovator in the world of portraiture and wedding photography.  One of only a few Canon Explorers of Light, Blackmore’s style blends the beauty and timelessness of classical portraiture with the spontaneity and appeal of photojournalism. His credentials were developed during his 25-year association with the legendary Monte Zucker as assistant, business partner, and co-educator. A celebrity and society favorite, Clay’s clients have included such luminaries as Larry King, Forrest Whitaker, Jenna Elfman, and Maria Sharapova. Renowned for his ability to photograph groups and cover events, Clay is consistently hired by corporate entities as diverse as the PGA and USGA and is a popular request for political inaugural balls.  In Clay’s groundbreaking work on Extraordinary Women:  Fantasies Revealed Clay photographically chronicles the dreams of 58 elite women, capturing intimate and energetic portraits of Madeline Albright, Dena Merrill, Joan Rivers, Cokie Roberts, and Dominique Dawes among others.  Blackmore is an active and contributing member of the elite Cameracraftsmen of America.

For more details about the upcoming How to Photograph Everyone Tour, visit: http://www.photographeveryone.com/

Disclosure

This was a solicited press release. I do not make a commission from this post and am merely sharing the information.

NOTE: This site requires cookies and uses affiliate linking to sites that use cookies.

If you enjoyed this article, please support future articles like this by making a donation or saving money by using my discount coupon codes. Either way, your support is greatly appreciated!

This blog is intended for freelance writing and sharing of opinions and is not a representative of any of the companies whose links are provided on this site.

The opinions provided are of Ron Martinsen alone and do not reflect the view of any other entity

Ask Ron: Canon 600EX-RT Radio Wireless and High Speed Sync on Sunny Days


1/400 sec at f/5.6, ISO 200 – Fill Flash via High Speed Sync

After doing my Canon 600EX-RT Wireless Real World Test article several readers have asked me how they perform when being shot wirelessly on sunny days, and a couple people asked about their wireless high speed sync performance for use as a fill flash.

I tried to answer all these questions in one shot above where the sun was setting. I shot directly into the sun with my camera set to 1/400 sec and used an external 600EX-RT on an umbrella as a fill flash via high speed sync. I got the desired lens flare and warm sunset look, but I also got the fill light to keep my subject from being backlit. I also got catch lights in her eyes.

There’s minimal processing on this shot taken from a Canon 5D Mark III that has been processed mostly in Photoshop CS6 Beta and Lightroom 4 from the original RAW which was processed in DPP. It’s not a portfolio shot, but it does prove the point that I can indeed get the fill flash using high speed sync (required at anything over 1/200 sec on this camera). I can also get more ambient light on the background if I want it by simply raising the ISO which I did not want to do for the this shot.

The 600EX-RT’s fired every time in the 58 times I tested this scenario, so they had no trouble with the sun (which should be true of any radio triggered flashes).

I hope that helps those who were interested in this question!

If you have a question for me, feel free to send me a mail with the subject Ask Ron. I can’t promise I’ll answer every question, but you may see your response on the next Ask Ron!

Best wishes,
Ron

Related Articles

Disclosure

If you make a purchase using links in this article, I may make a commission.

NOTE: This site requires cookies and uses affiliate linking to sites that use cookies.

If you enjoyed this article, please support future articles like this by making a donation or saving money by using my discount coupon codes. Either way, your support is greatly appreciated!

This blog is intended for freelance writing and sharing of opinions and is not a representative of any of the companies whose links are provided on this site.

The opinions provided are of Ron Martinsen alone and do not reflect the view of any other entity

Joe McNally, Through the Lens Tour

clip_image002[6]

The much anticipated Joe McNally, Through the Lens Tour, with stops in Australia and New Zealand is official and taking place in May. Sydney is the first stop in a month long jam-packed program, which will take Joe to the Gold Coast, Auckland NZ and finally Melbourne.

As part of the Joe McNally, Through the Lens Tour, Joe will present seminars, keynote talks and exclusive workshops. Fans, amateur and professional photographers will have a chance to hear Joe’s inspiring photography journey first-hand, see photography demonstrations and in the exclusive workshops get a once in a lifetime opportunity to spend a day with this humble internationally acclaimed photographer.

One of the many highlights of Joe’s career is that he is an on-going, 23 year contributor to National Geographic. Additionally, one of his most well-known series is “Faces of Ground Zero — Giant Polaroid Collection”, which features portraits of the heroes of 9/11.

The Joe McNally, Through the Lens Tour by Mentem Inc is thrilled to announce that Nikon Australia has come on board as the presenting partner of the tour.

Joe McNally is an ambassador for Nikon and one of the first to explore the capabilities of the new Nikon D4 - Nikon’s flagship model released earlier this year. As the presenting partner, Nikon Australia will be involved at every session providing attendees with technical advice and support on their professional range of Nikon gear including the Nikon D4 and D800.

James Murray, Nikon Australia’s General Manager, Sales and Marketing commented, ‘Nikon Australia is excited to be a part of bringing internationally acclaimed photographer, Joe McNally and this landmark tour to Australia’.

‘Throughout his career and countless inspirational and iconic images, Joe has shared with us his incredible vision down the barrel of his lens. We look forward to taking this to the next level with Joe telling us the stories behind some of these images, and revealing his key photography tips and techniques during the Joe McNally, Through the Lens Tour,’ said Mr Murray.

clip_image002[4]

Calling all fans, photojournalists, professional and amateur photographers - Save the Date!

Joe McNally, Through the Lens Tour IMPORTANT INFORMATION:

Sydney CBD – Exclusive Workshop, Monday 7th May

Sydney – Doltone House, Pyrmont, Tuesday 8th May

The Gold Coast – Marriot Resort, Friday 11th May – Sunday 12th May

New Zealand – Waipuna Hotel & Conference Centre, Monday 21st May – Tuesday 22nd May

Melbourne – Atlantic Group V, Peninsula, Wednesday 24th May

Melbourne CBD – Exclusive Workshop, Tuesday 29th May

Tickets and information is available through www.throughthelenstour.com.

About Joe McNally

Joe McNally is an internationally acclaimed photographer whose career has spanned 30 years and included assignments in over 60 countries. He has shot cover stories for LIFE, Golf Digest, TIME, Newsweek, Fortune, New York Times Magazine, and Sports Illustrated and is currently an ongoing, 23 year contributor to National Geographic, having shot numerous cover stories for them.

Awards

Joe McNally was listed by American Photo as one of the 100 Most Important People in Photography and described by the magazine as, ‘perhaps the most versatile photojournalist working today.’

Joe McNally is also the recipient of some of the most prestigious awards in the photo industry – Pictures of the Year, Communication Arts, Eisie, and World Press.

See Ron’s latest Joe McNally book review - Sketching Light here.

Disclosure

This is a press release with no commission or incentive for publishing. I do not make a commission from anything in this article. All photos copyright Joe McNally and used by permission.

NOTE: This site requires cookies and uses affiliate linking to sites that use cookies.

If you enjoyed this article, please support future articles like this by making a donation or saving money by using my discount coupon codes. Either way, your support is greatly appreciated!

This blog is intended for freelance writing and sharing of opinions and is not a representative of any of the companies whose links are provided on this site.

The opinions provided are of Ron Martinsen alone and do not reflect the view of any other entity