Monday, December 28, 2015

Merry Christmas and Happy New Year

Ara's First Christmas
Canon 1D X 1/60 sec at f/4.0, ISO 1600 at 14mm (11-24mm f/4L)

I’ve been enjoying a vacation from life and the blog to bond with my new baby girl, so my apologies for the sparse content and holiday deals posts lately. I’ll be getting back to real posts very soon, so don’t forget to check back for new articles in January!

If there’s content out there you’ve been waiting for me to cover, then please post a comment and I’ll work and I’ll consider adding that content to my queue for 2016 articles.

In the meantime, I did what any new dad would do and posted a couple pics of his latest pride and joy. She’s a chubby little girl, but she does a job reminding me what’s most important in life.

Happy Holidays from The Martinsen Family!

Chubby Cheeks
Canon 1D X 1/124 sec at f/1.6, ISO 125 at 50mm (Canon 50mm f/1.2L)

Disclosure

If you make a purchase using links found in this article, I may make a commission. It doesn’t cost you a penny more, but it does help to support future articles like this.

NOTE: This site requires cookies and uses affiliate linking to sites that use cookies.

If you enjoyed this article, please support future articles like this by making a donation or saving money by using my discount coupon codes. Either way, your support is greatly appreciated!

This blog is intended for freelance writing and sharing of opinions and is not a representative of any of the companies whose links are provided on this site.

The opinions provided are of Ron Martinsen alone and do not reflect the view of any other entity

Wednesday, December 23, 2015

35% Off All Topaz Labs Products Through December 31, 2015

Topaz Labs 35% Off Sale

Topaz Labs has a 35% Off Sale going on for the rest of 2015. Now is your time to get the best deal of the year on the complete collection or to complete your collection if you’ve bought products individually. Topaz Labs is like some of the competitors which perpetually has sales – this is a once a year thing, so if you are on the fence then now is the time to act.

Check out these Topaz Labs reviews to see why these are cool products are my #1 recommend bundle in my What Plug-ins Should I Buy? article:

Here’s some webinars that I’ve done to show I use these products (my apologies for the poor audio from the webcast recording software):

Here’s another that people often write me about to thank me for some of the tricks I show in this webinar:

Other articles you may enjoy

If you enjoyed this article, you may also enjoy these:

Disclosure

If you make a purchase using links found in this article, I may make a commission. It doesn’t cost you a penny more, but it does help to support future articles like this.

NOTE: This site requires cookies and uses affiliate linking to sites that use cookies.

If you enjoyed this article, please support future articles like this by making a donation or saving money by using my discount coupon codes. Either way, your support is greatly appreciated!

This blog is intended for freelance writing and sharing of opinions and is not a representative of any of the companies whose links are provided on this site.

The opinions provided are of Ron Martinsen alone and do not reflect the view of any other entity

Thursday, December 10, 2015

What Plug-ins should I buy? [Updated Dec 10, 2015]

Ron Martinsen’s December 2015 Best of the Best Ranking of the top Photography Plug-ins

Imagine that you were as rich as Bill Gates and retired. Even if you were and you have all the time on your hands to learn new things, I still doubt that any one normal human could use all of the great plug-ins available for Adobe Photoshop, Adobe Lightroom. There are just so many choices and so much overlap that it can make your head explode trying to figure out which ones you really need! What’s more, there are a lot of very good ones available that do save you lots of time, but you may waste a lot of time tinkering around with all of the options they offer!

I’ve tried to be selective about what I review on this blog based on my own research. The products I focus on are mainly what I determine are the best products and what I’m hearing my Top Photographers and other industry experts are telling me that they use.

I have found an awesome collection of products that do really make my editing process quite enjoyable, but I must admit that as much as I love most of the products I have it is hard to find time to use them all. As a result I’ve decided to finally throw down the gauntlet and rank the products that I have on my machine in order of importance to my personal workflow. What this means is that if I could only use X (i.e., 5) then you could look at numbers 1 through X (i.e., 5) to see which ones I’d keep.

With this information available to you, you can then look at your budget and make your selections based on either your own research.  You can compare that with my advice to come up with the best plug-ins on the market to help make you more productive.

This list is only about plug-ins, even though some may run stand-alone in addition to being a plug-in. This means that some programs that I can’t live without (i.e., ImagePrint) will not appear on the list. I also will just flat out say that Lightroom is my #1 photo editing and asset management product but I’d have a hell of a hard time living without Photoshop. I’m not a fan of Aperture, but it is a nice product that will be perfect for some – just not me. As a Canon shooter I also find Canon Digital Photo Professional has a horrible user interface, but it is still a critical part of my workflow for certain RAW processing tasks. I know there are Nikon shooters who feel the same way about Capture NX2, which is actually a decent product that can serve as an end-to-end solution if you are on the Nikon platform.

Recommended Plug-ins as of Dec 10, 2015

Previously this was a stacked ranked list of what I’ve reviewed but with my Dec 2015 update, I’ve decided to trim it down to just what I’d recommend to a family member or close friend. Yes, there are a lot of other products on the market, but this boils it down to what I’d get if I had to start all over from scratch today.

  • Topaz Labs Adjust – I used to think of this as the secret sauce for HDR images, but now I use it for so much more. In fact, Topaz has so many strong offerings that I’m often telling people that this product is just as valuable as Color Efex, so if you only buy one bundle then go for the Topaz bundle and trust this. Yes, some effects are hideous until you learn how to use them, but watch my one of my webinars and you’ll see that they don’t have to be.
  • Imagenomic Noiseware - Noiseware won my Noise Reduction Roundup and I find myself using it the most out of all the products I’ve tested (including some not featured on the blog).
     
  • Athentech Perfectly Clear / Lucid – I tried this product out a couple years ago and hated it, but now I find myself constantly using it both on my computer and my phone. I’ve edited more photos this year with this product than any of the others – combined (especially on my phone) – and I didn’t even start using it regularly until March! While I hate the skin softening results, I do find that it does make images look great – often by default – so I’ve poured countless images through Perfectly Clear. If you haven’t seen or tried this one out yet – you MUST – it’s pretty good with no hassle. [Note: Lucid is the stand-alone version with some reduced features so check out my review for more info.]
  • Imagenomic Portraiture – I process a lot of portraits every year so I’m always re-exploring skin softening products to try to make this process easier. While many products have come a long way, there is still nothing better than Portraiture.
  • Topaz Labs B&W Effects – There’s lots of great products in this space, but if I’m going to advise a friend to spend their hard earned money on only one then I have to go with this one. Topaz Labs has emerged as the industry leader in innovation with an active community to support it. Yes, Silver Efex Pro is good, but I’ve yet to find myself unable to get the same or better results with B&W Effects, so I’ve finally given up on it in favor of B&W Effects.
  • Topaz Software’s ReMask –  This is the fastest and easiest tool to create complex masks fast. onOne Software’s Perfect Photo Suite has the potential to be greater, but I’ve just had a much harder time mastering the masking features. I find ReMask to be much easier to use and very powerful. It can save you a hell of a lot of time separating your subject from a complex background or doing complex masks that can’t be adequately handled using Nik Software’s U-Point control technology or the vastly improved Refine Edge feature of recent versions of Photoshop. 
  • MacPhun Aurora HDR [Mac only] or HDRSoft Photomatix (esp with Trey Ratcliff’s Photomatix Presets) – If HDR is important to you then one of these has to be in the top 5. For as good as built-in HDR processing is in Photoshop and Lightroom, I still prefer stand alone applications. Aurora HDR is simply the best product on the market for HDR – bar none – but currently it’s only available on the Mac, so PC users will have to use the long-time industry standard Photomatix. Photomatix can create great results, but it’s cryptic controls can be difficult to master – especially if you want realistic results (and white clouds). Yes, you can go to Photoshop and work around its shortcomings, but Aurora HDR makes that easy to do in its UI without the need for Photoshop (or anything else).
  • Topaz Labs Texture Effects, Glow and Impression – These are the hottest new plug-ins on the market for a reason – they create amazingly original looking work from the most boring of images. I really, really, love these products, but I do wish that they were all just merged into one product.
  • Topaz Labs Restyle (alt review) – This is another one of those one click editing solutions that I love, but I don’t use it as much as I’d like to because it has so many choices! Seriously, I love choices but I sometimes find myself spending 20 minutes just pouring through all of the awesome choices it offers!

    It is very usefully for coming with up a “look” or “theme” for a project and leveraging favorites help reduce the time spent in the app. I adore this product and STRONGLY recommend you to check it out as this product is a game changer for those who want to focus on their photography, and not photo editing – yet still have professional results that don’t look like it was processed on Instagram.
  • on1 Perfect Resize – There was a time where this would have been in the top 3, but resizing in Adobe products and printer drivers have gotten pretty good so this is more useful when you need the best possible results or when other methods just don’t do a good job. Generally speaking if you are going to increase an image by 200% or more, then this is the best game in town. Sadly it’s a hidden feature that is an optional install for the latest version of the on1 Photo bundle. My review covers an older version, but nothing has really changed in this product for quite some time. Sadly you can only get this with the entire on1 Bundle.
  • Topaz Labs Simplify (review) – Great for turning your images into cartoons or drawings. It’s a cool app that I didn’t used to use that much, but I’ve learned that with the right scenes (especially leafy landscapes) it can create some exciting images that people want to buy. I also like to use it on busy backgrounds sometimes to remove distractions. This isn’t a product that most photographers would use every day, but when I pair it with the right image I often get a big grin on my face. Topaz Clean also is capable of doing this and more, so check it out while you are at it to see which works better for you. Personally, I tend to favor Simplify.

There’s of course a lot more that isn’t included here, so check out the Software Reviews section to the right or on my recommendations page to see if I’ve reviewed your favorite product. If you’d like my opinion one one not featured on my site then contact me.

What Happened to the Nik Collection by Google?

For as long as this blog has existed, I’ve been singing the praises of what used to be called the Nik Software Collection. They were the defacto standard by which all others were judged, and myself and so many others couldn’t live without it. However, my personal opinion of Google’s purchase of Nik Software, is that it seemed to be more of a patent grab than anything else as the innovation that Team Nik brought vanished after the acquisition (as well as many of the Nik employees).

If my calculations are correct, we are approaching 4 years since the last update of Color Efex and 2 years since the last update of anything (Analog Efex). As a result, it’s appears that these products are in sustained engineering mode. Given Google’s history of cutting products and services that aren’t part of their core business, I can’t escape the fear that one day an operating system change will come and we’ll hear that the Nik Collection will not be updated to support it.

With this in mind, I’ve been trying hard to wean myself off my favorite products like Color Efex, Silver Efex Pro, and Viveza for fear that I’d be up a creek without a paddle if I had an important job and they stopped working – with no plans to fix them.

I’ll be clear and state that these are still phenomenally good products, but if I’m going to advise my readers to spend their hard earned money then I want to point them to software solutions built by people with a ton of passion to make their products better (i.e., companies like Topaz Labs with their Complete Collection and MacPhun with their beautifully designed Creative Kit).  Sure, if you have bought the other recommended products and have an extra $149 to spare, then by all means pick these up as they are still quite good. However, I don’t recommend that people with limited funds make this their first purchase for the aforementioned reasons.

A Word About Bundles

One thing that is very clear is if you think you’ll ever want to own more than 2 or 3 products from a given company then you should just bit the bullet and get their largest bundled version. While it might be painful in the short-term buying such an expensive product, you’ll spend exponentially more if you find yourself buying all the products over time. The bundles are a great deal and the only way to go if you can make that happen. With that said, I do a quick run down of my favorite bundles here in priority stack ranked order:

  1. Topaz Labs Plug-In Bundle – It has taken some time, but Topaz Labs has gone from the bottom to the top thanks to so many creative and game changing products. I find myself using Adjust and B&W Effects quite a bit now. Texture Effects, Glow, Impression, ReStyle and Simplify highlight the amazing innovation coming out of this new industry leader in photo editing.

    These products can give your photos that wow with minimal effort allowing you to focus on photography instead of photo editing, and save shots that would otherwise be duds. I’m also a huge fan of ReMask when I have to do masking because it is much more accurate than Refine Edge in Photoshop. As a result, these 8 products easily justify the cost of the bundle (which is available at a discount on my blog).

    While many people swear by them, I don’t really use Clean, Detail, Lens Effects,or Star Effects that much, but the other products still make the bundle worth it. I don’t care for  DeNoise , so I always use Noiseware when I need to do digital noise reduction (from using higher ISO’s).

    This is my new “if you could only have one” bundle choice because it offers so much to help create new art from your photography, that I think it really deserves the top spot.
  2. Imagenomic Pro Plug-in Suite – Noiseware is the winner of my noise reduction series and as of now, nothing has changed that. I also have become obsessed with Portraiture as my preferred skin softening product for both photos and videos, so you may as well get the bundle. You’ll effectively get Real Grain for free, so it’s worth getting the bundle.
  3. MacPhun Creative Kit – This company has some of my friends from the once brilliant Nik Software, and its beautifully built user interface is the one by which all other products should aspire to mimic. While it lacks the brilliant U-Point controls that are the secret sauce of the Nik Collection, it has everything else and so much more. This is really a great solution for Mac users, but sadly isn’t on Windows yet so I can’t give it a better rating.
  4. Google Nik Collection – As I previously mentioned, this had been my favorite for many years. However, the product seems to be in maintenance mode with all of my Nik contacts leaving Google without any apparent replacements. Google has no meaningful financial interest in the product anymore, so I have concerns about its future. As a result, I’m reluctant to recommend it anymore, despite the brilliant software that remains.

    Yes, this is still a great product and I adore it, but I’m lost as to what Google is really doing for its future. As a result, IF you’ve got the other suites and a an extra $149 lying around then it’s a worthwhile investment – just make sure you have a plan B if it stops working unexpectedly in the future.
  5. on1 Photo 10 – I used to be a big fan of onOne Software, but this suite has been dumbed down so much with its confusing user interface that it’s left nothing really compelling to me anymore. I’m also tired of it coming out with new names and releases before they get the bugs out of the current one, so I really can’t get excited about this one anymore. Yes, Matt Klosowski makes it look pretty cool, but unless you’ve got his gift for photo editing, I think you’ll find yourself frustrated with the results you get with your own photos.
     
  6. Alien Skin Bundle – Alien Skin makes decent products, but with so much goodness offered these days I just don’t find myself saying “I need that” over the other products in my workflow.

You really can save a bundle by getting bundles, so before you make that stand alone purchase ask yourself – will I want to buy any of these other products in the future? If you say yes to at least 3 products offered in the bundle then pony up now to save big later – get the bundle!

Topaz Labs Photoshop Bundle – The Best Place to Spend Your Money

Adjust is a mainstay in many great photographers digital workflow because it’s a product that is so unique that really nothing competes with it. Topaz created this same kind of magic with Glow, Impression and ReStyle all of which are super hot sellers that I love. With ReMask still being the best manual masking solution and the strength of Simplify and B&W Effects, you really have a true artist toolkit with this bundle. Lens Effects, Clean, Detail. Star Effects  and InFocus add value but I just have so many plug-ins that I don’t have a need for them. I’m still not a fan of Denoise even though some readers swear by it.

Imagenomic

Imagenomic makes three popular products which can only be purchased separately. The first two mentioned below are staples in my regular work, so I couldn’t live without them.

Based on my extensive testing during my Noise Reduction Roundup, nobody out performed Noiseware.  It’s a great product that I go to for my most important jobs because I know it will do the best job to preserve the detail. It’s only disadvantage is the lack of Nik’s U-Point controls, but most of the time I will just create a layer mask and roughly sketch out where I want selective noise reduction, so I’ll just use Noiseware in both those and global noise reduction scenarios.

I’ve stopped using my long-time beloved Nik Software’s Dynamic Skin Softener (filter found in Color Efex) in favor of Portraiture which does the best skin enhancements I’ve ever seen. I turned my mentor on to this product after his copy of Color Efex wouldn’t work on his upgraded version of the Mac OS, and he loves Portraiture more than anything now! 

Real Grain isn’t my cup of tea, but most people probably don't realize that it simulates a lot of films which could be handy to some. It also has nice grains which can prove useful in printing or dramatic stylistic effects like reproducing the artificial grain found in the movie Saving Private Ryan.

The Rest

There are thousands of Photoshop & Lightroom plug-ins, and many of them are fantastic. However, I don’t have the bandwidth to test everything, nor can I use everything, so what you see in this article represents my reality. Don’t assume that if  product isn’t mentioned here that I don’t like it, but rather assume I probably haven’t used it very much – if at all.

I will say that I’m no fan of Portrait Professional and Focus Magic as I feel both offer mediocre solutions for which there are much better options.

If you’ve got a great product that you think I must know about then feel free to leave a comment with your suggestion(s). Do not link as spam comments will not be approved.

Special Offers

Visit my Discount Coupon Code page for specials on plug-ins and a wide variety of products – many of which aren’t available any where else on the web!

Other articles you may enjoy

If you enjoyed this article, you may also enjoy these too:

Disclosure

If you make a purchase using links found in this article, I may make a commission. It doesn’t cost you a penny more, but it does help to support future articles like this.

NOTE: This site requires cookies and uses affiliate linking to sites that use cookies.

If you enjoyed this article, please support future articles like this by making a donation or saving money by using my discount coupon codes. Either way, your support is greatly appreciated!

This blog is intended for freelance writing and sharing of opinions and is not a representative of any of the companies whose links are provided on this site.

The opinions provided are of Ron Martinsen alone and do not reflect the view of any other entity

Tuesday, December 8, 2015

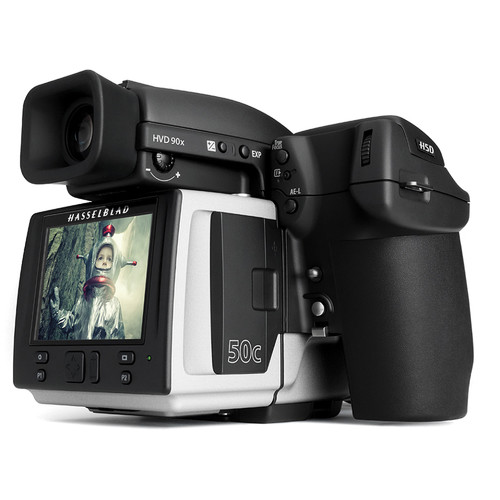
50% off Hasselblad H5D-50c Medium Format Body until December 14, 2015

Hasselblad H5D-50c Wi-Fi Medium Format DSLR Camera Body

The 50 MP 43.8 x 32.9mm CMOS sensor on the medium format Hasselblad H5D-50c Wi-Fi Medium Format DSLR Camera Body is larger than 36 x 24mm CMOS sensor you’d find on the Nikon D810, Canon 5Ds/5DsR, and Sony A7R II which is why there are some professionals doing large commercial print work (i.e., billboards) still benefit of a camera of this type. While they may have the budget for the $28,500 USD retail price, most mere mortals couldn’t dream of spending that kind of money.

From now until December 14, 2015, B&H is selling this camera at 50% off (still a whopping $14,500), so if you are one of those few people out there in the market for this beast then now would definitely be the time to buy!

Where to order

Click here to learn more or order at B&H.

Other articles you may enjoy

Mere mortals who can’t afford this camera might also enjoy these reviews of high megapixel cameras:

And here’s some fun high resolution accessories:

Disclosure

If you make a purchase using links found in this article, I may make a commission. It doesn’t cost you a penny more, but it does help to support future articles like this.

NOTE: This site requires cookies and uses affiliate linking to sites that use cookies.

If you enjoyed this article, please support future articles like this by making a donation or saving money by using my discount coupon codes. Either way, your support is greatly appreciated!

This blog is intended for freelance writing and sharing of opinions and is not a representative of any of the companies whose links are provided on this site.

The opinions provided are of Ron Martinsen alone and do not reflect the view of any other entity

FREE Trey Ratcliff Lightroom Presets for 2015


Trey’s Lightroom Presets - 2015 December

Trey Ratcliff is giving away his entire December 2015 presets collection this month, so CLICK HERE to get them now. You can see examples on his site from this collection and many more.

Here’s a few samples I thought were impressive for Lightroom preset edits…

Copyright (c) Trey Ratcliff - Editing using December 2015 Presets

Copyright (c) Trey Ratcliff - Editing using December 2015 Presets

Copyright (c) Trey Ratcliff - Editing using December 2015 Presets

Copyright (c) Trey Ratcliff - Editing using December 2015 Presets

Where to order

Click here to learn more or order for free!

Other articles you may enjoy

If you enjoyed this article, you may also enjoy these:

Disclosure

If you make a purchase using links found in this article, I may make a commission. It doesn’t cost you a penny more, but it does help to support future articles like this.

NOTE: This site requires cookies and uses affiliate linking to sites that use cookies.

If you enjoyed this article, please support future articles like this by making a donation or saving money by using my discount coupon codes. Either way, your support is greatly appreciated!

This blog is intended for freelance writing and sharing of opinions and is not a representative of any of the companies whose links are provided on this site.

The opinions provided are of Ron Martinsen alone and do not reflect the view of any other entity

Friday, December 4, 2015

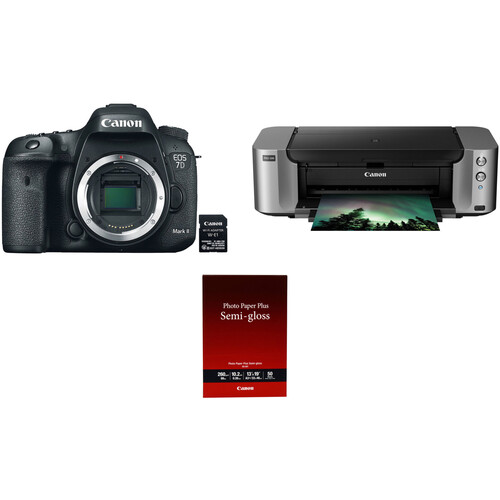
Canon 7D Mark II with PIXMA PRO-100 Printer & more only $1049 (save $1082!!!!)

Canon EOS 7D Mark II DSLR Camera with PRO-100 Printer, Camera bag, Memory card and more only $1049
Canon EOS 7D Mark II DSLR Camera
with PRO-100 Printer, Camera bag, Memory card and more only $1049

I hate to have deals posts, but this one is too good not to share. While there is a $350 mail in rebate, the fact that you can save $1082 on this bundle makes it a post worthy event.

Happy Holidays!

Where to order

Click here to learn more or order the XXXX on the B&H web site. My friends at Amazon have it available here.

Other articles you may enjoy

If you enjoyed this article, you may also enjoy these:

Disclosure

If you make a purchase using links found in this article, I may make a commission. It doesn’t cost you a penny more, but it does help to support future articles like this.

NOTE: This site requires cookies and uses affiliate linking to sites that use cookies.

If you enjoyed this article, please support future articles like this by making a donation or saving money by using my discount coupon codes. Either way, your support is greatly appreciated!

This blog is intended for freelance writing and sharing of opinions and is not a representative of any of the companies whose links are provided on this site.

The opinions provided are of Ron Martinsen alone and do not reflect the view of any other entity

Thursday, December 3, 2015

REVIEW: Epson SureColor P800 vs P600, 3880 & 4900 – Part I

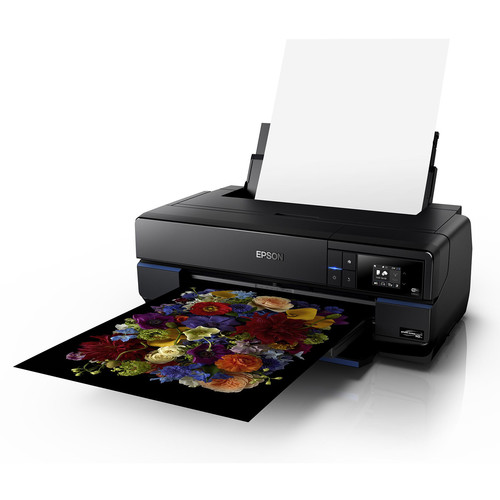
Epson SureColor P800

The Epson StylusPro 3880 has been an extremely popular fine art photo printer with legions of  fans online, so in some ways you can understand why Epson didn’t’ seem to be in a rush to replace it. However, 3880 users had to suffer with the lack of industry standard features like wireless printing, AirPrint, CloudPrint, and a modern color touch control panel that have become common place in the market. In fact, it always killed me when I would see lesser printers like the R3000 with all these great features and think – why doesn’t Epson just update the 3880 with all of this goodness?!!! I know I wasn’t alone in this thinking, so the arrival of this printer is one that has been eagerly anticipated for years – and very long overdue!

I had my first chance to check one out this past March in a private screening with Epson along with the P600, and I was thrilled with delight – but I could tell no one. As a result, this is a review that I’ve been eager to do for 9 months now as I’m extremely pleased to share my excitement about how happy I am with the P800.

Check out my unboxing article (which shows the media adapter) if you haven’t already, then come back here to learn more.

Setup

I’ve already reviewed the P600 and loved it. Since there are so many similarities between the P600 and P800, I’d ask you to read my P600 review for the basics of what I love about this printer. This review will pick up with where that one leaves off and discuss features and observations that are unique to the P800 and how it compares with both other Epson printers.

P600 vs P800 Physical Differences
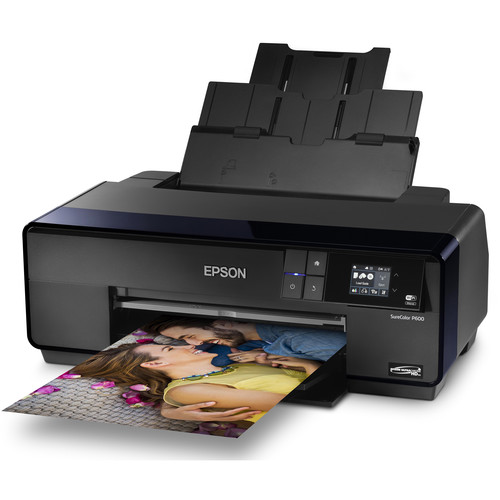
Epson SureColor P600 Inkjet Printer

The P600 was my go to printer for household printing needs until the P800 arrived. At first I thought I’d keep the P600 in service for that duty, but I quickly realized that wasn’t necessary. The P800 was just as easy to setup, use and let family members use. However, it had the benefit of more cost effective prints thanks to larger ink cartridges and better print results.


P600 (top) and P800 (bottom) - Externally they are nearly identical with a slight size difference

The biggest difference between the P600 and P800 is that you can only do 13” wide prints from P600 whereas the P800 handles up to 17” wide. This is a big deal for fine art printing as that allows for prints at 360 pixels per inch (ppi) from high resolution cameras like the Canon 5DsR, Sony A7R Mark II and D810 without resizing for the best possible print quality.

P600 (left) vs P800 (right) Ink Cartridges
P600 25.9 ml (left) vs P800 64 ml (right) Starter Ink Cartridges

While both printers use the new Epson UltraChrome HD Ink , another critically important difference is the size of the ink cartridges. The P600 only uses 24.9ml which will meet the casual printers needs, but the cost per ml is around $1.25. The P800 comes with starter 64ml cartridges, but actually uses 80ml for the refills. The larger cartridges mean a cost per ml of around $0.69 cents at the time this was written, so that means the cost per print is about 2x for the P600. Clearly, if you are doing a lot of printing the P800 is definitely going to have a lower cost of ownership!

P600 Overhead View - Cover Open

The P600 inks load from the top, and the print head house seems different externally but you can’t see the head itself. My Epson contacts say the actual Micro Piezo AMC print head is identical, so in theory the prints should be identical since they both also use the same ink but the P600 boasts a maximum resolution of 5760 x 1440 dpi whereas the P800 has a maximum of 2880 x 1440 dpi.


P800 Overhead View - Cover Open while printing

Given my past history testing printers, I’m confident that mere mortals will never be able to tell the difference between the actual print resolution of the two printers. My source that works at the print head driver level on a popular RIP for Epson printers tells me that the P800 appears to have the superior print head and that from his perspective the two are engineered very differently in terms of how they lay down ink. As a result, he’s had to write separate drivers for the two printers which suggests they may not share as much at the print head as they do on the outer case design.


P600 shiny plastic top scratches and smears easily

One thing I didn’t notice until I moved my P600 for this review was how many scratches and smears built up on top of the shiny front panel. This was pretty disappointing, but fortunately it isn’t a problem with the P800 as it doesn’t use any shiny plastic like this on top.

At the end of the day the P600 is a great printer, but IF you can afford to get the P800 then definitely do it. It’s more cost effective to operate and more durable.

For more information, see the Detailed Specs tab for the P800 here and the Specifications tab for the P600 here on Epson’s website.

P800 vs 3880 Physical Differences


P800 (bottom) vs 3880 (top)

Weight and size wise the P800 is about the same as the 3880 which means a foot print that allows you to put the P800 where your 3880 once was – IF you don’t use the optional roll media adapter sold separately (see more later in this article).

There’s really no advantage that I’ve found thus far with the 3880 beyond the fact that it has some the best ICC profiles of any printer on the market. A good ICC profile is critical to making a good print, so it will take time before the P800 catches up here. As a result, if you are upgrading you might want to hang on to your 3880 until you are satisfied with the paper profiles of all your favorite papers. If you generate your own profiles, then I can see no reason for not upgrading.

P800 vs 4900
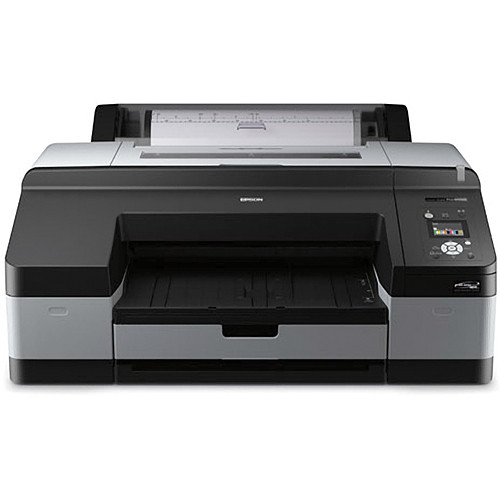
Epson Stylus Pro 4900 Inkjet Printer

Utter the words Epson Stylus Pro 4900 to many owners who didn’t print on it very often (likely at least every other day) and you are very likely to hear a string of bad words about the problems with the print heads clogging on this printer. While it has massive 200ml ink cartridges, you probably waste half of that each year doing power cleanings trying to unclog the heads – a frustration both in time and costs.

My sources all point to the Advanced MicroPiezo TFP print head design specific to the 4900 as being the culprit for the head clogging, so Epson took the safe route and decided to have the P800 use the same MicroPiezo print head from the 3880. The 3880 was well known to rarely clog and even when it did it could typically be corrected with one power cleaning, so this was wonderful news to me.

My 4900 died an untimely death due to print head clogging issues, so I didn’t have it on hand to test with for this review. However, I can say from experience that when its heads aren’t clogged the 4900 is a wonderful heavy duty printer that is quiet and supports big print jobs – especially useful to school/sports, portrait and wedding photographers doing a large number of sheets. If you have one for those purposes, then stick with it as the P800 is still optimized for a small number of sheets at a time. Given what I’m seeing with the new SureColor series improvements, I’d suspect a 4900 replacement is on the way next year so large volume print masters should hold out for that to get the heavy duty support.

If you only use the 4900 for proper roll support and you didn’t really utilize the large sheet tray then you might want to consider getting a P800.  To the untrained eye, many will find the print quality to be similar enough and the wireless features make it a welcome household addition. In addition it’s much lighter with a smaller footprint so if you are like me you’ll appreciate reclaiming some space in your studio back!

Ink
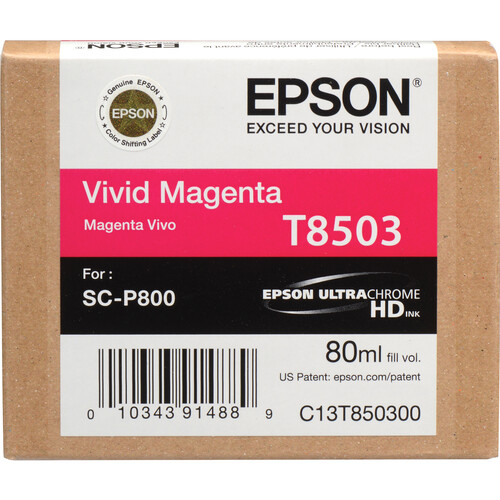
Epson T850 UltraChrome HD 80ml Ink Cartridges

Owners of existing Epson printers, including 3880 owners, will need to get new ink as the Epson UltraChrome K3 9-Cartridge Ink Set has been improved with the new Epson T850 UltraChrome HD 9-Ink Cartridge Set that has roughly the same street price. Loading is similar to the 3880 but now the LCD features a touch screen button to open the door:


P800 Ink Cartridges front load with a door that opens via the touch panel LCD button

Sadly Epson chose to ship the printer with 64ml ink cartridges instead of the standard 80ml, so your first set will run out much faster than your refills. That said, 64ml is still a lot of ink so average users could still find themselves going many months or even a a year before they need to replace these cartridges, so don’t let the internet trolls stress you out too much about this. For many this decision, which means a cheaper printer cost, was a wise one even if everyone would feel better if they were all topped off. That 144ml (16 ml * 9 cartridges) is roughly $100 worth of ink, so the price difference is significant enough to justify it – even it is annoying.

The Dreaded Ink Swap Issue

It is with great disappointment and frustration that Epson still chooses to require the Photo Black and Matte Black inks to use the same line, therefore requiring a line purge and recharge each time you switch between the two inks. While this process is automated, it still takes 3 minutes and 30 seconds and 4.6ml (~$3+) to switch from Matte to Photo Black and 2 minutes 30 seconds and 1.6ml (~$1.10) to go back from Photo Black to Matte. This is a lot of wasted time and money, and Canon has proved this is necessary by designing a printer with dedicated lines for both.

My Epson contacts still claim this is for our benefit and a superior design to Canon, but in this respect I call BS. Given how much that has been reengineered for this printer, I tend to share the opinion of the web trolls as to why this “feature” still exists.

If this is a new revelation to you then my advice is to just do your ink swaps carefully (meaning batch up your matte and photo black jobs to minimize swaps) as it is tedious and expensive if you don’t.

Roll Support

P800vsP600-Roll4 P600 Roll Adapter (top) vs
Epson Roll Media Adapter for SureColor P800 (bottom)

Of course the big news about the P800 is that it now properly supports rolls, albeit via an optional roll media adapter sold separately. This means this printer ends up becoming not only a replacement for the 3880, but many people will likely replace their 4900 for this smaller and more modern solution. In fact, I wouldn’t be surprised if a lot of R3000 owners upgraded to this model as well.

The good news is that this is legitimate roll printing support with the same kind of spindle you’d see on a 4900, but sadly it does lack the helpful dust cover so you’ll want to keep your printer covered or remove the roll when not in use to avoid getting dust on your roll media.

It features the standard adapters to support both 2” and 3” core rolls up to 100 feet long, so you can use “real” rolls of paper instead of the small 20’ rolls used by the P600 and R3000. This is also a solid hunk of metal so it’s very stable, and it installs in seconds with no tools. I think people who print rolls will be very pleased with everything except the reality that there’s no dust cover.

Where this really becomes important is when printing canvas because if you’ve ever tried to load sheet canvas you know that copious amounts of bad words are required before you finally get it right. What's more you end up with such a small canvas after wrapping that it really wasn’t worth the effort. Now you can print banner size canvases if you like with the only limitation being the 17” width of the roll.

Here’s a 17x22 print I did on Epson Canvas Natural Satin that took about 12 minutes to print at the maximum resolution (in line with Epson’s estimates):


Epson SureColor P800
printing from a roll of Epson Exhibition Canvas

If you decide to put your P800 where your 3880 once lived then you’ll need an extra 9 inches of depth to accommodate this adapter.

See my review of Exhibition Canvas Natural Gloss where I print from the P600 roll adapter to see how you can also print and gallery wrap a canvas.

Printer Driver remains the same

Anyone who has printed with Epson drivers on Windows will no doubt be at home with the P800 driver – it’s the standard stuff you see on all Epson pro printers as you can see below for the Windows version:

Epson's Print Driver UI for Windows

Page Layout for Windows

The same is true for the Mac on OS X Yosemite as well:

Screen Shot 2015-12-03 at 2.13.06 AM

See my Printing Series paper reviews (i.e., Exhibition Fiber, Exhibition Canvas Natural Gloss, Advanced Black & White, etc…)  details on how to do this for the P800 or the latest version Lightroom and Photoshop for the Mac and PC.

Consumer Friendliness with Excellent Results

One of the nice new features with this printer (and the P600) is that when you drop in a sheet of paper the touch screen panel automatically prompts you to select the size and paper type. This is important because it tells your personal devices what type of paper is loaded. It was easy to show my 13 year old daughter and wife how to print their own borderless 4x6 prints – which freed me from that burden!

Google CloudPrint, iOS 9 AirPrint,  and Epson iPrint

AirPrint from iOS 9
AirPrint from iOS 9

While none of these print methods are suitable for fine art printing, it’s awesome to be able to keep a pack of Epson Premium Photo Paper Glossy 4x6 sheets on the printer so anyone in the family can get a quick print. It wasn’t long ago when I had to keep a separate cheap printer around to do this, so it’s been a real delight to have the whole family using the one printer. Ironically it’s a lot more cost effective too because the cost per ml on some of those cheap $99 printers ends up being more than what I pay for ink in my P800 ink!

I had no problems getting CloudPrint to work, although you do have to be physically present near the printer to touch a confirmation on the LCD.

AirPrint was even easier and it just worked. It’s only caveat is that you have to load the paper first so that it knows what size print you want, otherwise it assumes the wrong size. Unfortunately the the borderless cropping is pretty aggressive, so if you want to avoid that then I’d suggest using Epson’s iPrint instead.

Epson iPrint Home Screen

I was pleased with the wealth of options from the home page, but what really impressed me was the maintenance features that were available (disabled below because I was printing):

Epson iPrint is great for homes without a laptop or desktop computer

While there’s no ICC profile support and other advanced features you’d use for fine art printing, the folks that want a little more control over their print job will be pleased with these options:

Printing offers most of the features you need to get the best results

The status information was fairly accurate so it was nice to have an app that just works beautifully with no hassle:

Epson iPrint just works!

The excellent wireless and front panel touch screen features were long overdue, so I’ve been extremely happy with the usability of this printer.

Additional Thoughts

It seems slightly noisier than the 4990, but more quiet than the 3880 and P600.

It’s a reasonably fast and quiet printer that is big, but still doable on a well built desk. I’ve also used printers on the floor before too, and aside from having to protect the printer from dust it works just fine. 

II still need to do my long-term advanced testing, but thus far I’m seeing excellent print quality when paired with an excellent ICC profile. As a result, I think that should please even the most picky print masters.

The 3880 has a wealth of phenomenally good ICC profiles, so it will take the P800 to catch up in this respect. Using a lower quality ICC profile with any printer will result in lower quality results. As a result, some may scoff and suggest that the 3880 is better with certain papers, but the reality is that with a true apples to apples comparison users should be very pleased with the P800. (NOTE: No, you can’t use your 3880 profiles with the P800 as it’s a different ink set)

Conclusion

I’ll write more on print quality comparisons in my next long-term installment in 2016, but I’ve already seen enough to highly recommend the Epson SureColor P800. This is the printer we have all been waiting for and I’m pleased to say it was worth the wait. I absolutely love it!

Where to order

Click here to learn more or order the P800 at B&H. My friends at Amazon have it available here.

NOTE: Until December 31, 2015 there’s a $300 instant rebate so if you are looking to pick one up then definitely do it this year! Don’t forget, if you have a photography business this is a business expense, so it helps you on your taxes as well!

Other articles you may enjoy

If you enjoyed this article, you may also enjoy these:

Disclosure

If you make a purchase using links found in this article, I may make a commission. It doesn’t cost you a penny more, but it does help to support future articles like this.

NOTE: This site requires cookies and uses affiliate linking to sites that use cookies.

If you enjoyed this article, please support future articles like this by making a donation or saving money by using my discount coupon codes. Either way, your support is greatly appreciated!

This blog is intended for freelance writing and sharing of opinions and is not a representative of any of the companies whose links are provided on this site.

The opinions provided are of Ron Martinsen alone and do not reflect the view of any other entity

Wednesday, November 25, 2015

Cyber Monday Deals–Topaz, on1 and More

Here’s the latest deals – some of which expire in less than 24 hours or while supplies last so act fast.

The survival of my blog depends on donations  and sales from clicking links on the blog, so please be sure to use my links when ordering. If you have any questions please do not hesitate to contact me.

You can also find more deals up on the Hot Deals page, as well as from my discount coupon codes.


See my review for Texture Effects and more

Cyber Monday Deal

Black Friday

B&H Deals

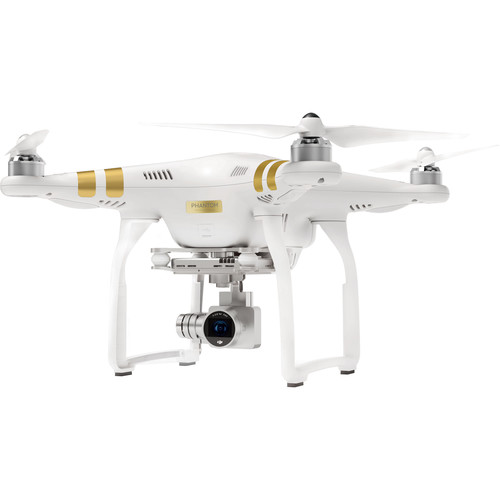
$100 OFF - DJI Phantom 3 Professional Quadcopter with 4K Camera and 3-Axis Gimbal

or $400 off version B

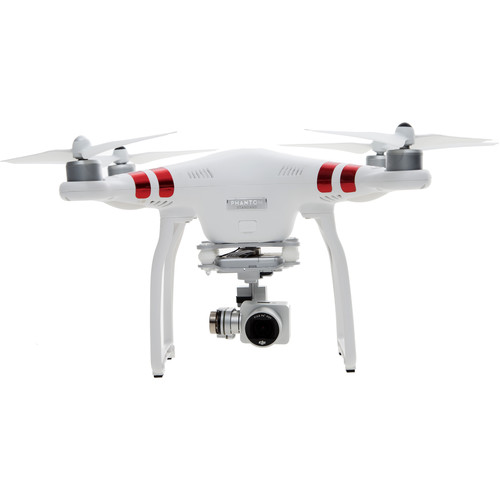
DJI Phantom 3 Standard with 2.7K Camera and 3-Axis Gimbal
Only $599!!! - DJI Phantom 3 Standard with 2.7K Camera and 3-Axis Gimbal

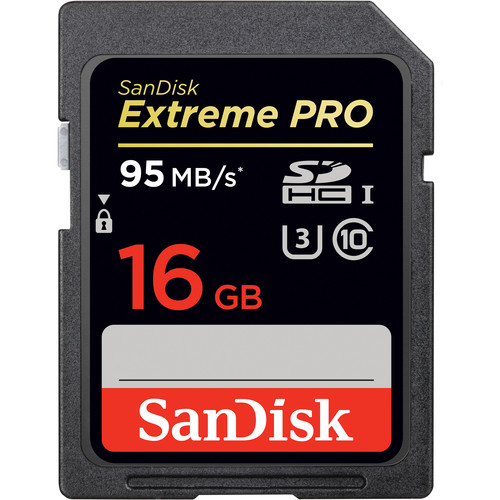
Memory Cards from Sandisk, Lexar & more for as little as $6.99

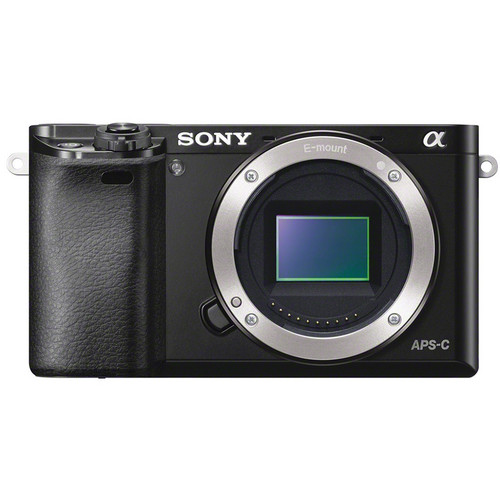
Sony Alpha a6000 Mirrorless Digital Camera w/ 55-210mm Lens & Accessories kit
$400 off - Sony Alpha a6000 Mirrorless Digital Camera w/ 55-210mm Lens & Accessories kit

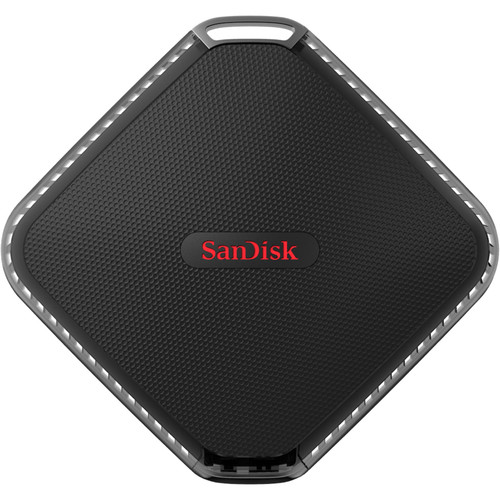
SanDisk 120GB Extreme 500 Portable SSD (Only $59.99 - 240GB & 480GB versions available)

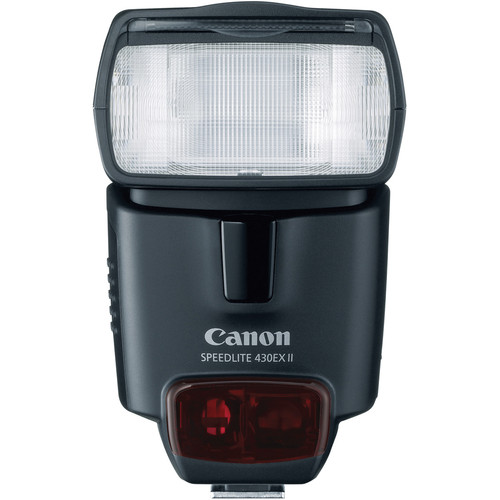
$100 OFF - Canon Speedlite 430EX II

Sony Cyber-shot DSC-WX350 (Was $298, now just $198)

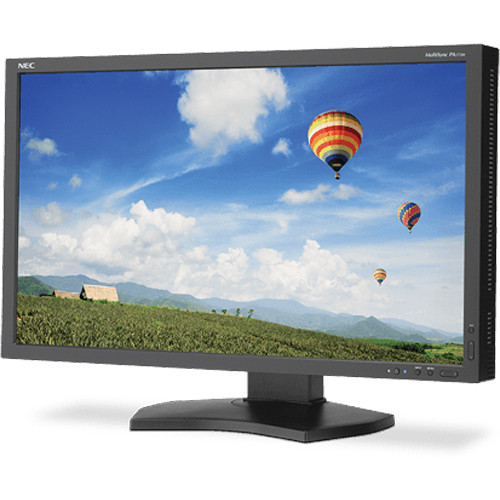
$350 OFF - NEC PA272W-BK 27" LED

See my review for the PA series

Camera Deals Pages

Click link or photo to see deals on many models / bundles – more than just what you see in the photo below:

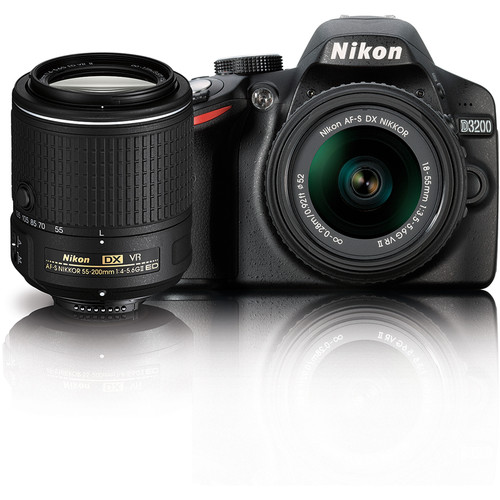
Nikon DSLR deals - as little as $396.95

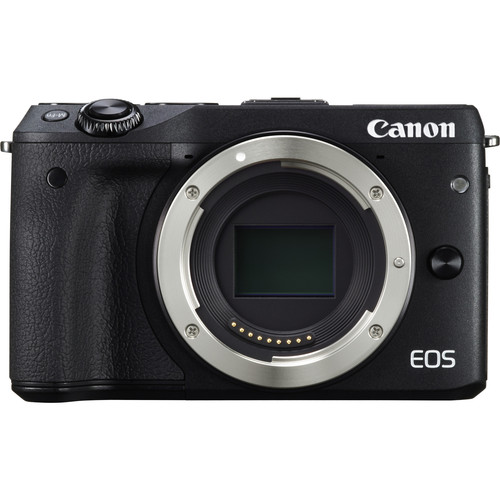
Canon EOS M3 Mirrorless for as little as $429 ($250 off)0

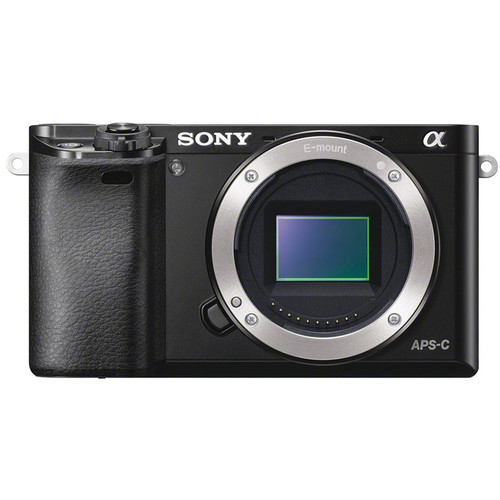
Sony camera deals - for as little as $398

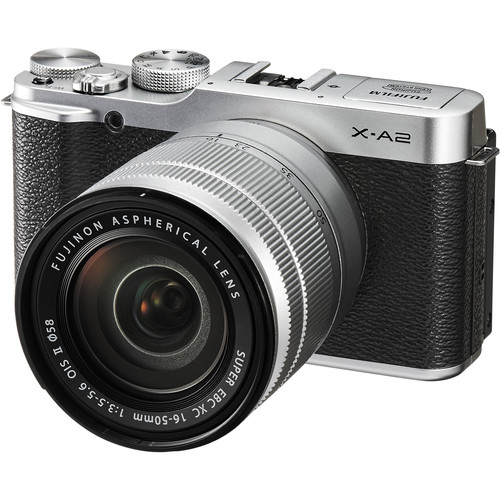
Fujifilm camera deals for as little as $499

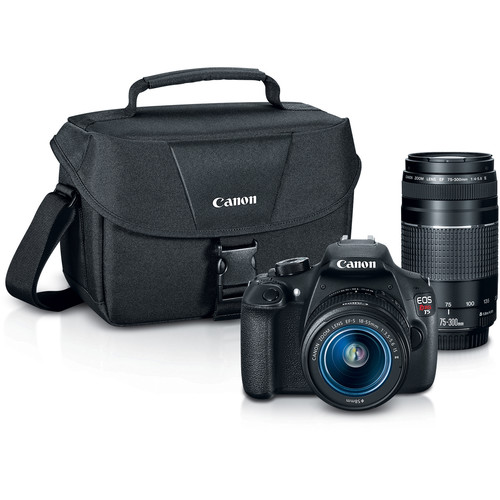
Canon DSLR Deals for as little as $449

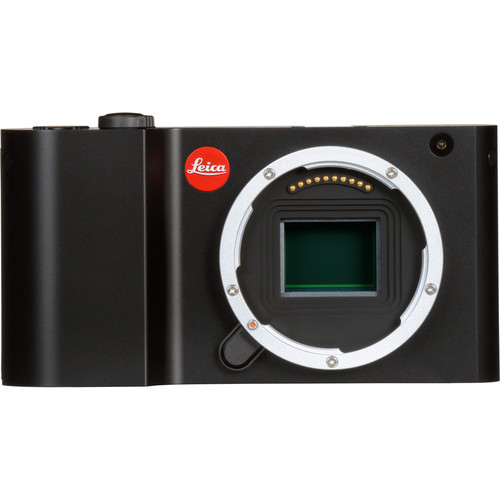
Leica at little as $1628

Adorama


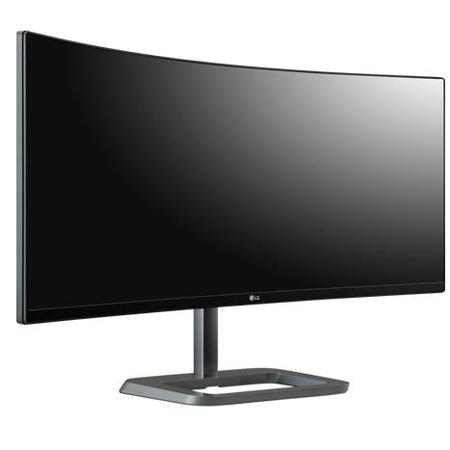
Only $635 after rebate - LG Electronics 34UC87C-B 34" Curved Ultra Wide Monitor, WQHD, 3440 x 1440

More Deals Coming

I’ve got a lot of deal info coming in so check back here often and sign up for my deals newsletter to stay up on the latest deals.

Other articles you may enjoy

If you enjoyed this article, you may also enjoy these:

Disclosure

If you make a purchase using links found in this article, I may make a commission. It doesn’t cost you a penny more, but it does help to support future articles like this.

NOTE: This site requires cookies and uses affiliate linking to sites that use cookies.

If you enjoyed this article, please support future articles like this by making a donation or saving money by using my discount coupon codes. Either way, your support is greatly appreciated!

This blog is intended for freelance writing and sharing of opinions and is not a representative of any of the companies whose links are provided on this site.

The opinions provided are of Ron Martinsen alone and do not reflect the view of any other entity