Monday, December 31, 2012

REVIEW: Canon 6D–Part I: Confessions of a D600 & 5D Mark III Fanboy

I’ll admit it, until I tested the new Canon 6D, the Nikon D600 was my camera of the year for 2012. Now that’s not to say it was the best camera made, but when you consider price, performance and features, it was a pretty tough camera to beat. When I got my review unit of the 6D from B&H, I wondered – would it be Canon’s answer to the D600?

Now as a Canon shooter, I am very fond of my 5D Mark III which I declared as the best camera for parents due to its great high ISO performance and advanced auto focus performance (an area where the D600 is very weak by comparison). However the 5D Mark III was nearly $1500 USD more than the D600 when I did my 5DM3 vs D600 comparison article, so it was tough to deny the value of the D600. My hope was that we’d get a 6D that was a cheaper version of the 5D Mark III, but where would the corners be cut to reduce the price?

Sample Images – Yeah, this sensor rocks!

This camera creates some delicious images that seem to even out perform the 5D Mark III at the highest ISO’s. The images you see below that weren’t shot in a studio are real world shots with NO flash, filters or enhancements. They are literally point and shoot shots usually in auto white balance (AWB) with Auto ISO and either Aperture Priority (most common) or Manual.

You can visit http://www.ronmartinsen.com/canon/6d to see more of my test images which includes both real world and studio images.


ISO 12,800 looks as good as the Nikon D600 to me


ISO 1250 has great detail and color with no objectionable noise
One quick pass in
Noiseware or Dfine and it’s as clean as ISO 100


Gorgeous detail and pleasant bokeh even at ISO 2000


ISO 6400 looks better than ISO 1600 on the 5D Mark II to my eyes


ISO 4000 – Every bit as good as the jaw dropping D600


ISO 12,800 – Even nasty situations like strong shadows
resulted in an impressive in-camera result

In-Camera HDR

Here’s a quick snapshot of a non-HDR image (no highlight tone priority either):


No HDR

HDR enabled with Auto “Adjust dyn range” and Auto Image Align enabled resulted in an image that addressed the blown out flower in the background at the expense of both noise and detail/pop of the subject flower.


Auto HDR

To me this feels just marginally better than the s110 and G15, so this feature shouldn’t be a major influence on your purchase decision. I still think you’ll want Photomatix or HDR Efex Pro if you want to do any serious HDR work.

Studio Images

Except where noted, all of the following images were shot in a studio using my Elinchrom lighting setup. These images are the original in-camera JPEG images that have been exported as originals from Lightroom with no modifications. There is no cropping, adjustments or anything, so please excuse the well known flaws in all of the images. 

While these are my outtake images, these are all copyright Ron Martinsen – 2013 and ALL RIGHTS ARE RESERVED. You may click to download the original images for your personal review, but you must delete them after viewing. You may not modify, edit, or use these images for any purpose without a notarized contract.


Yeah, there’s plenty of detail with a much less hassle than the D800


The colors on the 6D with the 24-105mm lens are excellent


Using shade white balance, I got a nice warm look right out of the camera with this shot


This vintage blue dress was tough to capture as blue
because other cameras I’ve used would render it closer to black


I’m very pleased with the dynamic range in this shot


This was natural light only with a reflector for fill

Early Thoughts

Overall, I like this camera. It’s got a great sensor and 5D Mark II users will feel right at home.

While I still think wedding and event photographers would be better off getting the 5D Mark III or 1D X, this camera is perfect for the family or hobbyist shooter. It’s definitely a must upgrade camera for anyone with a  xxD series (i.e., 40D, 60D, etc…) with the caveat that this is a full frame camera so your EF-S lenses aren’t going to work.

My Biggest Complaints of the 6D So Far…

The joystick multi-controller on the 5D Mark III is replaced by a 8-way pad on the rear dial like you find on the 60D, and personally I despise it. It seems to be touch aware so it’s very easy to get your AF point in the wrong spot or change your aperture while adjusting your AF point. It’s a horrible design, so the lack of a joystick is almost a show stopper for me.

The low-light AF speed reminds me more of the 1D Mark III than it does the 5D Mark III, so that has been a big disappointment. Now before everyone flips out and starts rumors, I’m not saying it’s unusable or any worse than the D600. However, I have noticed that it doesn’t acquire focus as fast as the 5D Mark III and 1D X in identical conditions with the same exact lens switched between cameras. Granted they were very tough low light conditions (like you’d find in a night club), but there is definitely a measurable downgrade.

Just like the D600 – I wish there were more AF points. However, the 6D AF points feel better spread out to the edges to me than those of the D600, but that could be because I’m a Canon shooter and I’m used to the 5D Mark II. 5D Mark II users won’t feel much of a difference, and I didn’t find it unusable – just different to what I’m used to with my new fancy schmancy cameras.

The last gripe I have is the fact that HDR Mode is disabled when RAW image quality is selected, and if you go JPEG only you still can’t have it keep the individual exposures like the 5D Mark III. That really annoys me when I don’t think that was a cost cutting feature, but rather a marketing decision. Boo, I hope this gets addressed in the firmware down the road!

Conclusion

The 6D creates stunning images that feel on par with my 1D X and it does so for a fraction of the price. It’s also about the same price as the D600 (based on the current sale that ends on Jan 5th). All of the important features are present and it definitely feels to me like an upgrade from the 5D Mark II in every way except for the lack of a joystick.

Click here to read my part II of this review.

Where to Buy

Click here to go to see the best deals on the 6D including the latest rebate offers.

Other Articles You Might Enjoy…

Disclosure

If you make a purchase using links found in this article, I may make a commission. It doesn’t cost you a penny more, but it helps to support this blog so I appreciate your support!

B&H loaned me a 6D for this review but has had no other influence or input on this article.

Neither Canon nor Nikon previewed or worked with me in any way for my 6D and D600 reviews.

NOTE: This site requires cookies and uses affiliate linking to sites that use cookies.

If you enjoyed this article, please support future articles like this by making a donation or saving money by using my discount coupon codes. Either way, your support is greatly appreciated!

This blog is intended for freelance writing and sharing of opinions and is not a representative of any of the companies whose links are provided on this site.

The opinions provided are of Ron Martinsen alone and do not reflect the view of any other entity

Thursday, December 27, 2012

Holiday Hot Deals on Canon Gear from Adorama

Canon 70-300mm L only $1,099.00 after adding to cart
See my review of this great lens!

Canon 6D only $1999.99 after adding to cart

Canon 50mm f/1.8 only $89.99 after adding to cart


Canon 7D only $1199.00 after adding to cart

600EX-RT only $569 (normally $629!!!)
See my review

There’s lots of other great rebate deals going on here too, but you MUST add the items to your cart to see the final price! Act now as most deals expire at the end of the year!

There’s also a screaming deal on the Olympus E-P3 PEN 12.3MP Camera and the Nikon D800 bundle and D600 Bundle.

Disclosure

if you make a purchase using links found in this article, I may make a commission. Your price doesn’t change so you decide if ronmartblog.com or Adorama gets the small commission for the sale.

NOTE: This site requires cookies and uses affiliate linking to sites that use cookies.

If you enjoyed this article, please support future articles like this by making a donation or saving money by using my discount coupon codes. Either way, your support is greatly appreciated!

This blog is intended for freelance writing and sharing of opinions and is not a representative of any of the companies whose links are provided on this site.

The opinions provided are of Ron Martinsen alone and do not reflect the view of any other entity

Tuesday, December 25, 2012

Olympus E-P3 Bundle–Save $400

Adorama has a hot deal right now where you can pick up the E-P3 with a lens, camera bag, and 8GB SDHC for $400 off the $899 retail price.

Click here to take a look at this $499 kit and get free shipping!

This is a DPReview Silver Award winning camera that has been discontinued, so this is a closeout deal.

Other articles you may enjoy

Disclosure

If you make a purchase using links in this article, I may make a commission but it doesn’t cost you a penny extra.

NOTE: This site requires cookies and uses affiliate linking to sites that use cookies.

If you enjoyed this article, please support future articles like this by making a donation or saving money by using my discount coupon codes. Either way, your support is greatly appreciated!

This blog is intended for freelance writing and sharing of opinions and is not a representative of any of the companies whose links are provided on this site.

The opinions provided are of Ron Martinsen alone and do not reflect the view of any other entity

Saturday, December 22, 2012

REVIEW: Sony DSC-RX1 Full Frame Compact Camera


Sony Cyber-shot DSC-RX1

The Sony Cyber-shot DSC-RX1 has generated quite a bit a buzz for offering a full-frame sensor and an outstanding 35mm f/2.0 Zeiss lens in a camera that’s about the same size as your average point and shoot. This is the technological breakthrough that many have been anxiously waiting for – true full frame performance in a compact package. However, the real question is is it worth its staggering $2,798 USD price (at the time this article was published)?

Image Quality

Click for original
Bokehlicious – yes, this is what a great f/2 lens on a full frame camera should look like!
f/2 @ 35 mm, 1/80,ISO 320, No Flash, AWB, In-Camera JPEG – NO Post processing
Click for in-camera original file

Let’s just cut to the chance so I can answer the question that everyone wants to know about – is this camera really as good as a full frame DSLR? From an image quality perspective, the answer is without question – YES! The sensor on the RX1 is fantastic and the lens is on par with my best L lenses on my Canon gear. It’s got gorgeous color, dreamy bokeh at f/2.0, and creates sharp images even when examined in RAW. It’s high ISO performance is on par with most of today’s DSLR’s as shown below:

Click for original in-camera JPEG - ISO 25600
f/4 @ 35 mm, 1/80,ISO 25600, AWB, In-Camera JPEG
Click for original

Dynamic Range


f/4 @ 35 mm, 1/80,ISO 1250, No Flash, AWB, RAW+JPEG

Based on what I’m seeing I’d call the dynamic range of this camera as average with today’s DSLR’s. I don’t think it blows any away, but it’s very good – and way better than anything in its class. The above shot was a normal exposure and the shot below was an in-camera HDR. On a wide gamut display the orange feels more vibrant on the shot below, but on a sRGB display they are about the same.  Both shots were hand held.


f/2 @ 35 mm, 1/80,ISO 320, In-Camera HDR Auto

The 1/80 sec issue

This camera has a love affair with 1/80 sec. It seems that the only speed it wants to shoot at when in creative, program mode or aperture priority is 1/80 sec. 99% of my shots in those modes when auto ISO was engaged were at 1/80 second which is odd given the fact that with a full-frame 35mm lens on a DSLR would typically drop down to 1/40 sec under these same conditions. Now, I can understand Sony’s desire to keep the shutter speed a little higher to avoid blurry subjects, but I’d prefer that to be a camera setting for minimum shutter speed.

Living at 35mm on a full frame


f/2 @ 35 mm, 1/80,ISO 100
f/2 isn’t that shallow when shooting at 35mm

It amazes me when I talk to students who seem to think that smaller f-stop numbers only mean lower ISO’s and more light. They are often quick to run out and buy a 50mm f/1.8 lens thinking that they can shoot f/1.8 all day indoors and avoid having to use a flash. Sure, that might be true if you are only doing very shallow DOF shots, but the reality is that you’ll probably miss a lot more shots doing that due to the challenges of shooting at f/1.8.

The RX1 can go to f/2.0 which typically on a camera this small means nothing due to its small sensor, but this is a real full-frame sensor so f/2 means you do get dreamy bokeh AND shallow depth of field. Given the back focusing issue and this reality, it means it’s easy to foul up shots if you go to a shallow depth of field.

Of course distance from the subject and focal length also come into play when it comes to creating dreamy bokeh, so f/2 isn’t going to give you that if you take in larger scenes (as shown above). With 35mm you have to physically get close to your subject to get the dreamy bokeh like shown below and the top of this article, but if you can you’ll be rewarded.

Mouse over to see before, mouse out to see after
f/2 creates dream bokeh, but shallow depth of field makes it tough to use.
Observe the giraffe's nose at f/2 (mouse out or click here) and f/4 (mouse in or click here)

This camera convinced me that I will never again own a fixed length lens camera again – especially a measly 35mm. I’ll make sacrifices for the ability to optically zoom and longer focal lengths are a must to me.


At 4000x6000 pixels, I can crop to get just Rudolph but I’d rather just zoom
Despite being about 3 meters away from Rudolph, I got a lot more in the frame than I wanted


f/2 can be fun under the right circumstances
f/2 @ 35 mm,1/160, ISO 100, No Flash, AWB

That said there are occasions where 35mm is the right focal length and having f/2 available can be just the ticket to blur out ugly backgrounds and make lights dazzle.

Back focusing Problems


f/4 @ 35 mm,1/500, ISO 2000, No Flash, AWB
At first glance (and through the LCD) this shot seems okay

One serious issue present in my test RX1 was major back focusing issues. Through the LCD you are fooled into thinking that you have the shot like above, but at actual full zoom you really see the problem:

image
Despite the flexible focus spot being on the eye,
the camera back focused on the shirt

Now before the Sony fan boys pull out the pitchforks, this issue isn’t limited to squirming toddlers. Here’s one of 20+ shots where the AF failed with every possible thing in its favor:


Center focus on the center tree snowflake with a camera on support
still failed to focus on the tree

Even with support and 1/250 sec shutter speed it couldn’t focus properly on this big stationary Christmas tree. It seemed that if given a light and dark subject in the scene, it will always focus on the light subject no matter what you tell the camera you want it to do with the flexible focus point. This can work to your advantage sometimes, but many times it can frustrate.

Video

I’m not a video guy so there’s not much for me to report here beyond the fact that the video looks great for basic work. The auto focus was a little slow, but that’s common for DSLR’s and the steady shot is no substitute for an external stabilization solution – just like with a DSLR. It’s still no camcorder, so your cheaper point and shoot or cell phone will be much more mom/user friendly, but this will give the real videographer much better results.

In-Camera HDR

The sad thing about the in-camera HDR is that you can’t use it if you are in RAW mode, so you have to switch to JPEG only for this feature to work. They do have a dynamic range expansion feature that will work on your JPEG’s when you are in RAW+JPEG, but I still prefer Fujifilm’s single exposure EXR mode found on the X10. Here’s a quick example with just its dynamic range expansion and with its HDR Auto mode engaged (both handheld in very low light):


Camera defaults with RAW+JPEG Enabled
f/4 @ 35 mm, 1/50,ISO 6400, No Flash, AWB

Now with HDR mode:


JPEG Only In-Camera HDR is very good
f/4 @ 35 mm, 1/25,ISO 6400, No Flash, AWB

It did a decent job of aligning the images and getting the shot. Naturally a tripod would be best for the sharpest result, but with no light in this room directly (only spill from outside and an adjacent room) I thought the results were very good – especially for hand held.

Sadly it doesn’t keep each of the exposures it takes either, so you only get the final output. This means a decision to go in-camera HDR is a final one.

Bookshelf Test


f/8 @ 35 mm, 13s,ISO 100, No Flash, AWB

My bookshelf test clearly demonstrated what a great sensor this camera has. The colors are excellent, the detail is very good and the performance across the full spectrum of ISO’s from 100 to 25,600 is on par with the best DSLR’s on the market.

Here’s some galleries of popular DSLR’s where you can see bookshelf test images to compare this camera:

Here some other cameras you may wish to compare:

More Sample Images

Visit http://www.ronmartinsen.com/sony/rx1 for more in-camera JPEG images that have only been renamed with zero modifications. All shots except the bookshelf shots and where mentioned are hand held.


f/2 @ 35 mm, 1/80,ISO 3200


f/4 @ 35 mm,1/500, ISO 2000


f/2.8 @ 35 mm,1/80, ISO 160


f/2.8 @ 35 mm,1/80, ISO 1000


f/2.8 @ 35 mm,1/80, ISO 320


f/4.5 @ 35 mm,1/80, ISO 800

Conclusion

Overall I’d have to say this is a great beginning, but not something I’m interested in at this time. I loved the image quality and I commend Sony for using such a great lens. However, I need a zoom lens on a form factor like this and this is one camera that I’d actually consider buying if it had interchangeable lenses.

It’s just lame being stuck at 35mm only at this day and age, so at this price point it’s more of a proof of concept camera than something I desire to own. Hopefully Sony will respond to feedback like this and come up with an interchangeable lens version or one that has a decent 24-100mm zoom. Current lens physics dictate that a 24-100mm on any full frame camera at a decent aperture (like f/4) would be roughly the same size as Canon or Nikons 24-70 2.8mm lenses, so it’s no wonder Sony chose to go with a 35mm prime, but that just doesn’t fly with me.

If you are someone who only uses 35mm and think that the only thing that matters is a combination of size and image quality, then this is the perfect camera for you. The RX1 has a brilliant sensor and a fantastic lens in a compact package so you won’t be disappointed.

Keep trying Sony – this was a great start!

Where to buy

Click here to visit B&H and get the RX1 today. Your purchase helps support this blog, so if you are going to get this camera we’d appreciate if you cleared your cart and used this link. It doesn’t cost you a penny extra and it helps support this blog – thanks!

Other articles you may enjoy

Disclosure

If you make a purchase using links found in this article, I may make a commission. It doesn’t cost you a penny more (the retailers just keep the commission otherwise), but it does help sustain this blog so I can bring more articles like this and the ones found on the right side of this blog. Thanks for your support!

B&H loaned me the camera used for this review.

NOTE: This site requires cookies and uses affiliate linking to sites that use cookies.

If you enjoyed this article, please support future articles like this by making a donation or saving money by using my discount coupon codes. Either way, your support is greatly appreciated!

This blog is intended for freelance writing and sharing of opinions and is not a representative of any of the companies whose links are provided on this site.

The opinions provided are of Ron Martinsen alone and do not reflect the view of any other entity

Friday, December 21, 2012

Things You Need AFTER You Buy Your New Camera - Must Have Photography Accessories

So you've got that shiny new camera you’ve always wanted for yourself, or you’ve just bought one for your significant other – now what?

One of the fatal mistakes that people make when moving up from a camera phone or point and shoot to a mirrorless or DSLR camera is that they fail to budget for the wealth of accessories that they’ll eventually need to buy to make the most of their investment. It’s like going from Putt Putt to real Golf where there are lots of tools of the trade needed to get the best results.

Now many people have different philosophies on this subject, and most of those opinions have formed based on the budget that someone had when they moved up to the big leagues of photography. As the thrifty person and they’ll tell you how they just bought a camera, did some DIY projects for accessories and used Freeware software. I’d encourage you to look at their work and see if that is where you want to go and if it is then if you think your skills are similar to theirs then perhaps that’s the right choice for you.

Personally I think that many people who get into photography as hobby have the budget to “do things right” and they want to get the right tools to get the best results. If this is you then read on for the advice I’d give any friend on what they need after they bought their new camera.

Overview

At a high level, I think the following things are needed in order of importance:

  1. Education – You can’t make the most of that expensive new camera unless you know how to use it, yet I teach people all the time who have spent thousands only to get shots that look worse than what they get on their phone or point and shoot because they never learned how to use their camera.
  2. Software – To get the results you are expecting from your camera you’ll need to know some post-processing techniques and you’ll want the right software to make that task easy. You’ll also have the reality of managing your huge library of photos, so you’ll need the right products to help you find your photos quickly and easily.
  3. Accessories – Just like in golf where you can buy a set of clubs and skip getting the glove, there’s consequences to not having the right accessories. In golf it’ll be that nice blister on your hand after playing 18 holes, and in photography it is typically disappointing results that could have been avoided with an accessories that typically cost less than $50. Sadly it’s just like golf though where there’s a bunch of those little accessories that you need, so a failure to budget for them can be a shock after the fact.
  4. Camera Bag – This is the photographers equivalent of a putter – you are always looking for the right one, but there always seems to be a compromise that keeps you searching for more. I think an easy way to see how long a photographer has been shooting is to ask them to list out all of the camera bags they have owned! A good one can make a big difference and the wrong choice can be disastrous (my horror story).
  5. Online Portfolio – No matter how good or bad you are at photography, you’ll eventually need a place to show off your work online. You’ll start off with sites like Facebook and Flickr, but eventually you get to the point where you only want to show your good shots in one place.
  6. Better Light – That on camera flash (if you have one) can work in a pinch, but you quickly realize that it’s not going to get the job done for the shots you really want to get. Sadly this is a place where you once again go down the rabbit hole of never ending expense.
  7. Stabilization – It doesn’t take long to realize that those cool shots you were hoping to get with your shiny new camera can’t be captured with a flash, and hand holding just isn’t going to work no matter how much you paid for that stabilized lens. This is where an investment in a good tripod and in some cases a monopod is going set you back a few bucks if you want to do it right the first time, or thousands if you fool yourself into thinking there’s a cheap solution.
  8. Better Lenses – That zoom lens that came with your camera is a huge improvement over what you’ve used before, so it’s easy to think that’s all you’ll ever need. However, it doesn’t take long to realize that your lens doesn’t get you close enough to the action, or it can’t fit everything in the room like you wish it could, or it doesn’t focus fast enough, or it’s images are just not as sharp and as colorful as your friends pro lens. There’s a solution, but the reality is something many dread to hear.
  9. Display and Printing – The final step in expressing your creative vision. When you own the process from capture to output it is very fulfilling, but like all things photography it can be very time consuming and expensive.
  10. Etc… Yes, the list never ends in photography. My parents own a ranch in Texas where they have a joke about the rancher who wins the lottery. When the reporter asks the rancher what he’s going to do with all of his millions he responds “keep ranching until it’s all gone.” Well photography is very much the same way in that there’s no budget big enough to get everything that you’ll want to have

Education

Some people like me can learn much of what they need to know from a book, so for them I wrote the article “Which books should I read?”. However, it doesn’t take long before these people are back asking for advice on photo editing, so I often follow up with my “What Photoshop books should I read?” article.

For many people, books are enough to get them going but for others I hear “I can’t learn that way – I just want to watch videos”. For people in this camp there is no better value for the money than Kelby Training (see my review for details and a discount).

Others come back and say, that they need the challenge of an assignment and want a teacher to help them so I typically point these folks to The Perfect Picture School of Photography (PPSOP) founded by one of my favorite photography authors Bryan Peterson.

For people who want more personal interaction than you can get online there are endless resources, but I find a Bryan Peterson Workshop is a good place to start (be sure to tell him I sent you). While I was a little disappointed the first time I assisted one of his workshops, I did observe a great improvement in 2012. I’ve had positive reports from others as well, so I think these are a great resource to get creative with hands on instruction.

I also do private training, classes, portfolio reviews and workshops. Here’s a couple postmortems of a couple of my workshops:

Contact me if you would like to work with me directly. NAPP, Joe McNally (Flash Bus & One Day Lighting Workshop), John Paul Caponigro, Greg Gorman and others have workshops worth attending too.

For more book suggestions, see the right column of my blog. My What’s Hot in Photography and Photo Editing Books articles list a bunch of new books that I haven’t had a chance to review in-depth either.

I’ve also written an eBook on printing as part of my printing series.

Software

At a minimum, I think every photographer should own Lightroom (see my Lightroom 4 review). This product helps you to organize your photos, make changes without destroying your originals, read your RAW files, and so much more. While some Apple users will be tempted to use Aperture, I personally have found Lightroom to be the best overall product. Both Aperture and Lightroom can be a little tricky to learn for the newcomer, but over the long-haul I think Lightroom is worth the effort. My favorite book on Lightroom is The Adobe Photoshop Lightroom 4 Book for Digital Photographers, but detail oriented Geeks may prefer The Adobe Photoshop Lightroom 4 Book: The Complete Guide for Photographers.

For many people, Lightroom may be all they need to get the results they want from their camera. For the more creative types or those wishing to push the limits, they will find themselves eventually investing in Photoshop. While Photoshop Elements is a cheaper alternative and a decent product, in the end it’s the full version of Photoshop that most photographers rely on as much as their best lens or camera.

Photoshop is powerful yet cumbersome so please refer to the education section above to help yourself get over the hump of learning it. However, even the best experts will rely on plug-ins to help them get their work done more efficiently. While it’s possible to do great work directly in Photoshop without ever using a plug-in, it’s much like cooking over an outdoor fire instead of using an oven and kitchenware.  As a result, I’ve written an article entitled “What plug-ins should I buy? (for Photoshop & Lightroom)” to help make sense of all of the choices from the major players in the industry. I probably need to update that article to account for the improvements in onOne Perfect Photo Suite 7, but much of the advice in that article remains the same.

I should also note that if you are going to be working with Photoshop then I highly recommend a Medium Wacom Intuos5 Digitizer Tablet. I don’t recommend the Bamboo for photography and personally I still use the Wacom mouse when I’m not doing brush work in Photoshop. If you have a Intuos3 or older tablet, then you might enjoy this article.

Lastly, no discussion of software is complete without a discussion of HDR as it’s the hottest topic in the business. My friend Trey Ratcliff is pretty much the front runner in this area, but I’m sure he’d agree with my HDR Software Comparison. You can also see some of Trey’s techniques in this tutorial.

Be sure to check out my discount coupon code page when ordering.

Accessories

There’s no end to the accessories you can buy in Photography, but I’ve try to boil this list down to the things that I have in my bag whenever I head out of my studio. I’m going to experiment with this cool new widget from B&H below to show my accessories list so I can modify it as my preferences evolve, so hopefully I can keep this part of this article fresh.

It’s worth noting that this contains a few specific items that require some additional information:

  1. For the polarizers and variable neutral density filters I have included 77mm as that’s a very common size, but the reality is that you must match this to the lens(es) you wish to use them with. However, I recommend the brands and models I’ve listed so the only variable that changes is your filter size. In addition, the Cokin set requires you to purchase Z-Series (not P-Series) rings for your filter size, so the kit isn’t the only purchase you need to make. I’ve also included both B+W and Hoya filters that I recommend, but personally I use Hoya. B+W is, in theory, the better brand, but I don’t like the brass rings they use. I also prefer Cokin set for my neutral density needs over the Singh-Ray, but the Singh-Ray is a great product (which also own) and it is the better ND only product.
  2. For the HoodLoupe you’ll need to match your LCD size. The 3.2” will work with 3.0” displays, but you can save a few bucks by getting an exact match.  
  3. Finally, the links for Photoshop and Lightroom are for the full version – be sure to get the version you need (Mac vs PC and Full vs Upgrade).

It should also be worth noting that there are billions of accessories out there and many are total crap, so don’t be surprised if you end up with others that disappoint or ones that I haven’t discovered yet that are awesome.

Camera Bag

Lowepro, Tamrac, Kata, Crumpler, etc… are just a few brands that you’ll have thrust upon you when you buy your gear, but honestly I don’t like any of them. The main reason why I’m not a fan of these bags is because I’m just unhappy with their quality of zippers and construction. Many people use them and swear by them, but when spending thousands on the best gear I want bags that are designed and built by pro photographers for working photographers (primarily photojournalists). To that end, ThinkTankPhoto is the most trusted brand in the business and once you use one you can’t go back to the other brands. You can see my TTP Bag Reviews here, but right now my favorites are:

  1. Airport Security – the ultimate travel bag that can be a backpack too
  2. Streetwalker Pro – my favorite on the go / lightweight load bag
  3. Modular Components – the perfect sports solution

With that said, there’s always situations where other bags fit the bill better so I’ve been known to rely on my Urban Disguise 40 (city shooting) or Logistics Manager (hauling studio gear) as well as many others. There’s no good one-size-fits all solution which is why photographers collect bags like golfers collect putters.

It should be noted that Think Tank Photo bags are also great because they are designed to fit in side the airplane, so I’ve avoided having to check my bag over many flights over the last 5 years thanks to this great design (including my big Airport Security and Airport Accelerator bags).

For the fashion-conscious photographers, Kelly Moore bags offer a great way to carry your gear in style and be stealth-like too.

Online Portfolio

I did a big web hosting series many years ago that was a big hit and at that that time Smugmug was my favorite choice. I’ve used them to host the photos on this blog and I rely heavily on their service (which runs on Amazon S3). However, Smugmug hasn’t kept up with the times so now my favorite place to store my photos is Zenfolio. I hold patents in web browser technology and am a 20+ year programmer, but when it comes to hosting my photos I don’t want any fuss. I want to drag, drop and be done. I want my site to look great without having any hassle. I want to sell my photos the way I want without any headaches. Zenfolio meets all of those needs which is why it’s the host of http://ronmartinsen.com.

See my review to learn more and my discount coupon code page to get discounts on Smugmug, Zenfolio, and more.

Better Light

Once you’ve got tired of noise from using higher ISO’s of your fancy camera, and noise reduction software isn’t cutting it anymore, you’ll want to invest in a flash. Sadly this is one of those places that opens another Pandora’s box in photography, but the results can be very rewarding. Here’s what I recommend:

Canon

Here’s the flash configuration I recommend for Canon shooters:

You’ll want to start with the 600EX-RT flash and build your way up from there. The ST-E3 is great once you want take your flash off your camera, and the battery pack gives you a lot more cycles before your flash starts to loose its oomph. The cord is for use with flash brackets and handy if you don’t own a ST-E3 but want to take your flash off the hot shoe (like when doing basic macro work).
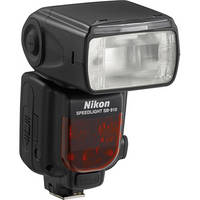
Nikon

Here’s what I recommend for Nikon shooters which has the addition of a radio controlled ETTL solution via Pocket Wizard:  

Everything else mirrors the Canon solution.

Flash Accessories

You knew this was coming right? With a flash comes accessories as there’s always something to buy in photography! Here’s some basics to get you started – especially when you decide to take that flash off the camera.

For those who can’t make the investment in the Rogue Master Lighting Kit, I recommend at least getting the Color Correction Kit.

If you decide to shoot a friends wedding or get serious into event photography, then you’ll want to check out the Quantum QFlash & Custom Brackets Rotating Flash Bracket.

Home Studios

If you want to take the next step up then you might want to check out my Home Studio on a Budget article, and if you want the full monty then you can check out my studio setup.

Here’s a few good books on the subject of flash and studio lighting:

Stabilization

While I try to use garbage cans, benches, rocks, etc… as much as possible, there comes a time where you have to have a good tripod and monopod (for panning) to get the job done. To that end I’ve written an article about my tripod recommendations which also links to my recommendations on ball heads and monopods. I highly recommend you check it out!

I should also note that my GT1541 tripod is perfect for International travel because it just sneaks in under the maximum required height (when collapsed) so I only had to wait for quick measurements before I was on my way (versus others which would be required to be checked in).

Generally speaking, I do not recommend video heads for photography use as long exposure photography requires more stabilization than is required for video.

Better Lenses

Want sharper images with better color before they ever leave your camera? A great lens is a good place to start! In addition, there’s a good reason why lens makers don’t make a 10-600mm f/1.2 lens with image stabilization – its called the physics of light! No, it’s not a conspiracy of the lens makers – there are real-world legitimate reasons so lens choice is always a compromise. As you progress on your path in photography you’ll find out which ones make the most sense for you, but until then I wrote an article entitled Which lens should I buy? to help you decide.

TIP: Lenses offer stabilization called Vibration Reduction (Nikon VR), Image Stabilization (Canon IS), Optical Stabilization, etc… but this is for counteracting normal camera shake. They don’t replace a tripod and more importantly these should be disabled when using a tripod for best results.

You can see what I use here.

Display and Printing

Before you can start getting prints (even from a third party service) to look similar on screen to the way they will in print you’ll need help “Choosing The Right Display Calibration Device”. You owe it to yourself to have a calibrated display so that you don’t’ get major surprises when printing or viewing your photos on others computers.

The next step from there is getting a good display so that you can actually see all the h colors of your image in high resolution. For that I highly recommend the NEC PA Series displays. Eizo makes the best monitors in the business, but you can get a great NEC that is almost as good for a fraction of the cost which is why I use them myself.

If you decide you want the ultimate in control of your creative process then you’ll want to print yourself. For that you should check out my printing series and my eBook

Etc…

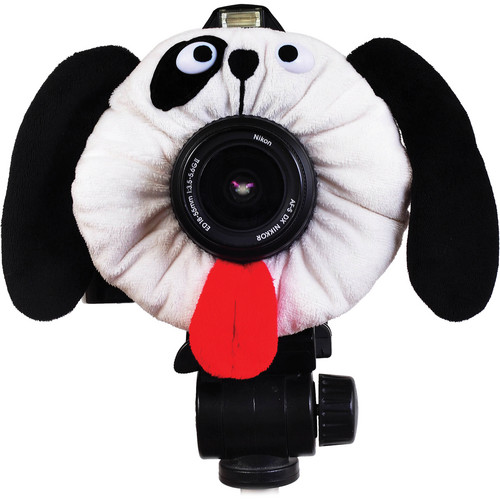
Honestly, it never ends which is both the fun part (i.e., challenge) and worst part (expense) of  photography. You’ll need to think about camera insurance, and before you know it you’ll be selling photos and looking for advice. You might even want tools to get kids to look at the camera or the perfect camera for parents. Heck, you’ll mostly likely decide that you need a new compact camera and case to replace that dreaded thing you used before your DSLR.

You might find yourself wanting to try before you buy, so check out my lens/gear rentals and when you’ve outgrown your starter camera then check out my advice for camera upgrades.

Yes, there’s a reason why my plan to only spend $500 on a camera exploded to thousands of dollars over the years, but I’m not alone.

I hope you stay with me as I document my photography journey with my articles (see the right side of this blog for the most popular ones), and you can check out my photography notebook for some of the lessons I wanted to make a note of along the way. Stay in touch here or via Twitter, Facebook, or Google+ as I post about my latest articles or on Flickr and 500px when I share some of my photos.

Good luck and welcome to the world of photography!

Ron Martinsen

Disclosure

If you make a purchase using links found in this article, I may make a commission. It doesn’t cost you a penny more (the retailers just keep the commission otherwise), but it does help sustain this blog so I can bring more articles like this and the ones found on the right side of this blog. Thanks for your support!

This article was written by my own accord and not sponsored, requested, etc… by any partner of this blog. Brands mentioned are because I believe in them and no other reason. I do create partnerships with brands I believe in to help bring you discounts where possible.

NOTE: This site requires cookies and uses affiliate linking to sites that use cookies.

If you enjoyed this article, please support future articles like this by making a donation or saving money by using my discount coupon codes. Either way, your support is greatly appreciated!

This blog is intended for freelance writing and sharing of opinions and is not a representative of any of the companies whose links are provided on this site.

The opinions provided are of Ron Martinsen alone and do not reflect the view of any other entity