Showing posts with label Skin Softening. Show all posts

Tuesday, June 4, 2019

REVIEW: Imagenomic Portraiture 3 (DISCOUNT OFFER) - Video Tutorial

Imagenomic Portraiture has always been my favorite skin softening product because it does a wonderful job of softening the skin without obliterating the texture like most other products (and techniques shown on YouTube). It's the secret sauce use by a lot of high end fashion and beauty photographers, so it's been a key part of my digital workflow for nearly a decade.

Buy and SAVE now using coupon code RONMART20

One of the big new features of version 3.0 is how the user-interface scales on a 4K UHD or larger display, like the NEC PA322UHD that I use.Here's the old UI which looks tiny both in thumbnail and when you click to view the 4K screenshot:

Imagenomic Portraiture 2 - Tiny on 4K

And here's the new UI which scales beautifully to any size:

Imagenomic Portraiture 3 - New Optimized for 4K UI

The heart of the new user-interface can be found in the left panel which is functionally similar, but now just bigger and easier to read:

Imagenomic Portraiture 3 - New UI Controls

The new user-interface is significantly more responsive thanks to hardware acceleration, so zooming is now instant with no painful minute waiting for the softening effect to be applied.

The user-interface does lose my beloved tabs feature which allows you to experiment and see the results of different settings spread over multiple tabs, but that was a geek feature most people didn't know exist so I don't think most users will miss it.

Skin Softening Results

Original Image - BEFORE Skin Softening (Zoomed to 111%) - Click for larger version

Portraiture 3 Normal Preset AFTER Skin Softening (Zoomed to 111%) - Click for larger version

Video Tutorial

My previous tutorial on Portraiture 2 had nearly 150,000 views and the advanced techniques tutorial was featured on the Imagenomic support website. In this all new for version 3 review, I focus on both a face and full body with basic and advanced techniques with improvements that hopefully address user suggestions for my past videos:

Conclusion

If you have a high resolution display, the upgrade is a no brainer because it's so much easier (and faster) to use. However, if your budget is tight I can honestly say that I don't see any improvements to the skin softening algorithms that make me prefer the new version over the old version.

This is still a great product that I highly recommend, especially for those who are disappointed by the wealth of terrible skin softening products and techniques currently available today. It's fast and easy to use and a must have for anyone who edits a lot of photos with people.

Where to Buy?

CLICK HERE to learn more or buy today, and be sure to use my coupon code RONMART20 to save 15% on one or more Imagenomic products as shown below:

Enter the code and click update to apply the discount

Other articles you may enjoy

If you enjoyed this article, you may also enjoy these:

Disclosure

If you make a purchase using links found in this article, I may make a commission. It doesn’t cost you a penny more, but it does help to support future articles like this.

NOTE: This site requires cookies and uses affiliate linking to sites that use cookies.

If you enjoyed this article, please support future articles like this by making a donation or saving money by using my discount coupon codes. Either way, your support is greatly appreciated!

This blog is intended for freelance writing and sharing of opinions and is not a representative of any of the companies whose links are provided on this site.

The opinions provided are of Ron Martinsen alone and do not reflect the view of any other entity

Monday, October 10, 2016

Imagenomic Portraiture 2.3.4 Skin Softening Tutorial (October 2016 Version)

Screenshot of Imagenomic Portraiture 2.3.4
Screenshot of the Portraiture User Interface

Despite 114,000+ views as of the time this was written, my Imagenomic Portraiture video tutorial received some complaints that it was hard to see the before and after because the model I used had such perfect skin. As a result of that feedback, I'm doing another version where it is much easier to see the before and after results.

Tutorial before and after image - click for a larger verison
Before and After of the video tutorial image - click the image for a larger version

I also got some feedback asking me to "just get on with it", so this new video starts off with the quick and dirty version and then has something extra afterwards for those who want more details about how to use my favorite skin softening product.

Video Tutorial - 2016 Edition

Without further adieu, here's the new video tutorial with my same boring voice:


Click here for the video page on YouTube

How does this compare to...

As of October 2016, I still think this is the best product on the market for skin softening.

Sure, you can find tutorials that show you how to do your own skin softening without a plug-in, but the power here is in the great defaults and the masking feature. I also find the results to be more pleasing than any other product I've used including Color Efex's Dynamic Skin softener, onOne Perfect Portrait, Portrait Professional, and more. I also have more high end professional photographers tell me that this is their go to product of choice more than any other, so I'm not the only one who swears by it.

Special Offer – Save 15%

Coupon code for Imagenomic Portraiture
See the Discount Coupon Code page for the latest code if this doesn’t work

CLICK HERE to use my coupon code RONMART2012 when you check out for a discount on the following products: (click banners to learn more)


Get all three products below at a discounted rate in this suite.


If you see a photo of mine that has skin, Portraiture
is the ONLY product I use for skin softening.


Want to get rid of noise from your images?
Noiseware is the king of noise removal while preserving detail – period!


Miss film and want to get that classic look and grain back?
Realgrain might be just what you are looking for!

Other articles you may enjoy

If you enjoyed this article, you may also enjoy these:

Disclosure

If you make a purchase using links found in this article, I may make a commission. It doesn’t cost you a penny more, but it does help to support future articles like this.

I am a featured photographer for Imagenomic. I did this promotion because I love Noiseware and Portraiture and because Imagenomic was an early supporter of this blog. I do not get compensated for being featured photographer, and I did this article without any solicitation or request from Imagenomic.

NOTE: This site requires cookies and uses affiliate linking to sites that use cookies.

If you enjoyed this article, please support future articles like this by making a donation or saving money by using my discount coupon codes. Either way, your support is greatly appreciated!

This blog is intended for freelance writing and sharing of opinions and is not a representative of any of the companies whose links are provided on this site.

The opinions provided are of Ron Martinsen alone and do not reflect the view of any other entity

Friday, April 19, 2013

TUTORIAL: Using Portraiture 2.3 by Imagenomic (Discount Offer)

CLICK HERE for my October 2016 new and improved video with more obvious before and after!

Imagenomic Portraiture 2.3 (Build 2308-01) using the Smoothing: High Preset
Canon 1D X 1/200 sec at f/10, ISO 100 at 160mm (70-200mm f/2.8L IS II USM)

Skin softening is a touchy subject because some people look at the shot above and screech “oh her skin looks like plastic” or something along those lines. That level of skin softening might be appropriate for certain target audiences, but skin softening doesn’t have to be that harsh. Here’s an example of how I typically do skin softening for my own taste:

My normal skin softening workflow as shown in the video plus a couple additional healing edits

Now even that might be too much for some people, so in my tutorial video in this article I show you how to use Portraiture to get the right amount of skin softening to suit your own personal needs.

Now this model has the best skin I’ve seen on an adult human being in all of my life. However, with today’s high resolution lenses and cameras, studio lights, and makeup that started to fail during a shoot even this models skin can look pretty rough:

Original image from camera with only minor blemish touchups

This woman is in her early 20’s and has wonderful skin, but even the best skin has blemishes – that’s reality. The makeup cracks make look much older than she really is and it causes some unnatural lines on her nose. As a result, the camera captures an more harsh version than the reality that existed before my eyes. This is where skin softening comes in, and it’s for the reality of scenarios like this that I always use it when I have skin in a photo. The difference is that I’ll use a lot more here than a casual shot, so always adjust the amount to suit your subject, the conditions and your artistic intent at the time you edit your photo.

Imagenomic Portraiture 2.3 User Interface


Imagenomic 2.3 User Interface

For this tutorial I’m using 2.3 and I’ve created a Skin Tones Mask similar to the one shown above (but more precise) and I’ve left Enhancements turned off. I love this product, but I find Enhancements to be redundant so I prefer to do them in their own layers in Photoshop so I can decouple that work from my skin softening work. As a result, I don’t really discuss this feature in the tutorial.

NOTE: At the end of the video there’s an error where I name the layer Portraiture 5 for the version, but I meant to do 2.3. Noiseware is version 5, so that was a typo.

Video Tutorial

CLICK HERE for my October 2016 new and improved video with more obvious before and after!

This video was recorded at 1920x1080, so it’s best to view it full screen on a HD display. Be sure to also set the YouTube controls to HD via the gear menu button as the “auto” setting doesn’t always do the right thing. If the iFrame above isn’t working, then click here to view the video in a web browser.

Conclusion

This isn’t really meant to replace my old Imagenomic Portraiture 2.0 -vs- Nik Software Dynamic Skin Softener review, but I never had a chance to put an in-depth video tutorial in it. This article makes up for that shortcoming and hopefully helps you to become more productive with skin softening.

See the end of this article for more related reviews.

I’m also well aware that great books like Professional Portrait Retouching Techniques for Photographers using Photoshop demonstrate how to do skin softening without a third party product. However, like all plug-ins what you from a third party solution that you don’t get from Photoshop directly is the ability to rapidly try different things and build a complex mask in seconds. As a result I’ll say that it might be possible to get identical results without this product, the fact is that you’ll get more control with faster results than Photoshop alone.

I highly recommend this product because I use it on every image I edit with skin. It’s that good and I wouldn’t want to work without it!

Special Offer – Save 15%

image
See the Discount Coupon Code page for the latest code if this doesn’t work

CLICK HERE to use my coupon code RONMART2012 when you check out for a discount on the following products: (click banners to learn more)


Get all three products below at a discounted rate in this suite.


If you see a photo of mine that has skin, Portraiture
is the ONLY product I use for skin softening.


Want to get rid of noise from your images?
Noiseware is the king of noise removal while preserving detail – period!


Miss film and want to get that classic look and grain back?
Realgrain might be just what you are looking for!

Other articles you may enjoy

If you enjoyed this article, you may also enjoy these:

Disclosure

If you make a purchase using links found in this article, I may make a commission. It doesn’t cost you a penny more, but it does help to support future articles like this.

I am a featured photographer for Imagenomic. I did this promotion because I love Noiseware and Portraiture and because Imagenomic was an early supporter of this blog. I don not get compensated for being featured photographer, and I did this article without any solicitation or request from Imagenomic.

NOTE: This site requires cookies and uses affiliate linking to sites that use cookies.

If you enjoyed this article, please support future articles like this by making a donation or saving money by using my discount coupon codes. Either way, your support is greatly appreciated!

This blog is intended for freelance writing and sharing of opinions and is not a representative of any of the companies whose links are provided on this site.

The opinions provided are of Ron Martinsen alone and do not reflect the view of any other entity

Wednesday, August 8, 2012

Imagenomic Noiseware, Portraiture & RealGrain Updated (15% Off Coupon Code)

Ron’s take on the new updates

Imagenomic has done a web site refresh and updated their products recently, so I thought I’d weigh in on the changes.

Noiseware gets a much needed visual appearance boost to match the more modern look of Portraiture. Functionally it appears to be mostly the same as far as the UI is concerned, but Imagenomic claims better noise reduction performance and results. From what I see the results are still the best in class as they always have been, so it’s still a great product that is a must for all photographers.

Portraiture seems unchanged at this point.

I’m not a Real Grain user so I didn’t run any tests on it yet.

Here’s the official press release with all of the details of the updates:

PRESS RELEASE: Imagenomic Announces Release of Noiseware 5 and Updates to Portraiture and Realgrain plugins

New Version Provides Faster Processing Speeds, Improved Algorithm, Unlimited Presets and History Control, and 64-bit compatibility for Mac OS X
Free Upgrade / Updates for Noiseware 5, Portraiture and Realgrain plugins for All Licensed Owners of Software

New York – July 12, 2012 – Imagenomic, an independent software vendor specializing in digital imagery enhancement solutions, has announced the release of Noiseware 5 plugin, the latest generation of its award-winning noise correction technology. Noiseware 5 features several new and improved enhancements, including a faster core algorithm that retains more image detail, a newly-designed user interface and controls, the ability to create an unlimited number of presets, and a new history control for an unlimited number of history steps. In addition, Noiseware 5 plugin provides 64-bit native support for Mac OS X to complement the existing compatibility for Windows systems, as well as full compatibility with Adobe Photoshop CS6.

"We know our customers have been looking forward to Noiseware 5 plugin and we are gratified by the enthusiastic feedback we have been receiving from the industry and the end-users. The progressive evolution and the continued improvement of Noiseware's core algorithm embody Imagenomic's commitment to a leadership position when it comes to the quality of the processed image, the ease-of-use, and the processing speed", explains Art Ghazaryan, Co-CEO and COO. "We are also pleased with the additional improvements and features we included with this update. The new preset manager, user interface and history controls will enhance the user experience with a product that has been an industry favorite for quite some time. Current owners of Imagenomic's Noiseware Professional plugin will be able to upgrade to Noiseware 5 at no cost to them."

Improved Processing Speed: The Noiseware 5 plugin offers improved multi-core support that renders processing speeds that are up to four times faster than version 4.0, and with its 64-bit compatibility for Mac OS X provides additional productivity benefits.

Improved Algorithm: An advanced algorithm has been incorporated into Noiseware 5 that
allows photographers to retain greater image detail and is up to 25% more effective in
reducing image noise.

New Preset Manager: The Noiseware 5 plugin now provides users with an unlimited number
of preset capabilities, along with an unlimited number of categories for easy-to-find settings
for most every type of photography and shooting environment they may encounter. In
addition, photographers can now store notes and other details regarding specific presets and
have the ability to import and export data.

New History Control: Noiseware 5 now includes a history control, which allows
photographers to create an unlimited number of history steps to manage levels of noise
reduction and return to earlier renditions as well as the ability to save them as presets.

Pricing & Availability

Noiseware 5 plugin replaces the Noiseware Professional plugin and is available for MSRP of $79.95. Noiseware 5 is free for existing customers of Noiseware Professional plugin. New users can try Noiseware 5 on a free 15-day trial basis. The Noiseware Standard plugin has been discontinued. A discounted upgrade pricing will be available for existing users of the Noiseware Standard plugin edition who wish to upgrade to Noiseware 5. Imagenomic will continue to support the users of the Standard plugin edition. Imagenomic also released minor updates to Portraiture and Realgrain plugins to ensure full compatibility with leading industry applications. These updates are free for existing users of Portraiture and Realgrain plugins.

My Reviews & Special Discount Offer

You can enjoy my discount off Imagenomic products when you click one of the following links:

and enter the coupon code RONMART2012 like this:

SNAGHTMLa62d657

You may also enjoy seeing these reviews of

Disclosure

If you make a purchase using links found in this article, I may make a commission. I’ve also been provided copies of the aforementioned products for the purpose of performing a review.

NOTE: This site requires cookies and uses affiliate linking to sites that use cookies.

If you enjoyed this article, please support future articles like this by making a donation or saving money by using my discount coupon codes. Either way, your support is greatly appreciated!

This blog is intended for freelance writing and sharing of opinions and is not a representative of any of the companies whose links are provided on this site.

The opinions provided are of Ron Martinsen alone and do not reflect the view of any other entity

REVIEW: Imagenomic Portraiture 2.0 -vs- Nik Software Dynamic Skin Softener

Imagenomic is mostly known for its award winning Noiseware product, but there’s another Imagenomic product that I use all of the time – Portraiture. What this product does is skin softening but in a more subtle yet sophisticated way by automatically detecting the skin surfaces and only applying changes to them.

In addition to the automatic mode you can use an eyedropper tool and take multiple samples to get great one pass skin softening on faces with multiple skin tones (i.e., shadows on face, rosy cheeks, etc…) which is something all of the other products I have used have failed to do in just one pass. Imagenomic handles this very well in a package that looks intimidating the first time you load it up, but it’s 2.0 improvements help you get the hang of how it works quickly so it grows on your fast.

Photo Thoughts – Red Jacket
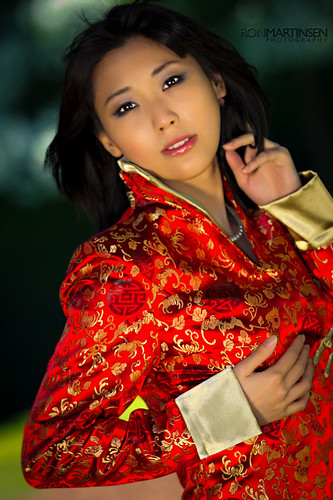
Haruka-488-Edit-2 - Alternate Crop - ALL RIGHTS RESERVED
Portraiture is my “go to” skin softening product

Rather than just do a review of Portraiture, I thought it might be fun to add a little user education in it by doing a end to end walkthrough and while I’m discussing how Portraiture and its best competitor – Nik Software’s Dynamic Skin Softener (found in Color Efex) work.

Portraiture –vs– Nik Software’s Dynamic Skin Softener (via Color Efex)


Color Efex Skin Softening User Interface

I’ve been a big fan of Nik Software since 2007 and the first product I purchased from them was Color Efex. Included with this product was their crown jewel filter that many photographers use daily – their Dynamic Skin Softener (DSS)  filter. I used it and loved it for years, but when Portraiture 2.0 came out I started to find myself going to Portraiture more often to get the job done right very quickly.


Portraiture’s User Interface on Windows 7 in 64-bit CS4

Portraiture’s User Interface appears more complex at first, but it is pretty easy once you realize that it automatically does everything so you could just load it and click OK and get pretty good results most of the time. However its power lies in the eye dropper too which goes beyond what Color Efex offers and actually lets you do skin samples as much as you like to pinpoint a range of colors that should be impacted by softening.

While Dynamic Skin Softener (DSS) is a good product and it can be dialed in to get similar softening results, I found the advanced eye dropper and some of the presets in Portraiture to be a big step ahead of what Dynamic Skin Softener can do.

To see what I mean, compare the screen shot above to the shot below (taken from Mac, but both work the same way) and notice the mask preview on the right. By sampling various spots on the image I was able to isolate most of the skin with minimal impact on the rest of the image. The remainder can usually be ignored or masked off with a quick black brush stroke when you return Photoshop, but I usually just leave it alone and most of the time I can isolate my selection to just the skin very quickly.

Nik’s Dynamic Skin Softener (DSS) I would have to use multiple U-Point controls and most likely the brush feature of Color Efex to do the same thing, but when skin tones shift quite a bit I find that I have to do multiple layers and sample each of the major tones separately to get them all done very well. Both products work well, but this is just much faster because I can do it in one quick pass with a few simple clicks.


Portraitures’ User Interface on Mac OS X in 64-bit CS5 with Presets Shown

Portraiture offers some handy presets (shown above) that speed up productivity as well as options for enhancing the skin tones (can be disabled).

The Nik alternative offers some sliders to control the level of softening, and U-Point controls allow you to disable softening in places. Finally Color Efex only has user-definable presets (called Quick Save slots), so you don’t get anything built-in to speed up your workflow.

Seasoned DSS veterans like me can use both products equally effective, but I still have found that the default settings in Portraiture are better to my personal preferences. This coupled with the fact that I can make fast adjustments in one pass means I get a a time advantage in my image processing my workflow that make it worth it the switch.

DSS vs Portraiture Comparison

Here’s an image that shows what the skin looks like after the skin softening with Nik Software’s Color Efex Dynamic Skin Softening, and when you hover over it you can see the same image processed with Portraiture. Click the links in the caption for larger versions:


Dynamic Skin Softener – click here for larger


Portraiture -
click here for larger

Both products create good results, but I find that DSS is a little more aggressive by default. Both products allow for adjustments so this can be addressed in the user-interface or by simply changing the opacity of the skin softening layer, but I find the defaults in Portraiture more suitable to my tastes.

This example for Portraiture uses color enhancements, but this can easily be disabled by clicking off in the Enhancements panel shown in the screen shots above. I used it because it saved me a processing step, but others may wish to do that in Photoshop or Lightroom directly.

Skin Softening is Subjective

Just like with noise reduction, how much skin softening you apply is very subjective. One user might want the porcelain/plastic look and the other may only want a faint hint. I’m in between, but I lean more to the softer side. If you flip through fashion magazines you’ll notice that the industry practice is definitely a lot of softening, but artificial texture is usually added after the fact to give it more of a realistic appearance.

My advice here is do what you like. You are the photographer, and your work is a reflection of you so do what you like the most.  Top Photographers like Jill Greenberg have made a name for themselves by doing unrealistic skin enhancements, so while some people might complain about your level of skin softening (as they do with Jill) others will call it your style (as they also do with Jill).

Don’t let the naysayers scare you. <g>

Other Changes to this Photo

Once I had my skin softening done then I selected the teeth using the quick selection tool, created a Hue/Saturation adjustment layer to adjust the teeth color. I removed a little saturation from the yellow channel and added a little lightness on the master channel. I learned this trick and others I used on this photo from Scott Kelby.  You can read a bunch of tricks like these in his book The Adobe Photoshop CS5 Book for Digital Photographers.

The next thing that needed to be fixed were the eyes. I made a selection on the eyes and did a quick high pass filter on them (around 24), then I changed the layer to use the overlay blending mode and then masked out whatever I didn’t want modified. Once again this was a Kelby trick discussed on his PhotoshopUser TV show but similar techniques are done in the book above too.

My last steps to this image were a little dodge and burn on the eyes, a visit to the warp tool to narrow the face, and I used the digital reflector filter in Color Efex to add some additional light and color to the face. I sharpened the final product with Sharpener Pro.


Before


After

Conclusion

I’ve had Portraiture for a long time, including the first version. At first I didn’t use it much because I was set in my ways with Color Efex. I just didn’t see the point. However, one of my mentors who was a die hard Dynamic Skin Softener fan (his only reason for owning Color Efex) picked it up and ranted about how much better it was. This got me to take a closer look and I quickly discovered that there is indeed much more than you can do much faster with Portraiture than you can with Nik’s Dynamic Skin Softener.

The biggest and best advantage is the fact that I no longer have to do multiple skin softening layers when the skin tones differ on the face (i.e., hot faces with rosy cheeks, shadows like on the neck above, birth marks, etc…), which was a big hassle in my previous workflow – especially if you are using the Aperture or Lightroom versions as you’ll need to make multiple passes which can be painfully slow with lots of TIF files created in Color Efex.

My overall advice is that if you are doing a lot of people work and you like skin softening, then Portraiture is a must own (which is why it is high on my What Plug-ins Should I Buy? list). If you just do a casual amount and own Color Efex then you can probably live without it. Both products are WAY better than using Photoshop’s Blur filter or Lightroom’s negative Clarity trick as both methods require a lot of complex painting that is very time consuming and I’ve never been as happy with the results.

If you enjoyed this article, you’ll love this:

TUTORIAL: Using Portraiture 2.3 by Imagenomic (Discount Offer)

Special Offer – Save 15% on ALL Imagenomic Products!!!

Imagenomic Shopping Cart with Discount Applied

Imagenomic is offering readers of this blog 15% off ALL of their products including their bundle. Click here and use the code RONMART2012 to get your 15% discount. See the screen shot above (click for a larger version) to see where and how to enter the code.

Always consult the Discount Coupon Code page if the offer links or code here do not work for any shown. Offer subject to change without notice.

Lightroom and Aperture support is available for an extra fee or sold separately.

Disclaimer

I was provided evaluation copies of the products mentioned in this article (except Color Efex – I paid for that). I may get a commission if you make a purchase using the links and codes featured in this article. Thank you for supporting this blog by using the links and code provided when making your purchase.

NOTE: This site requires cookies and uses affiliate linking to sites that use cookies.

If you enjoyed this article, please support future articles like this by making a donation or saving money by using my discount coupon codes. Either way, your support is greatly appreciated!

This blog is intended for freelance writing and sharing of opinions and is not a representative of any of the companies whose links are provided on this site.

The opinions provided are of Ron Martinsen alone and do not reflect the view of any other entity