Tuesday, November 13, 2018

PREVIEW: on1 Photo RAW 2019 (Special Offer)

5 minute edit of a Nikon Z7 NEF Image

I've been playing around with the final release version of on1 Photo RAW 2019  starting with this 5 minute edit of a Nikon Z7 NEF RAW Image that was taken in a nasty display case under horrible light and quickly turned it into a pretty decent image. It was a little slower than expected on my Windows system, but it's 2.5 years old so perhaps it might be time for me to consider a system upgrade.

This next image was a quicker edit that took advantage of the effects features much in the same way Luminar offers its effects for a workspace. The net result was a big improvement in a hurry:

image

Here's what's new for 2019:

A New & Faster Editing Workflow All of the editing modules from previous versions have been combined into the Edit module to create a single place for editing photos. The former editing modules are now available as tabs to allow you to work in each seamlessly without changing the application appearance. These include Develop, Effects, Portrait, and Local Adjustments tabs.

A New Workflow for Layers – ON1 Layers is no longer a separate module. Instead, the power of layers is accessible within the non-destructive workflow in the new Edit module. This allows for creating or editing multi-layered files, including raw files, and keeping non-destructive settings for each photo layer. Customers can also move, size and mask each layer. More importantly, and a new concept, each layer has its own non-destructive settings, all the way back to the original file. What’s most exciting is if you are working with raw files, powerful adjustments like exposure, highlights and shadows can now be processed using the raw data in a layered photo workflow. All without having to change modules or applications.

  • New Lightroom Photo Settings Migration – New AI-powered algorithms give customers the ability to transfer Lightroom edited photos, keep the non-destructive settings, and move them into ON1 Photo RAW 2019. The updated Lightroom Migration Tool in version 2019 transfers almost every edit you can make in Lightroom including raw processing, crop, retouching and local adjustments along with folders, photos, collections, and metadata.
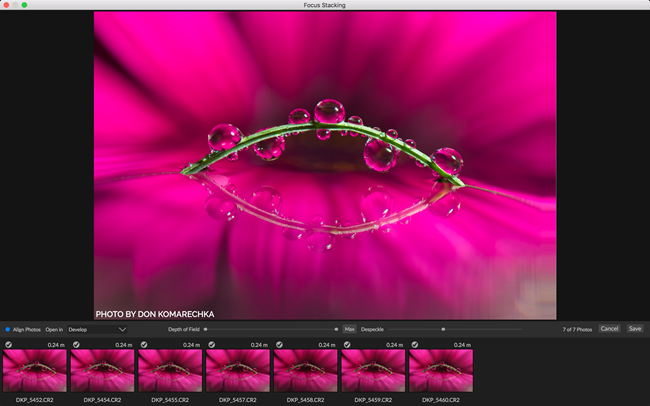
  • New Focus Stacking – Automatically blend a series of photos at different focus distances to increase depth-of-field. It’s so fast, you can adjust the focus in real-time, just like changing the focus on your lenses. Think of it like HDR, but for focus instead of exposure.
  • New Auto-Align Layers – Easily combine multiple photos as layers, then automatically align them based on image content, making it easy to mask and blend them together.
  • New AI Masking Tool (coming Winter 2019) – This new tool, powered by machine learning, will allow customers to easily identify areas of their photos to create a selection or mask and the AI technology detects your subject matter and automatically creates a beautiful mask.
  • New Portrait Tab – The new Portrait tab automatically detects faces in your photo allowing you to easily retouch, smooth skin, brighten and sharpen eyes, and whiten teeth.
  • New Text Tool – The new text tool is perfect for creating posters, postcards, or adding your byline or watermark. Easily control font size, color, position, and more and then save a preset to add the same text overlay to a batch of photos quickly.
  • New Master Keyword List – Now you can see every keyword you use in a single, searchable list. You can quickly apply, clear, edit, or delete keywords.
  • Enhanced Local Adjustments – Local adjustments have been enhanced to use the raw processing data. This allows for more highlight and shadow details with more tonal range. This also includes new controls like haze, whites and blacks.
  • New Layered HDR Workflow – With the powerful new non-destructive layers you can combine other photos, text or alternate exposures with your HDR photos. Use the powerful masking tools to combine multiple HDR renditions even.
  • New Filter Options in Effects We have added dedicated film grain, curves and color adjustment filters to Effects. These let you add film grain to color photos and make advanced, targeted color and tone adjustments faster. There’s even a new filter selector that allows you to search for filters, learn what they do and even view a sample before you add them.
  • New User Interface – The new user interface has a fresh and modern feel. Overall contrast has been reduced to make photos stand out along with a new font to help increase readability. Updated icons, tabs, and sliders will also take up less visual space.
  • Other Updates –  including support for HEIC files, keyboard shortcuts for changing modules, more accent color options, color labels on folders and more.
  • Additional Camera Support – Added support for the Fujifilm XF10, Fujifilm X-T3, Nikon P1000, Nikon Z7, Panasonic LX100 II, Leica M10-P.
  • Additional Lens Profiles – Added lens profiles for: Canon EF35mm f/1.4L II USM (750), Chinon Auto Chinon 35mm f/2.8, KMZ Helios-40 85mm f/1.5, Nikon 200-500mm F5.6 174, Panasonic LEICA DG 8-18/F2.8-4.0, Panasonic LEICA DG NOCTICRON 42.5/F1.2, Pentax Pentax SMC Takumar 50mm f/1.4, Sigma Sigma 17-50mm f/2.8 EX DC HSM, Sony FE 24-105mm F4 G OSS, Sony FE 50mm F1.8, Tamron 14-150mm F/3.5-5.8 DiIII C001, Tamron SP 24-70mm F/2.8 Di VC USD G2 (A032), Voigtländer Voigtlander Super Wide Heliar III

Focus Stacking

Probably one of the biggest new features is the built-in support for Focus Stacking, something that usually requires a 3rd party solution to get right. I wasn't able to try it out yet though as I did have images suitable for trying this feature. Here's a sample provided by on1:

ON1-Focus-Stacking

HDR Support

Improved HDR support is included as shown in this sample provided to me by on1:

ON1-HDR

Pano Support

Stitch your images quickly with the built-in support for building panoramic photos as shown with this feature provided by on1 by Hudson Henry...

ON1-Pano

HEIC File Format Supported

I was really happy to see that HEIC files worked fine on Windows and even with no edits the images looked as good as they do on the iPhone as was the case here...

iPhone X HEIC Support

Conclusion

This is the best version of on1 Photo Raw I've used yet, so I'm looking forward to spending more time getting to know the features better. I wasn't able to deep dive with the new features just yet, but I was happy with the support it offered for my Nikon Z7 raw files and Apple iPhone X HEIC files, so new camera or phone users are definitely going to appreciate it.

Where to Try or Buy?

CLICK HERE to learn more, get a free trial or buy today.

SPECIAL OFFER: Use the coupon code Mart20 to save if you decide to purchase.

Other articles you may enjoy

Enjoy more on the Reviews tab as well as Ron's Recommendations.

Disclosure

If you make a purchase using links found in this article, I may make a commission. It doesn’t cost you a penny more, but it does help to support future articles like this.

Try on1 Photo RAW 2019 Risk Free Today

NOTE: This site requires cookies and uses affiliate linking to sites that use cookies.

If you enjoyed this article, please support future articles like this by making a donation or saving money by using my discount coupon codes. Either way, your support is greatly appreciated!

This blog is intended for freelance writing and sharing of opinions and is not a representative of any of the companies whose links are provided on this site.

The opinions provided are of Ron Martinsen alone and do not reflect the view of any other entity

Tuesday, October 9, 2018

REVIEW: Epson SureColor P5000

Epson SureColor P5000Epson SureColor P5000 Standard Edition 17" Wide-Format Inkjet Printer

It's been two years since I first saw the P5000 in New York and since January 2017 when I write my first thoughts on this printer, but Epson USA and I finally got in sync to get one into my studio. I have had a chance put it through its paces with some of the best Epson Professional Imaging Media and I must say that I've been quite happy with it.

For long-time readers of my blog, you may recall, I reviewed the Stylus Pro 4900 in early 2011. I owned it for many years and made many great prints from it until it eventually died from a clogged print head. While time will only tell if this printer meets the same fate, it is claimed that improvements in the inks and a startup routine that clears the nozzles should hopefully reduce the likelihood of that happening again. If it does happen, I'll be sure to report it, but in the meantime I'm sure glad to have this work horse printer back in my studio again. Read on to learn why.

New UltraChrome HDX ink set

I found the UK UltraChrome HDX Ink Set Page to be a little more enjoyable to read than the official press release to learn about what's new ink that comes with this printer. Specifically, it illustrates how the new Photo Black ink has a pigment concentration that is 1.5 times higher, and the new Matte Black of the UltraChrome HDX ink technology has a raised pigment density.Bronzing has also been reduced in Cyan and Magenta.

Using the light light black (LLK) option means users can achieve 98% of Pantone. While choosing violet ink means the gamut increases to 99%, that's mostly important for graphics designers doing content that must match Pantone colors. For photography, you'll still want to stick with the LLK option for the best results with black and white photos as well as shadow details in color photographs.

For those with a Epson P800 that uses Epson UltraChrome® HD ink, the main difference is that the orange, green and yellows are slightly better. I don't think the average user will see the difference, but now that I have both I'd be inclined to use the P5000 over the P800 for prints that I deliver to my most demanding clients. 

Features & Setup

If you read my 4900 review, you pretty much can apply almost everything in it to this review. Nothing has really changed feature-wise other than a different color case and a new and improved ink set.

Sadly my areas of improvements back then remain and I've added a few more at the end of this article.

After downloading the software, setup was easy via USB or Network cable, but sadly wireless support still hasn't arrived.

You can still load the tray up with your favorite papers up to 17x22 as well as a roll of 17" wide paper, and print from either automatically.

And yes, sadly you must still wait for switching between photo black and matte inks so plan you print jobs carefully.

Photoshop CC 2018 (19.1.6)

Printing in Photoshop CC 2018 with the Epson SC-P5000

Printing from Photoshop is a challenge with all of the settings you need to make sure you set properly. Specifically, you must make sure that you set Color Handling in Photoshop's Print Settings to Photoshop Manages Colors (shown above) and your click Print Settings... to set the Media Settings Mode to Custom | Off (No Color Adjustment). If you fail to do this you'll get double color management which means your colors will be very off from what you see on the screen.

You also need to ensure that the Media Type in the driver matches the paper you are using as should the Printer Profile in Photoshop, and this can be rather tricky to figure out for the novice.

Printing in Windows with the Epson SC-P5000
This example shows printing to 13x19" Epson Premium Luster Photo (260) roll paper (not to be confused with Ultra Premium Photo Paper Luster). You must also click the Roll Paper Option... button to turn on Auto Cut each time you switch the paper source which is rather frustrating. Finally, for best results you'll want to set print quality to Max Quality.

Advanced Black & White

Epson is famous for great Black & White prints, so I've written a lot about its Advanced Black & White mode (aka ABW). If you aren't familiar with how to use it, the key thing to do is set the color media setting item to Advanced B&W Photo then click the Advanced Button for the custom mode color color controls as shown here:

2018-09-30_21-57-11

After clicking the Advanced button from Color Controls you can dial in the Color Toning (which I usually start with Neutral or Greg Gorman's Favorite - Warm)  then set Tone to Dark. I wrote about this topic in my Printing Series and interviews with Greg Gorman and Vincent Versace, so you can learn more about this dialog in those articles. Here's a quick look at my settings though:

2018-09-30_21-56-41

The important part to remember in Photoshop is to say "Printer Manages Colors" for Color Handling:

2018-09-30_21-57-27

Sounds too complicated? Well that's where the Epson Print Layout app below comes in - and it works exactly the same way on both Windows and Mac. With that said, my ABW article does explain how to use this feature on a Mac if you are interested.

Epson Print Layout 1.3.5

Printing Color in Windows Epson Print Layout with the Epson SC-P5000

Fortunately Epson makes printing much easier these days with Epson Print Layout whereby you simply choose the desired values in the Printer Settings section, make your desired adjustments (if any) in Layout settings and typically you can accept the defaults in Color Settings. Choose your copies and hit print, and everything just works. While you don't get the advantage of soft proofing and gamut warnings like you get in Photoshop, for most users this is the safe and easy way to get accurate color managed prints so I recommend using this software (on Mac and PC) unless you have a strong reason not to.

Sadly, despite choosing the Center "Centering" option, the image still printed on the left side of the page when using roll paper. What's more, there's no "Save Roll Paper" option like you see in the driver so more paper was wasted on the top and bottom.

See this article to learn how to workaround this issue which also occurred on the 4900, but sadly the workaround only applies to sheet paper.

Advanced Black & White Mode

Printing Advanced Black & White on Windows Epson Print Layout with the Epson SC-P5000

I think this is one of the big advantages of Epson Print Layout because Advanced Black & White mode is a little tricky to use, but this app makes it as simple as selecting "Advanced B&W Photo" from Type in the Color Settings section. From there just choose your desired color toning and tone and you are done - so easy!

Getting the Best Results

Yes, Epson ink is expensive but the ink its the secret sauce that makes the prints look so fantastic. It's also a required element for the ICC profiles that are fine tuned to get the best results out of your ink and paper combo. As a result, your best print results will always come from the use of genuine Epson inks made by Epson ONLY for the P5000 and ICC profiles generated on a P5000 (NOT a 4900) for the paper you wish to use. A failure to do this will result in poor quality prints, so my blanket advice is - don't print unless you are using the correct profile and genuine Epson ink!

Since getting the best ICC profiles from third parties can be difficult, the easiest and fastest way to get the highest quality prints is to use use genuine Epson paper. Your printer comes with perfect ICC profiles made specifically for Epson's papers found at https://epson.com/professional-imaging-media.

Click here to find deals on Epson papers at B&H or click here to find deals on Amazon.

I'm a big fan of sample packs to get a feel for what paper works best for me, so here are links to sample packs of my favorite Epson papers:

Also see the end of this article or my printing series for instructions and videos on how to use these papers for your Mac or PC.

Areas of Improvement for the Future

While the ink set has been improved, and the new black case looks great, there doesn't seem to be much else that has improved over its predecessor in 7 years since the release of the 4900. Specifically, I am disappointed the following wish list features didn't get added to the P5000:

  1. Support for wireless printing - including IPP printing (e.g., Mopria, AirPrint, etc...)
  2. 4x6 photo support - this pretty much forces you to get a P800 if you plan on giving 4x6 keep sake photos to friends or clients
  3. Dedicated lines for Photo Black & Matte Black Ink - Switching is a hassle and wastes a ton of ink. Canon has overcome this problem ages ago, so surely in 7 years Epson could have solved this problem. The lack of this feature is actually quite offensive.
  4. Still no "Center to Printable Area" feature for Roll Prints - really?!!! Again, this could have been a simple driver improvement or even a feature in Epson Print Layout, but no.
  5. Performance - Is it any faster? According to my contacts at Epson America, they say "No, it performs about like the 4900. 8" x 10" prints from 0:59 to 2:26  (normal is 1:28) and 11" x 14" prints from 1:42 to 4:04 (normal is 2:31)"
  6. No Driver Improvements - No meaningful driver changes from the 4900 means its far behind in terms of features and user friendliness when compared to the Canon PRO-1000 & PRO-2000 that I also use in my studio.

Click here to see my Q&A with Epson America when this printer was being launched for more details about what's changed.

Conclusion

It's been a while since I used my 4900 and sadly it died due to a clogged print head, so I was reluctant to decide if I should even bother reviewing this printer. Now that I have it, I forgot how fast and enjoyable this printer is to use. In fact, I looked back and saw how a majority of my printing was done on 4900 when it was in service. Since P5000 arrived I've found myself wanting to use it for its blazing speed and flexibility of doing roll and sheet paper without the hassle of any manual switching.

With that said, Canon's lack of roll support for 17" means this is really the only game in town for high quality 17" roll printing. While the P800 can do roll printing in a pinch, it's lack of a built-in cutter makes it less practical for those who enjoy doing banner printing.

In the end, I consider this a great printer for those doing large workloads on a weekly basis - not the occasional print. Professional event, wedding, school portrait, etc... photographers who do high volume printing on a weekly basis are going to appreciate its blazing speed and large capacity tray - even if you never print on roll paper. If this is you, then I highly recommend this printer.

Users making the occasional print are much better served with the P800 for its ease of use for everyday printing, and a head that is less likely to clog. If you are serious about roll printing then you'll want to move up to the 24" or larger model as 17" is pretty small in the world of "large format" printing - ESPECIALLY when doing canvas wraps.

Where to Buy?

CLICK HERE to learn more or buy today from B&H and consider one of these covers while you are at it to keep the dust away.

Other articles you may enjoy

If you enjoyed this article, you may also enjoy these:

For casual users, I also recommend you consider these reviews:

Enjoy these and more on the Reviews tab as well as Ron's Recommendations.

Disclosure

If you make a purchase using links found in this article, I may make a commission. It doesn’t cost you a penny more, but it does help to support future articles like this.

NOTE: This site requires cookies and uses affiliate linking to sites that use cookies.

If you enjoyed this article, please support future articles like this by making a donation or saving money by using my discount coupon codes. Either way, your support is greatly appreciated!

This blog is intended for freelance writing and sharing of opinions and is not a representative of any of the companies whose links are provided on this site.

The opinions provided are of Ron Martinsen alone and do not reflect the view of any other entity

Wednesday, September 26, 2018

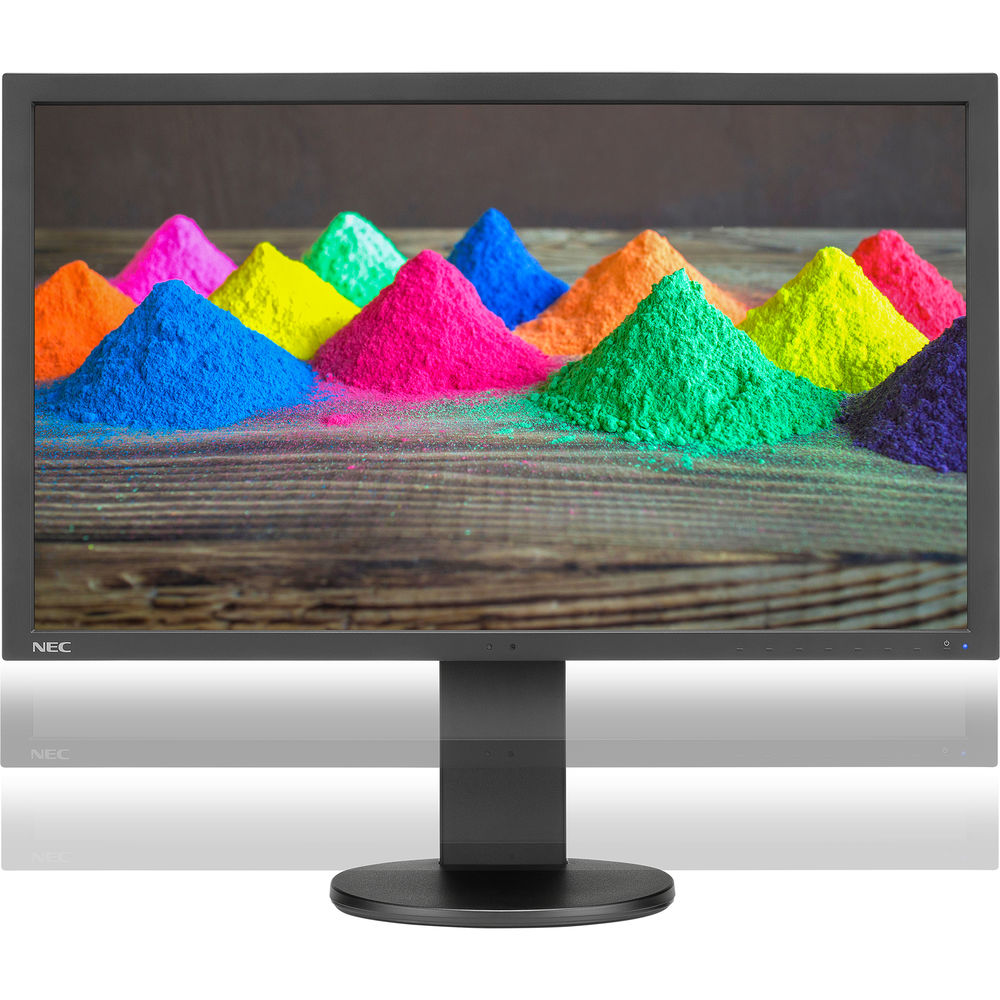
REVIEW: NEC PA271Q-BK 27" 16:9 Color-Critical IPS Monitor

NEC PA271Q-BK 27" 16:9 Color-Critical IPS Monitor

Since December 2014, my primary display has been my huge NEC PA322UHD which I've loved for the screen real estate. However, when I read about the latest PA series display with its improved color accuracy, I had to try it out. 

While I'll admit, that I miss the huge 32" 4k display for its size, I have appreciated that this display is much more color accurate which is very important when doing color critical photo editing and soft proofing.

Photoshop looks spectacular on this 16:9 aspect ratio WQHD resolution display that is 2560 pixels wide by 1440 pixels tall (or 109 ppi):

Plenty of space for Photoshop CC 2018

In fact, if you have a compatible video card you can even enjoy over a billion colors by enabling 30 Bit Display

image

What this will do is eliminate banding in grayscale or color images when you use good video cables that can support it! However, be careful with this if you'll be printing because no printer made supports 30 bit printing, so it can cause you to miss some banding issues which could occur during printing.

For everyday use Excel 365 still goes out to a whopping AM61:

Easily show all cells to AM61 in Excel 365

So while it might not be 4k it's still plenty of screen real estate to get a lot more done than traditional 1080p or 1920x1200 displays.

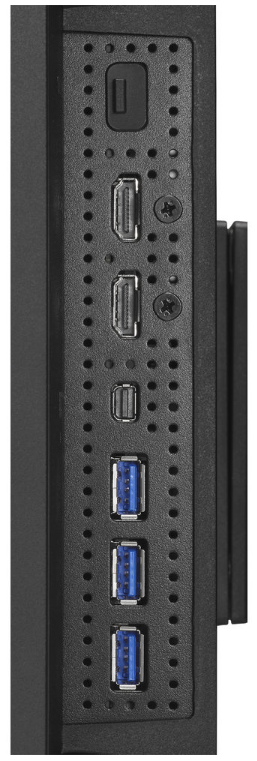
Inputs Galore

This display features lots of I/O ports both on the bottom (shown in silver on the left below) and on the side (shown in black on the right below):

imageimage

In fact, this is what you get:

1 x DisplayPort
1 x Mini DisplayPort
2 x HDMI
1 x USB Type-C
3 x USB (USB 3.1) Input
3 x USB (USB 3.1) Output

To learn more about the specs of this display be sure to visit the PA271Q product page.

NaViSet Administrator 2™

Want to do an Ethernet management of your NEC displays? No problem, check out the control you have using the NaViSet Administrator software:

  • Remotely adjust almost any parameter or setting found within the On Screen Display menu
  • Gather valuable information pertaining to a Windows computer such as model name, OS version, memory and CPU (Windows version only)
  • Any information that is gathered about connected devices is stored in a local database and can be exported for later review
  • Automatically issue email alerts if a diagnostic error is reported by a device or a setting has been changed
  • Schedule periodic polling for singular or multiple devices at specific times or on demand
  • Sort connected devices into groups to help organize collections of display and computers
  • Assign an electronic Asset Tag to a device to provide a secure method of tracking an product over a network

Click here to see a video to learn more about what you can do.

Easily Switch Between 2 Computers with 1 Mouse & Keyboard

This display acts as a KVM switch so you if you are like me and you have a Macbook Pro and a Windows PC that you want to use with this display and a single mouse and keyboard, then it's no problem. Just press the input button to go back and forth between the two as shown here:

Calibration Settings

image

I calibrate to the settings shown above and set my preferences to use 52 calibration and profile steps. Here's the information summary for this display after calibration:

image

An impressive 0.25 Delta E beats even the best Eizo's that I've tested. What this means in simple terms is that the color accuracy on this display is phenomenal.

Learn more about this display in this short 40 second video:

Conclusion

This is the most color accurate, fastest to color critical temperature, display I've used in years. For Eizo fans looking for a cheaper alternative where you sacrifice nothing, this is the display for you!

Now I want a 32" UHD version of this display, because I love this one so much that it would be hard to go back to my 4K display again!

Simply put, if you care about color accuracy and a display that is going to hold your calibration settings plus come up to temperature quickly, then this is the display for you!

Where to Buy?

CLICK HERE to learn more or buy today on B&H or click here to find it on Amazon.

Other articles you may enjoy

If you enjoyed this article, you may also enjoy these:

Enjoy these and more on the Reviews tab as well as Ron's Recommendations.

Disclosure

If you make a purchase using links found in this article, I may make a commission. It doesn’t cost you a penny more, but it does help to support future articles like this.
NOTE: This site requires cookies and uses affiliate linking to sites that use cookies.

If you enjoyed this article, please support future articles like this by making a donation or saving money by using my discount coupon codes. Either way, your support is greatly appreciated!

This blog is intended for freelance writing and sharing of opinions and is not a representative of any of the companies whose links are provided on this site.

The opinions provided are of Ron Martinsen alone and do not reflect the view of any other entity

Tuesday, September 18, 2018

REVIEW: Epson PictureMate PM-400 - A Great Whole Family Photo Printer


Epson PictureMate 400

Despite my history of printing my own images and even writing a book on the subject as part of my Printing Series, my beautiful wife has no desire to geek out on printing like me. As a result, she's been frustrated with the bottleneck (me) in getting prints made from her iPhone pics or from the photos I share with her from my DSLR and mirrorless cameras. To address this frustration, I decided to test the wildly popular Epson PictureMate PM-400 wireless compact color photo printer to see if it would meet her needs.

Setup

The nice thing about this printer is you don't need a computer, so you just turn it on - plug in the 4 color ink cartridge and you are in business. You can then quickly print to Epson 4x6 or 5x7 photo paper directly from your cell phone or SD card.

The wireless networking setup was easy and my Windows 10 PC had no problems discovering the printer. I also connected it via USB and saw no noticeable performance difference so I decided to take advantage of wireless printing so I could put the printer anywhere in the house where we were sitting when we wanted to crank out some pics while talking or watching TV.

AirPrint vs Windows

AirPrint is known for being easy and reliable, but it's also known for being very simplistic. With this in mind, I decided to print some photos off of my iPhone X and everything went pretty smooth. For large photos not taken on the phone it did seem to take nearly an extra 30 seconds to print a photo via AirPrint vs Windows, but if you aren't hovering over it like someone trying to watch water boil, the difference was tolerable.

Test Images & Performance

For comparison, I also pitted the inexpensive PM-400 against the excellent Epson SureColor P800 which costs nearly $1000 more just to see how wide the quality and performance gap was between the two - and the results surprised me!

Into the Light by Ron Martinsen on 500px.com

For my first image, I thought I'd start with an excellent photo with a wide range of tones to see what was the best this printer could do. The PM-400, which had been turned off for a couple weeks took  2 minutes 17 seconds for first print with 46.5 seconds for head prep before paper feed from cold start. This means roughly a minute and 30 seconds for this image to print for a roughly 36mb print job which was NOT specially prepared for this printer - I just threw an original JPEG at it.


PM-400 From Photoshop with Printer Manages Colors & Default Settings

The quality was average viewer good, but obviously with 4 colors you aren't going to get a match to the original. It actually looks quite a bit better in real life than the scan of the print here, so don't let the quality here scare you - in real life it seems "good enough" for most users and I think better than what you get from discount photo printing labs like Costco, Walgreens, Target, etc...

For my photography geek friends, here's the Photoshop and printer driver settings I used:

Epson PM-400 Photoshop Print Settings

Epson PM-400 Windows Print Driver Settings

Surprisingly the P800 took 2 minutes and 3 seconds with 11 seconds before the paper feed on a cold start. This means it took one minute and 52 seconds, but the tonal range was significantly better in the highlight areas on the cheeks.


Epson SureColor P800 from Photoshop with Printer Manages Color using the sRGB preset

Despite being printed on the same Epson 4 Stars Premium Glossy paper and not using any ICC profiles or complex print features, the P800 was pretty darn close the original photo. Had I used an ICC profile I could have got an identical match.

Again, for my printing geek friends here's the settings I used to get this print:

image

Epson Windows P800 V3 Driver Settings

Black & White Test

To the novice who has never done fine art printing, one would think that Black & White printing would be very easy and there's no difference between the two. However, the reality is that B&W printing is actually rather complicated and hard to get right simply because printers aren't using just black ink to print out a "black and white" image (which is really a grayscale image).

Here's the source image I used:

Sigma85ArtModel-531-Edit

When the PM-400 was warm it only took 10 seconds before the paper had been pulled into position and it started printing resulting in a total print time of 1 minute 37 seconds for a 57.4 mb job over a wireless network connection.  The P800 ABW did it in 2 minutes 2 seconds with 11 seconds which was the real kicker that I'd see consistently in my testing - the PM-400 was actually faster at cranking out a 4x6 photo!


Epson PM-400 Grayscale

No, your eyes aren't deceiving you - the black and white images often taken on a blue/purple tone depending on the ambient light that you view them under. It doesn't look quite as extreme as what you get from a scan in real life, but it's off - way off - from reality. Again, my wife thought it was fine but this one that was tough for me to accept.

I used the same Photoshop settings as above but here's the settings I used for the driver:

Epson PM-400 Windows Print Driver Settings

This time there was no contest in terms of tonal fidelity - the extra $1000 made a huge difference as you'd expect from a high end photo printer:


Epson P800 using Epson's Advanced Black & White (ABW) Mode

Epson P800 Windows V3 Driver using Advanced B&W Photo mode

For more information about Epson Advanced B&W Photo mode see my ABW article.

Casual Print Test

Here's a 100% unedited photo I took with my iPhone X:

IMG_3543

I printed directly from from my phone using AirPrint to the PM-400 and in 1 minute 30 seconds I had a nice borderless print.

Using my P800 via AirPrint on my phone was 1 minute 56 seconds which was surprising.

Windows Print Pictures Wizard

On Windows with Photoshop even when I told the driver to do borderless with max expansion, the aspect ratio of the photo caused me to get white bars on both the left and right side. To fix this problem I simply tried right-clicking on the photo in Explorer and choosing Print to use the Windows Print Pictures Wizard which resulted me in getting the same borderless results as AirPrint.  This is primarily due to the aspect ratio of iPhone prints vs digital camera prints which means that a true borderless print is going to crop more off the top and bottom of the print than one with white bars on the side. Keep this in mind when choosing borderless!

Quality-wise I saw the same differences in skin tones especially in the hot spots of the photos and in the cheeks as I saw with the model shot above, but it was less noticeable in a natural light photo.

Conclusion

In the end my wife loved the PM-400 so it was EXACTLY what she wanted and it works for her. I appreciated it for its ease of use and speed when the kids need a quick print of a photo that's on my iPhone for a school project where quality doesn't matter. It was also great for sending pics to the grandparents who don't really give a hoot about the quality as long as the pics are of their precious grandchildren!

For me, I obviously won't be giving up my P800 for the photos I care about. With that said, you don't need to spend a fortune as my P600 is almost as good for substantially less than the P800.

For the price, I loved the speed and ease of use I got out of the PM-400 so I can easily give it a strong recommendation for everyday non-color critical use. It's fast and certainly worth the great reviews it gets on Amazon for printer that cost less than a set of ink for my P800!

Where to Buy?

CLICK HERE to learn more or buy a Epson PictureMate PM-400 today.

Other articles you may enjoy

If you enjoyed this article, you may also enjoy my printing series. Also be sure to check out my Reviews tab as well as Ron's Recommendations.

Disclosure

If you make a purchase using links found in this article, I may make a commission. It doesn’t cost you a penny more, but it does help to support future articles like this.

NOTE: This site requires cookies and uses affiliate linking to sites that use cookies.

If you enjoyed this article, please support future articles like this by making a donation or saving money by using my discount coupon codes. Either way, your support is greatly appreciated!

This blog is intended for freelance writing and sharing of opinions and is not a representative of any of the companies whose links are provided on this site.

The opinions provided are of Ron Martinsen alone and do not reflect the view of any other entity

Wednesday, September 5, 2018

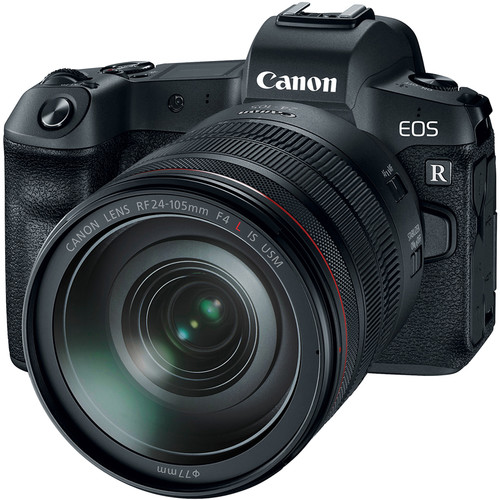
First Thoughts: Canon EOS R Mirrorless Digital Camera


Canon EOS R Mirrorless Digital Camera

A lot of people have been reaching out to me for my thoughts on the all new Canon R – Canon’s answer to the recently introduced Nikon Z series - given my history a “Canon shooter”. Long-time readers have noticed that I’ve been very vocal about how much I loved the Sony a7R III (my 2017 Camera of the Year) and Sony a9, so would my history with Canon change my opinion?

I’ve been off doing other things besides blogging lately, so I have actually been out of the loop on the rumors of the “R” until friends started reaching out to me about it this past weekend. While I’m not surprised about the announcement, I had no inside info prior to the release so it’s been a learning experience for me too.

My first thoughts are:

  • Why only 30mp?
  • Where’s the advanced eye auto focus?
  • Nice job with the screen on the top like my DSLR’s, but where’s the rest of the buttons?
  • No joystick?!!!! No thank you!!!

On paper, it feels like it’s button layout is more like a 6D Mark II / 80D but its sensor seems targeted for a 5D Mark IV user. This places it in line to compete with the Sony a7 III not the Sony a7R III which is a bit of a surprise for me – especially given the fact that this camera is priced like the more capable Sony a7R III.

While I should reserve judgement until actually using one, on paper I still think that Nikon and Canon have both missed the mark in competing with Sony’s more compelling offerings. I think Nikon did a better job with the Z7, but if I were spending my money on a mirrorless right now I’d still go with Sony.

Disclosure

If you make a purchase using links found in this article, I may make a commission. It doesn’t cost you a penny more, but it does help to support future articles like this.

NOTE: This site requires cookies and uses affiliate linking to sites that use cookies.

If you enjoyed this article, please support future articles like this by making a donation or saving money by using my discount coupon codes. Either way, your support is greatly appreciated!

This blog is intended for freelance writing and sharing of opinions and is not a representative of any of the companies whose links are provided on this site.

The opinions provided are of Ron Martinsen alone and do not reflect the view of any other entity