Showing posts with label 4. Show all posts

Saturday, December 28, 2019

REVIEW: Skylum Luminar 4– FINALLY Complex Sky Replacement Without Cumbersome Masks!

I’ve been following Skylum Software since its MacPhun days and along the way they have made many products that I’d put into the camp of “good, but still not there yet”. Luminar is definitely one of those products that has a lot of great photo editing features, but it’s always lacked my beloved U-Point controls in the Nik Collection (now by DxO). This is important because often times you want to make local edits to specific features of your photo, but not globally across the entire photo. While Photoshop and Luminar offer masks to help with this, they are cumbersome to create especially along the edges of the mask against complex subjects like tree branches with leaves or hair.

Luminar 4 addresses this with what it is calling Artificial Intelligence masking and it nothing demonstrates this better than its new sky replacement feature. While this isn’t far from the only new feature in Luminar 4, it’s the one that is worth talking about first as this really is breakthrough technology that makes me excited for Luminar now and in the future.

Here’s an example of a photo of a beautiful valley in Switzerland that I took this last October. This unedited version isn’t bad, but it’s a little hazy and lacks the impact of what it felt like when I saw it in real life:


Original

To address this, I used the AI Enhance feature with an auto generated luminosity mask with the AI Accent light filter to enhance the details and overall color of the image. I then used the Color and Details Enhancer filters to make the image feel a bit more crisp. Lastly, I used the Landscape Enhancer to Dehaze and boost the foliage a bit. This set me up for what I think is one of the biggest improvements – the AI Sky Replacement – where I used the Blue Sky 4 preset for a subtle but believable improvement:


Edited with Luminar 4 and Blue Sky 4

In less than a minute I got improvements that were good enough for me to call this one done. However, I like to tinker so I kept experimenting with skies. My wife was watching me do this and she encouraged me to use the Blue Sky 6 preset for leading lines that pull your eyes into the mountains:


Edited with Luminar 4 and Blue Sky 6

Changes like these are subjective so I polled my Facebook friends and most found Blue Sky 6 to be the best choice, while some aligned with me found Blue Sky 4 to be more believable.

In retrospect, I think both are believable if you don’t know of the original image. What’s more, it’s feasible for this scene to have clouds of this nature, so I don’t consider this to be a change that misrepresents the area – it just misrepresents my luck with the clouds this day.

What’s more, my sensor was as dirty as hell due to changing lenses in the wind so I lucked out and got about a hundred dust spots in the sky removed when I replaced the sky – without any effort on my part. I’ve seen Luminar 4 fans getting the same benefit by using sky replacement on power lines and other distractions in the sky. This s a huge time saver, and I find it quite believable – especially with the wealth of adjustments you can make to this filter:

So yes, I can easily say that this feature is a hit and delivers a huge value in your digital workflow making this a no-brainer investment or upgrade if you do outdoor photography.

Yeah, but what about…

Using your own sky photos? Yes, you can.

Complex backgrounds with only one click? Yep, no problem as shown here:


Blue Sky 4 with Complex Tree Branches

Click here for unedited original

Now this horribly bad looking photo isn’t believable as we’ve put a bright blue sky into an overcast day, so there’s still work to do. However, I wanted to illustrate the power of the AI masking (which is more easily appreciated with darker sky colors) so I had to include it.

What about people?

Here’s a photo I took in 2015 for my RX100 IV review that I never bothered to edit because it would have been too much work to mask around Kai’s hair. With the AI Face Enhancer, AI Sky Replacement and a few other minor adjustments I got a much improved image with about a minute of editing:

2015 RX100 IV Photo with Portrait Enhancements & Sky Replacements

Take note that I’m using the Blue Sky 4 preset in three images in this article, but the sky is different for all of them – this because this isn’t a simple image substitution but an AI application of the sky that keeps the horizon in mind. In this case it did miss a spot in the bottom left corner, so it’s not quite perfect – but it’s still pretty damn good. As I show in my video below, problems like this sometimes are easily solved by adjusting the horizon in this filter. However, this one can’t be corrected this way.

In this case, I like how the leading lines of the clouds all draw you into Kais’ face. However, you have to be careful about default processing choices because it’s easy to get dark skies like this. To address this problem be sure to experiment with the Sky Exposure setting as well as making sure that AI Sky Enhancer is 0 in the AI Enhance Essential filter.


Above with Sky Exposure set to 100 and Red saturation = -8

I also use the AI Face Enhancer remove skin flaws, enhanced lips & whitened teeth (both exaggerated for effect), pulled his jaw line in and more without me doing any face masks or object mapping. It just works with no hassle and that’s huge!

Video Tutorial

To demonstrate a lot of concepts in Luminar 4, I chose this image that I thought would be the ultimate test:


Video Tutorial Image BEFORE Edits

It features a lot of blown out background, thin strands of hair, and a face that is turned away from the camera.

Notice even when I zoom in, the auto masking around the hair is nothing short of spectacular:

Auto detection of the sky and face make this difficult edit easy

If you have 10 minutes to spare, you can see how I edited this image using Luminar 4:

Conclusion

While I do think the Windows version is unacceptably slow at times on my desktop computer, it’s still usable. I’m also still a fan of Lightroom, so I don’t want Luminar to be my digital asset manager so I find having to open photos using Edit Single Image and close them by right click remove to be unnecessarily cumbersome.

With these gripes aside, this is an impressive piece of software that does appear to be doing some advanced image analysis with AI above and beyond anything I’ve used to date. This alone makes it worth a look to help speed up your digital workflow. As such, I can highly recommend this product and I look forward to great improvements to come in the future.

Where to Buy?

CLICK HERE to learn more or buy today.

Other articles you may enjoy

If you enjoyed this article, you may also enjoy these:

Enjoy these and more on the Reviews tab as well as Ron's Recommendations.

Disclosure

If you make a purchase using links found in this article, I may make a commission. It doesn’t cost you a penny more, but it does help to support future articles like this.

NOTE: This site requires cookies and uses affiliate linking to sites that use cookies.

If you enjoyed this article, please support future articles like this by making a donation or saving money by using my discount coupon codes. Either way, your support is greatly appreciated!

This blog is intended for freelance writing and sharing of opinions and is not a representative of any of the companies whose links are provided on this site.

The opinions provided are of Ron Martinsen alone and do not reflect the view of any other entity

Friday, November 4, 2016

The Danger of the "I Only Shoot Raw" Mentality

Canon DPP 4.5.10.1 failing to load a CR2 file in November 2016
Uh oh, why doesn't Canon DPP 4.5.10.1 support my CR2 files from multiple cameras?

For years I've jumped off the "I only shoot raw"  bandwagon and instead shoot RAW+JPEG as 25+ years in the software industry has taught me to be weary of long-term support of old file formats.

A great case in point is that DPP 4, despite being out since mid-2014, still hasn't been updated to support its older raw files - despite having the same CR2 extension as current camera models. This means shots like this require me to go get an older version of DPP 3 .15.

Yes, you can go to Canon's website to try to download it but if you are working late and need that file you are going to freak if you get one of these dialogs:

Canon Site Down

Fortunately Canon is a big company so usually US users can go to Europe or vice versa and download the software off a different Canon file server.

You kept that old CD right?

Canon DPP 3.15 Setup Start CD Search

You kept that original CD for all of your old cameras right?

Oh, and you still have a computer that can load a CD, right?

It's been a while since I've checked the USA site, but I know that Canon Europe does have software downloads for the Canon Rebel XTi (if you remember to search for 400D) or a 40D. However, as you can see from above getting the software is only part of the problem - there's still that pesky CD prompt! Fortunately there's a solution for that problem here.

There's also the lingering question that even if this problem were solved, will it ask me for my serial number before allowing me to install it? Fortunately the answer is no - serial numbers are only needed for software downloads for newer models after the CD era.

If I don't have the camera and I can't read the raw then how do I know the serial number? Well, fortunately with apps like Lightroom and exiftool you can get around this problem.

Yes, I've been in the software business for a long time and I know all about deprecating software and old file formats. However, raw files are people's memories so this a bit worse than not reading an old database file. It can cause major panic and stress - even more so if you are a pro photographer who has a big client offering a big licensing fee for a digital asset in your archive (e.g., you have a great shot of the famous celebrity that just died).

Am I totally out of luck?

Is that thumbnail all I'll have of that memory moving forward?

Well, as of the last time I had a panic attack about this problem, I reached out to my contacts at at Canon North America and they assured me that they were aware of this issue and that they wouldn't get rid of DPP 3 until all CR2's were supported by DPP 4.

So, NO I'M NOT OUT OF LUCK and there's no reason to panic.

I still hold out a lot of hope that no major camera manufacturer - especially Canon and Nikon - would leave their users with no way to read their raw files. That's bad business, and that's not something any camera maker wants.

With that said, it does still give me chills that years later that DPP 4 still hasn't and with the way companies do reduction in workforces these days, will the people who are "in the know" about this be around to prevent that when they are replaced by fewer more ambitious young whipper snappers?

Yeah, but I use DNG

Oh wait, what's that? You think you are immune because you converted your RAW's to DNG? Read this article to see how you can get in problems there too.

Conclusion

While this example uses Canon, this problem could exist at any point in the future with any raw format - especially from camera companies that go out of business, are sold, or  who are small enough that they don't have the resources to continue to support old formats.

Yeah, I always shoot RAW as its great to have that file when you need it. However, I also don't mind spending a few extra bucks on memory cards and storage to keep those extra JPEG's around so I'm not screwed if 10 years from now if the latest software doesn't read my RAW's.

You have been warned.

NOTE: This site requires cookies and uses affiliate linking to sites that use cookies.

If you enjoyed this article, please support future articles like this by making a donation or saving money by using my discount coupon codes. Either way, your support is greatly appreciated!

This blog is intended for freelance writing and sharing of opinions and is not a representative of any of the companies whose links are provided on this site.

The opinions provided are of Ron Martinsen alone and do not reflect the view of any other entity

Tuesday, May 3, 2016

MINI-REVIEW: DJI Phantom 4–Stop Waiting, This Is The Drone You’ve Been Waiting For!

DJI Phantom 4 by Ron MartinsenDJI Phantom 4 (photo using a Nikon D5)

Prior to this review, my only drone experience was with the miserable Estes Proto-X FPV Quadcopter which couldn’t be calibrated properly so it was a lethal aerial weapon that loved to crash shortly after takeoff. In fact, it was so bad I couldn’t get enough content to review it, but take it from me it was garbage so avoid it!

Honestly, the thought of having an expensive device in the air that has so many ways it can crash makes me nervous – very nervous. My biggest fear has always been that I would suffer a total loss on my first flight due to some mistake on my part. As a result, I’ve waited patiently for the technology to improve to the point of being idiot-proof.

I had a lot of friends tell me DJI products were basically the Apple of the drone world and that spending the extra money would result in a drone that was easy to fly.  After watching the promo video, I was excited – very excited:

However, I also had a lot of questions – would it really be this easy?

Would I be one of the horror stories of someone who gets a new drone and crashes it right away?

My First Attempt

DJI Phantom 4 Auto Takeoff Screen
iPhone 6 with DJI app showing the slide to auto takeoff feature

After watching the videos and registering my quadcopter with the government via KnowBeforeYouFly.com, I was ready to go.

On my first attempt I was so blown away by the auto take off (see above) and landing features that I felt  confident enough to do a fly over my roof. Things were going great, and I was amazed at how easy it was to fly the Phantom 4. The live preview on my iPhone 6 was impressive, but even more impressive was how well it would hold a position awaiting my next command.

With the drone hovering over my roof, I made the fatal mistake to try demonstrate to my son Taylor how the auto “return home” feature works. We both watched in horror as it landed on my roof and promptly crashed upside down. Fortunately this was a good thing as it kept it on the roof and minimized the chance of a must more significant crash.

Things looked good, then they didn't...
Things seemed so promising until…

Lacking a ladder, I had to ask my neighbor for assistance so he got his ladder out and volunteered to be the one to go up to the roof for the rescue.

My fear had been realized!  The crash was scary, but it was both a good lesson on what not to do and to the durability of the Phantom 4. The video kept rolling the whole time and my phone never lost contact with it. The rotors stopped immediately after the roll and the damage to the unit was only some cosmetic scuffs on top of the rotors.

Shaken from the incident, I decided to call it a day.

I take full responsibility for this crash as the directions clearly say to try it out in an open field, but I was being a typical guy and just trying it out with more confidence than I should have had at that point!

My Second Attempt

Sunset on the creek
iPhone snapshot from my failed attempt thanks to a bad iPhone cable

With perfect weather and a perfect location at sunset, I was all excited to get a great video when sadly I discovered that my third party iPhone cable wouldn’t allow me to connect properly with the remote unit. The net result was a failed attempt so when I got home I tried using Apple’s iPhone lighting cables and it worked fine.

Lesson learned – stick with Apple’s cables to avoid heartache!

The Third Time Was A Charm


YouTube has compressed the 4k video too much, so the quality is actually much better offline

You must view the video full screen and check the video stats to see your actual playback resolution as shown here (via right click “stats for nerds”):

Bad video quality? Check the playback resolution

While I’m not going to win any academy awards for my video, it was a successful flight. I will be shooting more and practicing more over the coming months. The 4k looks incredible on my NEC PA332UHD 4k display, so I’m very excited about the possibilities. There’s also enough resolution for high 8 megapixel frame grabs too!

I was very pleased that I could switch between video and photos from my phone as well as an easily start/stop video recording. I can also report that a new video file is created transparently when the file reaches its maximum size and the stitched videos merge together flawlessly.

Things were going smoothly but I was pretty nervous, so when I tried to land the drone on the land the bridge while I was down in the creek, I was a little too close to the edge. I had a slight tumble (only one soft roll) and no damage was done as you can see here:

Whoops, rough Phantom 4 landing - Copyright Ron Martinsen - ALL RIGHTS RESERVED

With a good flight under my belt, I’m looking forward to having many more in the future. Knowing that this isn’t a fragile toy that is going to break super easily also helps a lot too, but I would advise beginners like me to get the DJI Care policy just in case!

Real World Shots

As usual, these are 100% unedited and exactly as they came out out of the camera. The first shot is very different because it used all default settings and the remainder just had a landscape creative style and cloudy white balance to warm things up.

I was so focused on flying that I didn’t bother to experiment with the flexible camera settings so these are basically P mode default shots. I am extremely pleased with what I see, so I’m excited to see what I can get when I start manually fine tuning the camera settings.


f/2.8 for 1/50 sec at ISO 170

Default Creative Style & Auto White Balance
High point of view shots with its wide angle lens opens up exciting possibilities


f/2.8 for 1/50 sec at ISO 115

Landscape Creative Style  / Cloudy White Balance
These images are in 4:3 format, but 16:9 is supported as well


f/2.8 for 1/50 sec at ISO 116

Landscape Creative Style  / Cloudy White Balance
Look at the detail on the rocks – this is a decent lens and sensor!


f/2.8 for 1/50 sec at ISO 125

One of the great advantages for shots like this is that you can get a great POV from near water level and not have to get your feet wet!

More photos will be added as I take them to http://photos.ronmartblog.com/drones/dji/phantom4.

What’s Included

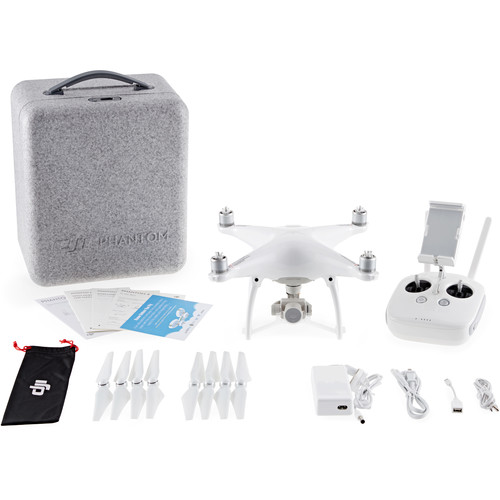
DJI Phantom 4 Quadcopter Drone

I did a very lame unboxing video which shows you pretty much what you see in the picture above, so you can skip it. Instead, your time is probably better spent looking at the full specs here, or checking out the many great tutorials here.

So what’s it really like?

I’m very impressed and excited to do a lot more with this quadcopter. It’s extremely well built and incredibly easy to use, despite the few boneheaded mistakes I made.

iPhone App User Interface View (indoors)

The iPhone app (shown above) is excellent, but I didn’t try Android version. It has all the controls I need and wanted – and more – with clear indicators when the unit was in danger or the battery was running low.

This device is built like something you’d expect to come from Apple. The rotors are easily put on and removed, yet they stay locked on very securely even with my two minor crashes.

The camera is outstanding for both photos and live 4k video, and the gimbal is extremely smooth. Thus far I have no complaints, but I will be putting it through my normal camera testing at a later date.

This device can hover in place very well so DJI offers ND filters, but it would take a windless day to get a really sharp shot with some of the longer stop filters.

Conclusion

This is just the beginning, so in the coming months as the weather in the Seattle area becomes more hospitable I’ll gain more practice. As I do, I will be posting additional videos and thoughts. Initially I am very happy with this product and have no buyers remorse whatsoever.

With great tutorials, excellent build quality, a fantastic remote control app and controller, excellent digital images, 4k video that rivals the Sony a6300, and support for numerous advanced features (covered later), I must say that I can easily give the Phantom 4 my highest recommendation. Assuming you don’t make a user error and fatally crash it, I would bet anyone who buys one of this is going to be very, very happy with their new quadcopter. I know I am!

Where to order

Click here to learn more or order at B&H or here at Amazon. I hope to have a special offer directly from from DJI in the near future, so check back later or contact me if you are ready to order now.

Need a Bag?

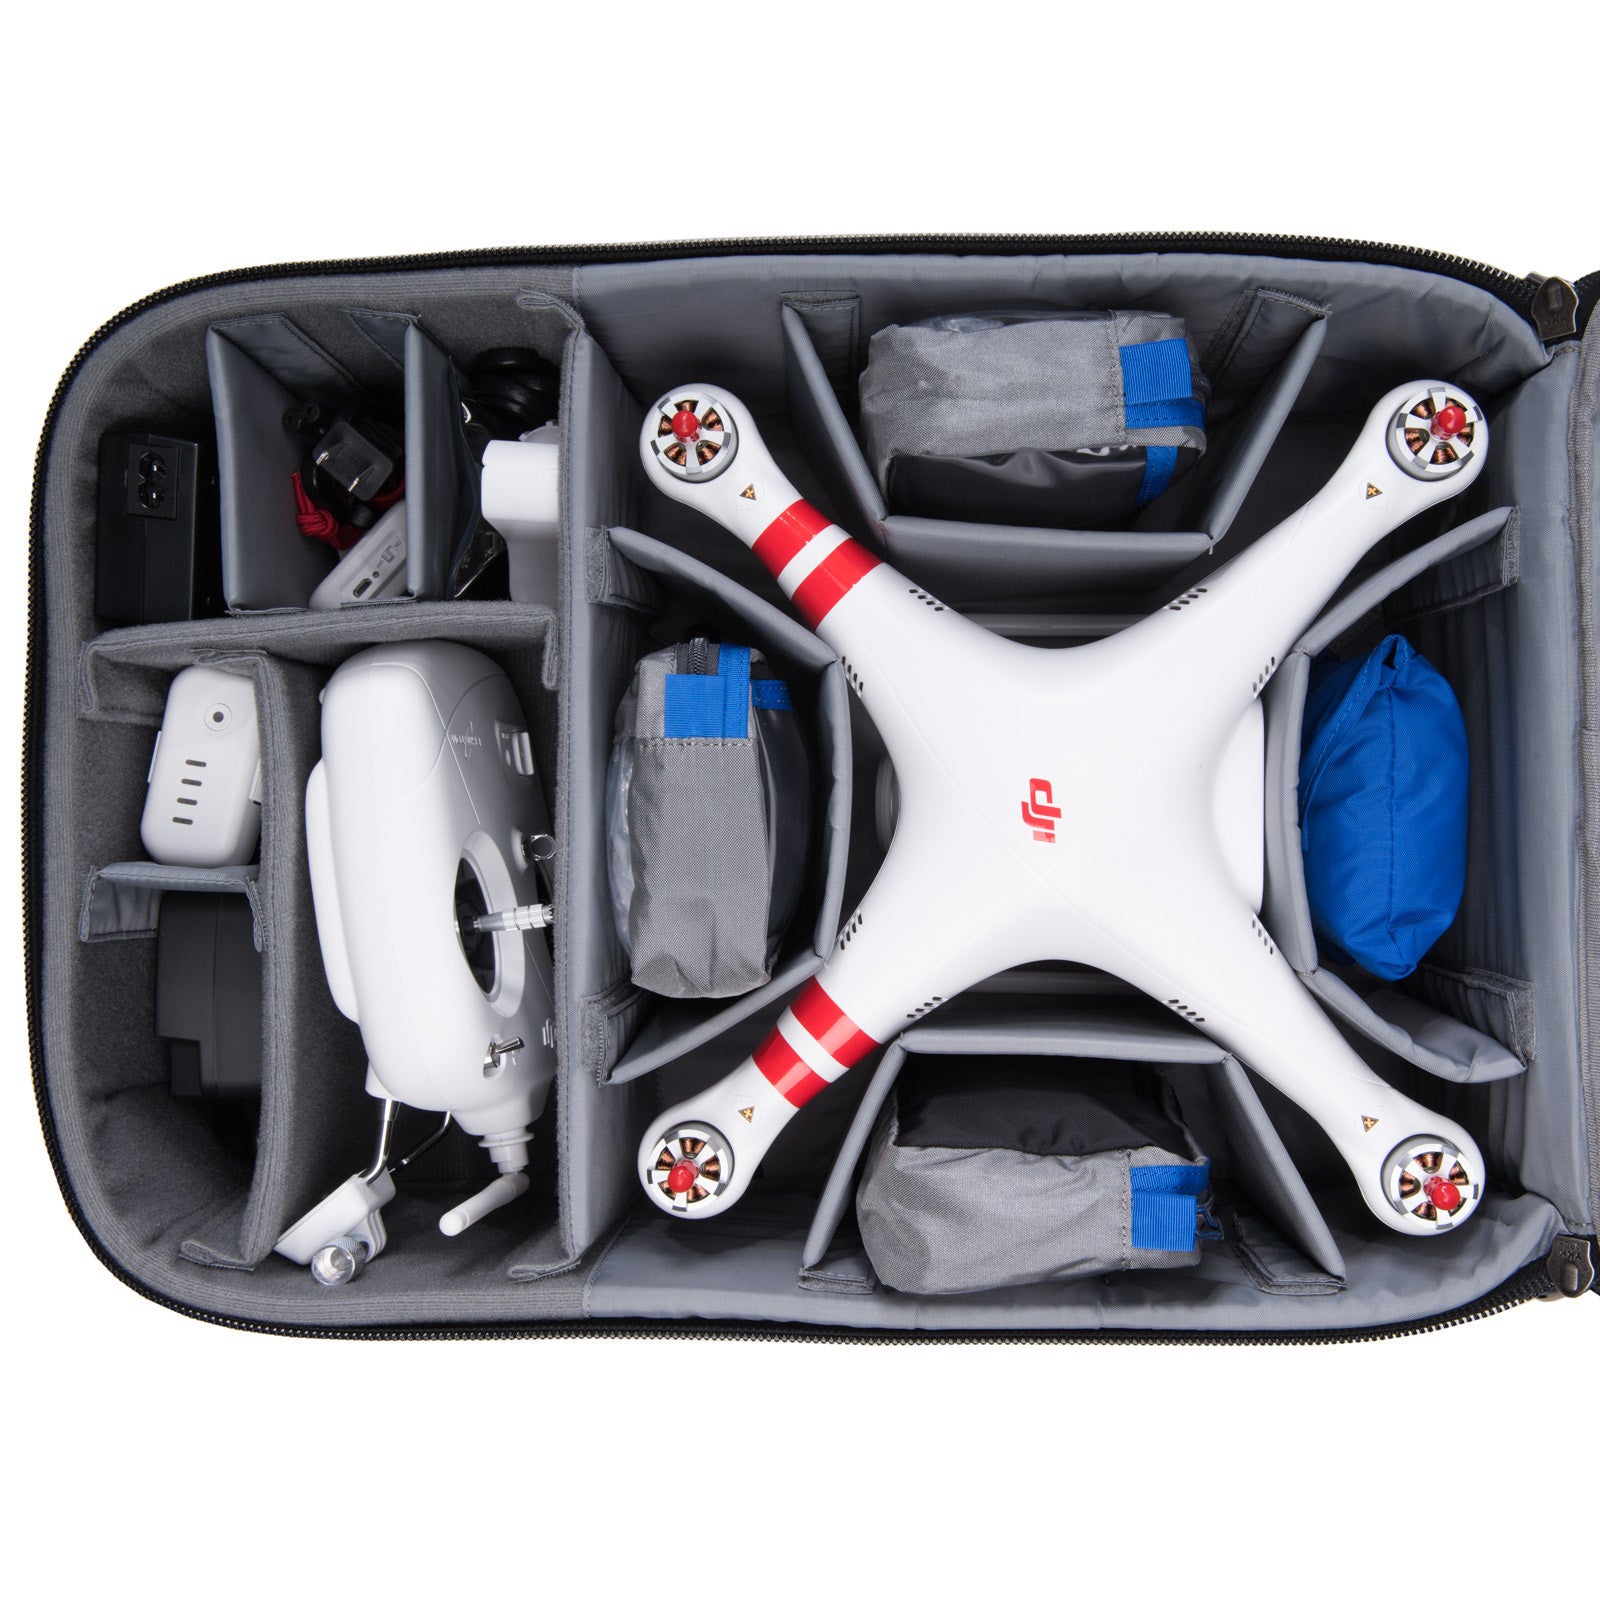
Think Tank Photo Airport HeliPak
Think Tank Photo Airport HeliPak (Review)

I do, so I’ve decided to go with the brand that I trust the most for my gear – Think Tank Photo. I’ve used ThinkTankPhoto bags for years and have learned to trust them with my expensive gear as well as the stuff I review (which can’t be insured). As a result, I’ve ordered the Think Tank Photo Airport HeliPak for myself, so I’ll be sure to review it after it arrives.

Order using my links and you’ll also qualify for a special gift for orders over $50.

Memory Cards

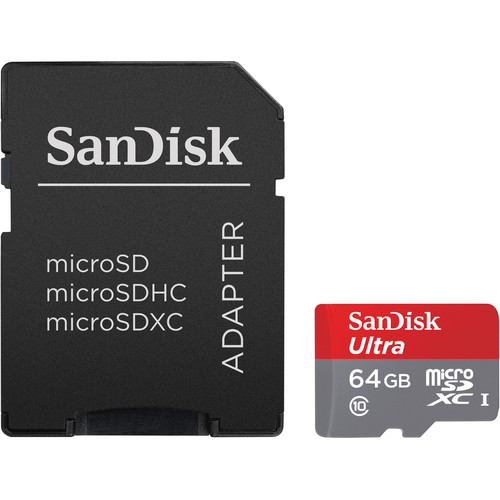
A micro sd  card is included with the Phantom 4, but I wanted a larger capacity so here’s what I used:

SanDisk 64GB Ultra UHS-I microSDXC Memory Card (Class 10)

Make sure you only use micro SDXC I or better when recording 4k video!

Other articles you may enjoy

If you enjoyed this article, you may also enjoy these:

Disclosure

If you make a purchase using links found in this article, I may make a commission. It doesn’t cost you a penny more, but it does help to support future articles like this.

NOTE: This site requires cookies and uses affiliate linking to sites that use cookies.

If you enjoyed this article, please support future articles like this by making a donation or saving money by using my discount coupon codes. Either way, your support is greatly appreciated!

This blog is intended for freelance writing and sharing of opinions and is not a representative of any of the companies whose links are provided on this site.

The opinions provided are of Ron Martinsen alone and do not reflect the view of any other entity

Tuesday, September 8, 2015

REVIEW: Topaz Labs Simplify 4–Ready For Something TOTALLY Different? (DISCOUNT)

BuzSim SplitToned III without Vignette
Topaz Labs Simplify 4
BuzSim Split Toned III Preset (without Vignette)

Ever dreamed of being an illustrator, but just don’t have the natural skills or time?

Do you have an image of a interesting scene that you’ve edited to death, but it still doesn’t wow you?

If so, then Simplify might be just what you need to spark your creativity and give your images something that make them unique. This is especially useful for scenes that have been over shot (can you say Paris?).

Here’s the original in-camera unprocessed RAW file that I enhanced in Simplify for this review:

Original
Original Staircase shot - unprocessed (from RAW)

It’s a cool scene, but out of the camera it’s fairly blah. The composition is good and there’s lots of interesting things going on, so when I play around with a few Simplify filters I get some interesting results. Here’s another cool preset with a little bit of adjustments on my part:

Oil Painting III with Adjustments

With this being Japan, the home of Anime and Hayao Miyazaki, then a little cartoon treatment might be fun too:

Line and Ink - Cartoon Natural II with Adjustments

While I realize this won’t appeal to everyone, I think these are fun deviations from reality that take an interesting photo and make it very exciting and different.

More than just cartoons and oil paintings

Quick & Easy Background Simplification

One thing I like to use Simplify for is to reduce the distractions in a scene. In the sample shot above I have a Sushi Chef in Japan with both foreground and background distractions that don’t really add anything useful to the shot. To reduce the clutter I could simply use the BizSim III preset and mask out the face and I’m mostly done. If this were an important shot I’d probably spend a little more time on object removal, but for a family vacation photo like this – I’m done.

Well, actually here’s what went into this 5 minute edit:

image

Layer 1 is the Simplify layer where I’ve let the head show through using a layer mask. The image that came out was too yellow so I desaturated the yellows but left then oversaturated in strategic places.

I finished up by using Color Efex to create a brilliance/warmth layer to warm up the skin (using a single U-Point on the face). I could have done this a variety of ways without using a Nik Collection product, but it’s just what I typically do so I did that here.

The saturation can be dialed to taste, but the important thing to notice is what happens to the wood grain, writing in the background and the chef’s jacket. Yes, I could have used a blur or another technique, but if you’ve got Simplify then this a fun way to try something different. Where I find this most useful is for concerts and event shoots where you have background distractions that beg for a saturation boost and loss of detail.

Here’s another example because I was having so much darn fun with Simplify tonight:

Infocus, Simplify & 5 minutes transform this shot from dull to fun
Infocus (to remove motion blur), Simplify & 5 minutes transform this shot from dull to fun

Even though I used the BizSim III preset again, it’s much harder to tell here. Where you notice it most is on his ID and neckerchief. However, the simplification adds to the whimsical nature rather than making it look too fake. It also makes the apron look more tidy with out any hassle during editing. Like the Sushi Chef shot, I did have to mask out his face, but I did nothing else this time.

Another idea for those shots ruined by crowds

Why spend hours removing people or fixing a ho hum shot?

This was a shot that was more of a “snap, I’ve been here” shot because there were too many people around to get the shot I wanted. I ultimately did slow down and got some nice shots, but  on my first trip here I didn’t take the time to do that. Had this been my only shot (or a boring cell phone shot), I could have turned it into something interesting and fun using a preset like this (BuzSim III). In less than a minute I have a fun piece of art that I actually enjoy looking at. The people add motion, excitement and character to the shot. However, the original really sucks:

Original - Yuck!
Original - Yuck!

While some people might pull out the pitchforks at the mere idea of doing something like this to a photo, I think it’s a fun way to do something interesting with your less than stellar shots. It’s also a great way to deal with crowds without spending hours removing them in Photoshop.

Conclusion

If you’ve used any other Topaz Labs software then the Simplify user interface will be familiar to you. For the most part this is a click a preset and drag sliders around to suite your taste type of app. I demonstrated it using the staircase shot in a recent webinar that I’ll link to here once it goes online.

If you haven’t used any Topaz software before then you are missing out because they are a fun and simple way to breathe some life into your images. If you follow my friend Trey Ratcliff at Stuck-In-Customs then you know he’s a big fan of Adjust, just like me!

Where to order

Use my coupon code to save when you check out!
Use my discount coupon code to save 15% when you check out!

WARNING: To get the discount you MUST CLICK HERE and enter the coupon code RONMART. If the code isn’t working then visit my discount coupon code page for the latest code and offer details.

Click here to order the bundle at a discount. For the next couple days the ronbundle or july4 codes might still work so try them out. If they don’t then use my coupon code as mentioned above to save. The bundle is the way to go long-term pricewise, so only skip the bundle if you are certain you are only going to buy a couple Topaz products.

Interested in an amazing photo trip to Japan?

Want to go photograph this staircase yourself? Contact me about joining me on my photography workshop in Japan!

Other articles you may enjoy

If you enjoyed this article, you may also enjoy these:

Disclosure

If you make a purchase using links found in this article, I may make a commission. It doesn’t cost you a penny more, but it does help to support future articles like this.

NOTE: This site requires cookies and uses affiliate linking to sites that use cookies.

If you enjoyed this article, please support future articles like this by making a donation or saving money by using my discount coupon codes. Either way, your support is greatly appreciated!

This blog is intended for freelance writing and sharing of opinions and is not a representative of any of the companies whose links are provided on this site.

The opinions provided are of Ron Martinsen alone and do not reflect the view of any other entity

Tuesday, April 30, 2013

TUTORIAL: Using Nik Software Color Efex Pro 4 & Special Offer

Click here to read my full review!

Copyright Ron Martinsen - ALL RIGHTS RESERVED
Color Efex Pro 4 – The right panel is where things get very interesting
Click for a closer look

Videos

Here are three videos that I did when I was first reviewing Color Efex 4 just before it was released to the public. It shows you what you can do with Color Efex 4:


Play in HD


Play in HD


Play in HD

Hopefully you enjoyed seeing what is possible with the Nik Collection by Google.

Before and After Images

Here’s a few images featured in the videos where you can see the before image and mouse out to see the after image.

ALL images are Copyright Ron Martinsen – ALL RIGHTS RESERVED. Please do not copy, link, save, print or redistribute in any way without my expressed written permission and a signed agreement.


Black & White Model Before


Black & White Model After


Seattle Sunset Before


Seattle Sunset After


Outdoor Model Before


Outdoor Model After

See the videos for more details about the filters used. Keep in mind these are subjective results which you can adjust to suit your taste. Given more time I would probably do some things differently. The important takeaway are the powerful tools you have at your disposal in the Nik Collection by Google.

Coupon Code – 15% OFF

Click here to get the ENTIRE
Nik Complete Collection by Google now only $126.65

Disclosure

I may get a commission if you make a purchase using links in this offer and/or my coupon code.

NOTE: This site requires cookies and uses affiliate linking to sites that use cookies.

If you enjoyed this article, please support future articles like this by making a donation or saving money by using my discount coupon codes. Either way, your support is greatly appreciated!

This blog is intended for freelance writing and sharing of opinions and is not a representative of any of the companies whose links are provided on this site.

The opinions provided are of Ron Martinsen alone and do not reflect the view of any other entity

Thursday, August 30, 2012

Last Day–Photoshop CS6 & Lightroom 4–$400 Off (EXPIRED)

THIS OFFER HAS EXPIRED

Adobe Photoshop Lightroom 4 + Photoshop CS6 for Mac

Click here to get Photoshop CS6 and Lightroom 4 for only $389.90 (save $400!!!!) AND get FREE a Kelby Training DVD (a $94.98 value)!

This offer expires when online ordering stops on August 31, 2012.

See my Lightroom 4 review here.

Disclosure

If you make a purchase using links found on this blog, I may make a commission. This offer is subject to the terms of B&H and may change or get cancelled at their discretion.  The information provided is what I understood at the time this article was published.

NOTE: This site requires cookies and uses affiliate linking to sites that use cookies.

If you enjoyed this article, please support future articles like this by making a donation or saving money by using my discount coupon codes. Either way, your support is greatly appreciated!

This blog is intended for freelance writing and sharing of opinions and is not a representative of any of the companies whose links are provided on this site.

The opinions provided are of Ron Martinsen alone and do not reflect the view of any other entity

Tuesday, March 13, 2012

REVIEW: Adobe Photoshop Lightroom 4 – Part II–What’s New in the Library & Develop Modules

For those moving up from Lightroom 3 to Lightroom 4, you’ll be happy to know that there are not any new or noteworthy changes to the Library module or Import and Export. Where the real changes take place are in the Develop Module.

The first and most obvious change you’ll see is in the Develop module IF you have files that were processed in an earlier version of Lightroom. If you do you’ll see the exclamation button as shown above, and you’ll notice that the sliders in the Basic panel look the same as they did in previous versions of Lightroom. When you click that button you get a chance to process the current or all of the files using the new process version using this dialog:


Mac or PC you’ll see a dialog like this when updating the process version

My advice here is to only do one file at a time as this is a pretty radical change that honestly I don’t see as one that is for the better. Your current photos won’t look the same once you click this so your hard work editing your files can be lost (but restored via the History panel). I’d encourage you to use the Review Changes button when you try this out and if you don’t like the results just do an Undo.


After the change previous Lightroom users may freak when they see the Basic panel

What I’m seeing most of the time when I choose this option is that my image gets a little brighter and not always in a good way. What stresses me out though is that my beloved Fill Light and Recovery sliders are gone and replaced by what what feels like a duplication of the Tone Curve panel. Honestly, this is my most despised change in Lightroom 4 as the new slider simply work like the Shadows and Adjustments in Photoshop or the Lightroom Tone Curves panel, so the the easy to use and understand Fill Light and Recovery just vanish.

If you want your old Fill Light and Recovery sliders back on any file (new or old) simply choose the 2010 Process Mode under the Camera Calibration and voilà all is right with the world again.

image
Get your old Process Mode back under
Camera Calibration and choose 2010

Another big change in Lightroom 4’s Develop Module is in the Gradient and Adjust Brush, but only when you use the 2012 Process Mode. What happens is you get a new Highlights, Shadows, Noise and Moiré adjustment sliders as shown below:


While Highlights and Shadows are new, the big updates
are Noise and Moiré (with a relocated Sharpness)

I actually liked this change, so if there’s a reason to use the new process mode – this is it!

The Lens Correction panel adds a “Remove Chromatic Aberration” checkbox which doesn’t seems to be very aggressive, but can help some photos with minor issues. Beyond that, everything else is basically the same.


Big Before / After Improvements are even easier now

While I’m not a fan of the new changes to the Basic panel, I’ll work with them and get used to it. I won’t bother to change my old files, but as I get used to it I think I’ll come to like it – just not yet. As you can see in the photo above, my first photo edit in Lightroom 4, I was able to take a photo with major issues and breathe new life into it. Total editing time – 10 minutes.

Soft Proofing – FINALLY!


Grab your Colorimeter, Soft Proofing has arrived – Woohoo!

I’ve done a whole printing series and Printing 101 eBook on the topic of printing and soft proofing, so I won’t rehash that here. However, I will make a generalization and say that if you don’t do your own printing then you’ll probably want to stay away from this feature.

While Soft Proofing can be useful to compare the ProPhoto color space that Lightroom uses to the sRGB color space used on the web (which is what your photo will use in a Web Browser), many will find it more confusing than helpful. I need to do a video to show you how to do it right, so I’ll do that in the future.

For those who do their own fine art printing, I’d say the important thing to remember here is that you’ll want to se the profile to whatever your output target will be (generally your printer paper profile) and I strongly advise you to clear the Simulate Paper & Ink checkbox. The later will more likely cause you to do more harm than good to your image, but that brings up another good point.

IF you want to edit your images during soft-proofing I STRONGLY URGE you to click the Create Proof Copy button. What this does is create a virtual copy of your edited image and allows you to make changes that are just for your print target. You can create as many of these as you like so create them to your hearts content – AFTER you’ve done all your edits to the original.

If you decide to make edits to the source image then Lightroom remembers that and will prompt you with this dialog:

imageI strongly urge you to NEVER clear the “Don’t show again” checkbox as you’ll want this reminder

What this wonderful dialog does is applies your changes to the proof or reminds you that you don’t really want to do that and gives you a chance to undo. While annoying, this will save your bacon so embrace this dialog!

This feature is a godsend that is super helpful for wide gamut display owners (like those with the NEC PA Series or Eizo displays) because you can do accurate soft proofing to see what will happen to your image before it is printed or ends up on the web.

Conclusion

I’ll be back with more about what’s new for Lightroom 4, but if you are looking for the answer to the question “should I spend the money to upgrade?” The answer is YES!  Even if you don’t’ care about any of the new features, if your camera gets a firmware update or if you get a new camera you’ll need Lightroom 4 to have it recognize your RAW files. If that’s not an issue, then print masters will love the soft proofing and general users will appreciate the adjustment brush improvements.

Right now the only negative I’m seeing beyond the Basic Panel change is that it uses a lot of RAM and can get sluggish at times. Even on my brand new 16GB high performance workstation I found it ran better after the occasional restart, but I never had any crashes so it’s reliable. I do expect the performance issue to be addressed in a future update so I wouldn’t let this deter you from buying, unless you had a machine that really struggled with Lightroom 3. If that’s you then I don’t recommend Lightroom 4 as you’ll probably get frustrated with the performance of this version.

Learn More

See more of my review in these parts:

To see more videos about what’s new visit http://tv.adobe.com/product/lightroom/. You can also learn more about what’s new for Lightroom 4 on Adobe’s website.

Want a Great Book On Lightroom 4?

Unless something terrible happens, The Adobe Photoshop Lightroom 4 Book for Digital Photographers is going to be another must own book for Lightroom users as the previous versions have been fantastic. Here’s my review of the last edition, and Scott Kelby hasn’t let me down with a string of awesome books to his credit.

Order Now

Click here to learn how to buy now for as little as $79.

Disclosure

If you make a purchase using links in this article I may get a commission. Adobe has provided me with a serial number for my copy of Lightroom 4 for the purpose of doing my review

NOTE: This site requires cookies and uses affiliate linking to sites that use cookies.

If you enjoyed this article, please support future articles like this by making a donation or saving money by using my discount coupon codes. Either way, your support is greatly appreciated!

This blog is intended for freelance writing and sharing of opinions and is not a representative of any of the companies whose links are provided on this site.

The opinions provided are of Ron Martinsen alone and do not reflect the view of any other entity