Showing posts with label 70-200mm. Show all posts

Friday, October 21, 2016

Nikon 70-200mm f/2.8E FL ED VR & PC 19mm Hands On

Nikon surprised me with a hands on demo with the some of their newest lenses attached to a Nikon D750. I was able to take shots and examine them via the on-screen LCD, and the quality at maximum zoom looked outstanding.

AF-S Nikkor 70-200 f/2.8E FL ED VR

Photo Oct 21, 1 27 03 PM
The all new 70-200mm from Nikon

First things first – this lens feels way lighter than any DSLR 70-200mm f/2.8 I’ve ever held, and that’s a good thing in these days where DSLR shooters question the burden of extra weight over mirrorless alternatives.

Another pleasant surprise was that in the limited testing indoors in Javits Convention Center, I was able to quickly focus and track subjects in non ideal lighting conditions. Every test shot I had at the appropriate shutter speed was razor sharp and in focus. This is a huge leap from its predecessor, as I always found my Canon 70-200mm f/2.8 II to be way faster at focusing especially in difficult lighting situations. I can honestly say that Nikon has created a lens that feels like its matched the focusing speed of my Canon, and limited testing proved that the VR and sharpness definitely warrant a head to head comparison in the future.

It’s got reasonable minimum focus distance which is a really big deal, so when I was testing it out with subjects nearby I didn’t have a practical scenario where it didn’t focus. This is going to be a big win for event and wedding photographers!

Here’s more specs from Nikon:

  • The professional’s choice for nearly any photographic scenario, the AF-S NIKKOR
  • 70-200MM f/2.8E FL ED VR sets a new standard for pro telephoto lenses
  • Wide f/2.8 constant aperture perfect for achieving optimal low-light performance
  • Up to 4 stops of Vibration Reduction (VR) image stabilization for improved handheld shooting
  • Electromagnetic diaphragm and Silent Wave Motor (SWM) offer consistent exposure control during high speed shooting and low-noise AF performance
  • Superior weather-sealing and Fluorine coatings for particle resistance and easy cleaning
  • 6 ED lens elements, 1 Fluorite lens element and 1 high refractive lens element combined with the Nano Crystal Coat help to eliminate distortion, ghosting and flare
  • The AF-S NIKKOR 70-200mm f/2.8E FL ED VR will be available in November 2016 for a $2,799.95 SRP

Learn more or pre-order here.

PC  Nikkor 19mm f/4E ED

Photo Oct 21, 1 26 01 PM
Left side view

This is a a crazy sharp tilt shift that feels very substantial with butter smooth knobs. While I’m not a big tilt-shift or manual focus lens shooter, real estate photographers are going to be pretty pleased with this offering as it shows minimum edge distortion based on my limited hands on testing today.

Photo Oct 21, 1 26 23 PM
Top View

Photo Oct 21, 1 26 16 PM
Bottom View

Photo Oct 21, 1 29 20 PM (1)
Inside the very thick lens cap

  • Nikon’s widest-ever tilt-shift NIKKOR offering, the PC NIKKOR 19mm f/4E ED lens offers complete control over perspective and depth-of-field
  • With 97° of coverage, the lens is designed to capture optically challenging-subjects like cityscapes or architecture
  • Tilt operation can be made parallel or perpendicular for improved control of perspective, focus and depth-of field
  • Super-wide 19mm focal length is perfect for shooting panoramas
  • Electromagnetic diaphragm offers consistent exposure control during high speed shooting
  • 3 ED lens elements, 2 Aspheric lens elements, Nano Crystal Coat combine to eliminate glare and Fluorine Coat to resist water and dirt
  • The PC NIKKOR 19mm f/4E ED lens will be available in November 2016 for a $3,399.95 SRP

Learn more or order now here.

Other articles you may enjoy...

Disclosure

If you make a purchase using links found in this article, I may make a commission.

NOTE: This site requires cookies and uses affiliate linking to sites that use cookies.

If you enjoyed this article, please support future articles like this by making a donation or saving money by using my discount coupon codes. Either way, your support is greatly appreciated!

This blog is intended for freelance writing and sharing of opinions and is not a representative of any of the companies whose links are provided on this site.

The opinions provided are of Ron Martinsen alone and do not reflect the view of any other entity

Wednesday, May 25, 2016

REVIEW: Nikon D5 – Part I of II featuring burst mode testing on video

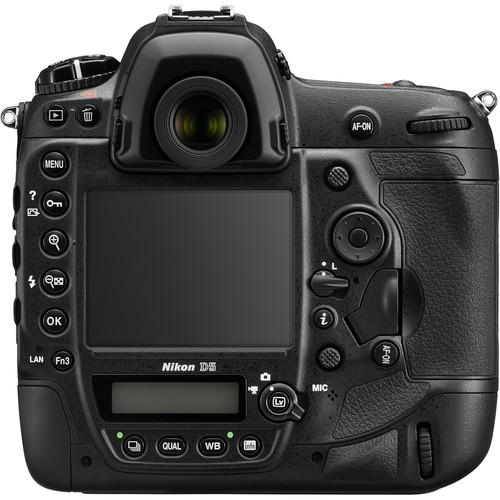
Nikon D5 Rear View
Nikon D5 Rear View

I’ve had the Nikon D5 for a couple weeks now and have been gaining a lot more insight as to what it’s like to live with this camera on a day-in / day-out basis. Initially my rose-colored glasses were so thick, I couldn’t find any faults but that was because I tested it in ideal conditions and my love for the D4s gave me a slight bias that this camera was going to be even better than its stellar predecessor.

Like all my reviews, this review isn’t for the fan boy looking for validation for plunking down a bundle for one of these cameras or those looking for a reason to move up to a D5. Instead, it’s an honest opinion of what I loved and hated about this camera during an extended test period, along with my final verdict.

While I am a Canon 1D X shooter, I’ve never hesitated to say that the D4s is a superior body to what I shoot with. In fact, going into this review I was very serious about purchasing a D5 as my primary sports body and taking a pass on the 1D X Mark II. You’ll have to wait until the next part of my review to find out what I will do, but it’s a big expense to switch platforms so this camera wouldn’t have to be just great – it would have to be game changing on a level greater than the stellar D4s.

A Video Tour of the D5

I despise editing video but it’s always fun to see a video that shows off the burst mode of sports cameras, so I decided I’d include one here. As I set up to do the video, I figured I’d give a tour of the body while I was at it. The tour is geared for both existing Nikon shooters as well as those who haven’t held a Nikon body before:


Visit YouTube to see the 1080p version

Go to the 7 minutes and 40 second mark in the video if you are only interested in the burst mode testing.

Burst Mode

For my burst mode testing, I recruited a physically fit young man who ran a series of routes repeatedly so I could try out various settings and compare the results.


53rd frame of this 56 shot RAW+JPEG series

At first things seemed VERY promising as I used continuous focus with a single AF point – which is what I do with my 1D X and my preferred choice with previous D series Nikon bodies.  I managed to get 56 frames before my subject reached my minimum focus distance of the 70-200 lens. These were all done with active matrix metering mode and shot in uncompressed RAW + JPEG, and the results were similar to what I saw with my son in my First Look article – every frame was in focus. Click the image above to see the beginning of the series and feel free to download and examine the shots to validate my claim, but please delete them when you are done with your inspection.

Please note that all images featured in this article and on this blog are copyright Ron Martinsen or their respective copyright holders, and all rights are reserved. You may not edit, print, or use these images for any purpose beyond visual inspection while viewing this article.


D5 autofocus is very good, but definitely not infallible

Would single point AF be the only way I could get this level of accuracy? Check back for part II of this review to learn more about what other settings and scenarios I tried and what lessons I learned about the D5 autofocus system.

Beware Highlight Spot Metering

As a Canon shooter, I shoot in evaluate mode and almost never change it. Issues with exposure are never a problem so every time I review a Nikon I struggle a little bit to get used to how it meters a scene. Eventually I learn that for most shots spot or center-weighted metering is the way to go. With that said, I made a mistake and accidentally chose highlight spot metering (which has an icon like spot but with a asterisks).

For better or worse, I quickly discovered this mode does in fact do a good job of spot metering based on the highlight in the frame and NOT area around your AF point (which is what my definition of spot metering is). Consider these three photos:


Highlight Spot Metering chooses to expose for the highlight on the floor


Highlight Spot now appears to meter for the bright spot of the column behind the baby


Highlight Spot finally gets it right when my son's head blocks the bright spot on the floor

Notice how the scene is roughly the same but there are three radically different results?

Click here to see the manual for the D5 to learn more about its metering modes.

Real World Shots

I already posted some real world shots in my article entitled Nikon D5 First Look, but here are a few more:


f/2.8 @ 135mm for 1/1000 sec at ISO 640

In random shooting where I didn’t know what to expect from the model,
I was able to get a reasonable number of focused shots


f/2.8 @ 200mm for 1/125 sec at ISO 180

In evenly well lit scenes, matrix metering worked similar to what I’m used to seeing from Canon


f/11 @ 92mm for 1/160 sec at ISO 100

In harsh lit scenes, matrix metering actually does an ok job but the highlights were a tad more harsh than I would have liked from a metering mode that looks at the entire scene


f/2.8 @ 135mm for 1/1000 sec at ISO 1600

Normal spot metering behaves like you would expect by metering on your AF point


f/4 @ 200mm for 1/200 sec at ISO 100

Spot highlight metering chose to meter for the trees in the background instead of the brightest spots around the AF point like I would have expected / hoped


f/2.8 @ 98mm for 1/2000 sec at ISO 1800

Sometimes matrix metering did exactly what I wanted the camera to do


f/2.8 @ 200mm for 1/2000 sec at ISO 2500

For those who plan to do other things besides sports shooting with this camera, you’ll be very pleased that this sensor is still capable of some very nice bokeh even as the ISO starts to climb

Visit the gallery to see my latest uploads both now and after the final review is published.

All of the shots featured in this article are unedited and come from the in-camera JPEG, but RAW’s were taken at the same time. No processing (not even cropping) has been performed on these images.

All images are copyright Ron Martinsen and may not be used in any way beyond viewing in conjunction with viewing this article. Downloading, printing, copying, editing, linking, etc… is prohibited.

Conclusion

Click here to see my conclusion in part II

Where to order

Click here to learn more or order on the B&H web site. I opted for the dual CF version, but an XQD version is available at no extra charge.

Other articles you may enjoy

If you enjoyed this article, you may also enjoy these:

Disclosure

If you make a purchase using links found in this article, I may make a commission. It doesn’t cost you a penny more, but it does help to support future articles like this.

NOTE: This site requires cookies and uses affiliate linking to sites that use cookies.

If you enjoyed this article, please support future articles like this by making a donation or saving money by using my discount coupon codes. Either way, your support is greatly appreciated!

This blog is intended for freelance writing and sharing of opinions and is not a representative of any of the companies whose links are provided on this site.

The opinions provided are of Ron Martinsen alone and do not reflect the view of any other entity

Wednesday, May 18, 2016

Nikon D5 First Look

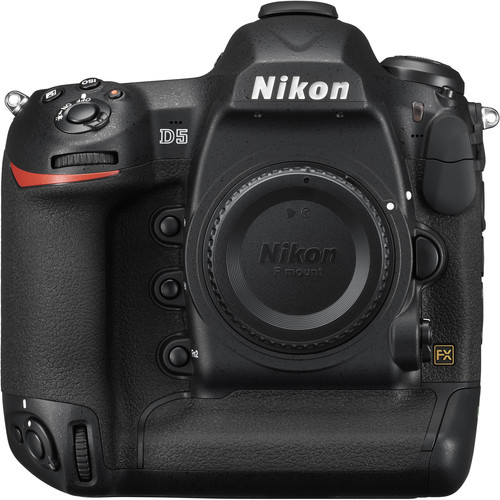
Nikon D5 DSLR Camera

I’ve been a fan of the Nikon D series pro bodies going back to the D3, and the D4s was one that I loved so much that I almost sold my 1D X to switch to the Nikon camp. As a result, when I heard the D5 announcement I quickly made arrangements to review it even before the Canon 1DX Mark II. Would this be the one that makes me switch camps? Read on to get my initial thoughts.

The AF system is scary good and the range at which you can move your focus point across the 55 physical points (but the system has 99 cross-type points for tracking). What this means you can easily put your AF point where you want it – especially at all rule of thirds points where most cameras fall short – and once you are in continuous mode the AF system will track your subject extremely well.

The touch screen support is pretty comical as its primary value seems to be in playback mode for swipe and pinch to zoom. In live view you can tap the screen to move your focus point, but it doesn’t actually focus until you press the shutter button. As a result, I don’t see much value in the touch to focus point feature other than the fact it might save a millisecond or so.

Thankfully the body is an evolution over its processor in that it offers more programmable buttons without removing all of the features D series bodies users have come to love. A fast 1000 Base-T (Gigabit) Wired LAN port, USB 3 and HDMI port (for the 4K UHD 3,840x2,160 / 30 fps video support) means its well equipped to interface with your accessories, but wireless still requires the optional  WT-6A Wireless Transmitter.

I haven’t tried out the ISO 3,280,000 yet, but I was playing around when I unboxed it and got this ISO 14,400 shot that impressed the heck out of me given how crazy low the noise was as well as how readable the text was – handheld in low light at 200mm standing about 6 feet away:


f/2.8 @ 200mm for 1/400 sec at ISO 14,400

Normally I’d delete a garbage shot like this, but this is definitely an impressive case of real world performance of the in-camera noise reduction being very impressive.

Here’s a better real world shot where ISO 5600 is as clean as some cameras minimum ISO setting:


f/2.8 @ 130mm for 1/2000 sec at ISO 5600

I was also aiming at Kai’s left eye when he jumped and the AF did a good job of staying focused on his eye despite his arm creating a distraction that would trip of older AF systems.

Automatic AF Fine Tune Feature

I was planning on doing a video on this feature but this one on YouTube was very good so I decided to point to it instead:

In theory this is how things are supposed to work, but in practice it was finicky and difficult to make it happy enough to get the shot with the 70-200mm that I’m testing with. I finally got it to work with the camera body on a firm surface on the floor pointing at a Datacolor SpyderLensCal Autofocus Calibration Aid, but that wasn’t as easy as what you see in the video. Granted, I was indoors so I’ll do more testing outdoors on a sunny day and see if that helps.

I’m very excited about this feature as AF microfocus adjustments are a pain even with some of the advanced software that’s out there like Reikan FoCal, so this is a game changing feature I hope they can perfect with firmware updates. In the meantime, FoCal, is still the way to go!

Real World Shots – A Walk In The Park

This is just a tiny sample of what’s to come, so check the gallery to see my latest uploads both now and after the final review is published.

These photos were taken during a casual walk through the park with my kids at the end of a sunny day. While the target demographic for D5 is sports photographers, any parent can confirm that keeping up with the kids will show the flaws of even the most advanced pro camera bodies. As a result, I’m impressed with what I’m seeing so far:


f/2.8 @ 200mm for 1/200 sec at ISO 280

At first you might be thinking, why are you showing me this fat baby shot?
The answer is because I pushed the stroller and let it roll on a flat surface, then I raised the camera and took the shot pointing at her left eye WHILE WALKING – at 1/200 sec!!!
I quickly saw the AF system was good, but this was ridiculous – I’ve never had a camera pass this test – until now.


f/2.8 @ 78m for 1/2000 sec at ISO 5000

Kai was hyper and jumping off the rocks, but it was no problem for the D5
as every frame I took came out with sharp focus


f/3.2 @ 80mm for 1/2000 sec at ISO 900

As a Canon shooter, I always struggle when I do my D series reviews at first because the metering doesn’t work the way I’m used to it performing with the Canon bodies. As a result, the images were darker than hoped, but you see 14 frames starting here that came in perfectly focused while shooting RAW+JPEG. I did this test 5 times and got identical results each time – all in focus.


f/3.2 @ 200mm for 1/2000 sec at ISO 1800

Same with the running test where I repeatedly got 42 shots in focus time and time again – also shooting RAW+JPEG. This indicates a very big and fast buffer to keep up with 14 frames per second even with the dual CF option I chose over XQD.


f/2.8 @ 200mm for 1/2000 sec at ISO 3600

Kai is unpredictable so when he randomly decides to jump on a swing the wrong way and gives me a funny shot like this, I was delighted that the D5 nailed it before I even knew what was happening. This is true point and shoot!

All of the shots featured in this article are unedited and come from the in-camera JPEG, but RAW’s were taken at the same time. No processing (not even cropping) has been performed on these images.

All images are copyright Ron Martinsen and may not be used in any way beyond viewing in conjunction with viewing this article. Downloading, printing, copying, editing, linking, etc… is prohibited.

Conclusion

Click here to check out my review.

Where to order

Click here to learn more or order on the B&H web site. I opted for the dual CF version, but an XQD version is available at no extra charge.

Other articles you may enjoy

If you enjoyed this article, you may also enjoy these:

Disclosure

If you make a purchase using links found in this article, I may make a commission. It doesn’t cost you a penny more, but it does help to support future articles like this.

NOTE: This site requires cookies and uses affiliate linking to sites that use cookies.

If you enjoyed this article, please support future articles like this by making a donation or saving money by using my discount coupon codes. Either way, your support is greatly appreciated!

This blog is intended for freelance writing and sharing of opinions and is not a representative of any of the companies whose links are provided on this site.

The opinions provided are of Ron Martinsen alone and do not reflect the view of any other entity

Tuesday, September 8, 2015

REVIEW: Canon 5DsR–The Value of 50 Megapixels (Part I of II)

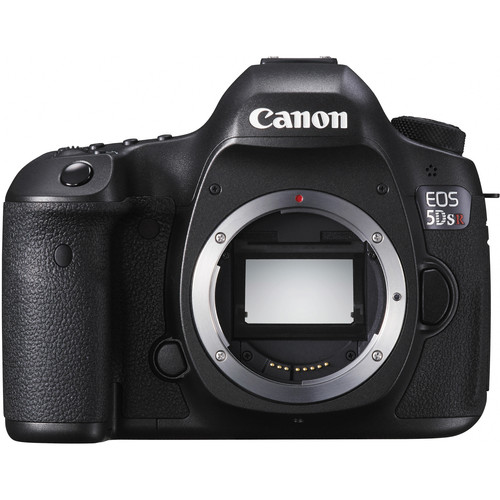
Canon EOS 5DS R DSLR Camera

I liked the Canon 5Ds a lot more than I expected to when I first reviewed it, but I had that burning question that every 5Ds user has – is the 5DsR better? Fundamentally the two cameras are identical with one major exception – the 5DsR removes the optical low pass filter which in theory means you should get much sharper images as the risk of possible moiré pattern issues under certain circumstances. In my testing of other cameras without the low pass filter like the Nikon D810 and Sony Alpha A7R, I have never had any issues so I figured the extremely hard to find 5DsR was going to be awesome. In fact, the early preview I got of it at WPPI suggested it would be excellent.

Rather than repeat everything for the identical body found on the 5Ds, I’d encourage you to read my 5Ds review. This article will focus primarily on image samples and observations while shooting with this camera. Part II will focus on differences between the models.

Real World Samples

The following images come straight from in-camera JPEG’s using the camera default noise reduction settings. Most camera settings are the default with the exception of RAW+JPEG, a desired White Balance (only Shade or AWB), and a desired focus point.  I chose to use the Standard Picture Style for all except for the California coast shots (I used Landscape) and where noted.

Click here for a full gallery of unedited images.

All images are copyright Ron Martinsen – ALL RIGHTS RESERVED. You may not save, print, edit, modify or otherwise use any images featured in this article or the gallery without expressed written permission.


f/4 @ 102mm for 1/640 sec at ISO 125
using 70-200mm f/2.8L IS II USM
Notice the detail in Mackelmore’s earpiece and Ray-Ban logo!


f/4 @ 105mm for 1/640 sec at ISO 200

It’s hard to get a sharp shot with a long lens and a high megapixel camera, but when your subject cooperates the result is some pretty impressive detail (at full size) and a pleasing bokeh even at f/4


Wanz - Copyright Ron Martinsen - ALL RIGHTS RESERVED
f/4 @ 115mm for 1/640 sec at ISO 160

The tough part about shooting at concerts is the inevitable distractions that end up in the frame, but there are so many megapixels that if you pull off a sharp shot like this one of Wanz you can still have a nice size file when you eliminate the distractions as shown above
(click the image for the uncropped original)


f/5.6 @ 30mm for 1/500 sec at ISO 100
 using the 24-70mm f/2.8L II
The detail in this shot illustrates why this camera is a landscape shooters dream


f/7.1 @ 44mm for 1/320 sec at ISO 200

Again, details galore make this a fun camera to capture the details of the California West Coast


f/5.6 @ 44mm for 1/1000 sec at ISO 100

With good dynamic range, sharp foreground detail and smooth out of focus regions, this is an ideal camera for capturing scenes where you want the context of the background but the sharpness of the foreground to jump out at you. In this respect, this camera and the 5Ds don’t disappoint!


f/5.6 @ 70mm for 1/1000 sec at ISO 100

Backlit subjects on a sunny day is a scenario where lesser cameras meters fail miserably, but in this case I got what I’d call typical Canon results. While some fill flash or exposure compensation (in-camera or in post-processing) would have helped, this was a reasonable starting point for tough conditions on a very sunny day


f/4 @ 70mm for 1/500 sec at ISO 160

Afraid of photographing bees? 50 Megapixels means you can shoot from a comfortable distance like this and crop to get your desired result yet still have a large file for printing


f/5.6 @ 70mm for 1/640 sec at ISO 100

In super bright sun my handheld landscape shots had pretty good detail even out in the distance like you can see here, but as the shutter speeds dropped below 3x to 5x the reciprocal of the focal length later in the day the background got super soft


f/5.6 @ 24mm for 1/250 sec at ISO 125

I was pleased with the detail in the shadows and color in this tough backlit shot


f/4 @ 70mm for 1/400 sec at ISO 320

I took about 10 of these shots, but only one came out this sharp. It was clear that 1/400 sec wasn’t nearly fast enough for even for the minimalistic movements of a bag piper


f/22 @ 47mm for 1/400 sec at ISO 6400

Toss in some diffraction, the softest aperture for this lens, and high ISO and you end up with a shot that’s pretty useless for anything but small images on social media.


f/7.1 @ 70mm for 1/640 sec at ISO 400

I found myself fearing to go beyond f/7.1 with this camera and lens combo as I was often disappointed when I went to a larger f-stop number or  ISO than what you see here. Notice the detail and dynamic range improvements of this shot over the one above though!


f/4 @ 61mm for 1/500 sec at ISO 400

Sunset was a joy with this camera as it captures a nice tonal range of greens on the course


f/5.6 @ 33mm for 1/640 sec at ISO 100

This is a fun shot to pixel peep at full size to see all of the detail it captures from this one man band setup on the pier in San Francisco


f/5.6 @ 70mm for 1/1000 sec at ISO 160

My focus point for this shot was the boat which meant the shallow depth of field didn’t leave me with a sharp shot of the flock of pelicans in the scene. I suspect I would have got a much better result for the birds with a 5D Mark III but at the expense of the detail of Alcatraz in the background.


f/5.6 @ 41mm for 1/500 sec at ISO 125

There were a lot of things going on in this shot, but I thought the wide dynamic range really showed its value in the dark areas

Click here for a full gallery of unedited images.

All images are copyright Ron Martinsen – ALL RIGHTS RESERVED. You may not save, print, edit, modify or otherwise use any images featured in this article or the gallery without expressed written permission.

AF Microadjustment Required?

One of my readers who read my 5Ds article posted on social media that she had to make a significant AF Microadjustment for each of her lenses when using the 5DsR. I didn’t see this issue with the 5Ds, but I decided to double check with the 5DsR unit that I received for testing. As you can see below a slight adjustment was required for my 24-70mm lens to correct some forward focusing issues but it wasn’t extreme from what I could see using my SpyderLensCal:

Datacolor SpyderLensCal Autofocus Calibration Aid
100% view of Datacolor SpyderLensCal Autofocus Calibration Aid

If you are seeing the problem my reader described which is more significant than what I see here, then please feel free to leave a comment. Please keep in mind that I have to approve comment due to spambot attacks, so you only need to comment once – it may be a few days before the comment is approved as I have to filter out the noise from the valid comments.

The 50 Megapixel Advantage

I strongly encourage you to read my 5Ds review (especially part II) where I show the value of 50 megapixels even when you are downsizing to web size images, but here’s another well-known practical use of 50 megapixels – cropping.

In this particular case I was walking along the beach in California with my family when my 16 year old son, Taylor, spotted what he claimed to be a whale breaching.  It was so far out that I couldn’t really see it and I thought he was mistaken. Using the only lens I had – the 24-70mm f/2.8L, I decided to take a shot to see what was really out there. Here’s one of the frames that I got:


f/7.1 @ 70mm for 1/1000 sec at ISO 100
using the 24-70mm f/2.8L II

I couldn’t see anything, but when I zoomed in on my LCD it became clear he was right as you can see below (slightly enhanced via the raw original in Lightroom):

Whale breaching at 100%
100% crop of the whale in the shot above

This reminded me of what my wildlife friends tell me they love about high megapixel cameras – the extra reach via cropping! Well, this definitely illustrates this point even if this is a rather extreme case – and the value of good light (to freeze your subject at a low ISO).

Conclusion

Click here to see my conclusion in part II.

If you haven’t done so already, please read my 5Ds review.

Where to order

Click here to learn more or order on the 5Ds or 5Ds R on the B&H web site.

Other articles you may enjoy

If you enjoyed this article, you may also enjoy these articles about other Canon products:

Here’s also some other articles on this blog that you might enjoy:


Disclosure

If you make a purchase using links found in this article, I may make a commission. It doesn’t cost you a penny more, but it does help to support future articles like this.

NOTE: This site requires cookies and uses affiliate linking to sites that use cookies.

If you enjoyed this article, please support future articles like this by making a donation or saving money by using my discount coupon codes. Either way, your support is greatly appreciated!

This blog is intended for freelance writing and sharing of opinions and is not a representative of any of the companies whose links are provided on this site.

The opinions provided are of Ron Martinsen alone and do not reflect the view of any other entity

Friday, July 24, 2015

REVIEW: Canon 5Ds–Should You Upgrade?(Part II of II)

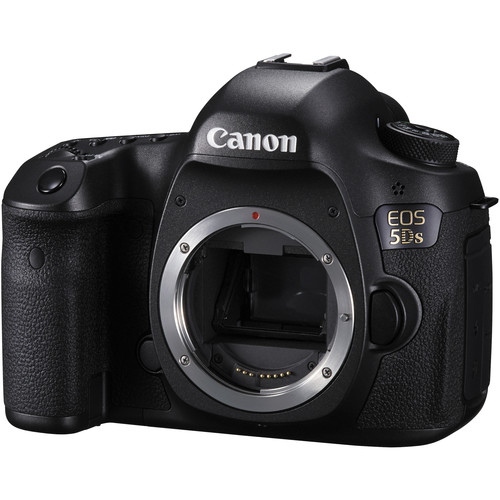
Canon EOS 5Ds 50.6 MP DSLR Camera

If you are just seeing this two part series, please go read the first part of my review entitled Canon 5Ds (Part I of II) with Unedited Sample Photos and come back here for my additional findings.

With a smaller pixel size (4.14µm vs 6.25µm) and diffraction that starts to kick in around f/7.1 (vs f/10), some will argue that the 5Ds only has one major benefit over the 5D Mark III - 2x more megapixels. Given the reality that most users will rarely print a file that full utilizes all 22.3 megapixels of the 5D Mark III (Super B/A3+ - 13x19 inches or 330x438mm), it is true that often those extra megapixels will go to waste – but they’ll still eat up your hard drive space 2x as fast (even more so if you use Photoshop). This begs the question what’s sense does it make to spend an extra $1200 (at the time this article was written) to upgrade?

For some these tradeoffs to take a step backwards from all the benefits the 5D Mark III has to offer. For others the answer to the upgrade question will be based on an emotional desire to have the latest and greatest technology Canon has to offer. The 5Ds certainly comes with plenty of bells and whistles not found on its cheaper sibling, so perhaps that reality alone might be enough for some people.

Read on to get the low down on why I both love this camera, yet I struggle to justify a valid reason to own it.

The 50 megapixel advantage


f/5.6 @ 24mm for 10 sec at ISO 100
 with Canon 11-24mm lens
Click to see the incredible sharpness and detail in this unedited in-camera JPEG image
(Apologies for the tilt)

Does resolution make a difference even when you throw away pixels?

This is the question I kept asking myself so I decided to do a basic test that anyone could do themselves if they had the gear on hand to see the advantage of the extra megapixels.

To begin I just zoomed in to 200% and observed the amount of detail in the bookshelf image taken with the 5Ds using my 11-24mm lens at 24mm at f/5.6 and ISO 100. Notice the dithering pattern in the book spine – that’s really there but only a three cameras I’ve tested have ever captured it – the A7R, D810 and 5Ds:

5Ds Crop from 200% Zoom of Original File

Now If look at the 200% capture of the same section with the 5D Mark III using the same lens, aperture and ISO and notice it is (obviously) smaller and the detail looks smeared by comparison:

5D Mark III Crop from 200% Zoom of Original File

If I zoom in to 300% to get roughly the same size the difference is night and day:

5D Mark III Crop from 300% Zoom of Original File

The 5D Mark III isn’t able to capture the dithering details on the spine or the sharpness of the letters simply because there’s not enough sensor resolution to capture it.

This isn’t rocket science, but it does prove that if you have a lens that can take advantage of the extra resolution then the 5Ds is definitely going to take advantage of it with image details you can use.

Downsizing to 4k

Next I decided to discard the extra megapixels using Photoshop CC 2015’s Image Resizing (and yes, there are better ways like using Perfect Resize) :

Canon 5Ds Image Resize to 4k

Here’s the same thing done to the 5D Mark III image:

Canon 5D Mark III Image Resize to 4k

Below is a table that shows the results (with image links) to before and after, but you can see the results in the screen shots above already. Again, the image with more detail resizes more nicely than the one that doesn’t which also means the file size is larger after resize.


Before Resize

After Resize

Canon 5Ds

8688x5792 15.3MB

3840x2560 6.24MB

Canon 5D Mark III

5760x3840 7.43MB

3840x2560 5.91MB

While this may be proving the obvious to some, it hopefully highlights to everyone that despite the pixel size disadvantage the extra megapixels come in handy when resizing your images.

So YES, even if you end up resizing your image for use on Instagram or Facebook, people WILL be able to see the difference. They won’t be able to quantify it, but the 5Ds images will appear more detailed and sharp.

Editing – The Real High Megapixel Advantage

I’ll admit that I liked some of the advantages of this camera enough that I found myself using it for some formal shots that I’ve had on my to-do list for years. When I edited these shots I really appreciated the extra pixels which helped to give Photoshop more data for gradients, shadow detail, and overall texture. This really made fixing flaws so much easier than normal because tools like the content aware patch and healing tools had more data to sample from.

Here’s an example of an image as it came out of the camera which was quite good even with its 8-bit sRGB in-camera JPEG:


In-camera JPEG Unedited – Click for Full Size
f/9 @ 70mm for 1/125 sec at ISO 100
 using 24-70mm f/2.8L II lens
The best part about a high megapixel camera is editing details as you have so much data to fix flaws with less impact on the adjacent area. The ability to zoom in at a significantly greater level for spot healing.

Anytime I edit a photo I always start with a 16-bit ProPhoto RGB Original RAW file which immediate offers more color and dynamic range than the in-camera original JPEG. Anyone who edits their photos from the RAW originals knows that this RAW advantage still yields benefits when converting an image back to a 8-bit sRGB JPEG for display on the web.  By having the extra megapixels with the 5Ds you get even more visible of benefits from your in RAW editing workflow because you have the well-known color benefits but now you also get more detail even when you downsize your image. Here’s the editing version with all of the benefits that extra megapixels and RAW data offer:


Edited Version - Click for full size
Extra resolution made correcting flaws super easy
and the RAW image had an incredible tonal range
in the background gradients and shadows

This really hit this point home for me because all of the discarded megapixels and color data still resulted in a image that had more color and detail than I’m used to seeing from my 5D Mark III. Yes, you may end up tossing all of those megapixels but the people who see your images will still see the benefits of you shooting with them versus a camera that has less resolution.

Get used to f/7.1 or lower

To avoid diffraction you’ll have to shoot at f/5.6 or less. With a camera that has such high resolution that your depth of field will be drastically reduced, this isn’t good news for landscape photographers. In the real world I found myself satisfied with the tradeoffs of using f/7.1 as you can see here in this long-exposure shot taken on tripod using a timer and mirror lockup:


f/7.1 @ 85mm for 6 sec at ISO 100
using a Canon 70-200mm f/2.8L IS USM 

As I zoom in to 100% and explore on a PA322UHD 4K display I see that I’ve got pretty decent detail of images that the naked eye can’t even notice. Here’s a few fun examples:

100% Crop of Pacific Science Center IMAX Sign
100% crop of Pacific Science Center IMAX sign

100% Crop of Crane
100% crop of crane

100% crop of buildings in the far back section of the shot

This started to feel like the enhance scene in Blade Runner, and made me not really want to live in downtown for a fear of an invasion of privacy by 5Ds shooters!

The super high resolution means that you get more detail at the expense of a a more shallow depth of field, but with landscapes the circle of confusion calculations work in your favor.  If you are a macro shooter, this is going to be a big problem so keep this in mind.

Patient wildlife shooters on a tripod might also be able to take advantage of both the added resolution and generous extra pixels for cropping to get closer to their subjects with high fidelity than they are currently used to enjoying. This is no sports camera, but in skillful hands amazing results are certainly possible.

Bookshelf Test

The following shots are done on a tripod with all camera default settings except I also enable RAW. The full gallery of bookshelf images can be found here, but I’ve included a few noteworthy images in this article.

I’ve already covered the sharpest aperture (f/5.6) at ISO 100 earlier in this review, so I’ll move on to a discussion about ISO. Here’s the same shot taken at the maximum native ISO:


f/5.6 @ 24mm for 1/6 sec at ISO 6400

As you zoom into 100% you can see the noise level (using the Low setting) is pretty bad and the details start to get smeared:

ISO 6400 100% Crop
ISO 6400 100% Crop

For reference again, here’s the same shot at ISO 100:

ISO 100 100% Crop
ISO 100 100% Crop

With the requirement that you have to use significantly faster shutter speeds to get sharp shots hand held, this means you’ll quickly get into high ISO’s like this where the extra resolution benefits start to fade. This is one of the big reasons why I don’t think this camera is going to be for everyone as current 5D Mark III owners will feel like the noise level is a major step backwards.

For the record, this is the same level of noise problem I saw with the Nikon D800/D810, so this isn’t a problem unique to Canon. As a result, I would NOT consider any high megapixels camera like this to be suitable for vacations, parents, travel, concert or street photography.

Real World Shots

The following images come straight from in-camera JPEG’s using the camera default noise reduction settings. Most camera settings are the default with the exception of RAW+JPEG, a desired White Balance (only Shade or AWB), and a desired focus point.  I chose to use the Standard Picture Style for all except for where noted.

Click here for a full gallery of unedited images.

All images are copyright Ron Martinsen – ALL RIGHTS RESERVED. You may not save, print, edit, modify or otherwise use any images featured in this article or the gallery without expressed written permission.


f/5.6 @ 24mm for 1/125 sec at ISO 1600
 using 11-24mm lens
This was one of my many “almost” sharp shots but the slight camera shake despite shooting at over 5x the reciprocal of the focal length. As a result you can expect that hand held shooting is pretty much out of the question for most photographers.


f/5.6 @ 24mm for 1/125 sec at ISO 200

Extreme details, no matter how gnarly, are always fun to capture with this camera


f/5.6 @ 85mm for 1/100 sec at ISO 100


f/5.6 @ 24mm for 25/10 sec at ISO 100

Images like this have to be seen in print or on a 4k display to be fully appreciated
as 1080p just doesn’t cut it – too much detail is lost!

See the first part of my review entitled Canon 5Ds (Part I of II) with Unedited Sample Photos for more images as well as the complete gallery. 

What about other models?

I know many of you are probably wondering about the 5Ds R about now, and I’ll cover that camera when I can finally get my review unit from B&H. I’ve also got a Sony A7R II in the queue will be reviewing it along with the 5Ds R later this year.

Until my my other reviews are ready you can go enjoy these reviews to see what I think of some of the others super high resolution cameras:

I don’t cover medium format cameras on this blog, and I don’t have any other super resolution cameras planned for review at this time (excludes models released after this article was written).

Conclusion

I can highly recommend the 5Ds for those who are doing detail critical work AND who will be using this camera with either studio lights or on a tripod. However I started this article with the question with “should you upgrade”, so I’ll finally go against the fanboys and marketplace momentum and recommend AGAINST getting this camera if you plan to use it as your primary or only camera that you shoot unsupported.

Unless you live in the dessert where you can always shoot at ISO 100 with high shutter speeds, you’ll need shutter speeds that are 3x what you are used to using (assuming you have the latest IS, else 5x+) to avoid motion blur in your hand held images. Extra resolution of blurry images will give you poor results no matter how you slice it as many former D800/D810 owners will tell you. As a result, I consider this a specialty camera for a limited audience or for those who will be using it as 2nd body to back up their lower megapixel Canon DSLR.

This advice applies to the Nikon D810 and Sony A7R II as well. High resolution is both a blessing (when used effectively) and a curse, so “don’t be that photographer” that’s blaming the camera or lens for a bunch of blurry shots that are caused by using a high resolution camera properly. Medium format shooters already know this so when you get to these resolutions you cross into a whole new world that’s not for the beginner or casual photographer! You have been warned.

Where to order

Click here to learn more or order on the 5Ds or 5Ds R on the B&H web site.

Other articles you may enjoy

If you enjoyed this article, you may also enjoy these articles about other Canon products:

Here’s also some other articles on this blog that you might enjoy:

Disclosure

If you make a purchase using links found in this article, I may make a commission. It doesn’t cost you a penny more, but it does help to support future articles like this.

NOTE: This site requires cookies and uses affiliate linking to sites that use cookies.

If you enjoyed this article, please support future articles like this by making a donation or saving money by using my discount coupon codes. Either way, your support is greatly appreciated!

This blog is intended for freelance writing and sharing of opinions and is not a representative of any of the companies whose links are provided on this site.

The opinions provided are of Ron Martinsen alone and do not reflect the view of any other entity