Showing posts with label Douglas Dubler. Show all posts

Tuesday, December 4, 2018

Printing Series: Douglas Dubler – Fashion Photographer & Epson Stylus Pro Master Printer


Copyright © Douglas Dubler – ALL Rights Reserved

My printing series, which I hope everyone is enjoying, would never have existed had it not been for Douglas Dubler. I first met Douglas at the Nik Summit  in 2010 and was floored by his “Avatar Beauty” print (a 44” x 60” beauty shot shown at the end of this section) that had such amazing color and detail that I could stare at it all day long. I was immediately hooked and realized that now was the time to get into printing.

Before meeting Douglas, I had always advised people to outsource their printing to avoid the headaches I had endured in the past when trying to print my own photos. However, Douglas assured me that all my fears and concerns based on past horrible experiences were no longer valid. He explained that amazing prints were now possible by anyone – with the right tools if you just followed the proper procedures. In fact, he declared it was so easy that “a monkey could do it.” With that gauntlet thrown down, I set out to prove if Douglas was right, and I quickly discovered he was 100% correct! With the headaches of the past (mostly) gone, I decided it was time to share the joy of printing – the final and most important part of the art of photography - with all of my readers.

All that I’ve learned from this amazing master printer would take years to blog, so I set out on a journey that resulted in my Printing Series and book. I hope that you enjoy the tips here so that you can get the same passion for printing that Douglas, and I now share. I hope you enjoyed my printing series, so if you ever see Douglas, be sure to thank him for it!


Copyright © Douglas Dubler – ALL Rights Reserved

Custom Paper Profile Guru

It seems that every master printer, RIP software vendor, printing product maker, etc… in North America knows Douglas Dubler. To many he is the ultimate paper profile guru who shows what is possible when you fight your way for that last 10% of printing perfection. His prints are a testimony to the reward he gets from spending several days building a perfect paper profile.

Yes, Douglas Dubler is hard core when it comes to paper profiles – probably more than you’ll ever want to be. However, there’s much to learn from Douglas no matter what level of investment you decide to make in printing. There’s also one thing that he taught me that is 100% true – your final print is really only as good as the paper profile you use to print it. Don’t believe me? Check out my ColorMunki article where I show how a simple paper profile can make a radical difference on a sub $100 printer with crappy generic paper.

The good news for the rest of us is that Douglas is a highly respected member of the X-Rite Coloratti who has been actively involved in helping to make the paper profiling process more accurate and easier for everyone. Even if you have never heard of Douglas, if you print using paper profiles generated by an X-Rite product then you owe Douglas a debt of gratitude for what he’s done to help to improve the process and fantastic results we are capable of enjoying today.


Copyright © Douglas Dubler – ALL Rights Reserved

Printing so easy a monkey could do it!

This was the claim that Douglas made, but in retrospect it could be a bit of a play on words as this series kicked off with a review of the X-Rite ColorMunki (now replaced by the i1 Studio). The ColorMunki is the entry level way to get an even larger monkey off your back – prints with horrible color that don’t resemble what you see on your display! Sure there’s more advanced products which can be used to get that last 10% of perfection for the fine art print, but Douglas was adamant that anyone could get great results worthy of hanging in their home. His formula for great prints is quite simple:

  1. Start with a good image – Shoot a great image in RAW and process that raw data as a 16-bit ProPhoto RGB image in Photoshop or his current favorite, Capture One. Without a great image and lots of data to work with, then the rest of the workflow fails.
      
  2. Calibrate your display – without a calibrated display you are effectively playing printing equivalent of Russian Roulette. It is virtually impossible to edit your image in a way that can be viewed on other devices (i.e., printers and other people’s displays) with the same vision you had for the colors in your image when you processed it (i.e., in Aperture, Lightroom, Photoshop, etc…). For this you need hardware designed to calibrate your display, and Douglas recommends a  i1Photo Pro 2 or better because it includes a spectrophotometer (more on that later). However if you can’t afford that, then at least an i1Display Pro is necessary . Some operating system tools for visual software calibration exist, but are only as accurate as your eyes and for most of us that isn’t very accurate as this test proves. His recommended display calibration settings are 6100K, 2.2 Gamma and 120 brightness.
      
  3. Use a good paper profile – Here’s where things can start getting complicated, depending on how good you want your results to be. For any of us, just using the paper profiles provided by the OEM for our printer will give satisfactory results with a monitor that is calibrated. This is possible via soft proofing where you have your monitor calibrated and you use software like Adobe Photoshop to apply a printer paper profile to adjust your display image so that it is a close representation of how your image will appear after it is printed.
     
    You can improve upon this result by using a spectrophotometer like the i1 Studio to create your own paper profiles which I discuss in very old my ColorMunki review. I covered more advanced paper profiling in my i1Xtreme review (now replaced by the i1Photo Pro).
     
  4. Print using a great printer – As a serious entry level printer Douglas recommends Epson’s SureColor P800 or for the ultimate; his current high end choice, the 17” SureColor P5000 Epson printer w/UltraChrome HDX inkset.
       
  5. Print on only the best papers - The Epson Legacy papers (Legacy Baryta and Legacy Platine) are Douglas' favorite gloss papers. While all of the Epson Legacy papers are extremely good, he really loves Legacy Fibre because it has such a wide color gamut, improved longevity with the new UltraChrome HD (P800) and HDX (P5000, P9000) Epson ink sets. It creates amazing prints using matte black ink.

Of course this is just a basic workflow and Douglas is not a basic guy.


Copyright © Douglas Dubler – ALL Rights Reserved

Douglas Dubler’s Full Workflow

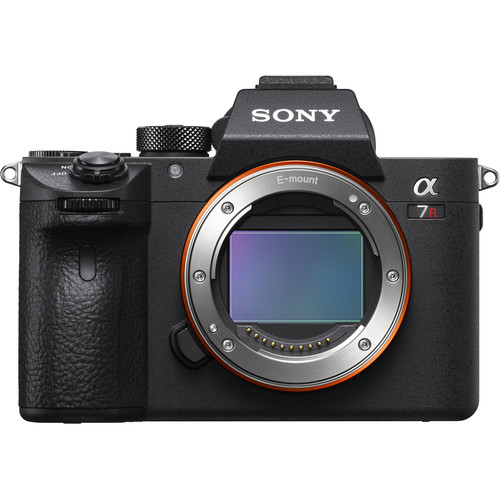
Douglas only shoots with the best equipment possible, which for him is the Sony A7R III  and Phase One IQ3 100MP medium format, Broncolor strobes using the Scoro S power packs.

He explains that he wants to start with the best image possible and add his artistic touch on top of that. He doesn’t want to waste time compensating for crappy equipment. Once he has that great 16-bit ProPhoto image ready, he does the following:

  1. Start with a good wide-color gamut display – Douglas uses a Eizo ColorEdge CG247X as his primary display and the NEC MultiSync PA241W-BK (which I use too – and  love it) as his secondary display. He recommends at least a i1Basic Pro 2 for calibrating your display . To calibrate your Eizo display, Douglas recommends Eizo Color Navigator and for the NEC he only recommends the SpectraView II Display Calibration Software.       
  2. Prepare your image for print – He strongly believes that your image should be resized to its final size and resolution using on1 Perfect Resize and he does a special two pass sharpen Nik Software’s Sharpener Pro to prepare his images for a final print.      
  3. Create great paper profiles using your own spectrophotometer - Douglas uses the X-Rite i1iSis XL Color Calibration System (B&H), but a X-Rite i1iO Automated Scan Table 2 or even the i1Photo Pro 2 can be used to create the best possible profiles for your paper. 
  4. Analyze your profile using ColorThink Pro (review) – Give this product your image & paper profile, and it graphs you can see where the image exceeds the ability of the paper to reproduce portions of your image (i.e., out of gamut areas). You can use this data to modify your image or try different paper profiles to see which paper will give you the most color gamut coverage. This can be very useful when selecting papers as some papers will be able to render more colors in your image than others.
  5. Use ColorBurst OverDrive – Douglas feels that the best way to get the most out of your Epson printer is to use great RIP software. For Douglas, that only means you have several choices including Mirage, ColorByte ImagePrint, or ColorBurst OverDrive. He feels using a RIP gives him the best image quality possible. It also gives him the features necessary to come back and get those same great results in the future (which may sound silly you now, but after reading my Printing 101 eBook – you’ll understand how complex it can sometimes be to get the same results on another day). Douglas claims to be able to do it years later and with his fastidious workflow, I believe him!
  6. Use the best ink and papers – He strongly recommends that you stay away from third party ink and refills as you are defeating one of the major benefits that the Epson printer platform offers – fantastic archival ink! He also highly recommends that you at least try the new Epson Legacy papers.  See my printing series for more reviews of great papers too.      
  7. Print big on the best printer – For Douglas, the Epson SureColor P9000 is the best printer on the market - period. Nothing makes a statement like a large print, and I can testify that it is quite magical seeing the results from these amazing machines. You may enjoy this video of Douglas discussing how he gets the most out of his large format Epson printers.   
  8. Inspect your prints in good light – Douglas uses a GTI VPI 52 print inspection station, and recommended the product I use – the GTI PDV-2020EX Desktop Viewer - 23.5 x 25.3" with Lower Luminaire and Side Walls. The ability to critically examine your image in consistent and color balanced light helps you to judge what corrections might be necessary to your image to get the best possible result, GTI’s solutions offer that advantage. Randy Hufford, Greg Gorman, and others featured in this series are a big fan of these light boxes and after using one you can never be satisfied with any other light source for image editing.
  9. Become a Master Printer – If reading this brief synopsis really inspires you to master fine art digital print making, then Douglas offers one-on-one remote viewed sessions in a ten-hour complete course on all aspects of color management from concept to output. Contact me for details if you are interested.


Copyright © Douglas Dubler – ALL Rights Reserved

Conclusion

I’d like to thank Douglas Dubler for the countless hours he took out of his busy schedule to educate me and answer my every question. Douglas is super funny and honest guy who really cares both about creating amazing prints and sharing his knowledge with those who follow in his footsteps. It has been an honor to work with him as my dream is to one day be able to create the amazing fashion photos he has on his portfolio at http://www.DouglasDubler3.com.


Copyright © Douglas Dubler – ALL Rights Reserved

More Douglas Dubler Articles

Since I originally wrote this article, Douglas has been kind enough to share more content with me. Here's  few more articles featuring Douglas that I think you will enjoy:
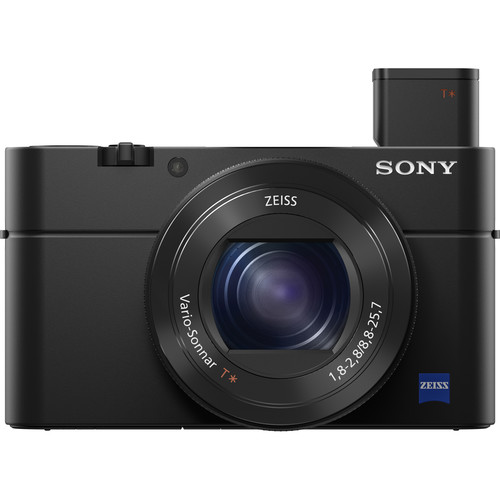
Disclosure

If you make purchases using the links provided, I may get a commission. I appreciate your supporting this blog by using the links provided!

NOTE: This site requires cookies and uses affiliate linking to sites that use cookies.

If you enjoyed this article, please support future articles like this by making a donation or saving money by using my discount coupon codes. Either way, your support is greatly appreciated!

This blog is intended for freelance writing and sharing of opinions and is not a representative of any of the companies whose links are provided on this site.

The opinions provided are of Ron Martinsen alone and do not reflect the view of any other entity

Tuesday, December 19, 2017

REVIEW: Sony a7R III - The Best Camera on the Market in 2017 - Period (Part I of II)


Sony a7R III

While I'm a Canon shooter, I was very impressed with the image quality I got out of the Nikon D850 that I reviewed earlier this year. However, the Sony a7R and a7R II were the sensor by which I judged all others based on their dynamic range. As a result, I was very much looking forward to this review - especially after the camera body of improvements of the new a9 answered my prayers for a Sony body that properly built for photographers.

Since the Sony 24-70 is such a poor lens, I decided this time around I'd have some fun and get the best Sony lens I've ever tested - the Sony FE 90mm f/2.8 Macro G OSS Lens:


Sony FE 90mm f/2.8 Macro G OSS Lens

This was a good choice as this lens is crazy sharp with gorgeous bokeh, yet it's a macro lens which means you can get as close as 11" to your subject and still use auto focus. It's inclusion of Optical Stead Shot also means that you can get super sharp shots despite being handheld.

Everyone who has followed this blog knows that I'm a huge fan of the Sigma 85mm Art, so it would take a lot for this lens to impress me. I'm also reviewing the new Canon 85mm f/1.4L IS at the same time as the Sony, so I have experience with  great lenses in this focal length so I was excited to put this lens through its paces.

Body Impressions

Simply put, this and the Sony a9 offer the only bodies that compete with Nikon for an excellent use and placement of physical buttons. In fact, the improvements to the wheel, joystick and button placements on the a7R III make it the most comfortable one yet.

The joystick support for moving the AF point is my biggest improvement as I've grown so used to this that I can't hardly use a camera without it. This change along with the much better feeling selector wheel (which Fujifilm should look closely at), means it's a natural fit for those coming from Canon and Nikon pro bodies.

The improved electronic viewfinder mean you can leave the hoodman loupe at home and just use the viewfinder on a sunny day to review your images. The resolution and color is excellent, and doesn't feel artificial like the old alpha series cameras.

The articulating rear display is handy for shooting in tight spaces, and optional touch means it works for those who both love and hate touch. Should you want to do more, like a family selfie, the PlayMemories Mobile app can be used to easily remote control the camera.

I was also happy to discover that the phenomenally good eye tracking AF was pre-programmed into a push of the joystick, so this camera was configured perfectly for me right out of the box. In fact, I never found myself using that f*@king Fn menu that you had to live in on other and older Sony models.

While the menus still suck and are just as illogical as ever, there's great support for creating your own favorites and there's lots of great options built in. You also can program many buttons to put your favorite features at the tip of your fingers, or into the blasted Fn menu should you be so inclined.

While this camera touts a cool "Pixel Shift" feature described in the video above, the lack of in-camera support of it was enough of deterrent that I didn't bother with it. Perhaps if Lightroom took advantage of it, I might be interested, but currently it's not for me unless I have a moiré pattern issue AND the opportunity to go back and shoot the subject again with this feature to address the problem. It doesn't seem practical as is for everyday use though.

One negative change from its predecessor is that you can't use Sony's in-camera apps which means you lose the only way it previously supported doing time lapse photography. I had hoped that the PlayMemories Mobile app would have this feature, but I didn't see it when testing in December 2017.

First Look - Real World Shots

I've only had a few hours to play with this camera, so here's some early shots. However, I'd like to point out that these are all the 100% unedited in-camera 8-bit sRGB JPEG's shot in bad light (ISO's 2000 - 8000). All shots are handheld with the standard creative style and auto white balance (ambience) unless otherwise noted.

To quote my friend Douglas Dubler, any mammal can see this camera has excellent dynamic range.

All shots are copyright Ron Martinsen - All Rights Reserved. You can review them while your web browser is open to this article, but you may not edit, print, save, link, or re-publish them in any way without written consent.


f/4 @ 90mm for 1/200 sec at ISO 3200

Are you f'ing kidding me? Look at how much detail is in the highlights in the jpeg and I haven't even touched the RAW yet! Look at that incredible bokeh despite ISO 3200!


f/4 @ 90mm for 1/200 sec at ISO 2500

If there's a fault to this camera, the dynamic range is so wide that it can make specular highlights vanish! This leaf is wet and in the light and no filter has been used!


f/2.8 @ 90mm for 1/500 sec at ISO 4000

It's true this a macro lens, but the resolving detail of this sensor and lens combo means every shot is like a science lesson!


f/5.6 @ 90mm for 1/200 sec at ISO 5000

Vivid mode with shade white balance gives nice warm tones that in this case create an image that is identical to how my minds eye saw it. Look at all of that splendid detail!
See the camera default color here


f/5.6 @ 90mm for 1/200 sec at ISO 2500
-1 EV
Same color settings as the previous shot and with a little under exposure, every detail in the highlights of the log moss is very detailed


f/5.6 @ 90mm for 1/200 sec at ISO 2000

This time with default color settings, but zoom in to 100% and it's like going to biology class and looking at the leaves under a microscope


f/5.6 @ 90mm for 1/200 sec at ISO 2500

The detail in the highlights of the rocks is unlike anything I've shot with before. Sure, this shot is in bad need of a circular polarizer, but this handheld in-camera 8-bit sRGB JPEG shot shows great details in the shadows and darks


f/5.6 @ 90mm for 1/200 sec at ISO 5000

Once again, 5000 ISO - in-camera 8-bit sRGB - holy cow! The wet leaves lack the typical hot spots you'd get unless you used a circular polarizer, yet I didn't. Very impressive!


f/4 @ 90mm for 1/200 sec at ISO 800

A nice example of the contrast between smooth bokeh and crazy sharp detail


f/2.8 @ 90mm for 1/200 sec at ISO 5000

While this is a little underexposed for my taste, the default exposure with auto white balance (ambiance) did result in nice skin tones. The bokeh from this lens made the messy background vanish as well


f/2.8 @ 90mm for 1/200 sec at ISO 5000

image
100% crop of the eye from the from the above shot. Sony's auto eye AF absolutely nailed the pupil in horrible light while my daughter was dancing around


f/2.8 @ 90mm for 1/200 sec at ISO 3200

This was like the 6th frame I shot with this camera and it was the typical  shoot a photo at the closest thing next to the box when opening it up. I was immediately impressed with the detail and rich colors


f/2.8 @ 90mm for 1/200 sec at ISO 8000

Since this is a macro lens, I went in closer and was highly impressed - especially given the resolution of this camera. I couldn't do this shot handheld and get this kind of sharpness out of the highest resolution Canon and Nikon cameras

First Shots from Douglas Dubler

At the same time I am reviewing this camera, so is industry legend Douglas Dubler who destroys most photographers with a simple point and shoot. He is world famous for many things, including his ballet shots, so these photos come from his first test with the a7R III . He was simply blown away.

The following photos edited by the incredible photo editing master, Irfan Yonac, are used with permission and highlight what this camera can do in very low light.

Copyright Douglas Dubler 3 - All Rights Reserved

Copyright Douglas Dubler 3 - All Rights Reserved

Copyright Douglas Dubler 3 - All Rights Reserved

Copyright Douglas Dubler 3 - All Rights Reserved

Follow Douglas on Instagram for more photos.

Handheld Video

I don't do video as everyone who follows me on this blog knows, but that said here's a couple handheld videos that I tossed on YouTube (which completely destroys the quality):


Sony a7R III Unedited Video - XAVC S 4K 30p 60M


Sony a7R III Unedited Video - XAVC S 6MBs 30p 120fps S&Q

Terrible conditions, low-light, roughly ISO 2500, but still you can see this is nothing to sneeze at.

Conclusion

See part II for my full conclusion, but it's already safe to say that if you were on the fence about getting one of these my recommendation is an resounding YES! The dynamic range is simply incredible and with a lens like the Sony FE 90mm f/2.8 Macro G OSS, magic is sure to follow.

Despite my significant investment in Canon, I am seriously wishing Santa would bring me one of these cameras - it's that outstanding. Simply put, nothing I've tested - including Phase One and Hasselblad medium format digital cameras - comes even close.

Where to Buy?

CLICK HERE to learn more or buy the a7R III today.

CLICK HERE to learn more or buy the 90mm.

Other articles you may enjoy

If you enjoyed this article, you may also enjoy these:

Enjoy these and more on the Reviews tab as well as Ron's Recommendations.

Disclosure

If you make a purchase using links found in this article, I may make a commission. It doesn’t cost you a penny more, but it does help to support future articles like this.

NOTE: This site requires cookies and uses affiliate linking to sites that use cookies.

If you enjoyed this article, please support future articles like this by making a donation or saving money by using my discount coupon codes. Either way, your support is greatly appreciated!

This blog is intended for freelance writing and sharing of opinions and is not a representative of any of the companies whose links are provided on this site.

The opinions provided are of Ron Martinsen alone and do not reflect the view of any other entity

Thursday, September 14, 2017

A Point and Shoot Beats Most DSLR Portfolio Shots

All of the following photos were taken with a point and shoot (and no, it wasn't a Leica) which I serve up as evidence that it's more about the photographer than camera (although this is a pretty damn good camera too).

All images are Copyright Douglas Dubler 3 - ALL RIGHTS RESERVED. You may click to view full size versions in Google Chrome, but you may not save, print, download, link to, repost, etc... any without written consent.


"Summertime Boy" - 1/1250 at f/5 ISO 100 (-1 1/3 EV)


“Peruvian Jungle Lily” - 24mm at the closest focusing distance ( less than 8 inches) At f5.6


f/6.3 for 1/40 sec at 24mm (-1 EV)


"Lilies" - 24mm (widest) end of the zoom lens. At f4.5 at almost the closest focusing distance

And the camera was...


Sony RX100 IV  at B&H (review)
Also on available at Amazon

Yes, the Sony RX100 IV was used for all of those shots except the first one which was actually taken with he Sony RX100 III!

Of course, to be fair these were taken by one of the greatest living photographers of our time, Douglas Dubler (website). This legendary photographer has shot more magazine covers than most photographers have (or will have) portfolio caliber shots in their lifetime. He's also been the featured photographer for the launch of major products from Nikon, Epson and so many more. Simply put, these weren't taken by a mere mortal, but it does show off what this camera can do.

In Douglas Dubler's own words


24mm for 1/160 sec at f/8 ISO 100 (-1 EV)

Many people who are familiar with my work most likely associate me with high resolution capture and large format gallery prints. Much of this work is/was done on medium format digital backs or high megapixel DSLRs. Lately I have been exploring a different direction. Several years ago I purchased a Sony RX100 III for my girlfriend and began giving her photography lessons. As her photography progressed I noticed a look that I began to admire. 


24mm for 1/80 sec at f/5.6 ISO 100 (-1 EV)

They were done mainly at the 24mm focal length at the closest focusing distance (around 4 or 5 inches ). The small sensor gave her more than adequate depth of field at modest apertures (f4-5.6).  The wide angle lens gave just a little distortion which enhanced the subject. My best description is a hybrid of environmental and semi Macro.


24mm for 1/60 sec at f/5 ISO 100 (-1 EV)

Inspired, I began to emulate the effect with my A6500 and larger A7RII. Even with the APS-C sized sensor in the A6500 with various focal length lenses from the Sony 12-24mm ( on the A6500, a 18-36mm), to many different Zeiss,Sony and Sigma prime lenses I couldn’t get the look.  If I was shooting flowers to get the depth of field I would end up with a shutter speed that was too slow (wind vs. flowers!).  So I borrowed her camera and spent a few days at the New York Botanical Garden seriously photographing flowers. It took me one day to work out my approach but I was very happy with the beginning results.


"Maleficent Tree" - 24mm for 1/160 sec at f/5.6 ISO 100 (-1 1/3 EV) RX100 III

The next step was to make some prints, the whole point of photography.  With a little editing in my favorite Capture One V10 and of course B&W conversion done with Nik’s Silver EFex Pro 2 I was ready for the litmus test..  With my Epson P5000 and Epson’s new Legacy Platine paper I made prints that rivaled the best silver-gelatin prints.   As a test, at the beginning of one of my classes I had the students look carefully at one of  the prints and guess what camera I had used. Unanimously they declared a high resolution professional DSLR or mirrorless camera. I showed them the diminutive Sony and at first they thought I was joking. I assured them I wasn’t.


24mm for 1/60 sec at f/4 ISO 100 (-1 EV)

Since then I went out and purchased a MarkIV model which is around my neck whenever I leave my house. Even on my bike I can easily carry it in a small bag around my waist. Now no one even looks at me and I blend in with the iPhoners. I hand hold almost all of the images and as a result am able to shoot many more images. It doesn’t mean I will abandon my abstract Macro studies with the larger cameras and tripod but I have a feeling I will always have this camera hanging around my neck…

Douglas Dubler's thoughts on a couple shots


Black Dahlia - 24mm@f5.6@1/80sec, ISO 100, exp.comp.-1.3 stops

I found these two blossoms in perfect juxtaposition, full face and profile, which I am always looking for. They were the last shots out of 250 exposures that I did during my B&W class at NYBG last week.

I was actually on my way out of the garden and, in exiting, revisited the flowers I had shot earlier at around 6 P.M. I was tired after a long day of teaching but instinctively knew that those last few minutes of sublime light (exactly 7:11 P.M.) reward those who are patient. 

Processed in Capture One V10 and B&W conversion done in Nik Silver Efex Pro 2.


“Empress Lotus”

I have been trying for quite some time to get a good shot of a lotus blossom. For me that meant getting directly over the flower. Not so easy when you consider they grow in water, in this case, water that is over 5 feet deep. I surveyed all of the lotus in bloom and decided this was aesthetically my favorite. All I had to do was wait for the best light.  At around 7:10 P.M. the sun was no longer directly on the flower but was creating a beautiful soft illumination that seemed to be emanating from within the flower.

With some help from my friend Steve Titus (shown below) I was able to get an almost vertical camera angle and with the advantage of the articulating LCD could precisely compose the shot. It still took over 40 shots to get this precise uncropped composition.

Post processing, I had my friend Irfan Yonac do some digital enhancement using an “analog film” technique. It was the final step in the evolution of this photograph. Shot at 28mm@ 100 ISO @ f5.6 @ 1/200 sec, exp.comp.-1.0 stops.

Processed in Capture One software available at B&H.

Here's a funny behind the scenes shot of what it took to get this shot...


Conclusion

My review shows what mere mortals will get with this camera, but it's fun to see that in the hands of an X-Rite Coloratti Master like Douglas what is possible!

I really hope you enjoyed this guest blog from as much as I did. If so, please leave comments and check out more of Douglas's work on Instagram, Facebook,  or his website. Here's a couple more guest blogs from Douglas with his amazing work:

And here's one where Douglas breaks out the big camera that will really blow your mind:

Thanks Douglas!

Sincerely,
Ron Martinsen

Want to do a workshop with Douglas?

Contact me if you are interested in working with Douglas or doing a workshop with him in New York City.

Other articles you may enjoy

If you enjoyed this article, you may also enjoy these:

Enjoy these and more on the Reviews tab as well as Ron's Recommendations.

Disclosure

If you make a purchase using links found in this article, I may make a commission. It doesn’t cost you a penny more, but it does help to support future articles like this.

NOTE: This site requires cookies and uses affiliate linking to sites that use cookies.

If you enjoyed this article, please support future articles like this by making a donation or saving money by using my discount coupon codes. Either way, your support is greatly appreciated!

This blog is intended for freelance writing and sharing of opinions and is not a representative of any of the companies whose links are provided on this site.

The opinions provided are of Ron Martinsen alone and do not reflect the view of any other entity

Wednesday, September 23, 2015

Getting The Shot: “Indonesian Beauty II” by Douglas Dubler 3


Indonesian Beauty II

This image was captured with a Sony A7II  at f/4 @ 1/30 sec using ISO 400 with a Zeiss Otus 85mm (using a Novoflex adapter).
Retouching by
Irfan Yonac

Here’s the story behind this image in Douglas Dubler’s own words (edited by Richard Hood):

As an art form based in “the actual,” photography has always provided a meeting-ground for both beauty and truth. In over forty years shooting fashion and beauty portraits, I have consistently sought to explore this intersection, looking for moments that define a visual tapestry, woven out of  the “why,” as well as the “who.” My photography depends upon finding the right tools, creating the right environment, and establishing the right rapport with a subject, to display something of the truth within the beauty I'm capturing.  My recent creation of a portrait entitled, “Indonesian Beauty” demonstrated the process of combining technique, technology, and timing in order to capture a compelling, and transcendent image.

In the 1990s, I visited seven Asian countries in four weeks, lecturing to photographers on behalf of Fuji film. After such an intense working experience, I decided to take a rest-and-recovery stop in Bali. There, I established a routine that involved catching the sunrise each morning from a different location,  working for an hour or so until the light got too high, then retiring for some sleep and food. I'd then go out for the sunset in a new location. I had planned to spend a week in Bali, but was so captivated by colors and culture, I remained for three weeks.

When I returned to New York I was introduced to Gde Arsa Artha, who has since become a good friend, and who has, over the years, continued to teach me about Balinese art and culture.  Just last month, Gde was responsible for my visit to the Indonesian Consulate, where we were invited to attend a fashion show  they were hosting for four Indonesian couture designers, who were in New York for the Couture Show.  Always wanting to put my best foot forward and following Pasteur’s mantra “Chance favors always the prepared mind,” I organized a mini entourage consisting of a digital tech/1st assistant, 2nd assistant, hair and make-up artist, and several others to help with the equipment. Out of this visit would come my  portrait of Chitra, the “Indonesian Beauty,” featured here in an earlier blog, and the current portrait of Sarah Azca, shown here.

Figuring on just a simple main light and one light for a background if necessary, I packed one of my Broncolor Grafit 3200 wt./sec packs with one of my “signature” Lightbar 120s and a regular Pulso head.  (over $18,000 worth of lighting equipment at retail).  When we arrived at the Indonesian Consulate, they were in the process of dressing the models and doing their walk-throughs in preparation for the show.  I took a few minutes to survey the three floors looking for the best place to set up, where I could at least take advantage of some of the wonderful available light that was entering through a beautiful domed skylight, similar to a mini-Guggenheim.

I decided that the second floor would be more central as that was where the dressing rooms were and I could capture the models both coming and going.  I had the Lightbar 120 set up and proceeded to do a few captures to check the light.

I didn’t like what I saw.

But more of an issue was the fact that no matter where I positioned the light, someone was always walking in front of it and almost tripping on the power cord or head extension.  I quickly realized that, even if I got the light worked out to my liking, the logistics were such that the decision to  light the shoot had been wrong.  In the past, this would probably have been the end of my day.  Here is where the importance of having the best tools comes to the fore:  after a few readings with my Sekonic Litemaster Pro light meter, I decided that with the super fast Zeiss lenses I had and the image stabilized Sony A7II camera, I could work with the available light, filling when and where necessary with my Roscopak silver/white reflector

My next objective was to find one or two models with whom I thought I would be able to work well. Initially, I had assumed  that the majority of the girls were from Indonesia. But after speaking to several of them, I learned that, in fact, most were from New York City.   My hair and make-up artist, Sylvia Pichler, while touching-up the make-up,  was alerting me to interesting looks on the girls.  One of the first models she brought to my attention was Sarah Azka, an Indonesian  who had been flown to New York by one of the designers.  Instantly, I thought she had a great look and the dress and headpiece she was wearing were a beauty photographer’s dream.  We took a few photographs on the lower floor,, where the light wasn’t to my liking so I told her that when she was done with the show I would like to take some more photographs.

I continued to work basically filing time waiting for her to be finished.  When she appeared, I immediately had my friend Gde tell her to follow me upstairs and I found a spot where the light had a beautiful bounce quality, though because it was after 3:00 P.M. my f-stop was starting to drop quickly.  I knew I had to work quickly. I changed my ISO to 400 and put the incomparable Zeiss Otus 85mm f1.4 on the A7II with the Novoflex adapter.  At f 4 I was at 1/30 sec. which was about as slow as I wanted to go, hand-holding this heavy piece of glass.  With my “previous” camera, I would have had to be at 1/320 sec. which would have increased my ISO to over 3200. A definite “quality” deal breaker.

I shot 230 images that day.  This photograph was number 227.  When I shot it I knew there was no need to continue. I had the shot!

So it all came together. I had the right tools in the right place at the right time. I had the right model, and, though there was a definite language barrier, I was able to establish that few precious moments of rapport with her, so necessary to capturing the intangible magic that makes up a great beauty or portrait shot.

Follow Douglas on Social Media

Want to follow Douglas on social media? Click on the following links and start to follow him:

Want to do a fashion photography workshop with Douglas and Ron in New York City?

Douglas is an iconic fashion and beauty photographer with hundreds of magazine covers to his credit. If you are interested in joining him in Manhattan for a workshop, please contact me and I’ll add you to the list for future workshop announcements. Exact details will be included when space for the next workshop opens up.

Other articles you may enjoy

If you enjoyed this article, you may also enjoy these:

Disclosure

If you make a purchase using links found in this article, I may make a commission. It doesn’t cost you a penny more, but it does help to support future articles like this.

NOTE: This site requires cookies and uses affiliate linking to sites that use cookies.

If you enjoyed this article, please support future articles like this by making a donation or saving money by using my discount coupon codes. Either way, your support is greatly appreciated!

This blog is intended for freelance writing and sharing of opinions and is not a representative of any of the companies whose links are provided on this site.

The opinions provided are of Ron Martinsen alone and do not reflect the view of any other entity

Tuesday, September 1, 2015

Getting The Shot: “Indonesian Beauty” by Douglas Dubler 3

Copyright Douglas Dubler 3 - ALL RIGHTS RESERVED
Indonesian Beauty

This image was captured with a Sony A7II  at f/4 @ 1/60 sec using ISO 100 with a Zeiss Makro-Planar T* f/2 100mm (using a Novoflex adapter). 
Retouching by Irfan Yonac

Introduction

Douglas is a good friend of mine who was the driving force behind my successful Printing Series and eBook. Click here to see my printing series article about him, and you can read his latest bio at the end of this article.

In Douglas’ Own Words

The most successful photographs have at least three things in common. They are, and not necessarily in order of importance; concept, technique, and execution.

Last week I attended an Indonesian festival celebration in New York City with my Balinese friend, Tjokorda Gde Arsa Artha. The Indonesian Consulate General on 68th Street between Madison and 5th Avenue had the block closed to traffic and had food and craft vendors selling their wares to the public.

With my friend Gde’s guidance and contacts we were able to enter the Indonesian embassy where they were about to begin a “fashion” show with exotic Indonesian beauties dressed in their colorful ethnic costumes.

The first thing that caught my eye was the bright 3 P.M. sun backlighting these large pieces of red fabric that were serving as curtains for the fashion show. I quickly had my friend’s son Dalem Arsa Artha stand in front of the curtain and I did a portrait of him. The red background was like a large backlit transparency which reminded me of a technique I used in the studio years ago creating backgrounds using front and rear projection screens which gave me saturation and color palette impossible to achieve with the standard choice of seamless papers. It quickly became one of my trademarks.

Fast forward to last week. Being a beauty photographer, I immediately began looking at the 20 or so girls and women for a beautiful and interesting subject. One woman in particular, Chitra Irawan, caught my attention with the combination of her colorful costume, elaborate beaded veil and beautifully reserved demeanor. I had my Friend Gde approach her and ask her if she would pose for me. She agreed and quickly told me she had no experience as a model. I knew I would only have a few minutes to try and get a good shot. Her connection with the camera would make or break the shot. Somewhat of a tall order to expect from a non-professional.

I had her stand directly in front of the red curtain which was still backlit by full sunlight. On my Sony A7II 24MP camera I attached my superb Zeiss 100mm f2 lens via the Novoflex adapter. I set the aperture to f4 to give me about one inch or so of depth of field at the distance I was at. I used the “focus peaking” feature on the camera to ascertain that just the beads were sharp and let her face and eyes go slightly soft. I gave her a minimum of direction but she understood perfectly and in this shot gave me just the “right” look. Instinctively I knew I had the shot.

The whole process took about 15 minutes at most. I took exactly 23 exposures and every one was focused precisely where the yellow “marching ants” indicated. Remember I was doing this with a manual focus lens. With the IBIS camera stabilization and a shutter speed of 1/60 sec., I still had no problem capturing razor sharp images. Something I have never been able to do with a DSLR. Within 5 minutes the sun had gone behind some clouds and the”red” background was no more.

As an aside comment to photographers who are complaining about Sony’s compressed raw file I say get a life and take some pictures! I pushed this file .17 of a stop, not the 5 or 6 stops that apparently produces the digital artifacts that the “pixel peepers” are seeing. I come from an analog background where my typical film push was +1/8 stop. So slight that only one lab in New York City could do it.  So to me +5 or whatever is incomprehensible.

To conclude, the success of this photo is tied to my many past experiences over forty years as a photographer. When I find myself in a new situation, I usually use as a point of reference/departure one of those experiences or a combination of them. I generally make creative decisions very quickly and for the most part edit in the camera.

The lighting for me is always number one. I can’t make it in Photoshop. Next, the right choice of lens and aperture. The Zeiss 100mm f2 has that holy grail of sharpness and beautiful bokeh that you can’t get from any other lens (except my favorite Zeiss 135mm f2 APO Sonnar). Next, the perfect composition.

And last and most important, the connection with your model/subject. Without that all of the above is for naught. Of the 23 captures this is the only one with this feeling. Some people might say that I was lucky…

Color managed by X-Rite Photo software.

About Douglas Dubler

Douglas Dubler is a fashion and beauty photographer who seamlessly joins craft and creativity to produce some of the most memorable images in editorial, advertising and fine art photography. Dubler has been able to achieve this union by synthesizing right and left brain thinking. His early training in Fine and Liberal Arts at Boston University enriched him with an articulate sense of form, color, and composition. Initial experiences as a plastic sculptor and silk screen artist instilled in him a great respect for the craft and workmanship necessary to create fine art, and produced the dedication to detail that appears in his work as a photographer. Early mentors in his creative life were Ansel Adams and Isamu Noguchi.

Dublerʼs professional photographic career began in the late ʻ60ʼs in California and the Virgin Islands where he photographed underwater life. Seeking dry ground, he made the transition to studio photography in the early ʻ70ʼs. In 1976 his desire for commercial success drew him to Los Angeles where he began to specialize in fashion and beauty photography. During this period Douglas was mentored by renowned fashion photographer Neal Barr with whom he has maintained a decades long friendship. Working primarily with major motion picture studios, Douglas photographed celebrities and subsequently obtained cosmetic assignments from Max Factor and Redken Laboratories. In addition he also began working as a photographic consultant and special photographer on feature films.

Access to European editorial markets and major cosmetic accounts lured Douglas to New York in 1982. His editorial assignments brought him primarily to Italy where he spent extensive amounts of time working for Amica, Lei, and Italian Vogue. His celebrity editorial clients include Jacqueline Bisset, Jane Fonda, Shirley MacLaine, Dolly Parton, Brooke Shields, Andie MacDowell and Sharon Stone.

Dublerʼs innovative techniques and his consistent ability to reproduce accurate, pleasing skin tones with minimal retouching has produced a client list of major cosmetic companies including Max Factor, Revlon, Clairol, Coty, Redken, Avon, Charles of the Ritz, Sally Hansen, and Alexandra de Markoff. His commercial successes have been recognized by the industry with awards from the Starch Report, Communication Arts, Art Directors Club and Clio.

For the past decade, Douglas has been working as a creative director/ photographer for the majority of his clients. Prompted by his desire to be involved at the conceptual phase of a project, he finds the challenge more fulfilling and is a vocal advocate of this holistic approach to the type of images he creates. Recent clients in this phase of his career are LVMH, Paspalley Pearls, CNN, Epson, Broncolor, Nikon and Nik Software.

His personal work, unlike his commercial work, is eclectic and runs the gamut from surreal abstract to still life to architectural. His digital fine art prints are represented by Mertens Fine Art in Montecito, California and Throckmorton Fine Art in New York City. Teaching venues include The School of Visual Arts where he is a graduate instructor, Brooks Institute, International Center of Photography, Hallmark Institute of Photography, the University of Miami and Palm Beach Photographic Center.

The ability to meld technology with creative imagery has firmly established Douglas Dubler as an innovator and artist and will continue to create a constant demand for his iconographic beauty and fine art images.

Want to do a fashion photography workshop with Douglas and Ron in New York City?

Douglas is an iconic fashion and beauty photographer with hundreds of magazine covers to his credit. If you are interested in joining him in Manhattan for a workshop, please contact me and I’ll add you to the list for future workshop announcements. Exact details will be included when space for the next workshop opens up.

Other articles you may enjoy

If you enjoyed this article, you may also enjoy these:

Disclosure

If you make a purchase using links found in this article, I may make a commission. It doesn’t cost you a penny more, but it does help to support future articles like this.

NOTE: This site requires cookies and uses affiliate linking to sites that use cookies.

If you enjoyed this article, please support future articles like this by making a donation or saving money by using my discount coupon codes. Either way, your support is greatly appreciated!

This blog is intended for freelance writing and sharing of opinions and is not a representative of any of the companies whose links are provided on this site.

The opinions provided are of Ron Martinsen alone and do not reflect the view of any other entity

Tuesday, October 30, 2012

PhotoPlus Expo 2012 Trip Report (Part 1 of 2)


Print Masters & Photography Legends Eddie Tapp & Douglas Dubler

PhotoPlus Expo is the place to be for photographers and photo editors each year as all the big names in the industry (excluding the Kelby Media Empire) come out in force to show off their new gear. There’s also an endless number of photography legends giving presentations and interacting with the attendees, so it’s really a ton of fun to be there and rub elbows with your favorite photographers.

This this first of a two part series, I go into some of the non-product highlights and in part two I dive in to some of the products that caught my eye at the show (like the Canon 6D featured on my blog yesterday).

Industry recognition for ronmartblog.com this year

This year I got to enjoy some of the spotlight with my work being featured in four major booths:


Nik Software gave me the stage for a photo editing demo
(Cell phone photo courtesy of Art Marshall of NEC)


NEC had my work on all of their displays


Canon featured my work on the new iPF6450 that I’ll be reviewing this holiday season


Elinchrom featured my ring flash shot as well, albeit as Rob instead of Ron Martinsen – ha, ha

Models Galore

If you are patient and wanted to improve your portfolio on the cheap, then PPE is the place to go as many booths feature amazing models in good light for photographers to test out their products. Here’s just a few examples:


Panasonic had a biker babe


Unique Photo had a pretty cool dude running around


Sigma had great models and lighting to show off their lens on your camera

All of my images were taken with a Canon EOS 1D X with the new Canon 24-70mm f/2.8L II USM lens with available light and auto ISO.

Highlights of the Show (Part 1 of 2)

Everybody is out to wow the crowd at PPE, so there’s always something fun in the biggest sponsors booths. Here were a few of my favorites:

4K Display by Sony

I first wrote about 4K displays in 2010, but every time I’ve seen them since then I still get impressed. The latest was the 4K display by Sony in the form of what appeared to be their much touted 84” display:

All of the images on display impressed, but this one grabbed me the most when I was examining the details. This photo has not been sharpened beyond in-camera sharpening and when you do a 100% crop this is what you get:

Even if this were a print, that would be pretty impressive but the fact that it’s a image on a TV that is just astonishing!

Nikon Cuts a D4 and Brings a Mad Scientist


Nikon D4 split in half was cool but also painful to see


HD Video was front and center with this mad scientist hands-on filming exhibit at Nikon

Canon had amazing prints from the new iPF6400, iPF6450 and iPF8400


Canon featured amazing prints, but Michel Tcherevkoff’s was my personal favorite

Lots of a Amazing Prints


Hahnemühle had lots of great prints, but this was
one of my favorites prints of the show


Metal Mural dazzled the crowd with its metal prints,
so I’ll be working with them on a future article


Fujifilm showed off its best shots including this amazing floral shot
taken with a X-Pro1 by Azuma Makoto


Nikon didn’t disappoint either with lots of great D800 based imagery


Canon had walls of jaw dropping images as well


And no show would be complete without Epson’s Signature Worthy Collection

Now check out part II

Learn more about the cool products at PPE this year in this article:

PhotoPlus Expo 2012 New Product News (Part 2 of 2)

Disclosure

If you make a purchase using select links in this article, I may make a commission.

NOTE: This site requires cookies and uses affiliate linking to sites that use cookies.

If you enjoyed this article, please support future articles like this by making a donation or saving money by using my discount coupon codes. Either way, your support is greatly appreciated!

This blog is intended for freelance writing and sharing of opinions and is not a representative of any of the companies whose links are provided on this site.

The opinions provided are of Ron Martinsen alone and do not reflect the view of any other entity