On July 31st, 2013 my longest running discount and partnership on my blog expired, so I decided I’d show my appreciation for all they have done for me by giving you a couple new videos that shows why I like the Nik Collection by Google.
Conclusion
This is one of many examples of what you can do, but this is often the secret sauce of many well respected photographers.
Goodbye Special Offers
If you didn’t read this in time, I’m sorry to say that you’ve missed the boat. The lowest price I was ever able to get for the best Photoshop plugins on the market has expired.
Other articles you may enjoy
If you enjoyed this article, you may also enjoy these:
If you make a purchase using links found in this article, I may make a commission. It doesn’t cost you a penny more, but it does help to support future articles like this.
NOTE: This site requires cookies and uses affiliate linking to sites that use cookies.
If you enjoyed this article, please support future articles like this by making a donation or saving money by using my discount coupon codes. Either way, your support is greatly appreciated!
This blog is intended for freelance writing and sharing of opinions and is not a representative of any of the companies whose links are provided on this site.
The opinions provided are of Ron Martinsen alone and do not reflect the view of any other entity
My partnership and special offers with Nik Software have ended. Here’s where you can learn more about the Nik Products that I have reviewed and learn how you can get a great deal on onOne Software just by being a Nik Collection owner.
Click here to learn more and see the articles below to see my thoughts on each of these products:
Save 50% on the Perfect Photo Suite 7 (with a FREE upgrade to 7.5) if you own the Nik Collection by Google
Frequently Asked Questions
The following is my understanding based on my conversation with my Nik Software marketing contact and what I’ve read on the Google website. I’m not responsible for any errors or change in policy that is beyond my control. Buyer beware.
What happened to your discount?
It’s gone. My partnership with the Nik Team (now acquired by Google) has ended. I’d like to thank Kevin, Josh & Laurie for their support and wish them the best in the future.
I already owned the collection, but I didn't get the free upgrade email. What do I do now?
Start by checking your junk mail folder. If you can't find it there, check your deleted items. If that doesn't work, then try to think if you had a different email account that you used to register or purchase your Nik software. If none of that works, then send an email to supportus@niksoftware.com to request a new email.
I clicked on the link but it wasn't a exe. What do I do with this file?
Odds are you are using Internet Explorer. Instead of clicking, choose right click Save As... and save it as a exe on your desktop. If that doesn't work, download the file and RENAME it to have a .exe extension, then run it. Alternatively you can use Chrome as shown in my videos and this won't happen as it lacks this security feature to prevent you from downloading malicious exe's off the web.
I just bought the complete collection - how do I get a refund?
It is my understanding that those who purchased within the last 30 days will get a email (check your junk mail folder) within the next couple days that will get an automatic refund of the purchase price different (i.e., you get it for $149 - max). The exact cutoff date is 30 days prior to today's announcement. They can't go back forever, so if you go back 31 days then you are out of luck.
What happen to my product ID's?
They've been eliminated - your email address that you used to register your product is your new product id. Your email from Google (check your junk mail) has details on how to install the new Nik Collection by Google upgrade.
What's new in the upgrade?
Branding, Windows 8 support, Single Installer and a new licensing model that doesn't require PID's. I'm not aware of any fundamental changes to any of the Nik products.
If I only own one Nik Software product what happens?
You are very lucky because you get a FREE upgrade to the entire collection. Count your lucky stars! ;-)
What about upgrades?
All Nik customers who get the email will be upgraded to the latest version at no charge. I've also been told that in the future upgrades will be free, so it sounds like it's pay one price to play.
Is Google using this as a trick to force us to all pay for an upgrade to a new or replacement product here in 6 months?
Not from what I understand. It sounds like they plan to carry the product forward and just wanted to simplify the distribution, licensing and upgrade process.
Wait Ron, I asked for your advice and you told me X and now this happens. You suck!
Hey, I'm very sorry as I just found out at 8:36 AM this morning like the rest of the world. I had no clue this was happening and it's financial impact on me is going to be significant, so I feel your pain.
Does this mean Nik is now in maintenance mode and we won't see any real upgrades?
It's my understanding that the product group still exists and is working on new products, so I don't think that is the case. I have no facts though so this is pure speculation based on rumors.
Now that you don’t make a commission off Nik products, which program would you get? This or a competing product?
Click here to read my advice on which plug-ins to buy. Nik still makes the best products in the business, so my advice doesn't change based on this. This will impact the business model of this blog, so I will lose money over the long haul. If you find this blog useful, donations will become more important over the long haul to sustain this blog now that one of my top partners has changed the game.
I didn't get the email, what do I do?
Start by checking your junk mail folder. If you can't find it there, check your deleted items. If that doesn't work, then try to think if you had a different email account that you used to register or purchase your Nik software. If none of that works, then send an email to supportus@niksoftware.com to request a new email.
Upgrade Video
Here’s a little video I did on my Windows system that shows how you can upgrade quickly and easily for both Photoshop and Lightroom:
Mac Users Video
Here’s a little video I did on my Mac OS X 10.8.2 system that shows how you can upgrade quickly and easily for both Photoshop and Lightroom:
Zenfolio - The Ultimate place to host your photos on the web
Disclosure
If you make a purchase using links found in this article, I may make a commission. All information is provided to the best of my ability based on reliable sources, but my sources and I do not make future policy so changes are possible without notice.
NOTE: This site requires cookies and uses affiliate linking to sites that use cookies.
If you enjoyed this article, please support future articles like this by making a donation or saving money by using my discount coupon codes. Either way, your support is greatly appreciated!
This blog is intended for freelance writing and sharing of opinions and is not a representative of any of the companies whose links are provided on this site.
The opinions provided are of Ron Martinsen alone and do not reflect the view of any other entity
This offer has moved - CLICK HERE to see the latest offer
For a limited time only, owners of Nik plug-ins including the Complete Collection, ColorEfex Pro, Silver Efex Pro, Viveza, or Dfine, can get 50% off onOne Software's Perfect Photo Suite 7 Premium Edition! Perfect Photo Suite 7 Premium Edition includes seven integrated products that give you more capabilities and more power and than any plug-in collection available. It seamlessly integrates with Photoshop, Lightroom, and Aperture, and unlike other plug-ins, you can also use it as a standalone application with full photo editing capabilities including layers. When you become an onOne Software owner, you'll have peace of mind knowing that your software investment will continue to reap rewards from our ongoing development of new and ground-breaking technologies today and into the distant future.
Ordering Info
Your cart should look like this if you clicked the correct link
If you make a purchase using links found in this article, I may make a commission.
NOTE: This site requires cookies and uses affiliate linking to sites that use cookies.
If you enjoyed this article, please support future articles like this by making a donation or saving money by using my discount coupon codes. Either way, your support is greatly appreciated!
This blog is intended for freelance writing and sharing of opinions and is not a representative of any of the companies whose links are provided on this site.
The opinions provided are of Ron Martinsen alone and do not reflect the view of any other entity
Gyeongbokgung Palace HDR in Nothing But Nik Collection
Gyeongbokgung Palace HDR using multiple plug-ins
With the great deal on the Nik Collection (click here) that’s everybody has been taking advantage of, I have been getting questions about the collection and where other products fit in. One of the most common questions is:
Can I do everything with just the Nik Collection?
The answer that is yes and no.
Here’s the thing – we all know that in theory you can do anything a third party add-in does in Photoshop by itself, so “technically” you don’t need any plug-ins. However, the reality is that many effects are hard to create and some are just so easy using plug-ins that it doesn’t make sense to roll your own. As a result we buy plugins to both make our lives easier and to add new tricks to our toolbox.
What I’ve found is that the more tools that I have in that toolbox, the more I tend to use them which varies the outcome of how I edit a photo. Honestly if I used the same software and edited the same photo twice I’d probably have some variation (just like if you have two photographers photograph the same exact subject at the same time), but I tend to vary more when I add more editing tools into my workflow.
Here’s the example images I used to test this theory using these three exposures:
Original 3 Images (-2, 0, +2 EV) Metered off the sky for the 0 Ev exposure Canon 1D X, f/10 @ 28 mm, ISO 1000, No Flash
Since I wasn’t happy with any of the bracketed exposures I decided to do an HDR which was prefect for this test since the Nik Collection includes HDR Efex Pro 2 which did well in my HDR Comparison article. I also had noise since this required ISO 1000, so it also gave me a chance to use Dfine in one and my favorite product – Noiseware in the other.
My restricted to Nik only workflow
Here’s how my layers palette ended up for the mostly Nik only version after using HDR Efex Pro (on the Background layer – after tone mapping):
I have an asterisk here because I allowed myself to use Photoshop features like masking and the Photo Filter (for the dull sky to give it some nice blue color), but beyond that and standard healing brush stuff to clean sensor spots – this was an all Nik workflow for the first image in this article.
The workflow was basically HDR Efex, followed by noise removal with Dfine, then clean up some sensor spots. I then did some pre-sharpening on my clean base image using Sharpener Pro followed by some selective adjustments with Viveza. I warmed up the image with Brilliance / Warmth and then made some contrast adjustments using Pro Contrast – both from Color Efex. I then did a little more corrective work with Viveza and then used Silver Efex to create a low opacity layer to just give my midtones some more oomph (I do this quite often). Finally I didn’t like the sky color compared to the non-Nik only one so I used the same photo filter as below from Photoshop. I finished up with Sharpener Pro for the final creative sharpening.
Using whatever I wanted (my natural workflow)
Without any limitations, here’s how I processed this particular photo with all my plug-ins at my disposal. I did forget to try out Topaz Adjust which I use quite often, but it was getting late and I just forgot. That said, I’m satisfied with the results, so here’s how I got there:
The big differences here was that I started by using Photomatix to do my HDR, then I brought that into Photoshop where I used Noiseware – my favorite noise reduction product. I was a little unhappy with the color cast so I used a white balance technique I learned in Welcome to Oz 2.
I made a little curves adjustment and then went to the Color Efex Skylight filter to give my image some warmth, but I used U-Point controls to remove the effect from the sky. I had forgot to clean my sensor spots, so I just did that here.
I then made the sky blue using the Photo Cooling Filter #82 that comes with Photoshop and then I worked on the sky issues I got from Photomatix. I then used my favorite filter, Tonal Contrast to give the image some nice color and detail. I warmed it up a bit more with the Brilliance and Warmth Filter. I then went to Perfect Photo Suite and used the Red Enhancer filter in Perfect Effects to give it that extra pop that makes it stand out from the Nik only version.
I finished up with some sharpening using PhotoKit just to mix things up.
Conclusion
The net result here is that I used different products and got different results. There’s so many variables involved that I don’t think this proves that one method is better than the other – they are just different. I’m satisfied with both versions, but I like the mixed products version better (and it was the one I did first).
To answer the question head on, I don’t think that you necessarily NEED any additional plugins after you have the Nik Collection. It’s a great group of products and you can see that I used some in both workflows. In fact, on any given image I might have used more Nik products (especially Viveza). However, I like the ability to use my favorite noise reduction software and explore different plug-ins. In this example I didn’t use too many, but very often I’ll use Portraiture with people and Topaz Adjust with pretty much any shot that doesn’t feature people.
Other articles you may enjoy
If you enjoyed this article, you may also enjoy these:
If you make a purchase using links found in this article, I may make a commission. It doesn’t cost you a penny more, but it does help to support future articles like this.
NOTE: This site requires cookies and uses affiliate linking to sites that use cookies.
If you enjoyed this article, please support future articles like this by making a donation or saving money by using my discount coupon codes. Either way, your support is greatly appreciated!
This blog is intended for freelance writing and sharing of opinions and is not a representative of any of the companies whose links are provided on this site.
The opinions provided are of Ron Martinsen alone and do not reflect the view of any other entity
See the bottom of this article for a 15% discount offer on this product.
This article refers to version 4.1.1, but as of 8/7/2012 with version 5.0, I still consider it the best noise reduction software product on the market.
Ever heard of Scott Kelby (founder of NAPP)? Well, if you’ve been reading this blog you sure have because he’s the biggest and best Digital Photography, Photoshop & Lightroom book author on the planet. Well when Scott says something is good, I listen and he recommends Imagenomic Noiseware Professional in his Lightroom 2 for Digital Photographers and The Adobe Photoshop CS4 Book for Digital Photographers. After spending a month with this product, I understand why. This product has the best automatic mode of any product I have ever used. It seems to have the best algorithm for knowing what to sharpen and what to leave alone and how to avoid destroying the sharpness of your image in the process of trying to make that noise go away.
How does it work?
While the user-interface of this product is fairly intimidating, the good news is that it is so damn smart that you really don’t need to use it! Here’s what it looks like on Window Vista system, but it is available on Mac OS as well:
It’s smoking fast and the Settings up at the top left corner of the screen were sufficient enough for my needs. These settings are like presets of the sliders below, so Night Scene as shown in the image above is simply raising the Noise Reduction values. This is very much like presets in Adobe Lightroom, and a brilliant way to make the complex simple. For those wanting more control, there’s a wealth of options and ways to set measure points. However, I found that I didn’t need it. This is a run and click OK solution that I just store on a merged (CTRL+SHIFT+ALT+E in Photoshop) layer so I can undo if I change my mind later.
Noise Reduction Roundup Images
This product is one of three excellent after-market products that I am reviewing as part of my Noise Reduction Roundup article.
Initially I was processed the original images in Canon’s Digital Photo Professional (DPP) 3.5. When one of the product engineers raised a concern about JPEG compression I decided that it made more sense to import the RAW into Photoshop via Adobe Camera Raw (ACR) 5.2. I then used that single PSD to work on all the photos.
Here’s the exact process I used:
Open CR2 in Photoshop CS4 32-bit on Windows Vista 32-bit
This launches ACR 5.2, go to the Detail tab and set Noise Reduction to 0 (XMP data from disk has cropping info – XMP was generated from Lightroom 2.3 where I catalog my files)
Open object as a Smart Object at Original Size
Duplicate the layer twice
Rasterize the third layer & copy 3 more times
Name each layer (original, acr, photoshop, noiseninja, dfine, noiseware)
Save PSD (these are huge)
Apply corresponding filter to each named layer (using layer comps to define each layer and hide other layers) using default values (run filter, press OK when dialog appears)
Save PSD
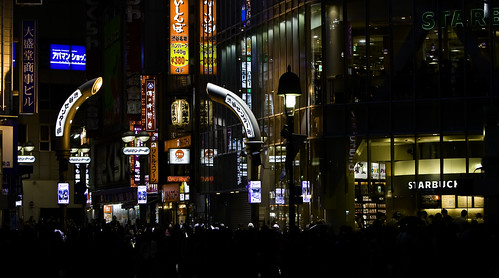
Switch to each layer (using layer comps) and do a File | Save As… JPEG and choose 12 when the dialog comes up (although by accident I did 10 on Tokyo for all of them).
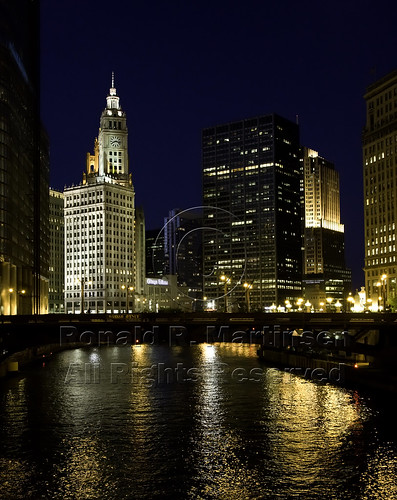
For Chicago, I created a Text layer watermark and showed both the image and watermark layers.
I realized that these images had the wrong color profile, so I had to re-open them all, apply the sRGB color profile and save again at JPEG 12.
The images below are part of the roundup images. The original link shows a JPEG 12 version of the original with no noise reduction added (the default setting is always to add a little). The Auto link was processed on a duplicate layer using the automatic settings (i.e., the same results you’d get if you ran the filter and just hit OK right after installing this product). This image was saved as JPEG 12 in Adobe Photoshop CS4. The Suggestion version was processed the same way, but with the instructions found below the links. As you can see from the images below the results are outstanding. Hover over images to see before and after (using auto) results, but you have to look very carefully. Hints about where to look are included for each image, but its best to click the hyperlinks to see the full size images and switch between tabs in your browser to see the differences. You may download and compare them in Photoshop, but please delete them when you are done comparing.
This article includes a before, auto and suggested 100% crop to compare the differences. For the best results, click on these images to view them at 100%.
The final article will include six 100% crops next to each other so you can more easily see the differences together, so stay tuned to this entire series for the best results.
Here’s a shot I took with a Canon G9 at ISO 400 which was fairly noisy, but thanks to Noiseware you can see how nice it cleans up. Hover over the shot below to see the before and after (pay attention to the top of the image to see the bad noise in the original). This is straight out of camera with no post-processing, so it still needs a little work (especially sharpening):
David McDonell of Imagenomic (at the time this was originally written) offered the following suggestions to improve the Noise Reduction improvements of this photo:
Set the Preset to Night Scene.
In the Frequency tab, go to the group called Noise Level and set the slider Mid Freq to 0.
In the Frequency tab, go to the group called Noise Reduction and set the slider Mid Freq to 60%.
Conclusion
This is the product of choice recommended by Photoshop guru, Scott Kelby. I hadn’t heard about this product until he mentioned it in one of his books, and I’ll admit that my expectations for it were low. After all, Noise Ninja was king in my book, so how could this product compete with that? Well, the reality is that this product blew me away and yielded out of box results that knocked my socks off. This is how the default noise reduction should be done in my book, so it is very easy to recommend this product. The user-interface offers lots of powerful adjustments, similar to Noise Ninja, but it offers some ease of use features like its settings list which allows you to select some common user scenarios and get a new automatic result. I wish it had a noise brush or U-Point controls to help with selective noise reduction, but the reality is that I can easily do that myself with a layer mask (as I typically did with Noise Ninja in the past).
15% Off Discount Offer
Be sure to enter the coupon code RONMART2012 when you check out for a 15% discount on the following versions:
If you make a purchase using links found in this article, I may make a commission.
NOTE: This site requires cookies and uses affiliate linking to sites that use cookies.
If you enjoyed this article, please support future articles like this by making a donation or saving money by using my discount coupon codes. Either way, your support is greatly appreciated!
This blog is intended for freelance writing and sharing of opinions and is not a representative of any of the companies whose links are provided on this site.
The opinions provided are of Ron Martinsen alone and do not reflect the view of any other entity
You may also enjoy my What Plug-ins Should I Buy?article to see where the Nik Suite stack ranks against the myriad of photo editing products.
Here’s where you you enter the code in the shopping cart (15% discount shown below, but this code will be 20% beginning Wednesday November 23rd at 9:00 AM):
If you’ve followed my blog and Nik Software sales in the past, you know that this is usually a once a year deal. If you’ve been holding out, now is the time to get the biggest savings of the year.
NOTE: This site requires cookies and uses affiliate linking to sites that use cookies.
If you enjoyed this article, please support future articles like this by making a donation or saving money by using my discount coupon codes. Either way, your support is greatly appreciated!
This blog is intended for freelance writing and sharing of opinions and is not a representative of any of the companies whose links are provided on this site.
The opinions provided are of Ron Martinsen alone and do not reflect the view of any other entity
If you missed the Nik Software webinar by Janice Wendt (see here), I’ve created a video where I try to replicate what she did based on my own notes from her presentation. This results in my workflow being a more choppy than it typically is, but hopefully you’ll still get something out of it.
I recommend you view these videos in full screen using HD and turn your sound volume level up.
I begin by using Dfine to do noise reduction on the image to prepare it for the rest of its editing journey:
To hear Nik Radio’s interview of Ron (9/23/10 episode #41), click here.
Special Offer
To get a discount just enter the code (see my discount coupon code page for updates if this doesn’t work):
If you did everything correctly you should see the correct price. My code also works for other versions – not just upgrades, so save on most Nik Software products when you use this code!
Prices subject to change without notice. I will get a commission and you’ll get a discount if you purchase using my code, so help us both by using the code!
NOTE: If any other codes are listed please choose REMOVE and enter mine as it’s the best deal you can get for this product!
Nik Software customers in Europe should contact europe@martinsen.com to get more information about the discount.
Disclosure
Nik Software is a partner of this blog. If you make a purchase using my code, I may get a commission. Please support this blog by using my coupon code. This is a video I created based on the content of the webinar presented by Janice Wendt at Ron’s request to Nik Software as a public service to his readers.
NOTE: This site requires cookies and uses affiliate linking to sites that use cookies.
If you enjoyed this article, please support future articles like this by making a donation or saving money by using my discount coupon codes. Either way, your support is greatly appreciated!
This blog is intended for freelance writing and sharing of opinions and is not a representative of any of the companies whose links are provided on this site.
The opinions provided are of Ron Martinsen alone and do not reflect the view of any other entity
Ever wonder why your captured images do not live up to your expectations? The exposure was right, the lighting was right, and most important, the framing was right. But the image did not live up to what you envision. Learn re-touching techniques that bring back the “alive” feeling, the mood, and all that inspired you when you committed to capture the image.
Her techniques remove the need for tedious selections and endless numbers of steps. These lessons are developed in such a way to save countless hours in front of your computer screen. Janice will teach how to get the most out of your workflow, optimizing raw images, noise-reduction techniques, global adjustments vs. targeted adjustments, selective enhancements, bringing out detail, applying traditional techniques, black and white images from color capture and creating a style with your retouching.
RonmartBlog.com and Nik Software have teamed up to bring you this special webcast exclusively for Ron Martinsen Photography Blog readers. Ron’s been a big fan of Nik Software for years and was one of the first web sites to offer a 15% discount off Nik Software (coupon code RMARTINSEN), so he’s very excited to have all of his loyal readers get to know their Nik Software products during this presentation. If you haven’t purchased any Nik Software products yet, you’ll really enjoy seeing the cool things that Janice can do with Nik Software. You are certain to see why Ron loves these products so much and uses them on nearly every photo he edits!
Janice’s teaching technique is designed to energize and inspire you to see what is possible in the final steps of image preparation. Tools to be used include: Photoshop CS5 and the full suite of Nik Software products.
Sign Up Now
This session will take place on Monday, July 11, 2011 at 5:00 PM - 6:00 PM PDT. It is open to blog readers around the world. To register, simply click this link:
To hear Nik Radio’s interview of Ron (9/23/10 episode #41), click here.
Special Offer
To get a discount just enter the code (see my discount coupon code page for updates if this doesn’t work):
If you did everything correctly you should see the correct price. My code also works for other versions – not just upgrades, so save on most Nik Software products when you use this code!
Prices subject to change without notice. I will get a commission and you’ll get a discount if you purchase using my code, so help us both by using the code!
NOTE: If any other codes are listed please choose REMOVE and enter mine as it’s the best deal you can get for this product!
Nik Software customers in Europe should contact europe@martinsen.com to get more on the discount.
Disclosure
Nik Software is a partner of this blog. If you make a purchase using my code, I may get a commission. Please support this blog by using my coupon code. This webinar is being presented at Ron’s request to Nik Software as a public service to his readers.
NOTE: This site requires cookies and uses affiliate linking to sites that use cookies.
If you enjoyed this article, please support future articles like this by making a donation or saving money by using my discount coupon codes. Either way, your support is greatly appreciated!
This blog is intended for freelance writing and sharing of opinions and is not a representative of any of the companies whose links are provided on this site.
The opinions provided are of Ron Martinsen alone and do not reflect the view of any other entity
One of the members of the Photography club I belong to asked a questioned about Nik Software’s Dfine versus Topaz Labs Denoise for which I felt the solution was using Nik Software’s Dfine in manual mode (something I discuss in my Noise Reduction Series).
To respond to him properly required a complex response complete with pictures, so I decided I’d just do a blog article for the response so others might be able to benefit from this as well. Essentially I’ll demonstrate how to use manual mode in Dfine to get better results than you’ll get by default in Dfine and many other noise reduction products.
Automatic Method – The Default
To begin with, when you use Dfine you probably do like most people out there and just run it and get this dialog:
Automatic Profile Applied – The Default Behavior
Automatic method is very good and most of the time will give you the results you want with no further action required.However, if you are unhappy with the results, then try Manual Mode.
Manual Method – Step by Step
Step 1 is to change the method from Automatic to Manual as shown here:
Change the Method to Manual
You’ll notice that there are rectangles in various places on the Lego guy, the glass and the stand disc. These are the measure points that Dfine detected automatically.
Step 2 is to click the Add Rectangle tool and draw rectangles around the areas where the automatic noise reduction didn’t work very well. What you are doing here is telling Dfine to include sample from those areas when doing the noise reduction which means that it will be more aggressive next time it removes noise (which is now a manual operation discussed later).
Click the Add Rectangle Tool
Here’s examples of two places I did additional measurements on – mouse in and out of the image to see the locations on the top and between the Lego characters legs:
Drag new rectangles over areas not handled very well
Step 3 is when you click Measure Noise so that the noise reduction is now applied to the areas where you drew rectangles.
Click Measure Noise to reapply noise reduction to the image with your new measure points
You should now see better (or at least more aggressive) noise reduction than you did the first time. This may be too much noise reduction so you may need experiment around with this to get the best results (or use a layer mask/brush feature to paint in the noise reduction you do and don’t want).
Other Helpful Tips
Since we are creatures of habit and many don’t explore beyond those first days with a product, I’d like to take this change to remind you of a couple other neat “hidden” features of Dfine over competing products.
Color Ranges
The first is Color Ranges where you can apply or suppress noise reduction based on color samples you select as shown here:
Color Ranges
In this example if I wanted to prevent noise reduction occurring on his shirt logo then I’d just sample that red and choose 0 for Contrast Noise and/or Color Noise.
Edge Preservation
One problem with noise reduction is that it can cause edges to get soft, especially in hair. To combat this issue, yet still keep some noise reduction you can experiment with the Edge Preservation slider to see if it helps.
It isn’t entirely necessary if you have Sharpener Pro and will be sharpening your image anyway, but some may prefer to do this step here – especially Lightroom users.
Conclusion
While Imagenomic Noiseware won my Noise Reduction Series because of its superior noise reduction with edge preservation for its default scenarios, Dfine was only a point behind and offers some powerful tools like those shown here and of course the wonderful U-Point controls to turn noise reduction on/off (especially useful for hair, textured walls, etc…) that in skilled hands can offer unmatched results that reduce noise and maintain image detail.
I highly recommend this product and use it quite often because of its flexibility, which is why it is at the #1 spot in my What Plug-ins Should I Buy?article.
Special Offer
Check out this page for some special offers for the products mentioned here that are only available during the holidays:
and visit my Discount Coupon Code page for specials on a wide variety of products – many of which aren’t available any where else on the web!
Disclosure
I may get a commission if you purchase using the links in this article. Thank you for supporting the blog by coming back here when making your Photography purchases (or making a donation if you can’t take advantage of my links).
NOTE: This site requires cookies and uses affiliate linking to sites that use cookies.
If you enjoyed this article, please support future articles like this by making a donation or saving money by using my discount coupon codes. Either way, your support is greatly appreciated!
This blog is intended for freelance writing and sharing of opinions and is not a representative of any of the companies whose links are provided on this site.
The opinions provided are of Ron Martinsen alone and do not reflect the view of any other entity
Have you ever noticed that the biggest problem with doing white balancing is that typically the end result is a bit dull? See my ExpoDisc article for a good example of various techniques that all offer accurate white balance, but nothing that is visually outstanding.
We want “good” color, but that doesn’t always translate to 100% accurate color. Since good is subjective, the color masters at X-Rite have come up with a fantastic solution to solve this problem – the ColorChecker Passport.
Even though I have seen images on the web and on X-Rite’s web site, I’ll admit that I really didn’t know what the ColorChecker Passport really does. When I got mine and opened it up I saw a lot of pretty colored squares then I changed the page and saw a grey card (hey, I know what that is!) and then I saw business card looking document that certifies the quality of my ColorChecker (huh?). Okay, now what?
See it in action
The box cover and web site for ColorChecker Passport shows a girl holding one and I’ve seen videos and screen shots of people taking photos of models holding one of these, but I still wasn’t quite sure how it worked. In this case a video is worth a thousand words, so check this out to see what I mean:
The video above is great because it shows the end to end solution in action (best viewed in an external window).
Creating a DNG Camera Profile from Lightroom
Camera Calibration supports custom camera profiles as shown above
The reason why you want to create a DNG Camera Profile is so that you can have an entry show in in Adobe Camera Raw or Lightroom under the Camera Profiles section as shown above. This allows you to apply that profile to most or all for photos to get a good starting point for your images (way better than using the white balance eye dropper tool). Click the image above to see our new entry that will be created in this section.
Step 1 – Choose File Export or the appropriate preset
If you chose File Export you will get this intimidating looking dialogue, but it is really only asking you for the name of the profile you are creating. Choose your names carefully!
If your image wasn’t suitable for creating a profile, you will get this message:
but if you did everything right you’ll be glad to see this message:
You can tell by the ColorChecker Passport in the photo below that the color is very accurate and when you hover over the image you’ll see the photo before the camera profile has been applied. Move your mouse in and out to see before/after differences where you will see the color shift. There is a tungsten light cast on the hat that is just my error, so ignore that as no tool (that I’m aware of) can easily compensate for a scenario that requires two light balances.
Accurate Color with DNG Profile created using ColorChecker Passport
Assuming you have a calibrated display that is displaying the sRGB colorspace properly (wide gamut will be WAY over saturated), you should notice that the final edited version of this file is not very accurate – in fact, it is way off – but if you ignore the color checker some might say that isn’t a bad thing. The idea here is that color management is important for getting you on a accurate starting point,and some may wish to carry that theme all the way through the photo.
After Subjective Editing in Lightroom 3 Only using Nik Software and Imagenomic Portraiture Add-ins
Some might find it somewhat worthwhile to just click the 18% gray swatch after their edits to bring the colors closer in line to reality, but you can see by the color checker that because this isn’t a raw file then that level of detail is lost. Perhaps the colors improve with the 18% gray click, but they are still way off.
After Subjective Editing and clicking the 18% Gray patch with the white balance eye dropper tool
Which is right? Neither & both – it’s subjective. Some will find both repulsive as they are inaccurate color, some will like the top and some will like the bottom image. What you do know is that you now have a tool to help you to see how you are deviating from the true colors.
Skin Tone (Portrait) White Balance Adjustment
Have you ever done a white balance adjustment and thought your photo look worse afterwards? You are not alone because 18% gray may be great for getting an accurate white balance for your image, accurate doesn’t mean visually appealing.
In the the table below I’ve sampled a white balance from each of the skin tone/studio white balance targets as well as the default 18% gray target to show the difference each has on the skin of the model. Which one is best is a subjective discussion because accurate and visually pleasing are generally mutually exclusive.
What you will notice is that as you make your skin tone pleasing the rest of your image goes to hell, so I’ll show later how to deal with that issue.
You may click the photos for a larger version AND you can click the hyperlinks to see what square I clicked in Lightroom.
From what I hear from some friends who use the ColorChecker Passport is that they generally prefer the white balance 2 setting (two from bottom or left depending on how you have oriented your passport in the shot). For this shoot I chose 5 because I really liked the skin tone of the arms for this model.
It should be noted that the blocks right next to the skin tones are for landscapes, so this same technique can be use to get a more visually appealing landscape result. Here’s a video link that shows how this works.
After getting the white balance set properly from Lightroom I ended up with a great skin tone, but everything else sucked. To correct this without using Photoshop, you can use Nik Software’s Viveza which allows you to drop U-Point controls (aka control points) to mask out parts of the image so you can only change the things you are interested in without worrying about creating masks around difficult things like hair.
Edit in Viveza directly via Lightroom
Since this image was just for the web, I exported it as a 8-bit sRGB. That’s not recommend for a typical workflow. 16-bit ProPhoto is better.
As you can see from the U-Point control below, I just placed one on the background and made it cover 100% of the photo and then I could make adjustments which fixed the background. I then added a couple points on the model to make sure that the background was the item being adjusted and not the model (for this modification). If you hover over the image you’ll see the mask that Viveza 2 creates for you (remember: white reveals, black conceals) to allow the background to be modified but the foreground is mostly left alone.
One click on the background and an adjustment will get you a nice white background again
This same technique was repeated in many places such as the white fur at the top of the dress underneath the passport. Here’s a mask showing the area edited:
Viveza 2 revealing the mask it creates behind the scenes for this U-Point control
Some tough areas such as the hat will require multiple control points that are best grouped together so that they may all be adjusted using the same values:
Control Point Groups are useful when you need a bunch of controls in a tight area such as the fur areas on this outfit
The exact number of U-Point controls you will need depends on your photo, but for this one I used a record setting 28 controls (actually more if you count the group). Here’s an image that shows where I made some adjustments (the eyes were adjusted to brighten the iris and whites):
Once I had my colors where I wanted them it was time to have fun editing the photo. For a photo like this I would typically start by using Nik Software’s Dfine or Imagenomic Noiseware to remove the noise from this ISO 800 shot. Next up I would want to get some skin softening which could be done in Nik Software’s Color Efex using the Dynamic Skin Softener filter or by using Imagenomics killer skin softening application – Portraiture 2:
Portraiture 2 rocks for softening skin and it has great built-in masking support
After a few spot healing corrections and applying adjustment brush strokes to enhance the eyes, I felt I had done all I needed to do for this photo in Lightroom so all that was left was sharpening. I started by using Lightroom 3’s sharpening which is said to be a big improvement, but I don’t think it really is. Here’s that I settled on in Lightroom (cranking it any higher gave me nasty artifacts around the shadows and eyes):
Lightroom 3.0 Sharpening still doesn’t cut it in my book
I didn’t like the results so I just went to the history window and did an undo. I then decided to use Sharpener Pro using a new TIF file so that way I could do different sharpening techniques on my edited image at some point in the future (i.e., one for print one for display). Here’s the results of my effort (which did include a U-Point control by the eye to remove sharpening in the shadows):
To my eyes, there’s no comparison – Sharpener Pro is still the best tool on the market for sharpening your images
The Final Result (Before & After)
While this photo has some defects that I’d typically fix if I were using Photoshop, you can see that there’s a huge difference between the before and after below:
Before and After using only ColorChecker Passport, Lightroom 3, Nik Software and Imagenomic Portraiture Add-ins
These results were good enough for me, so I called it a night. It’s pretty impressive what you can do in only Lightroom with add-ins these days huh?
Now naturally you wouldn’t edit your subject holding the target. This was just a test shot that did, but considering the scope of this article I elected to use it. Another example from this series can be found in the article entitled Photo Thoughts: Sexy Mrs. Claus which also leveraged the ColorChecker Passport camera profile created for this article as well as this one:
Sexy Mrs. Claus 2011
I hope you enjoyed this tutorial integrated in with my mini-review of the X-Rite ColorChecker Passport!
Conclusion
I’m kicking myself for waiting so long to use this tool. I found that in practice I generally take my shots and then when I’m done I do my ColorChecker Passport shot at the end because that’s the best way to avoid disrupting my workflow. Naturally when I remember, I take my passport shot first. While I love my ExpoDisc, I think that this tool offers me more of what I need and can really save time.
I highly recommend this product for those who are passionate about color accuracy.
I was provided a free ColorChecker Passport by X-Rite for the purpose of reviewing it for this article. I may also get a link if you make purchases from the retailers linked in this article.
The photos in this article are Copyright Ron Martinsen – ALL RIGHTS RESERVED.
NOTE: This site requires cookies and uses affiliate linking to sites that use cookies.
If you enjoyed this article, please support future articles like this by making a donation or saving money by using my discount coupon codes. Either way, your support is greatly appreciated!
This blog is intended for freelance writing and sharing of opinions and is not a representative of any of the companies whose links are provided on this site.
The opinions provided are of Ron Martinsen alone and do not reflect the view of any other entity


 One click on the background and an adjustment


