One of my blog readers (Jackie) shared an article with me today on How to Photograph Police that I think is definitely worth a read when you have some spare time:
NOTE: This site requires cookies and uses affiliate linking to sites that use cookies.
If you enjoyed this article, please support future articles like this by making a donation or saving money by using my discount coupon codes. Either way, your support is greatly appreciated!
This blog is intended for freelance writing and sharing of opinions and is not a representative of any of the companies whose links are provided on this site.
The opinions provided are of Ron Martinsen alone and do not reflect the view of any other entity
Here’s a run down of a big stack of books that publishers have sent me to review. I haven’t had a chance to read these cover to cover, so my feedback is based on partial reads and skimming these books. Put another way, if a friend asked me “should I get this book?”, then what I’d tell them is what I’ve said below for each book.
Nikon D800: From Snapshots to Great Shots by Jeff Revell is basically the beginners guide to photography using a Nikon D800. Of course, if you are a beginner you probably shouldn’t have a D800 (see why here), so I don’t get the purpose of this book. It’s pretty with nice images, but honestly there are much better books. Go check out my Which Photography books should I read? article for my advice on more helpful books to read. I’d advise reading those others and if you are still wanting more, then look at this book (if you are a D800 owner).
Canon 5D Mark III: From Snapshots to Great Shots
Canon 5D Mark III: From Snapshots to Great Shots by Ibarionex Perello goes a step farther than the D800 book above by offering a DVD for an extra fee where the author verbally gives you more examples of the content covered in the book. For some, this will help you learn better but for those who can absorb information from books I’d say it’s safe to skip the DVD. My Which Photography books should I read? article still offers more helpful books to read, but this book does earn some kudos for diving a bit into the top video and sound equipment which aspiring amateur videographers might find helpful. Like the book above, it’s nicely laid out but the 5D Mark III is good enough on its own that I don’t think many will find much need for this book after a brief initial learning curve.
Nikon D3200
Nikon D3200: From Snapshots to Great Shots by Rob Sylvan is a book written about a beginner camera for beginners, so in this sense it makes more sense than the previously two discussed books as the camera and subject material are appropriate for the same audience. It’s not afraid to discuss the auto modes and all the feature of this camera from a beginners perspective, so it’s a nice gift book for a new D3200 owner.
Recommended as a gift for new D3200 owners
Exposed: Inside the Life and Images of a Pro Photographer
Exposed: Inside the Life and Images of a Pro Photographer by Michael Clark is kinda like a Joe McNally’s The Moment It Clicks where it’s effectively like having a chat with the author over a beer about his life as an adventure photographer. There’s very little education in the content of the book, but the included DVD kinda makes up for it as it shows how he does his post-processing. Readers on Amazon seem to like, it, but I wasn’t impressed enough to finish the book. Your mileage may vary.
Kevin Kubotas Lighting Notebook: 101 Lighting Styles and Setups for Digital Photographers
I’ll be taking this one on my flight to New York too as I’m eager to finally finish. HIGHLY RECOMMENDED!
Visual Stories: Behind the Lens with Vincent Laforet
Visual Stories: Behind the Lens with Vincent Laforet was a book that I was pretty excited about when I got it because Vincent is a well respected videographer who should have amazing visual stories to talk about right?
Well, he might but myself and the two other people who I loaned a copy of this book to could never get inspired enough to finish this book either. It’s dry and never really grabs you.
Of course, I should say up front that I also wanted to poke my eyes out when trying to read the well respected book The Photographer's Eye: Composition and Design for Better Digital Photos by Michael Freeman, so just because I don’t like it doesn’t mean that you won’t love it. However, you won’t be seeing a full review of this book from me – that’s for sure.
Envisioning Family: A photographer's guide to making meaningful portraits of the modern family
Envisioning Family: A photographer's guide to making meaningful portraits of the modern family by Tamara Lackey has something a lot of photography books lack – excellent images. To me it is a simple, but fundamental thing that every photography book should get right even before the first word is written. What follows is a book where the author pours her heart and soul into a book that I think women will really enjoy. I think “get to the point” people will be a little frustrated by it, especially if they are intermediate to advanced.
Recommended for women aspiring to have a career or serious hobby in photography.
Picture Perfect Practice: A Self-Training Guide to Mastering the Challenges of Taking World-Class Photographs
This book is at the top of my list of “must finish” books, and I hope to do a more detailed review of it on my blog at a later date. It definitely seems like it could make my recommended photography book list!
Highly recommended for intermediate to advanced photographers.
Storytellers: A Photographer's Guide to Developing Themes and Creating Stories with Pictures
Storytellers: A Photographer's Guide to Developing Themes and Creating Stories with Pictures by Jerod Foster is the book that I think Vicent Laforet wanted write. This book really shows how to tell a story with a single photo and offers lots of instruction and exercises. Jerod is a Texas Tech University instructor and this book shows as it’s written very much like a text book (a good thing).
My only knock on this book is that it didn’t go into as much depth as I would have expected on a collection of photos to tell a story, but the author educates you on how to accomplish that. Overall this is a good book for those who are looking for compositional tips and how to have their photos tell a story.
Recommended for those advanced photographers who want to push their work to the next level with storytelling.
Adobe Photoshop Lightroom 4 Book: The Complete Guide for Photographers
If you make a purchase using links found in this article, I may make a commission. These books were randomly sent to me to me by the respective publishers. As mentioned earlier, there aren’t enough hours in my days to read all of these so this is simply a high level overview of my impressions of these books after casual “bookstore style” thumbing through these books. Recommended books are the ones I’d probably buy if I were at the bookstore.
NOTE: This site requires cookies and uses affiliate linking to sites that use cookies.
If you enjoyed this article, please support future articles like this by making a donation or saving money by using my discount coupon codes. Either way, your support is greatly appreciated!
This blog is intended for freelance writing and sharing of opinions and is not a representative of any of the companies whose links are provided on this site.
The opinions provided are of Ron Martinsen alone and do not reflect the view of any other entity
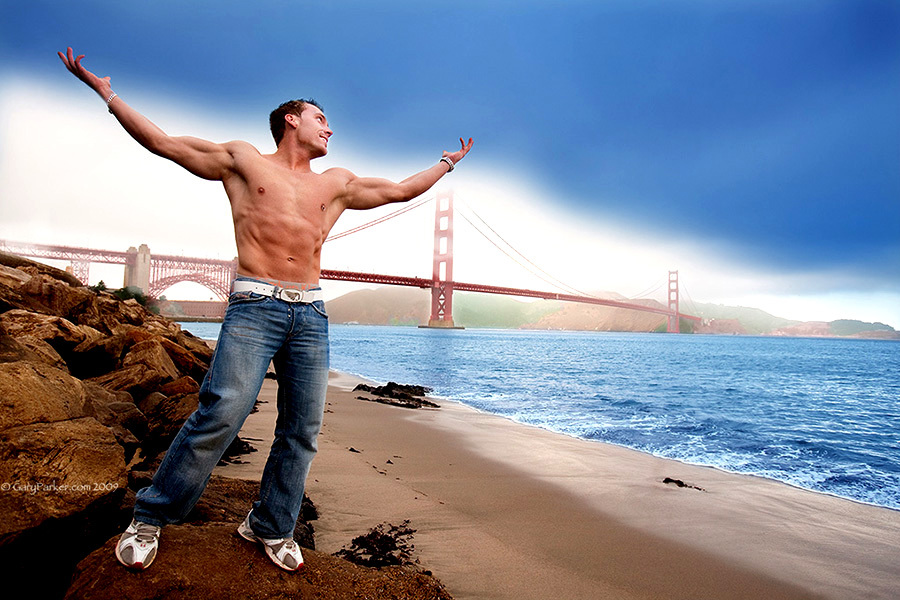
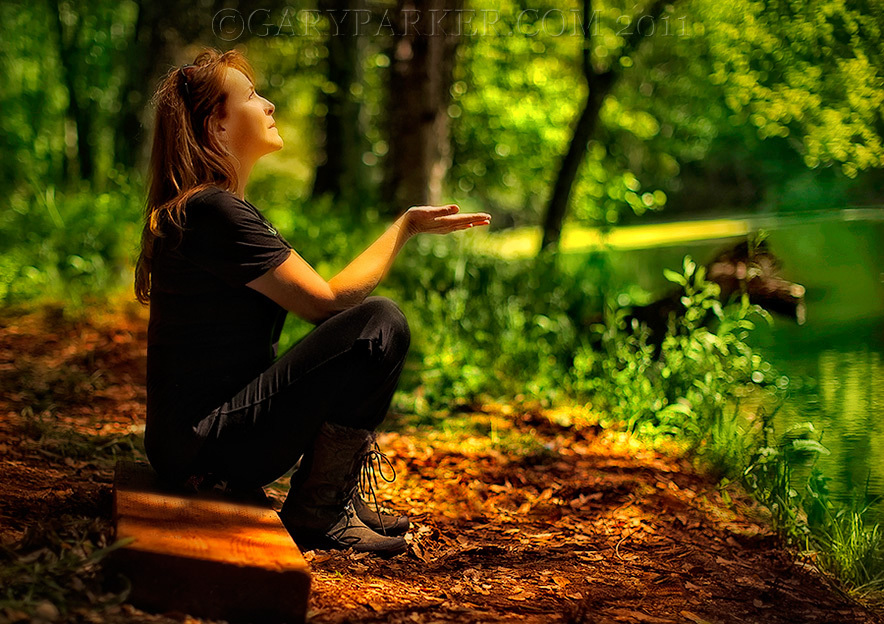
The world is full of opportunities for taking great photos of people, but for some reason many people struggle to see how to get the great shot. Some say it’s the location that makes all the difference, and it certainly helps, but guess what? All but the last photo in this article were shot at public parks! The Northwest is filled with so many great places for photography that location should never be the issue, so what’s left? — learning how to get the interesting shot!
In my last workshop I helped my students get some awesome shots (here’s a small sample), but this time is going to be even better. This time I’ll have Raia again (featured at the top of this article and in the previous workshop photos) PLUS I’ll have Pulitzer Prize winning photographer Gary Parker on hand to teach you real-world techniques you just can’t pick up from books or videos.
Gary’s years as a photojournalist have taught him how to make magic out of any situation, and he’ll be showing the students of this workshop how he does it. You’ll get to learn how he see’s a situation and manages to pull of some of the amazing shots you see in this article and in his personal and pet portfolios.
Gary and I have a few spots left for our workshop this Saturday May 26th and we’d love you to join us. We will be custom tailoring the class to the students goals, so now’s the chance to go out and get the shots that have been escaping you.
I’ll be teaching the technical side of things and Gary will be the composition expert. We’ll have Raia (featured at the top) as our model and one or more assistants on hand to help control the light in our favor — all shot at the place where I got this famous shot:
Haruka Copyright Ron Martinsen ALL RIGHTS RESERVED
This is your chance to see how to get the great shots of people with your own interpretations thrown in with YOU as the photographer. In this workshop you will learn:
How to work with assistants as well as do things on your own
Get great shots of people at a crowded park where you might now feels like no shot is possible
New and exciting camera angles and techniques
Add and suppress light to your advantage
Get great shots from backlit scenarios
Include the scene in your shot yet still not have your subject look too small
Adapt to whatever challenges are thrown at you to still get the shot
and so much more!
Click here to learn more and sign up today before the last remaining spots are taken!
All you need is a DSLR camera and an open mind. Beginners are allowed, but you will be expected to be familiar with your camera (more so for Nikon users than Canon users) or at least have your camera manual on hand.
NOTE: This site requires cookies and uses affiliate linking to sites that use cookies.
If you enjoyed this article, please support future articles like this by making a donation or saving money by using my discount coupon codes. Either way, your support is greatly appreciated!
This blog is intended for freelance writing and sharing of opinions and is not a representative of any of the companies whose links are provided on this site.
The opinions provided are of Ron Martinsen alone and do not reflect the view of any other entity
Ask nearly any parent how they managed to get their DSLR approved by the significant other, and the answer is nearly always that they claimed they needed it to get better shots of the kids. That argument is valid too as kids are the toughest subject to shoot. Dark, blurry, and out of focus shots are the norm, so I tell parents that if you photograph kids you are a sports photographer.
I hate to say it, but its time to go back to your significant other and tell them you need a camera upgrade. I know it’s going to be painful, but this really is THE camera that is going to get you the shots you’ve been missing for years. I know this because I’m a dad, and even I’ve struggled with this problem when I was too lazy to go get my flash.
Any child of a photographer is typically camera shy after a while as the Mamarazzi chases them around the house pointing a big lens and obnoxious flash at them. However, if you can afford this camera with the sniper rifle lens (a.k.a., the 70-200mm f/2.8L IS II USM) then you are armed to do battle to get the shots that have escaped you until now.
Conquering the Blurry Shots
1/160 sec at f/2.8, ISO 12,800, 105mm AWB Unprocessed – straight out of the camera
If you are a parent, this camera is a fantastic investment to get the shots your current camera always misses. The reason why is that your Auto ISO can now use a much larger range of values before. This impacts your shutter speed which you want high to freeze action, so that increases your odds of getting the shot. You can also set a minimum shutter speed (see below) to help increase your odds even more. This coupled with the better AF system (see the next section) means that parents who are too busy to go get the flash can fire away and still end up with a handful of shots for the family scrap book like the one above (instead of massive disappointment).
No More Blurry Pics – Try This
1/250 sec at f/2.8, ISO 160, 200mm
When you use Av mode the camera looks at your lens and sets the shutter speed to approximately 1/<lens focal length>. This means that if you are at 70mm it will typically set your shutter speed to 1/100 sec. Auto ISO helps, but if you are in a fixed ISO it can drop to speeds that are impossible to hand hold. The 5D Mark III has a new feature to help with this problem.
On the Shoot 2 menu the second entry is called ISO Speed Settings. If you press this you can scroll to the bottom and adjust Min. shutter spd. (range 1/250 – 1 sec plus Auto). What this does is prevent your shutter speed from dropping below 1/250 sec when you use Aperture Priority (Av) or Program (P) modes. Nikon and 1D series owners are used to this feature, but this isn’t available on most Canon bodies. Now if you’ve hit your maximum ISO (12,800 by default) then your camera has no choice to drop below this value to try to get the shot, so if this happens you simply need more light (ambient light, a flash, or a lens that lets in more light).
When you set your camera to this mode you can stay in Av mode for most of your kids shooting without worrying about the shutter speed dropping so low that most of your shots turn out blurry. Of course this just applies for small typical kid behavior as sports and other action will require shutter speeds faster than 1/250 sec. This is where the 1D X has an advantage as you’ll be able to set the minimum shutter speed to whatever value you like (up to 1/8000 sec), just like its sibling the 1D Mark IV.
You can also go change the Auto ISO range here to have a maximum of 25,600 instead of 12,800 so that your camera will use that extra stop of light if it needs it. This is what I do, but your choice to do so depends on how much noise you can tolerate in your images. Keep in mind though, noise is easy to remove with products like Dfine and Noiseware.
What about that nasty orange tint like in the shot at the beginning of this section?
In the shot at the top of this section I was using Auto White Balance (AWB) which generally creates great results, but under tungsten light it can be a harsh orange. If you used the tungsten white balance it would give you a shot that isn’t quite so orange. If you shoot in RAW (files with cr2 extension for Canon) you can do this in post processing. Here’s a RAW file processed with a more natural white balance:
Click to see a large version complete with drool
I did nothing more to this file than simply change the white balance, so as you can see it can make a big difference. You can’t do this with JPEG shots so this is why its always handy to shoot raw (or sRaw if you know you won’t be making large prints).
Crop the crap out of your shots without fear
There’s lots of cameras with lots of megapixels, but most have done so much in-camera damage to those pixels to get you that large megapixel count that the pixels are useless. If you crop and try to upscale your image with Perfect Resize there’s not much it can do. Resizing just makes those ugly pixels look big and ugly. However, this camera has 22.3 high quality megapixels at your disposal, so when you crop down there’s plenty of detail left in the image for up scaling.
Here’s a great example – even when your subject is being stubborn like in this shot below:
1/250 sec at f/2.8, ISO 250, 200mm AWB
There’s so much high quality data in the image file that you can easily crop the shot and have plenty of detail to work with. Here’s the shot with ONLY a crop (no post-processing whatsoever).
Crop to 1883px wide by 2825px tall – easily enough pixels for a high quality 16x24” print
When you click the photo for the original you can see the detail is outstanding, but you are only left with about 5 megapixels. However, it’s a very good 5 megapixels so when we use Perfect Resize to upscale the image to 50 megapixels (5759x8640 which is 16x24” at 360 ppi) there’s enough data to create a very usable file. Click this to open the 50 megapixel file and print it at 16x24. If you view it at 2 feet away you’ll find it’s as good as most images you see anywhere that size. If you take the time to sharpening for output it’s even better.
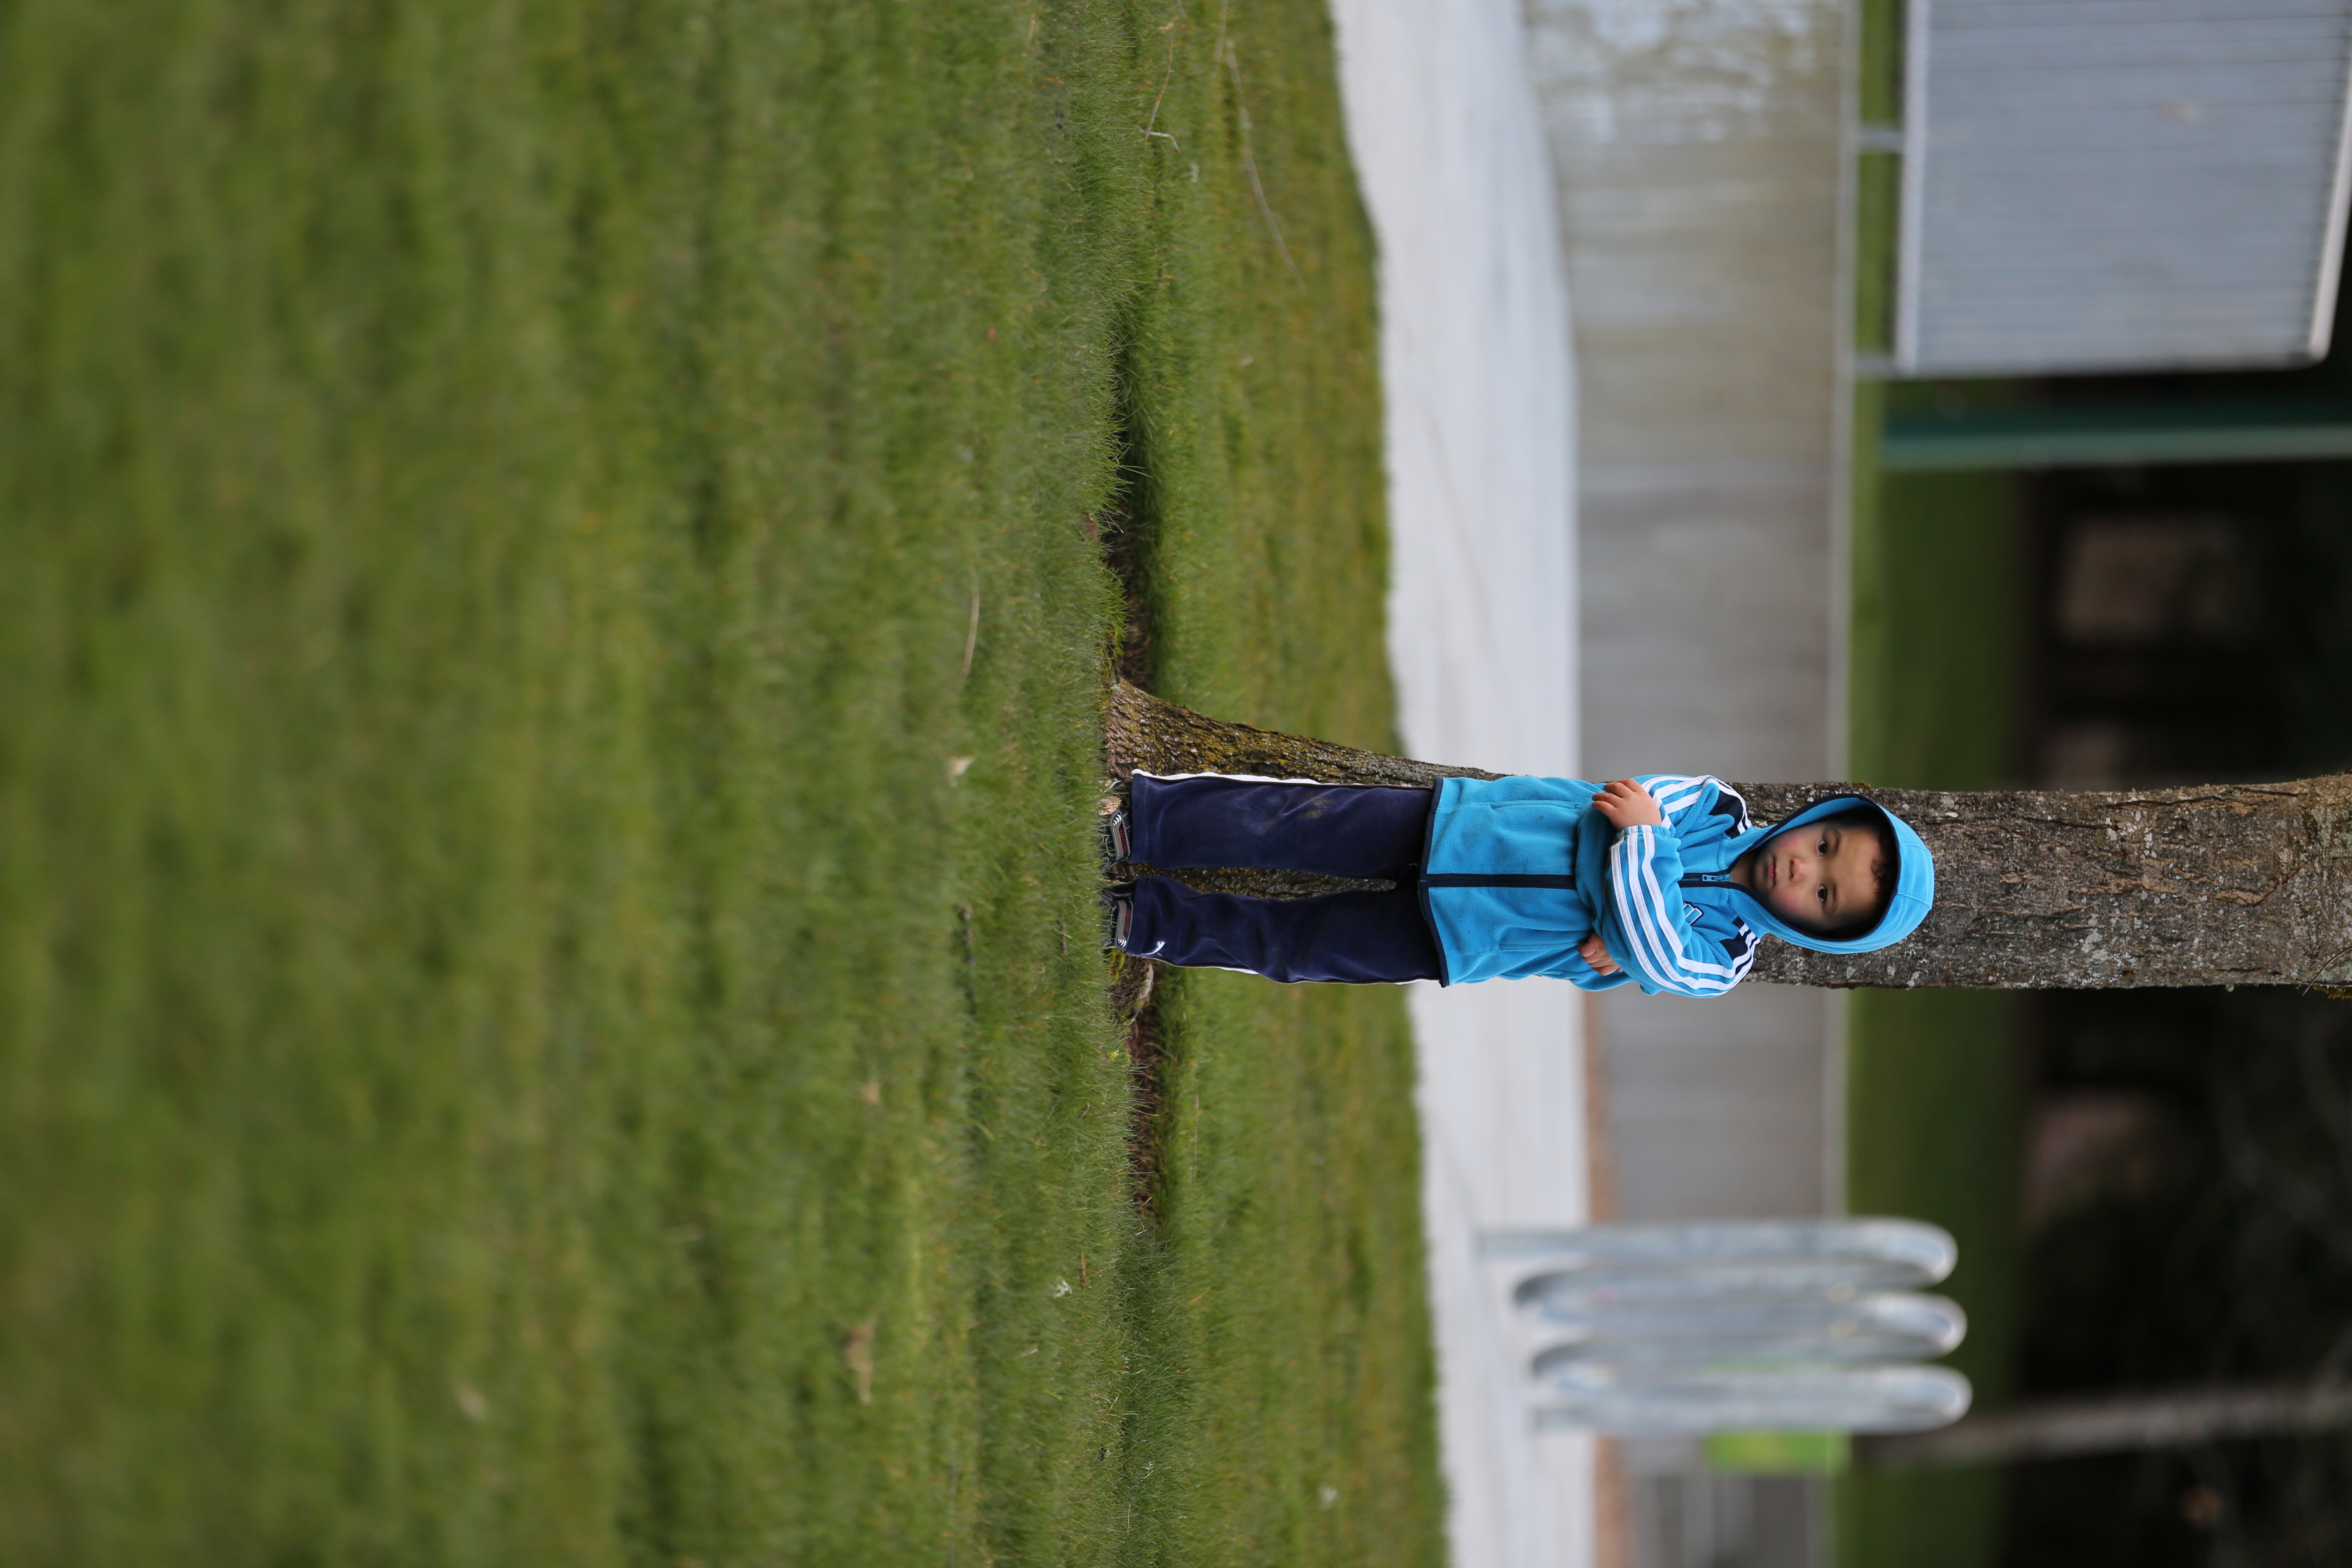
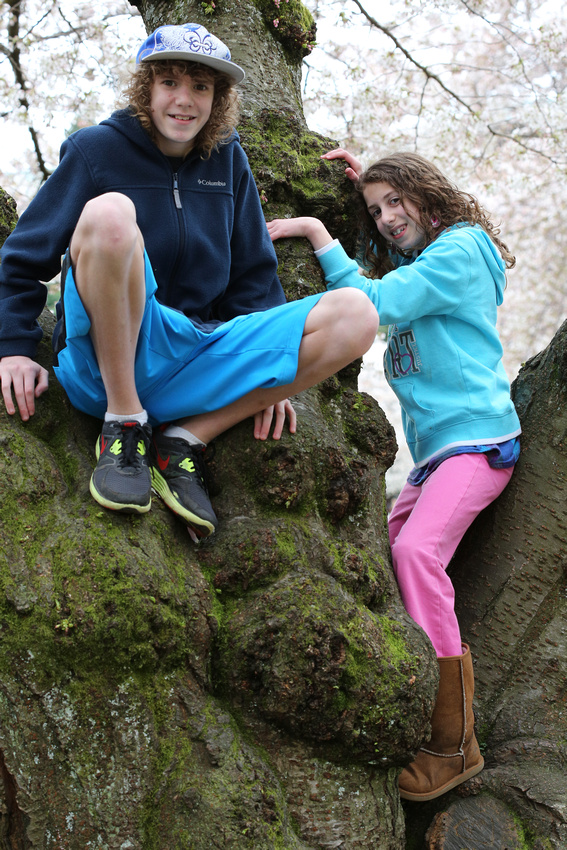
Autofocus Performance – The Swing Test
Action Shot - 1/2000 sec at f/2.8, ISO 500, 70mm AWB
I was busy being Dad this weekend to my three kids so I didn’t get as much time as I would have liked to shoot, but I did get to play around with the 5D Mark III. I’m still getting used to the controls so I had a large number of user errors that I can’t blame on the camera (i.e., like forgetting about the minimum focus distance when doing this sequence, and failing to change the aperture to f/5.6+). These user errors were mainly due to me playing with so many variables that I just wasn’t paying enough attention to the basics, but with that said I was very happy with the performance. While I’ve got lots of in-focus and sharp shots (many more than this one which is a tad soft), most were pretty bad shots (eyes closed, subject not looking, etc…) so I decided to grab this shot here which is stronger compositionally than it is sharp. I’ve thrown some other sharp ones in the sample gallery for you to examine.
What this sequence taught me about the 5D Mark III is that the AF system is very flexible and very good – straight out of the box. It has the same level of auto focus complexity as the 1D Mark IV (which is so difficult to use I created a guide to help people), but the five AF presets help increase your odds of getting things right. Rather than jumping to my 1D Mark IV settings I experimented using only the defaults and found them to be good for most cases, but the swing test wasn’t foolproof (to be fair though, this is tough for the 1D Mark IV too).
In a sequence like this your subject moves so fast that you can’t keep an AF point on any given point. If you go to full auto AF points then it will always choose something besides the eye, so it’s easy to get a crisp Adidas logo or shoe tread, but getting the eye in sharp focus requires a little work. In short, the camera does what you tell it to do but not necessarily what you want it to –after all it’s a machine, not a human. :)
I shot myself in the foot here though by failing to change the aperture to f/5.6 – f/8.0 to get more depth of field, and I needed to back away from my subject to address my 70-200mm’s minimum focus distance. However, once I settled on all of my settings, my model (my son) and assistant (my daughter pushing him) were gone.
I wouldn’t say that I found the perfect AF setting for this sequence, but I got enough data to know that I can pull off a good sequence when I try this again. I don’t think any of the defaults are perfect for this difficult situation, but out of the box I got more usable frames than I have with any new camera to date. I’ve beat this performance with the 1D Mark IV, but I suspect if I tried those settings here (with the correct camera settings) I’d get results that were as good or better.
It cleans up real nice (in a Larry the Cable Guy voice)
ISO 25,600 With (mouse out) and Without (mouse over) Processing
I’ve been playing around a lot with the higher ISO’s to see how practical they are in the real world. For the shot above you can click here to get the original in-camera JPEG with zero processing (orange cast is from AWB), and click here to get the processed (from RAW) version.
It doesn’t get any more real than this because the truly hardest shots to pull off are when you are around the house with kids and you aren’t ready with all of your gear. In this case there’s no flash and the only ambient light is the light coming in from the front window (which is a mix of a fluorescent street light and tungsten) and the tungsten coming off the fireplace to the camera left. To the naked eye this is a pretty dark scene (about 2 stops darker that it appears here).
The original is a bit rough around the edges, but I thought – what if I had to make that photo work? With that in mind I white balanced the RAW in DPP and exported a 16-bit TIFF to Photoshop CS5 for further processing. From there I did a curves adjustment (to brighten the face), Noiseware “Stronger Color” preset to cut some of the noise, and then I did a low pass of Portraiture to clean up the skin a bit. Finally I did some basic high pass sharpening (Sharpener Pro would work too).
While the final result wouldn’t be suitable for a billboard, I could easily do a 13x19” print with this. I’d probably clean up some of image and do more work on the eyes, but it’s a totally usable starting point.
The truth is that for “mom’s” scrapbook, I’d probably call the in-camera JPEG done. At the 4x6 print size, it needs no work beyond white balancing and sharpening.
The Holy Grail Feature NEW to the 5D Mark III
When I was shooting the Seahawks last December I remembered a problem that has always plagued me – when using the AI Servo drive mode, if the action stops my shots all come out blurry. If I switch to One Shot (which takes time fiddling with the AF drive settings) then I’m doomed if the action starts moving again. Since this happens between plays, then it’s near impossible to switch. As parents it’s even worse for us as kids change their movement patterns faster than pro athletes!
I talk to a lot of pro photographers. Some have celebrity status or years experience shooting high profile sports, but I’ve discovered that most do things out of habit or consensus (i.e., what everyone else is doing). To that end, the universal workaround for the One Shot/AI Servo switching problem has been to change the camera custom function to use the AF-On button for focus (instead of a half-press on your shutter release button). This allows the photographer to control when the AF goes on and off. It’s effectively a workaround to the fact that you can’t quickly switch from AI Servo to One Shot auto focus drive modes*. That was a fine workaround for slow AF systems, but on a sophisticated AF system like on the 5D Mark III (and the 7D, 1D Mark IV, etc…) its a waste because you lost most of the benefit of AI Servo (which is designed to work best with autofocus always on).
* = People using big lenses with an extra button on them could program their camera to do this, so bird shooters have been doing this for years. However, most of us can’t afford $5000+ lenses, so this is new for mere mortals – and for smaller lenses. It’s also a fact that many people with these big lenses had no idea they could do this using that button either (based on my recent informal poll).
Changing the Depth of Field (DOF) Button to Toggle the AF Drive Mode
The 5D Mark III features the ability to reprogram the DOF button to toggle your AF drive mode states between One Shot and AI Servo. Here’s how:
Here’s the button that we’ll make useful on your new camera
Go to the C.Fn2:Disp./Operation menu (in the orange section) and scroll down to Custom Controls.
When you press the SET button you see a bunch of options, but the most important one is the fourth one that looks like aperture blades.
Press the SET button and scroll to the option that says One Shot <->AI Servo
Press SET change it.
You can now press the menu button to get out or just start shooting. However, now you are set up for real success when photographing kids. Now when you press the DOF button on the front of your camera, you’ll temporarily toggle the auto focus mode while the button is pressed. This means that if you are currently in AF Drive One Shot and you press this button, then while you are holding it down you’ll be in AI Servo. When you release it you’ll return to One Shot. The inverse is true too, so if you are in AI Servo, then holding it down will put you in One Shot.
I know this is confusing, so I tried to create a video that shows how to do this. My apologies for the really crappy video, but it gets the point across:
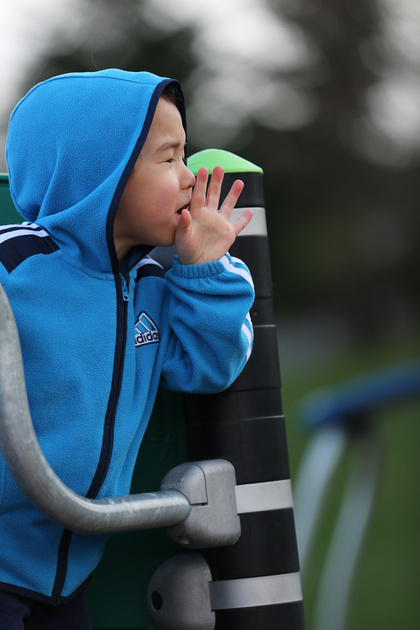
Now that you have that programmed, you can always remember that if your subjects legs are moving, then you use the AI Servo auto focus drive mode. If your subject stands in a fixed position then you should be in One Shot auto focus drive mode. You can set the AF Drive mode to whatever your subject will be doing the most and then use the toggle button on the front of your camera to switch to the opposite mode when needed. For my rough and tumble toddler I typically am in AI Servo mode while he’s running around and then I toggle to One Shot when he stops to play (or pout as was the case below).
1/320 sec at f/2.8, ISO 640, 185mm AWB
Now that I have this feature I think the 5D Mark III is worth the upgrade simply for this feature. My 1D Mark IV doesn’t have this feature and it needs it big time as sports shooting always requires switching between these AF drive modes. Action requires AI Servo, but between plays when people are standing around you need One Shot.
By using this feature you WILL increase the number of in focus shots. There’s a lot more to the AF system that’s required to get a high success rate of in-focus shots, but I’ll save that for another day. In the mean time if you only do this, you’ll be doing much better than you have in the past.
Using Silent Mode to capture the moment
1/320 sec at f/2.8, ISO 1250, 120mm AWB
The sound of the mirror slap is classic sound for a DSLR and when you own your first DSLR you enjoy hearing it. However, you quickly learn that it can scare a kid off or cause them to stop doing what the action that caused you to pick up your camera in the first place. As a result it can be a distraction – especially at memorable events (i.e., recitals, plays, religious events, etc…). Now with the silent mode (and new for the 5D Mark III – silent burst mode), you can limit the amount of mirror slap noise to capture those shots without drawing attention or distracting your subject. In this short video I show how to use it and how it compares to other modes:
For those of you with 1Ds Mark III and 1D Mark IV’s, I can tell you that this mirror slap seems a tad bit louder and more mechanical sounding than what you find on the pro bodies, but it certainly works. In fact, I’d say it’s very similar to the sound of taking a photo while you are in Live View.
Parents, wedding and event photographers should be very pleased with this new feature!
Adorama also has kits in stock with the 24-105mm f/4L IS lens (which is what I use). They are also offering a great deal on Lightroom 4 ($50 off) and Eye-Fi ($15 off) if you buy them together with your camera.
B&H also has a sale which features a SanDisk 16MB memory card and an extra battery (plus other qualifying rebates) for only $3499 (with free shipping).
Disclaimer
I paid full-price for this camera (zero discount) and was not paid a penny for this article from anyone. I mention Adorama only because they got me this camera quickly so I could bring this article to you while others are still waiting for their packages to arrive.
If you use links in this article to make a purchase I may make a small commission.
NOTE: This site requires cookies and uses affiliate linking to sites that use cookies.
If you enjoyed this article, please support future articles like this by making a donation or saving money by using my discount coupon codes. Either way, your support is greatly appreciated!
This blog is intended for freelance writing and sharing of opinions and is not a representative of any of the companies whose links are provided on this site.
The opinions provided are of Ron Martinsen alone and do not reflect the view of any other entity
All of the photos in this article are unprocessed photos that come directly from the in-camera JPEG file created by the 5D Mark III. All of these images are linked to a gallery of photos where you can view more info about the shot or download the original file that came from the camera (some files renamed for but otherwise untouched).
These photos are copyright Ron Martinsen - ALL RIGHTS RESERVED. You may not redistribute, link or otherwise consume without expressed written consent of Ron Martinsen.
Nice Dynamic Range and Color
I’ve been very pleased with the dynamic range and color I’ve been getting from the in-camera JPEG’s shown here:
1/200 sec at f/10 (handheld), ISO 3200, 100mm AWB
1/500sec at f/2.8, ISO 160, 70mm AWB
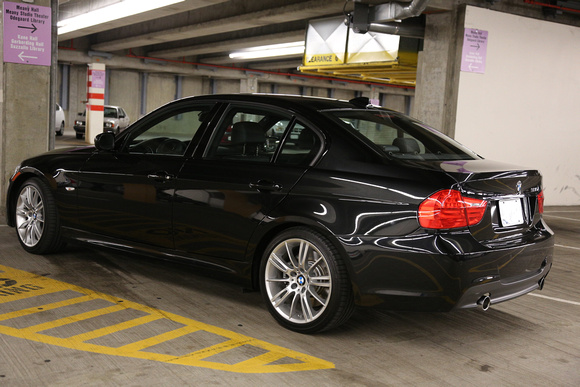
Garage Lighting – No Problem
Here I just snapped off a shot in the garage of a good looking car:
1/30 sec at f/4 (handheld), ISO 3200, 47mm AWB
Even at ISO 3200 the image looks clean (click for a link to the original). Garage conditions like this are tough, so I was impressed that without a flash I could get a shot like this.
High ISO with People
All of these are handheld shots with no flash.
ISO 12,800 AWB
ISO 20,000 AWB
The orange cast from auto white balance here is annoying but it can easily be fixed in DPP, Lightroom or Photoshop. I tested intentionally with the default settings and did not post-process this issue away.
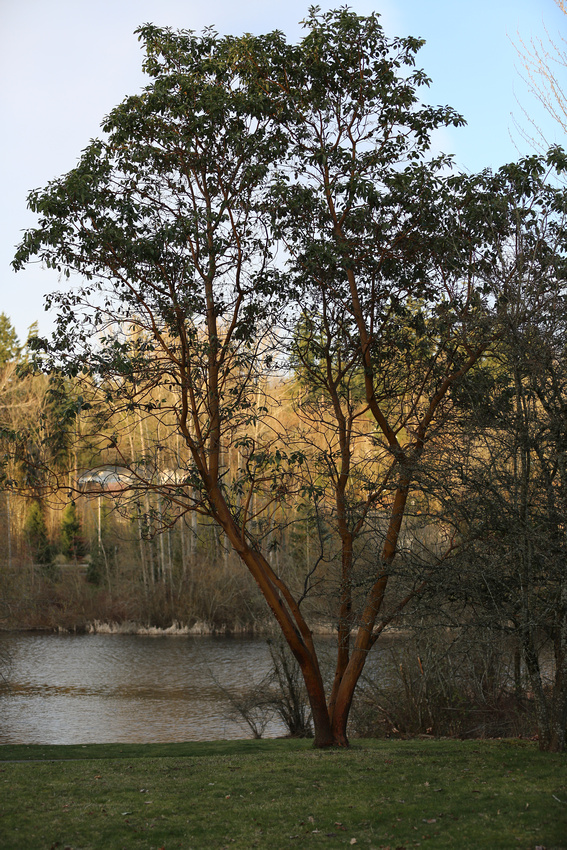
ISO 2000 shot shows good dynamic range compared to predecessors
Here’s a single exposure as it came out of the camera “perfectly exposed”. The detail is good and the dynamic range of colors and exposure are decent, but even the X10 can out do this:
1/125 sec at f/11, ISO 200, 115mm AWB
Here is a handheld in-camera HDR shot using the Natural effect:
Auto Adjust Dynamic Range Setting with Natural Effect
This wasn’t my favorite example, but it’s one where you can see even with moving water and a slight breeze that the handheld HDR image alignment is pretty decent. This is in stark contrast to the G1X which is useless unless its on a tripod. It’s hard to believe these products come from the same company!
HDR Effects Samples
All of the following shots were shot hand-held and have not been modified from the in-camera result. No in-camera editing was done either. I suspect if I would have used a tripod and it wasn’t so windy then these results would have been much better, but I wanted a real-life experience for this article.
1/100 sec at f/8, ISO 800, 100mm No HDR Effect – Single Exposure
HDR Effect – Natural
HDR Effect – Art Standard
HDR Effect – Art Vivid
HDR Effect – Art Bold
HDR Effect – Embossed
After my testing today I’ve got confidence in the “Auto” Adjust dyn range setting and the Natural effect. I figure I can always go for the extreme look later, but in-camera I want it to look natural.
Beware Moving Subjects
This is true of ALL HDR and is logical when you think about it, but for those who are new to HDR I thought I’d show you what can go wrong if you don’t think about what’s really happening in HDR mode. Here’s a setting that with a single exposure is okay but the sky is blown out:
To fix that we can do HDR but if we forget about having a shutter speed that can deal with moving people AND the Auto ISO to cover the range of exposure needed to get the shot at that shutter speed, then ghosts will appear:
Ghosts during HDR can sometimes be corrected (see below)
Ideally you want a clean shot, but sometimes that’s never possible. The best bet is to wait for the foreground subjects to leave, crank up your shutter speed, try again as I did here:
1/500 sec shutter speed used as the base for this HDR
This taught me that it’s best to be mindful of your situation and pay close attention to the shutter speed to get the best results.
Single Shot
HDR Natural – Handheld
Conclusion
I’m very pleased with the high ISO performance and features of the camera that allow me to get the shots that in the past would have been lost while I went searching for my flash. I’m feeling very comfortable shooting in manual and letting the ISO dictate the exposure, but I do find it tends to shoot one stop darker than I like with no exposure compensation. As a result I find myself dialing in the necessary ISO as needed.
I feel totally comfortable with using shots up to ISO 25,600 with anything at or below 6400 being as solid as ISO 1600 and below on my 5D Mark II.
I’m also impressed with the HDR mode which seems to work well even hand held. This is handy enough that I think I’ll do more HDR as there’s no post-process headache yet you can save the exposure to leave that option open if you like. I’ve come to love the EXR mode of my X10, so I’m pleased to have an option to get results that good from my DSLR and the benefit of it not being JPEG only (for the individual exposures – not the HDR image) is a big plus.
Adorama has a good deal on Lightroom 4 ($50 off) and Eye-Fi ($15 off) if you buy them together
Disclaimer
I paid full-price for this camera (zero discount) and was not paid a penny for this article from anyone.
If you use links in this article to make a purchase I may make a small commission.
NOTE: This site requires cookies and uses affiliate linking to sites that use cookies.
If you enjoyed this article, please support future articles like this by making a donation or saving money by using my discount coupon codes. Either way, your support is greatly appreciated!
This blog is intended for freelance writing and sharing of opinions and is not a representative of any of the companies whose links are provided on this site.
The opinions provided are of Ron Martinsen alone and do not reflect the view of any other entity